

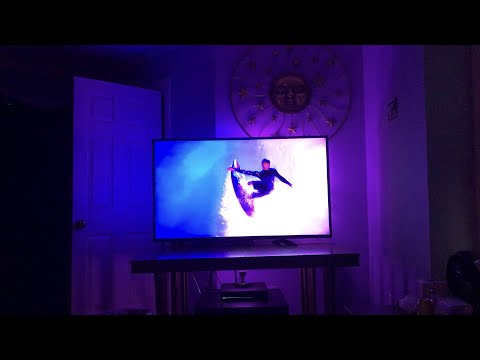
Harmonize Project is a low-latency video analysis and pass-through application built with Python which connects to Philips Hue lights and lightstrips based on their location relative to your TV screen; creating an amazing ambient lighting effect!
Check out our Reddit thread here and watch the demo below! Electromaker explains how our application works at a high level in his podcast here!
Harmonize Project (formerly known as Harmonize Hue) has no affiliation with Signify or Philips Hue. Hue and Philips Hue are trademarks of Signify.
- v2.0: Support for gradient lightstrips is now available!
- v1.3: Added multicast DNS discovery for detecting bridge
- v1.2: Latency now optimized for a single light source centered behind display (use the -s argument at the command prompt to enable)
- Light color and intensity follows relative location to the display perimeter
- Video -> Light streaming latency of 80ms
- Approximately 60 color updates per second
Lights:
- Minimum of one compatible Hue light required (obviously). Limited to a maximum of 20 lights for streaming. A gradient lightstrip counts as 7 lights.
Minimum Hardware:
- Hue bridge using firmware version 194808600 or greater
- Raspberry Pi (tested on version 4B) or Linux box running at 1.5GHz+ with at least 4 CPU cores (tested on Ubuntu 22.04 64-bit LTS)
- Video/Camera input device (tested with an USB 3.0 HDMI capture card)
Example A Hardware configuration (Tested on Raspberry Pi 4B):
- RPi RAM: 256MB Free Minimum (512MB recommended)
- RPi CPU: 1.5GHz+, 4 Cores strongly recommended due to running three simultaneous threads.
- HDMI Splitter (Must be able to output 4k & 1080/720p simultaneously) Here is a good one for $25, though it breaks HDR when downscaling output 2. The goal here is one output of 4K and another output of 1080/720p.
- USB3.0 HDMI Capture Card (Capable of capturing 720/1080p; delay should be 50ms or under.) I got this when it was $45. A similar one should be fine. These are untested: Panoraxy | Aliexpress (This shape/style tends to perform well.)
Example B Hardware configuration (for A/V receivers with 2 or more HDMI outputs, also tested on Raspberry Pi 4B):
- Raspberry Pi 4B kit running with recommended power supply. This hardware option was tested on the 8GB model running Ubuntu 64-bit OS (see software setup option B below).
- HDMI Splitter (tested on U9 ViewHD Latest 4K 1x2 HDMI Splitter 1 in 2 Out, Model U9-Pluto v1.4)
- USB3.0 HDMI Capture Card (tested on Elgato Cam Link 4k)
Software Setup:
Ubuntu Desktop 22.04 LTS 64-bit with Python v3.10.4 (most recent version tested)
Install OS from Raspberry Pi Imager software onto SD card (see https://www.raspberrypi.org/software/). Install SD card and boot.
Install all dependencies via the following commands. Be sure to watch for errors!
- Install pip:
sudo apt-get install python3-pip
- Install HTTP Parser, NumPy, and zerconf Python dependencies via pip:
pip3 install http-parser numpy zeroconf termcolor
- Install Snap:
sudo apt install snapd
- Install Avahi (multicast DNS daemon):
sudo snap install avahi
- Install Screen (SSH multiple window manager):
sudo apt install screen
- Compile and install OpenCV 4.6+ from source - [Follow this guide...] (https://docs.opencv.org/master/d2/de6/tutorial_py_setup_in_ubuntu.html) Compiling may take a couple of hours. Note that if you upgrade Ubuntu to a new release you may need to completely uninstall, recompile, and reinstall OpenCV.
sudo apt-get install cmake
sudo apt-get install gcc g++
sudo apt-get install python3-dev python3-numpy libpython3-all-dev
sudo apt-get install libavcodec-dev libavformat-dev libswscale-dev
sudo apt-get install libgstreamer-plugins-base1.0-dev libgstreamer1.0-dev
sudo apt-get install libgtk-3-dev
sudo apt-get install git
git clone https://github.com/opencv/opencv.git
mkdir opencv/build
cd opencv/build
cmake -D CMAKE_INSTALL_PREFIX=/usr/local -D BUILD_opencv_java=OFF -D BUILD_opencv_python2=OFF -D BUILD_opencv_python3=ON -D PYTHON_DEFAULT_EXECUTABLE=$(which python3) -D INSTALL_C_EXAMPLES=OFF -D INSTALL_PYTHON_EXAMPLES=ON -D BUILD_EXAMPLES=ON -D WITH_CUDA=OFF -D BUILD_TESTS=OFF -D BUILD_PERF_TESTS=OFF ..
make -j4
sudo make install
cd ../..
git clone https://github.com/MCPCapital/HarmonizeProject.git
Legacy Software Setup (currently unsupported and not maintained):
Download the latest scripts and install all dependencies via the following commands. Be sure to watch for errors! You will need about 1GB of free space. The script can run for up to an hour.
git clone https://github.com/MCPCapital/HarmonizeProject.git
cd HarmonizeProject
sudo ./setup.sh
Hardware Setup Example A:
- Connect Video Device (PS4, FireStick, etc.) to the splitter input.
- Connect an HDMI cable from the 4k output to the TV; and from Output 2 (downscaled) to the video capture card connected to your device.
- Ensure your splitter's switches are set to downscale Output 2 to 1080 or 720p!

Hardware Setup Example B (for A/V receivers with 2 or more HDMI outputs):
- Connect your video device (PS4, FireStick, etc.) to an available HDMI input on your A/V receiver.
- Connect an HDMI cable from the HDMI output 1 from A/V receiver to the TV.
- Connect an HDMI cable from HDMI output 2 from the receiver to the HDMI input on the splitter.
- Connect an HDMI cable from the HDMI output 1 of the splitter to the HDMI input on the video capture device.
- Connect the video capture device USB 3.0 output to a USB 3.0 port (not a USB 2.0 port) on the Raspberry Pi.
- Ensure that the DIP switches on the splitter are set to downscale HDMI Output 1 to 1080 or 720p.
Entertainment Area Configuration:
- Hue App -> Settings -> Entertainment Areas
- Harmonize will use the height and the horizontal position of lights in relation to the TV. The depth/vertical position are currently ignored.
- In the example below, the light on the left is to the left of the TV at the bottom of it. The light on the right is on the right side of the TV at the top of it.

First-Time Run Instructions:
- If you have not set up a bridge before, the program will attempt to register you on the bridge. You will have 60 seconds to push the button on the bridge.
- If multiple bridges are found, you will be given the option to select one. You will have to do this every time if you have multiple bridges (for now).
- If multiple entertainment areas are found, you will be given the option to select one. You can also enter this as a command line argument.
To start the program:
screencd HarmonizeProject./harmonize.py- Type Ctrl+A and Ctrl-D to continue running the script in the background.
- To resume the terminal session use
screen -r - Press ENTER to safely stop the program.
Command line arguments:
-vDisplay verbose output-g #Use specific Entertainment area group number (#)-b <id>Use specified bridge ID-i <ip>Use specified bridge IP address-sEnable latency optimization for single light source centered behind display-w #Sets the video device wait time to the specified value, in seconds. Defaults to 0.75.
Configurable values within the script: (Advanced users only)
- Line 293 -
breadth- determines the % from the edges of the screen to use in calculations. Default is 15%. Lower values can result in less lag time, but less color accuracy. - Line 380 -
time.sleep(0.015)- Determines how frequently messages are sent to the bridge. Keep in mind the rest of the function takes some time to run in addition to this sleep command. Bridge requests are capped by Philips at a rate of 60/s (1 per ~16.6ms) and the excess are dropped. - Utilize the
nicecommand to give Harmonize higher priority over other CPU tasks.
- "Import Error" - Ensure you have all the dependencies installed. Run through the manual dependency install instructions above.
- No video input // lights are all dim gray - Run
python3 ./videotest.pyto see if your device (via OpenCV) can properly read the video input. - w, h, or rgbframe not defined - Increase the waiting time from the default 0.75 seconds by passing the
-wargument *This is a known bug (race condition). - python3-opencv installation fails - Compile from source - Follow this guide.
- Sanity check: The output of the command
ls -ltrh /dev/video*should provide a list of results that includes /dev/video0 when the OS properly detects the video capture card. - Many questions are answered on our Reddit release thread here. New issues should be raised on Github.
Pull requests are encouraged and accepted! Whether you have some code changes or enhancements to the readme, feel free to open a pull request. Harmonize Project is licensed under The Creative Commons Attribution-NonCommercial 4.0 International Public License.
Development credits to Matthew C. Pilsbury (MCP Capital LLC), Ares N. Vlahos, and Brad Dworak.


