This is My eVic VTC Mini.
- eVic VTC Mini
- eVic VTwo Mini
- eVic VTwo
Original VTC Mini 3.03 firmware
My custom firmware is more or less identical to the official firmware - Just added some missing features.
- Use official firmware updater to upload bin/myevic_enc.bin OR
- Use evic-usb to upload bin/myevic.bin to your box:
evic-usb upload bin/myevic.bin(change to myevic_enc.bin if you see "Verifying APROM...FAIL").
-
Double-click:
A double fire click switches between standard view and clock screen. The clock screen is close to the one viewed on the VTwo box; just better. See below to know how to configure clock.
-
Third info line:
The third info line of the main screen, used to display amps, puffs or time counters now have a few more options:
- Battery voltage
- Atomizer voltage
- Board temperature
- Real-time clock

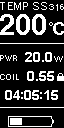
###Menus: Holding fire and right button a few seconds enters menus. There's many more to LOGO and Game menus now. See below.
-
Screen
-
Contrast:
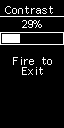 Default VTC contrast is around 17%. This screen gives you access to the full contrast range of the display. -
Saver:
 Configure screen saver timing. After 30 seconds of inactivity, the main screen switches to an analog clock screen for the duration configured in this menu, after what the box shuts down. Scroll down the menu to the "Off" option to disable box shutdown.
-
-
Coils
Coil management menu.
-
On each line of the four TC modes:
Click fire to switch to edit mode on the resistance. While the resistance value is highlighted, click + and - to edit its value. Setting the resistance to any non-zero value automaticaly locks it. Bring the resistance to zero with - to unlock and reset it. You may also fire two seconds to zero the resistance.
-
Other lines:
-
Zero All:
Zeroes all resistances; also zeroes all "START" mode saved resistance settings.
-
TCR Set:
Enters the TCR Set menu. This menu can also be accessed by switching off the box and pressing both Fire and Right regulatory button for 5 seconds.
-
Exit:
Self explanatory.
-
-
-
Clock
-
Date/Time
Setup date and time. Fire change edited field, + and - set value.
-
Clk Adjust
Adjust clock: for small adjustments to clock time + and - adjust clock by seconds. Fire to save. For VTwo owners, this option also adjusts the X32 frequency accordingly if done properly.
-
Clk Speed
For owners of VTC mini (useless for VTwo owners) The VTC mini does not have the needed 32kHz crystal soldered on the pcb to regulate the clock speed; so, another internal clock source is used to drive the clock. Since its frequency is quite different, a clock speed ratio is needed to regulate the clock. Usage: First setup date & time. Wait a few hours to let the clock drift; then use this menu to adjust time to the real time. This will compute the box-specific ratio between real time and internal processor clock speed. Accuracy of a few seconds per day can be achieved this way.
-
-
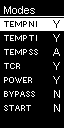
Modes
Configure used/useless modes. Click on each menu item to set 'Y' or 'N' if you want to see any given mode proposed while cycling between modes in menu mode. Typically, you'll set "START" mode to 'N'. Typically.
-
Expert
Some advanced options:
-
USB:
Choose between several USB modes:-
HID: Normal operation mode - factory setting. Disables any other USB device than HID. HID is always active, even in the two others modes of operation.
-
COM: A virtual COM interface; mainly used for debugging with a COM terminal such as putty.
-
DSK: A virtual drive to download the firmware file. Connect the box to a PC, and a disk device will appear with a "FIRMWARE.BIN" file. This can be read and copied. This file is an encoded firmware file that can be uploaded to another device using evic-usb or the official Joyetech firmware tool.
-
-
DBG
Enables or disables the debug informations mode. Once the DBG option is set to "ON", Debug informations can be shown/hidden by clicking fire button four times. This option is OFF by default to prevent users to inadvertendly mess up their screen.
-
-
Miscs
-
LOGO
Guenuine menu
-
Game
Flappy bird. Guenuine menu.
-
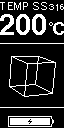
3D
Cool 3D spinning cube. Come back to this menu and set it to "None" to cancel animation. Or reset the box.
-

Follow [evic-sdk::Readme] (https://github.com/ReservedField/evic-sdk/blob/master/README.md) instructions to:
-
Setup the environment
-
Install python-evic
-
Install and unpack nuvoton-sdk with the following changes:
- Unpack into this project directory (evic-sdk itself is not required for this project)
- When unpacking nuSDK unpack only
Librarydirectory. For example unpackM451 Series BSP CMSIS V3.01.001/LibraryfromM451_Series_BSP_CMSIS_V3.01.001.ziptomyevic/nuvoton-sdk/Library
-
To build invoke:
EVICSDK=. make
-
Temperature Control on SS316
Temperature Control on SS316 is different in this firmware when compared to the original one. Depending on your setup, you might need to change you regular temperature setting. It's often better to use Temperature Control in TCR mode with SS316L, adapting the TCR/Temperature values to the build by a dry cotton test.
It's hard to find a consensusal value for the TCR of SS316L. Anything from 88 to 100 can be found depending on the source. The original value of 120 is obviously way too high. steam-engine.org gives a value of 87.9, which seems reliable, therefore the TCR for SS316 was selected as 88 instead of original 120.


