
Click here for the full documentation.
- NVM and node version 8.
- yarn
- AWS CLI
- BASH
- Docker (only required for testing)
- docker-compose (only required for testing
pip install docker-compose)
Install the correct node version:
nvm install
nvm use
We use Lerna to manage multiple Cumulus packages in the same repo. You need to install lerna as a global module first:
$ yarn global add lerna
We use yarn for local package management
$ yarn install
$ yarn ybootstrap
Building All packages:
$ yarn build
Build and watch packages:
$ yarn watch
LocalStack provides local versions of most AWS services for testing.
The LocalStack repository has installation instructions.
Localstack is included in the docker-compose file. You only need to run the docker-compose command in the next section in order to use it with your tests.
Turn on the docker containers first:
$ docker-compose up local
If you prefer to run docker in detached mode (i.e. run containers in the background), run:
$ docker-compose up -d local
Run the test commands next
$ export LOCALSTACK_HOST=localhost
$ yarn test
Run end to end tests with
$ yarn e2e
- Run
./bin/prepare - Deploy your instance integrations on aws and run tests by following the steps here
Integration tests are run on every Travis CI build. If you want to skip the
integration tests for a given commit, include [skip-integration-tests] in the
commit message.
Travis CI determines what stack to run the tests against based on the name of the branch. It expects that the branch name will be suffixed with a dash followed by the name of the stack to test against. For instance, to run against the "test-123" stack, a branch should be called "something-test-123". If the stack cannot be determined from the branch name then the "cumulus-from-pr" stack will be used.
If you create a new stack and want to be able to run integration tests against it in CI, you will need to add it to travis-ci/select-stack.js.
In order to prevent multiple instances of the integration tests from running
against a stack at the same time, a lock file is created in S3 for each stack.
Before integration tests start they will wait until that lock file is not
present. They will then create that lock file, run the tests, and delete the
lock file. The lock file will be located at
s3://${CACHE_BUCKET}/travis-ci-integration-tests/${DEPLOYMENT}.lock. The lock
file will contain a link to the Travis CI job that created the lock file. If
your tests seem to be hung waiting for that lock file, check to see if the job
that created the lock file is still running or has crashed. If it has crashed
then the lock file should be deleted. You should also figure out why the lock
file was not cleaned up and fix that for next time.
Code coverage is checked using nyc. The
Travis CI build tests coverage. A summary can be viewed in the build's output.
Detailed code coverage in html can be found by going to the Artifacts tab and
navigating to index.html in the coverage folder. Clicking on index.html will
take you to an html page showing code coverage for each individual file.
The yarn test command will output code coverage data for the entire Cumulus
repository. To create an html report, run nyc report --reporter html and open
the index.html file in the coverage folder.
To run code coverage on an individual package during development, run
npm run test-coverage. This will output the coverage in the terminal. An html
report can be created using nyc report --reporter html as described above.
This project uses eslint to check code style and quality. The configured eslint rules can be found in the project's .eslintrc.json file.
In an effort to gradually reduce the number of eslint errors in our codebase,
we are using a script called eslint-ratchet. It runs eslint against the
repo and compares the number of errors to the previous number of errors. The
previous number of errors is stored in the .eslint-ratchet-high-water-mark
file, and tracked in git. If the script is run and the number of errors has
been reduced, the new, lower score is stored in
.eslint-ratchet-high-water-mark and should be committed into git. If the
number of errors has increased, the script will fail and tell you that the
number of errors has increased.
To run the script, simply run ./bin/eslint-ratchet from the top of the
cumulus repository.
The eslint-ratchet script is also part of our Travis CI build. If the number
of eslint errors that Travis CI finds has increased, it will fail the build. If
the number of errors has decreased from what is stored in
.eslint-ratchet-high-water-mark, it will also fail the build. In that case,
run ./bin/eslint-ratchet and commit the new-and-improved
.eslint-ratchet-high-water-mark file.
To help prevent unexpected build failures in Travis CI, I suggest adding a
local post-commit hook that will run eslint-ratchet after every commit. This
will not cause your commits to fail if the score has increased, but it will
let you know that there is a problem. To set up the post-commit hook, create a
file called .git/hooks/post-commit which contains:
#!/bin/sh

set -e

echo "Running ./bin/eslint-ratchet"
./bin/eslint-ratchet
Make sure the hook is executable with chmod +x .git/hooks/post-commit
This idea of ratcheting down the number of errors came from Vince Broz's excellent quality gem.
Create a new folder under packages if it is a common library or create folder under cumulus/tasks if it is a lambda task. cd to the folder and run npm init.
Make sure to name the package as @cumulus/package-name.
We use a global versioning approach, meaning version numbers in cumulus are consistent across all packages and tasks, and semantic versioning to track major, minor, and patch version (i.e. 1.0.0). We use Lerna to manage our versioning. Any change will force lerna to increment the version of all packages.
Read more about the semantic versioning here.
The name is not important, but release-x.y.z seems like a good choice.
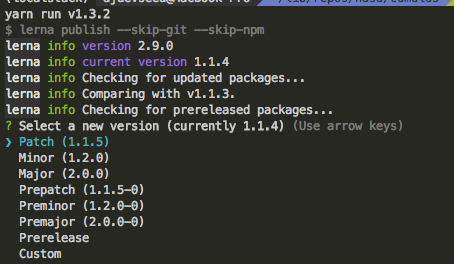
When changes are ready to be released, the Cumulus version number must be updated.
Lerna handles the process of deciding which version number should be used as long as the developer specifies whether the change is a major, minor, or patch change.
To update cumulus' version number run:
$ yarn update
Update the CHANGELOG.md. Put a header under the 'Unreleased' section with the new version number and the date.
Add a link reference for the github "compare" view at the bottom of the CHANGELOG.md, following the existing pattern. This link reference should create a link in the CHANGELOG's release header to changes in the corresponding release.
Update example/package.json to point to the new Cumulus packages.
Create a PR against the master branch. Verify that the Travis CI build for the
PR succeeds and then merge to master. Once merged, the release branch can be
deleted.
Publishing of new releases is handled by Travis CI and is triggered when the
release tag is pushed to Github. This tag should be in the format v1.2.3,
where 1.2.3 is the new version.
Create and push a new git tag:
$ git tag -a v1.x.x -m "Release 1.x.x"
$ git push origin v1.x.x
Travis will build and run tests against that tagged release, publish the new packages to NPM, and then run the integration tests using those newly released packages.
Creating a new release for an older major or minor version is similar to creating any other release. Create a branch starting at the tag of the previous release, then follow the instructions for creating a new release.
For example, if versions 1.7.0 and 1.8.0 had been published and you wanted to
create a 1.7.1 release, you would create the release branch by running
git checkout -b release-1.7.1 v1.7.0.
$ lerna exec -- rm -rf ./package-lock.json
$ yarn clean


