andrzej-k / kubesnap Goto Github PK
View Code? Open in Web Editor NEWThis project forked from intelsdi-x/kubesnap
PoC - Kubernetes monitoring by snap
License: Apache License 2.0
This project forked from intelsdi-x/kubesnap
PoC - Kubernetes monitoring by snap
License: Apache License 2.0


Snap can be deployed to collect metrics in various environments including Docker containers and Kubernetes. It can be run in a Docker container to gather metrics i.e. from host and other containers. Deployment of Snap in Kubernetes cluster gives a possibility to monitor pods in the cluster.
To start examples below you need to have Kubernetes cluster set up. If you do not have Kubernetes cluster you can go to GCE section Snap on Kubernetes with Heapster publisher to start new Kubernetes cluster on GCE with Snap as telemetry solution.
First step is to download Snap repo. All of the needed files are in the snap/integration directory.
$ git clone https://github.com/intelsdi-x/snap-integration-kubernetes/
$ cd ./snap-integration-kubernetesIn order to run Snap in a single docker containter you can pull Snap Docker image intelsdi/snap from official Snap repo on DockerHub (https://hub.docker.com/r/intelsdi/snap/) or build it by yourself.
To run Snap with official image intelsdi/snap from DockerHub repo you simply run the command:
$ docker run -d --name snap -p 8181:8181 intelsdi/snapHowever, if you prefer building Snap image on your own, you can use Dockerfile located in the directory snap/integration/docker. To build Snap image from Dockerfile, you run the command:
$ docker build -t <snap-image-name> snap-integration-kubernetes/src/snapand when the image is ready, you may start Snap with your own image:
$ docker run -d --name snap -p 8181:8181 <snap-image-name>To verify that Snap container has started correctly and perform some actions to start collection of metrics we need to log into the Snap container. Getting into the container is quite simple:
$ docker exec -ti snap bashNow that you are inside the container with running Snap daemon, you may run command to list the plugins:
$ snaptel plugin listThe output should be No plugins found. Have you loaded a plugin? as there are no plugins loaded yet. Let's download some...
Inside a container you may use many different Snap plugins. Most of them require configuration. All of the plugins requirements can be found in their documentation.
In this section we show how to configure and load CPU plugin collector https://github.com/intelsdi-x/snap-plugin-collector-cpu inside a container. The documentation of the Snap CPU plugin collector can be found here: https://github.com/intelsdi-x/snap-plugin-collector-cpu/blob/master/README.md. As it is stated in the documentation, the CPU plugin collector gathers information from the file /proc/stat residing in the host machine. Running this plugin inside the container requires mapping of this file inside of the container. The original host file /proc/stat has to be available inside of the container. This means that we have to adjust Snap container in order to be able to use CPU plugin inside it.
In a Docker container mapping of the files is done with the addition of -v flag when running the container.
$ docker run -d --name snap -v <path-to-file-on-host>:<path-to-file-in-container> intelsdi/snapSo, to run Snap with CPU plugin reading resource usage from host you need to use command as below.
$ docker run -d --name snap -v /proc:/proc_host intelsdi/snapIf you get the error Conflict. The name "/snap" is already in use by container 0c8552a92025293b663ac458dd5f2133b5c825f1840fa4169f6957246c424503. You have to remove (or rename) that container to be able to reuse that name.. you have to remove running Snap container:
$ docker rm -f snapand then create it one more time:
$ docker run -d --name snap -v /proc:/proc_host intelsdi/snapNow that we have Snap container configured, we may download and load CPU collector plugin...
$ curl -fsL "https://github.com/intelsdi-x/snap-plugin-collector-cpu/releases/download/6/snap-plugin-collector-cpu_linux_x86_64" -o snap-plugin-collector-cpu
$ snaptel plugin load snap-plugin-collector-cpu
...and file publisher plugin:
$ curl -fsL "https://github.com/intelsdi-x/snap-plugin-publisher-file/releases/download/2/snap-plugin-publisher-file_linux_x86_64" -o snap-plugin-publisher-file
$ snaptel plugin load snap-plugin-publisher-file
Now, running the command:
$ snaptel plugin listwill print information about the two loaded plugins. To start the collection of metrics you can create task.
$ curl -sO https://raw.githubusercontent.com/intelsdi-x/snap-integration-kubernetes/examples/tasks/cpu-file.json
$ snaptel task create -t snap-integration-kubernetes/examples/tasks/cpu-file.json
Command:
$ snaptel task listwill provide information whether the metrics collection was successfull or not. Use task watch to verify that tasks have been created correctly.
$ snaptel task watch <task-id>More information and examples of loading plugins is described in section Customization and Configuration.
If you already have Kubernetes setup you can follow the instructions described in sections a) and b). However, if you do not have Kubernetes and you wish to try Snap out on Google Compute Engine you can go to section c).
To run Snap in Kubernetes pods create daemonset from manifest file snap-integration-kubernetes/run/kubernetes/snap/snap.yaml presented below.
apiVersion: extensions/v1beta1
kind: DaemonSet
metadata:
  name: snap
  namespace: kube-system
  labels:
    kubernetes.io/cluster-service: "true"
spec:
  template:
    metadata:
      name: snap
      labels:
        daemon: snapteld
    spec:
      containers:
      - name: snap
        image: intelsdi/snap
        # mapping of /proc is required for CPU plugin
        volumeMounts:
          - mountPath: /proc_host
            name: proc
        ports:
        - containerPort: 8181
          hostPort: 8181
          name: snap-api
        imagePullPolicy: Always
      volumes:
        - name: proc
          hostPath:
            path: /proc
The manifest contains parameters volumeMounts and volume. Those fields are required for CPU collector plugin to run properly. As it is stated in the documentation (https://github.com/intelsdi-x/snap-plugin-collector-cpu/blob/master/README.md) the plugin gathers information from the file /proc/stat residing in the host machine. The original host file /proc/stat has to be accessible inside of the container. Running this plugin inside the pod requires mapping of this file inside of the container. This means that we have to adjust Snap daemonset manifest in order to be able to use CPU plugin inside it. This is done with the use of volumeMounts and volume fields.
Let's create Snap daemonset:
$ kubectl create -f snap-integration-kubernetes/run/kubernetes/snap/snap.yamlAnd verify that pods have been created:
$ kubectl get pods --namespace=kube-systemLog into the one of pods using the pod name returned by kubectl get pods command.
$ kubectl exec -ti <snap-pod-name> bash --namespace=kube-systemNow that you are inside the pod with running Snap daemon, you may run command to list the plugins
$ snaptel plugin listThe output should be No plugins found. Have you loaded a plugin? as there are no plugins loaded yet. Let's download some...
$ curl -fsL "https://github.com/intelsdi-x/snap-plugin-collector-cpu/releases/download/6/snap-plugin-collector-cpu_linux_x86_64" -o snap-plugin-collector-cpu
$ curl -fsL "https://github.com/intelsdi-x/snap-plugin-publisher-file/releases/download/2/snap-plugin-publisher-file_linux_x86_64" -o snap-plugin-publisher-file
...and load them.
$ snaptel plugin load snap-plugin-collector-cpu
$ snaptel plugin load snap-plugin-publisher-file
Now, running the command
$ snaptel plugin listwill print information about two loaded plugins. To start the collection of metrics you can create task.
$ curl -sO https://raw.githubusercontent.com/intelsdi-x/snap-integration-kubernetes/examples/tasks/cpu-file.json
$ snaptel task create -t ./cpu-file.json
Command:
$ snaptel task listwill provide information whether the metrics collection was successfull or not. Use task watch to verify that tasks have been created correctly.
$ snaptel task watch <task-id>If you want to know how to load other plugins read the section Customization and Configuration.
There is also a possibility to publish metrics gathered by Snap collector to customized Heapster (supporting Snap as data source) (https://github.com/intelsdi-x/heapster). This solution requires:
To run the customized Heapster image you need to create Heapster service and deployment from manifest files snap-integration-kubernetes/run/kubernetes/heapster/heapster-service.yaml and snap-integration-kubernetes/run/kubernetes/heapster/heapster-controller.yaml.
$ kubectl create -f snap-integration-kubernetes/run/kubernetes/heapster/heapster-service.yaml
$ kubectl create -f snap-integration-kubernetes/run/kubernetes/heapster/heapster-controller.yamlKubernetes manifest has to be adjusted to use with Snap Docker collector plugin (https://github.com/intelsdi-x/snap-plugin-collector-docker). To start Snap daemonset adjusted to use with Snap Docker collector plugin you simply run the command:
$ kubectl create -f snap-integration-kubernetes/run/kubernetes/snap/snap-docker.yamlThe manifest snap-integration-kubernetes/run/kubernetes/snap/snap-docker.yaml contains fields volumeMounts and volume that allow to map files inside of the pods. They are required because Docker collector needs access to files on the host:
/var/run/docker.sock/proc/usr/bin/docker/var/lib/docker/sys/fs/cgroupWhat is more, the daemonset must be created with volume security option privileged (http://kubernetes.io/docs/user-guide/security-context/). This is neccessary to access /var/run/docker.sock file.
apiVersion: extensions/v1beta1
kind: DaemonSet
metadata:
  name: snap
  namespace: kube-system
  labels:
    kubernetes.io/cluster-service: "true"
spec:
  template:
    metadata:
      name: snap
      labels:
        daemon: snapteld
    spec:
      # this option is required for tribe mode
      hostNetwork: true
      containers:
      - name: snap
        image: intelsdi/snap
        # mapping of dirs below is required for docker plugin
        volumeMounts:
          - mountPath: /sys/fs/cgroup
            name: cgroup
          - mountPath: /var/run/docker.sock
            name: docker-sock
          - mountPath: /var/lib/docker
            name: fs-stats
          - mountPath: /usr/local/bin/docker
            name: docker
          - mountPath: /proc_host
            name: proc
        ports:
        - containerPort: 8181
          hostPort: 8181
          name: snap-api
        - containerPort: 8777
          hostPort: 8777
          name: heapster
        imagePullPolicy: Always
        # privileged mode is required to access mounted volume
        # /var/run/docker.sock
        securityContext:
          privileged: true
      volumes:
        - name: cgroup
          hostPath:
            path: /sys/fs/cgroup
        - name: docker-sock
          hostPath:
            path: /var/run/docker.sock
        - name: fs-stats
          hostPath:
            path: /var/lib/docker
        - name: docker
          hostPath:
            path: /usr/bin/docker
        - name: proc
          hostPath:
            path: /proc
Verify that pods have been created correctly:
$ kubectl get pods --all-namespaces -o wideNow you need to log into one of the pods using the name returned by the command kubectl get pods:
$ kubectl exec -ti <snap-pod-name> --namespace=kube-systemDownload and load Docker collector:
$ curl -fsL "https://github.com/intelsdi-x/snap-plugin-collector-docker/releases/download/5/snap-plugin-collector-docker_linux_x86_64" -o snap-plugin-collector-docker
$ snaptel plugin load snap-plugin-collector-dockerAfter you create customized Heapster deployment and Docker collector plugin you download Snap Heapster publisher plugin and load it:
$ curl -fsL "https://github.com/intelsdi-x/snap-plugin-publisher-heapster/releases/download/1/snap-plugin-publisher-heapster_linux_x86_64" -o snap-plugin-publisher-heapster
$ snaptel plugin load ./snap-plugin-publisher-heapster
Running:
$ snaptel plugin listwill provide information whether plugins have been loaded correctly. After that you can download an exemplary task manifest and create it:
$ curl -sO https://raw.githubusercontent.com/intelsdi-x/snap-integration-kubernetes/examples/tasks/docker-heapster.json
$ snaptel task create -t ./docker-heapster.jsonTo verify that metrics are being collected in Heapster you may check Heapster pod logs:
$ kubectl logs -f <heapster-pod-name> --namespace=kube-system
To start work with Google Cloud Platform you have to follow steps defined below.
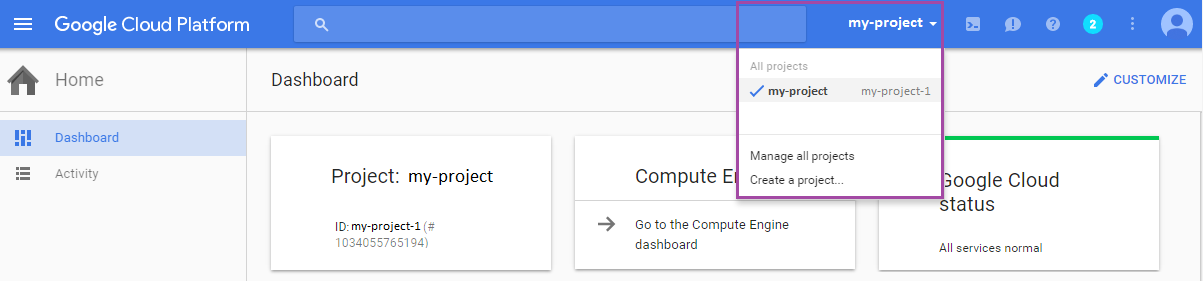
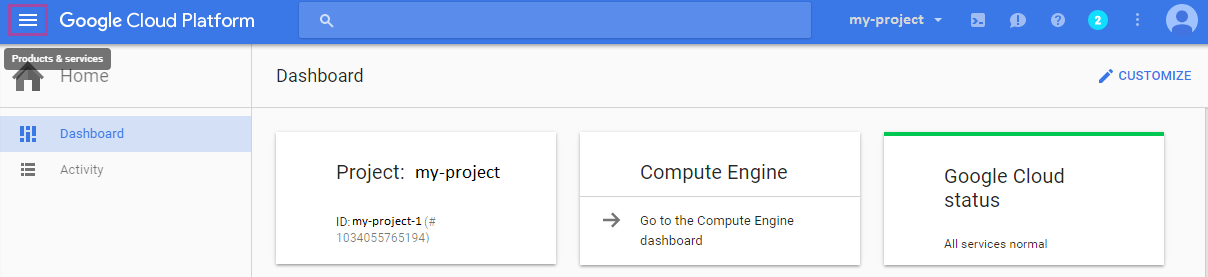
select Products & Services from GC Menu in the top left corner
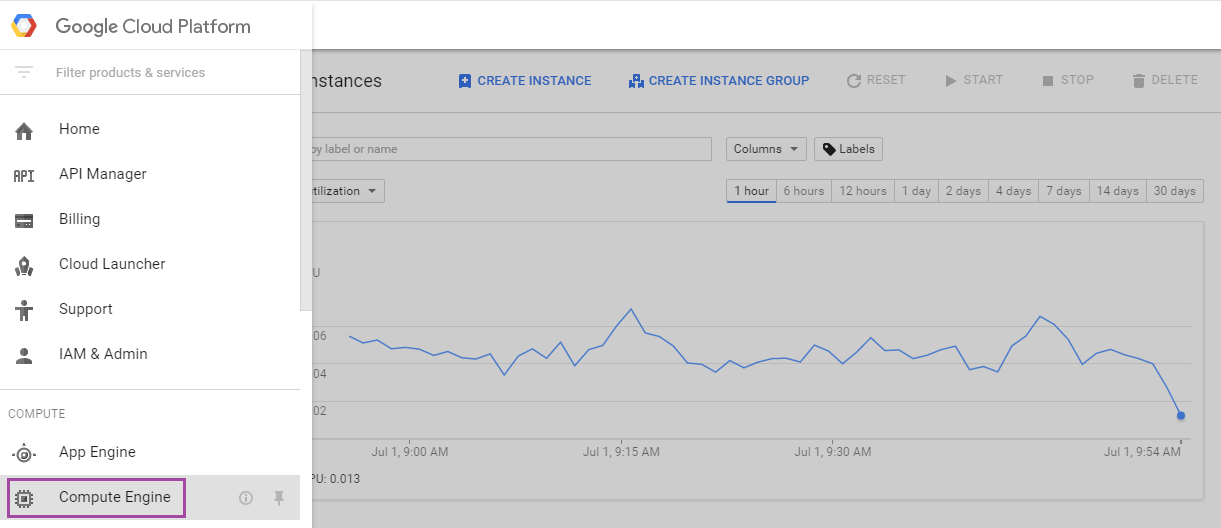
and then select Compute Engine from the drop-down list
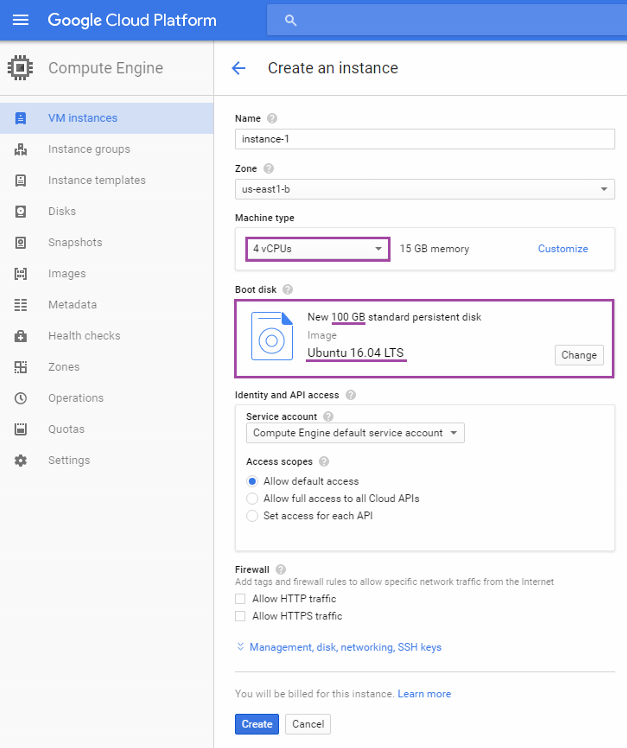
create a new VM instance

set the instance name
choose a machine with at least 4 vCPUs and at least 15GB RAM
select Ubuntu 16.04 with standard persistent disk with at least 100GB
manage credentials for the Google Cloud SD. To do that, run the following command:
gcloud auth login
Answer Y to the question (see below) and follow the instructions:
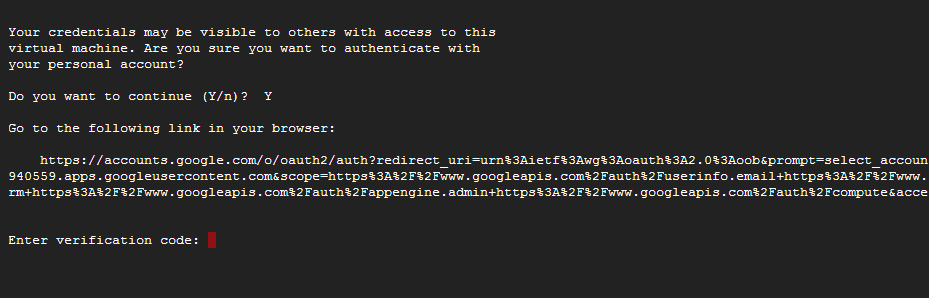
check if you are on credentialed accounts:
$ gcloud auth listClone kubesnap into your home directory:
git clone https://github.com/intelsdi-x/kubesnap
Go to kubesnap/tools:
cd kubesnap/tools
Provision kubesnap (it takes approximately 35 minutes on a VM with 4 vCPUs and 15 GB of RAM in us-central1-b zone):
./provision-kubesnap.sh
Inside Docker container it is possible to load most of the Snap plugins. The list of all Snap plugins is available in plugin catalog https://github.com/intelsdi-x/snap/blob/master/docs/PLUGIN_CATALOG.md. After you choose plugin you click the plugin name. This redirects you to the plugin repository.
To use plugin inside the container you need to download its binary. In order to get plugin binary URL you go to the release section...

...and copy the link for the latest plugin release.

Many of the plugins require prior configuration and adjustment of container or Kubernetes manifest. The example of such plugin is Snap Docker collector plugin. The Docker collector allows to collect runtime metrics from Docker containers and its host machine. It gathers information about resource usage and performance characteristics. More information about docker collector can be found here: https://github.com/intelsdi-x/snap-plugin-collector-docker.
All of the plugins requirements can be found in their documentation. The documentation of the Snap Docker plugin collector can be found here: https://github.com/intelsdi-x/snap-plugin-collector-docker/blob/master/README.md. Docker plugin collector needs access to files residing in the host machine:
/var/run/docker.sock/proc/usr/bin/docker/var/lib/docker/sys/fs/cgroupThis means that the original host files have to be available inside of the container. Running this plugin inside the container requires mapping of those files inside of the container. What is more, Docker collector plugin requires enviroment variable PROCFS_MOUNT to be set. It should point to the directory inside the container where original host directorry /proc is mounted. This has to be done in both cases: Docker container and Kubernetes pod.
In a Docker container mapping of the files is done with the addition of -v flag when running the container.
$ docker run -d --name snap -v <path-to-file-on-host>:<path-to-file-in-container> intelsdi/snapThe enviroment variable PROCFS_MOUNT must also be set. In Docker this is done with the use of -e flag when running the container.
$ docker run -d --name snap -v <path-to-file-on-host>:<path-to-file-in-container> -e PROCFS_MOUNT=<path-to-file-in-container> intelsdi/snapSo, to run Snap with Docker collector plugin gathering metrics from host you need to use command as below.
$ docker run -d --name snap -v /proc/host:/proc_host -e PROCFS_MOUNT=/proc_host intelsdi/snapTo verify that Snap container has started correctly and load Docker collector plugin we need to log into the Snap container. Getting into the container is quite simple:
$ docker exec -ti snap bashNow that you are inside the container with running Snap daemon, you may download and load Docker collector plugin using plugin binary URL from release section in plugin's repository.
$ curl -fsL "https://github.com/intelsdi-x/snap-plugin-collector-docker/releases/download/5/snap-plugin-collector-docker_linux_x86_64" -o snap-plugin-collector-docker
$ snaptel plugin load snap-plugin-collector-docker
Load file publisher:
$ curl -fsL "https://github.com/intelsdi-x/snap-plugin-publisher-file/releases/download/2/snap-plugin-publisher-file_linux_x86_64" -o snap-plugin-publisher-file
$ snaptel plugin load snap-plugin-publisher-file
Running command:
$ snaptel plugin listwill print information about the two loaded plugins. To start the collection of metrics you can create task.
$ curl -sO https://raw.githubusercontent.com/intelsdi-x/snap-plugin-collector-docker/master/examples/docker-file.json
$ snaptel task create -t ./docker-file.json
Command:
$ snaptel task listwill provide information whether the metrics collection was successfull or not.
This way you may download and load almost any Snap plugin inside the Docker container.
To run Docker collector in Kubernetes pod we need to fullfill the same requirements. We have to mount directories /var/run/docker.sock, /proc, /usr/bin/docker, /var/lib/docker and /sys/fs/cgroup file inside of the pod and export PROCFS_MOUNT variable. In Kubernetes this adjustment needs to be added in the manifest file.
Mapping of the files is done with volumeMounts and volume parameters as shown below in the snap-integration-kubernetes/run/kubernetes/snap/snap-docker.yaml.
apiVersion: extensions/v1beta1
kind: DaemonSet
metadata:
  name: snap
  namespace: kube-system
  labels:
    kubernetes.io/cluster-service: "true"
spec:
  template:
    metadata:
      name: snap
      labels:
        daemon: snapteld
    spec:
      # this option is required for tribe mode
      hostNetwork: true
      containers:
      - name: snap
        image: intelsdi/snap
        # mapping of dirs below is required for docker plugin
        volumeMounts:
          - mountPath: /sys/fs/cgroup
            name: cgroup
          - mountPath: /var/run/docker.sock
            name: docker-sock
          - mountPath: /var/lib/docker
            name: fs-stats
          - mountPath: /usr/local/bin/docker
            name: docker
          - mountPath: /proc_host
            name: proc
        ports:
        - containerPort: 8181
          hostPort: 8181
          name: snap-api
        - containerPort: 8777
          hostPort: 8777
          name: heapster
        imagePullPolicy: Always
        # privileged mode is required to access mounted volume
        # /var/run/docker.sock
        securityContext:
          privileged: true
      volumes:
        - name: cgroup
          hostPath:
            path: /sys/fs/cgroup
        - name: docker-sock
          hostPath:
            path: /var/run/docker.sock
        - name: fs-stats
          hostPath:
            path: /var/lib/docker
        - name: docker
          hostPath:
            path: /usr/bin/docker
        - name: proc
          hostPath:
            path: /proc
More information about mounting of volumes can be found in Kubernetes documentation (http://kubernetes.io/docs/user-guide/volumes/). Environment variable is added with env parameter (http://kubernetes.io/docs/tasks/configure-pod-container/define-environment-variable-container/).
In order to run Snap with Docker collector you have to create daemonset from snap-docker.yaml file.
$ kubectl create -f snap-integration-kubernetes/run/kubernetes/snap/snap-docker.yamlVerify that pods have been created.
$ kubectl get pods --namespace=kube-systemLog into the one of pods using the pod name returned by kubectl get pods command.
$ kubectl exec -ti <snap-pod-name> bash --namespace=kube-systemNext steps to have Docker collector plugin running are very similar to those described Configuration of Docker container section. Inside the container or pod we run following commands:
$ curl -fsL "https://github.com/intelsdi-x/snap-plugin-collector-docker/releases/download/5/snap-plugin-collector-docker_linux_x86_64" -o snap-plugin-collector-docker
$ curl -fsL "https://github.com/intelsdi-x/snap-plugin-publisher-file/releases/download/2/snap-plugin-publisher-file_linux_x86_64" -o snap-plugin-publisher-file
$ snaptel plugin load snap-plugin-collector-docker
$ snaptel plugin load snap-plugin-publisher-file
$ curl -sO "curl -sO "https://raw.githubusercontent.com/intelsdi-x/snap-plugin-collector-docker/master/examples/tasks/docker-file.json"
$ snaptel task create -t ./docker-file.json
Command:
$ snaptel task listwill provide information whether the metrics collection was successfull or not.
This way you may download and load almost any Snap plugin inside the Kubernetes pod.
Snap can be run in a tribe mode. Tribe mode causes Snap instances to form a cluster. This allows user to create agreements and add Snap instances to those agreements. When an action is taken by one Snap instance that is a member of an agreement, that action will be carried out by all other members of the agreement. When a new Snap joins an existing agreement it will retrieve plugins and tasks from the members of the agreement. As you may read in the doumentation (https://github.com/intelsdi-x/snap/blob/master/docs/TRIBE.md) tribe mode is a beta feature yet. However it has been successfully set up and tested in a configuration presented in this section.
First we need to add a command argument to Kubernetes manifest. Command "sleep" and "inf" will allow to execute own command in the container.
apiVersion: extensions/v1beta1
kind: DaemonSet
metadata:
  name: snap
  namespace: kube-system
  labels:
    kubernetes.io/cluster-service: "true"
spec:
  template:
    metadata:
      name: snap
      labels:
        daemon: snapteld
    spec:
      # this option is required for tribe mode
      hostNetwork: true
      containers:
      - name: snap
        image: intelsdi/snap
        command:
        - sleep
        - inf
        # mapping of dirs below is required for docker plugin
        volumeMounts:
          - mountPath: /sys/fs/cgroup
            name: cgroup
          - mountPath: /var/run/docker.sock
            name: docker-sock
          - mountPath: /var/lib/docker
            name: fs-stats
          - mountPath: /usr/local/bin/docker
            name: docker
          - mountPath: /proc_host
            name: proc
        ports:
        - containerPort: 8181
          hostPort: 8181
          name: snap-api
        - containerPort: 8777
          hostPort: 8777
          name: heapster
        - containerPort: 6000
          hostPort: 6000
          name: tribe
        imagePullPolicy: Always
        # privileged mode is required to access mounted volume
        # /var/run/docker.sock
        securityContext:
          privileged: true
      volumes:
        - name: cgroup
          hostPath:
            path: /sys/fs/cgroup
        - name: docker-sock
          hostPath:
            path: /var/run/docker.sock
        - name: fs-stats
          hostPath:
            path: /var/lib/docker
        - name: docker
          hostPath:
            path: /usr/bin/docker
        - name: proc
          hostPath:
            path: /proc
Then we create daemonset and list Snap pods.
kubectl create -f snap-integration-kubernetes/run/kubernetes/snap/snap-docker.yaml
kubectl get pods --all-namespaces -o wide
The output should be similar to this:
kube-system   snap-ljzuh                               1/1       Running   0          14s       10.91.97.192   10.91.97.192
kube-system   snap-4vcny                               1/1       Running   0          14s       10.91.97.193   10.91.97.193
kube-system   snap-bc47e                               1/1       Running   0          14s       10.91.97.194   10.91.97.194
kube-system snap-x2kjd 1/1 Running 0 14s 10.91.97.195 10.91.97.195Next step is to choose one of the pods to be seed and exec command:
$ kubectl --namespace=kube-system exec snap-ljzuh -- snapteld --tribe --tribe-addr 10.91.97.192 --tribe-seed 10.91.97.192 --tribe-port 6000After that you press ctrl + c to return to the console.
$ kubectl --namespace=kube-system exec snap-4vcny -- snapteld --tribe --tribe-addr 10.91.97.193 --tribe-seed 10.91.97.192 --tribe-port 6000
$ [ctrl + c]
You repeat the same action for every pod you want to join to Snap tribe, adding --tribe-addr parameter with the IP address of the host running Snap.
$ kubectl --namespace=kube-system exec snap-bc47e -- snapteld --tribe --tribe-addr 10.91.97.194 --tribe-seed 10.91.97.192 --tribe-port 6000
$ [ctrl + c]
$ kubectl --namespace=kube-system exec snap-x2kjd -- snapteld --tribe --tribe-addr 10.91.97.195 --tribe-seed 10.91.97.192 --tribe-port 6000
$ [ctrl + c]
After you have all Snap instances added to tribe, you may list them with command:
kubectl --namespace=kube-system exec snap-eplj3 -- snaptel member list The output should be similar to:
Name
node3
node1
mon1
node2
The command lists hostnames of all members of a tribe. When you run
$ kubectl --namespace=kube-system exec snap-eplj3 -- snaptel agreement listThe output is None, because Snap instances form a tribe, but they are not assigned to any agreement. Let's create an agreement.
To create an agreement with an exemplary name all-nodes we use command:
$ kubectl --namespace=kube-system exec snap-eplj3 -- snaptel agreement create all-nodesThe output confirms creation of the agreement:
Name 		 Number of Members 	 plugins 	 tasks
all-nodes 	 0 			  		 0           0
There are no nodes added to the all-nodes agreement yet. To add all nodes to the agreement you use commands below (replace hostnames with hostnames returned by your snaptel member list command):
$ kubectl --namespace=kube-system exec snap-eplj3 -- snaptel agreement join all-nodes mon1
$ kubectl --namespace=kube-system exec snap-eplj3 -- snaptel agreement join all-nodes node1
$ kubectl --namespace=kube-system exec snap-eplj3 -- snaptel agreement join all-nodes node2
$ kubectl --namespace=kube-system exec snap-eplj3 -- snaptel agreement join all-nodes node3
Each time you run this command the number of member increments:
Name 		 Number of Members 	 plugins 	 tasks
all-nodes 4 0 0To exec a command inside a container you do not necessarilly need to log into the container. For example, you may download plugins like this:
$ kubectl --namespace=kube-system exec snap-eplj3 -- curl -fsL "https://github.com/intelsdi-x/snap-plugin-collector-docker/releases/download/5/snap-plugin-collector-docker_linux_x86_64" -o snap-plugin-collector-docker
$ kubectl --namespace=kube-system exec snap-eplj3 --  curl -fsL "https://github.com/intelsdi-x/snap-plugin-publisher-file/releases/download/2/snap-plugin-publisher-file_linux_x86_64" -o snap-plugin-publisher-file
and load them:
$ kubectl --namespace=kube-system exec snap-eplj3 -- snaptel plugin load snap-plugin-collector-docker
$ kubectl --namespace=kube-system exec snap-eplj3 -- snaptel plugin load snap-plugin-publisher-file
We can also create task:
$ kubectl --namespace=kube-system exec snap-eplj3 -- curl -sO "https://raw.githubusercontent.com/intelsdi-x/snap-plugin-collector-docker/master/examples/tasks/docker-file.json"
$ kubectl --namespace=kube-system exec snap-eplj3 -- snaptel task create -t ./docker-file.json
Now running command:
$ kubectl --namespace=kube-system exec snap-eplj3 -- snaptel agreement listwill print output:
Name 		 Number of Members 	 plugins 	 tasks
all-nodes 4 2 1A declarative, efficient, and flexible JavaScript library for building user interfaces.
🖖 Vue.js is a progressive, incrementally-adoptable JavaScript framework for building UI on the web.
TypeScript is a superset of JavaScript that compiles to clean JavaScript output.
An Open Source Machine Learning Framework for Everyone
The Web framework for perfectionists with deadlines.
A PHP framework for web artisans
Bring data to life with SVG, Canvas and HTML. 📊📈🎉
JavaScript (JS) is a lightweight interpreted programming language with first-class functions.
Some thing interesting about web. New door for the world.
A server is a program made to process requests and deliver data to clients.
Machine learning is a way of modeling and interpreting data that allows a piece of software to respond intelligently.
Some thing interesting about visualization, use data art
Some thing interesting about game, make everyone happy.
We are working to build community through open source technology. NB: members must have two-factor auth.
Open source projects and samples from Microsoft.
Google ❤️ Open Source for everyone.
Alibaba Open Source for everyone
Data-Driven Documents codes.
China tencent open source team.