Assignment 2 Technical Task Details:
- Based on minikube
- Deploy 3 replicas of nginx/apache
- Include a simple "hello world" in the index.html of nginx/apache
- Deploy 1 replica of tomcat v8
- Deploy sample.war to tomcat deployment (use this: https://tomcat.apache.org/tomcat-8.0-doc/appdev/sample/)
- Deploy a jenkins pod (1 replica)
- Configure a static "dummy" job in jenkins
- Submit the project as a set of yaml manifests, Dockerfiles, bash scripts, xml files, and anything else you deem appropriate.
- Include a simple/short README file that tells how to operate the project.
- Archive everything into a zip or tar.gz, and upload it to the link provided, send it via email or provide a direct link
Solution:
Step-1: Login to minikube cloud cluster by going to below link and clicking on ‘Launch Terminal’ button in blue color under ‘Create minikube cluster’ section:
https://kubernetes.io/docs/tutorials/hello-minikube/
(Wait for a couple of minutes or so for the cluster to get started)
You can also choose to deploy to your own minikube cluster but that might give problems while using hostport. For my assignment, I have used the one on katakoda from link above.
Step-2: Download all the project artifacts directly using git clone command as below and cd into it:
git clone https://github.com/ankur512512/backbase-a2.git
cd backbase-a2
Step-3: I have assumed that we would be having a Docker registry somewhere to store our images and thus I have created a fresh account on dockerhub for this assignment with below credentials:
Username: backbasedevops Password: backbase@123
Now use these commands to login to docker hub and then build and push our custom images to docker repository:
docker login -u backbasedevops -p backbase@123

docker build -f Dockerfile-tomcat . -t backbasedevops/tomcat
docker build -f Dockerfile-nginx . -t backbasedevops/nginx
docker build -f Dockerfile-jenkins . -t backbasedevops/jenkins

docker push backbasedevops/nginx
docker push backbasedevops/tomcat
docker push backbasedevops/jenkins
Step-4: We are ready to create our deployments in kubernetes now. Run below commands to create and start the deployments:
kubectl apply -f .
Please note that I have used hostPorts for tomcat (8080) and jenkins (8090) as they were having just 1 replica/pod. But for nginx, I haven't used any hostPort but created a nodePort service on nodePort: 30007, as nginx was having 3 replicas and would give hostPort conflict issue after first replica is started.
Wait for the pods to come in ready state using this:
kubectl get pods -w

(Hit ctrl+c when ready)
Step -5: Time to test.
a.) Test the tomcat deployment by using curl command as below:
curl `minikube ip`:8080/sample/
This should give output like this:
<html>
<head>
<title>Sample "Hello, World" Application</title>
</head>
<body bgcolor=white>

<table border="0">
<tr>
<td>
<img src="images/tomcat.gif">
</td>
<td>
<h1>Sample "Hello, World" Application</h1>
<p>This is the home page for a sample application used to illustrate the
source directory organization of a web application utilizing the principles
outlined in the Application Developer's Guide.
</td>
</tr>
</table>

<p>To prove that they work, you can execute either of the following links:
<ul>
<li>To a <a href="hello.jsp">JSP page</a>.
<li>To a <a href="hello">servlet</a>.
</ul>

</body>
</html>
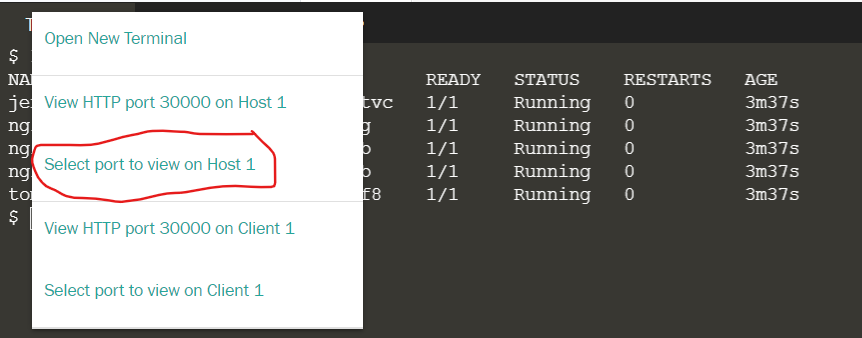
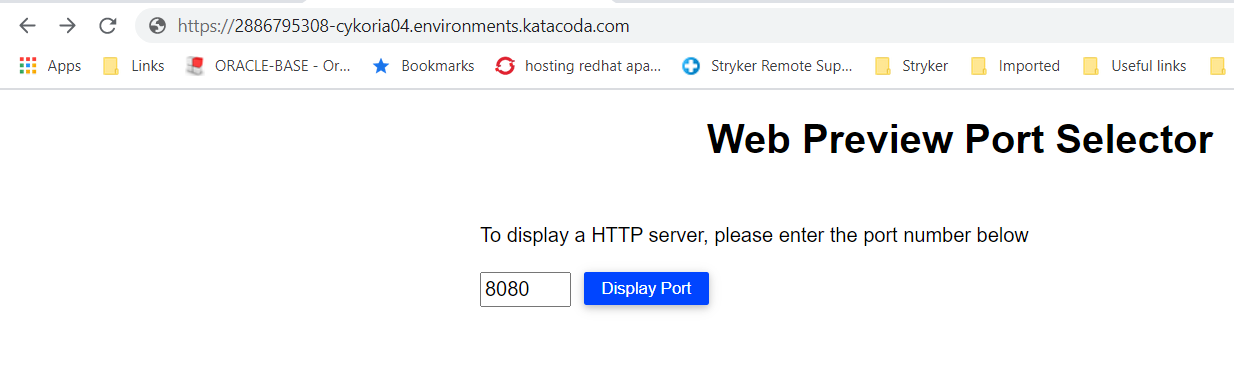
If you want to check it via web-browser UI as well, then click on the '+' sign at the top of the minikube terminal (next to the preview port 30000).

Then select 'Select Port to view on Host 1':
Enter the port number '8080' in the text box next to the 'Display Port' button and hit enter:
You will see the default tomcat page. Append the URL with '/sample/' and hit enter. It would look like this:

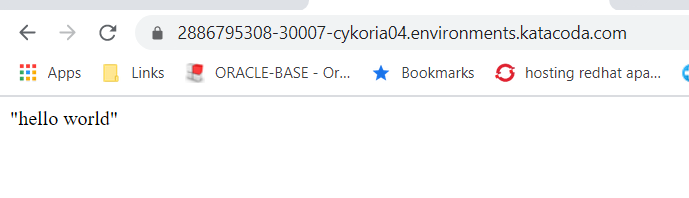
b.) Test the nginx deployment using below curl command:
curl `minikube ip`:30007
This will give you a simple output like below:
"hello world"
If you want to check it via web-browser UI as well, then click on the '+' sign again at the top of the minikube terminal (next to the preview port 30000).
Then select 'Select Port to view on Host 1'
Enter the port number '30007' in the text box next to the 'Display Port' button and hit enter. A screen like this should appear.
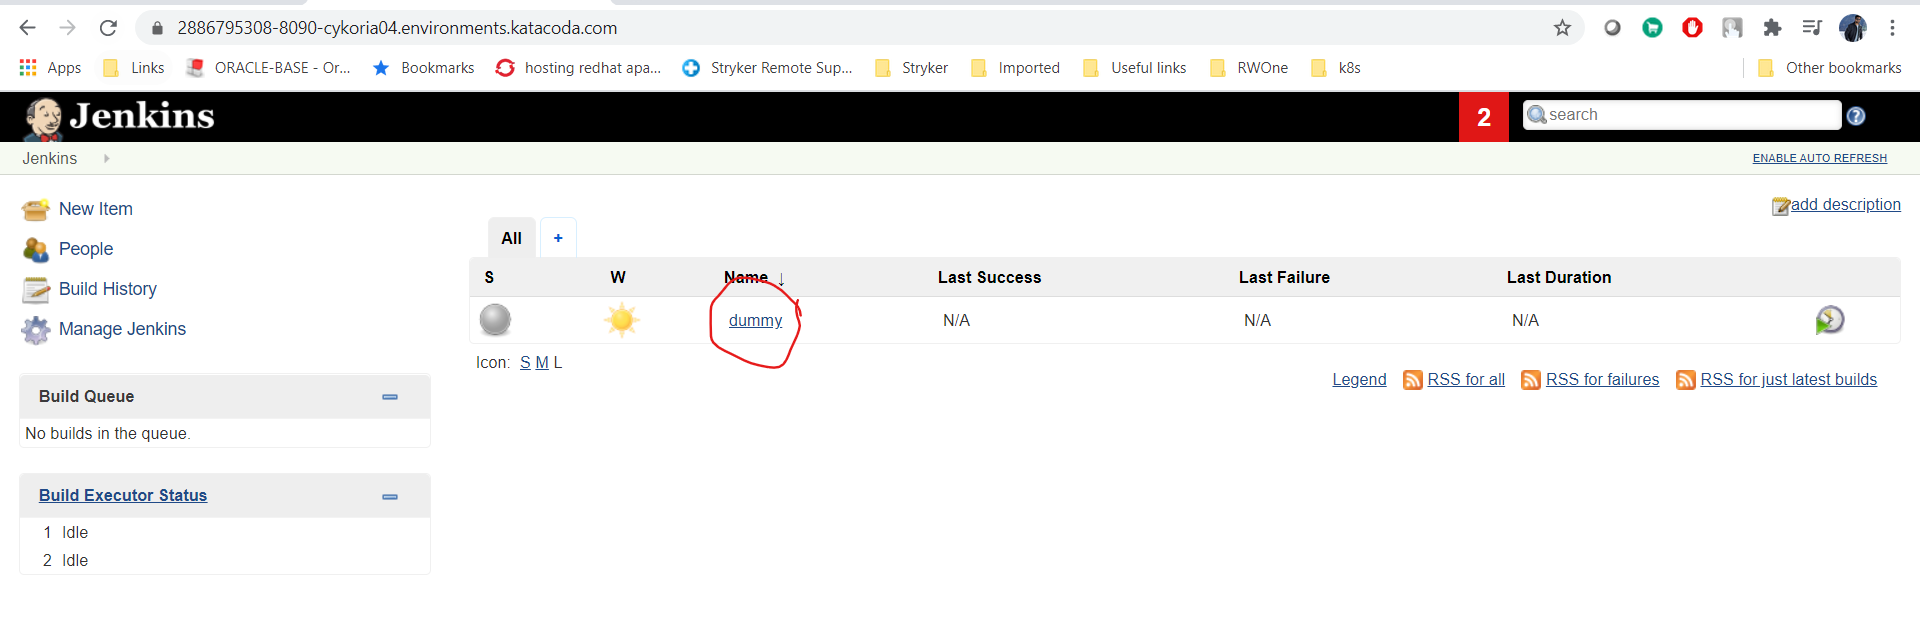
c.) Test the Jenkins deployment using below:
Check it via web-browser UI , by clicking on the '+' sign again at the top of the minikube terminal (next to the preview port 30000).
Then select 'Select Port to view on Host 1'
Enter the port number '8090' in the text box next to the 'Display Port' button and hit enter. A screen like this would appear: