You´ll need
- Raspberry Pi 3
- Debian bases Linux
- Python 3.8, PIP, Kivy
- Screen (e.g. 7" Raspberry)
- Servos Adafruit_PCA9685
- Tubes
Aufbauanleitung https://github.com/H3c702/Hector9000docu/blob/master/H9000_ger_V0.2a.pdf
NOT TESTED! COMES WITHOUT ANY WARRANTY!
sudo apt update
sudo apt install libsdl2-dev libsdl2-image-dev libsdl2-mixer-dev libsdl2-ttf-dev pkg-config libgl1-mesa-dev libgles2-mesa-dev python-setuptools libgstreamer1.0-dev git-core gstreamer1.0-plugins-{bad,base,good,ugly} gstreamer1.0-{omx,alsa} python-dev libmtdev-dev xclip xsel libjpeg-dev

## Update your update-alternatives to use python3.x instead of raspbian standard version 2.x
## Kivy might not run on everything > 3.8 !!
sudo update-alternatives --install /usr/bin/python python /usr/bin/python3 1
sudo update-alternatives --config python

## Be sure to have some more dependencies
sudo apt install python3-pip git wget curl -y


## Install pip, Kivy and their dependencies:
python -m pip install pip setuptools virtualenv
python -m virtualenv kivy_venv
source kivy_venv/bin/activate
python -m pip install "kivy[full]" kivy_examples
## Kivy on wheels
python -m pip install --pre "kivy[full]" kivy_examples


## After you have installed Python and Kivy you can get the sources by using Git
cd ~
git clone https://github.com/arbadacarbaYK/ChicksOnTheBlocks.git

## Install all the requirements listed in the file requirements.txt
cd ChicksOnTheBlocks/
pip3 install -r requirements.txt

## Done!

Some files were in the wrong directory, too lazy to check which, copied all
cp ~/ChicksOnTheBlocks/src/ ~/ChicksOnTheBlocks/
cd ChicksOnTheBlocks
./run.sh
The Kivy App can be started with python main.py
If you are testing this on a separate machine set dev_environment=True and uncomment Adafruit #import Adafruit_PCA9685 in HectorHardware.py
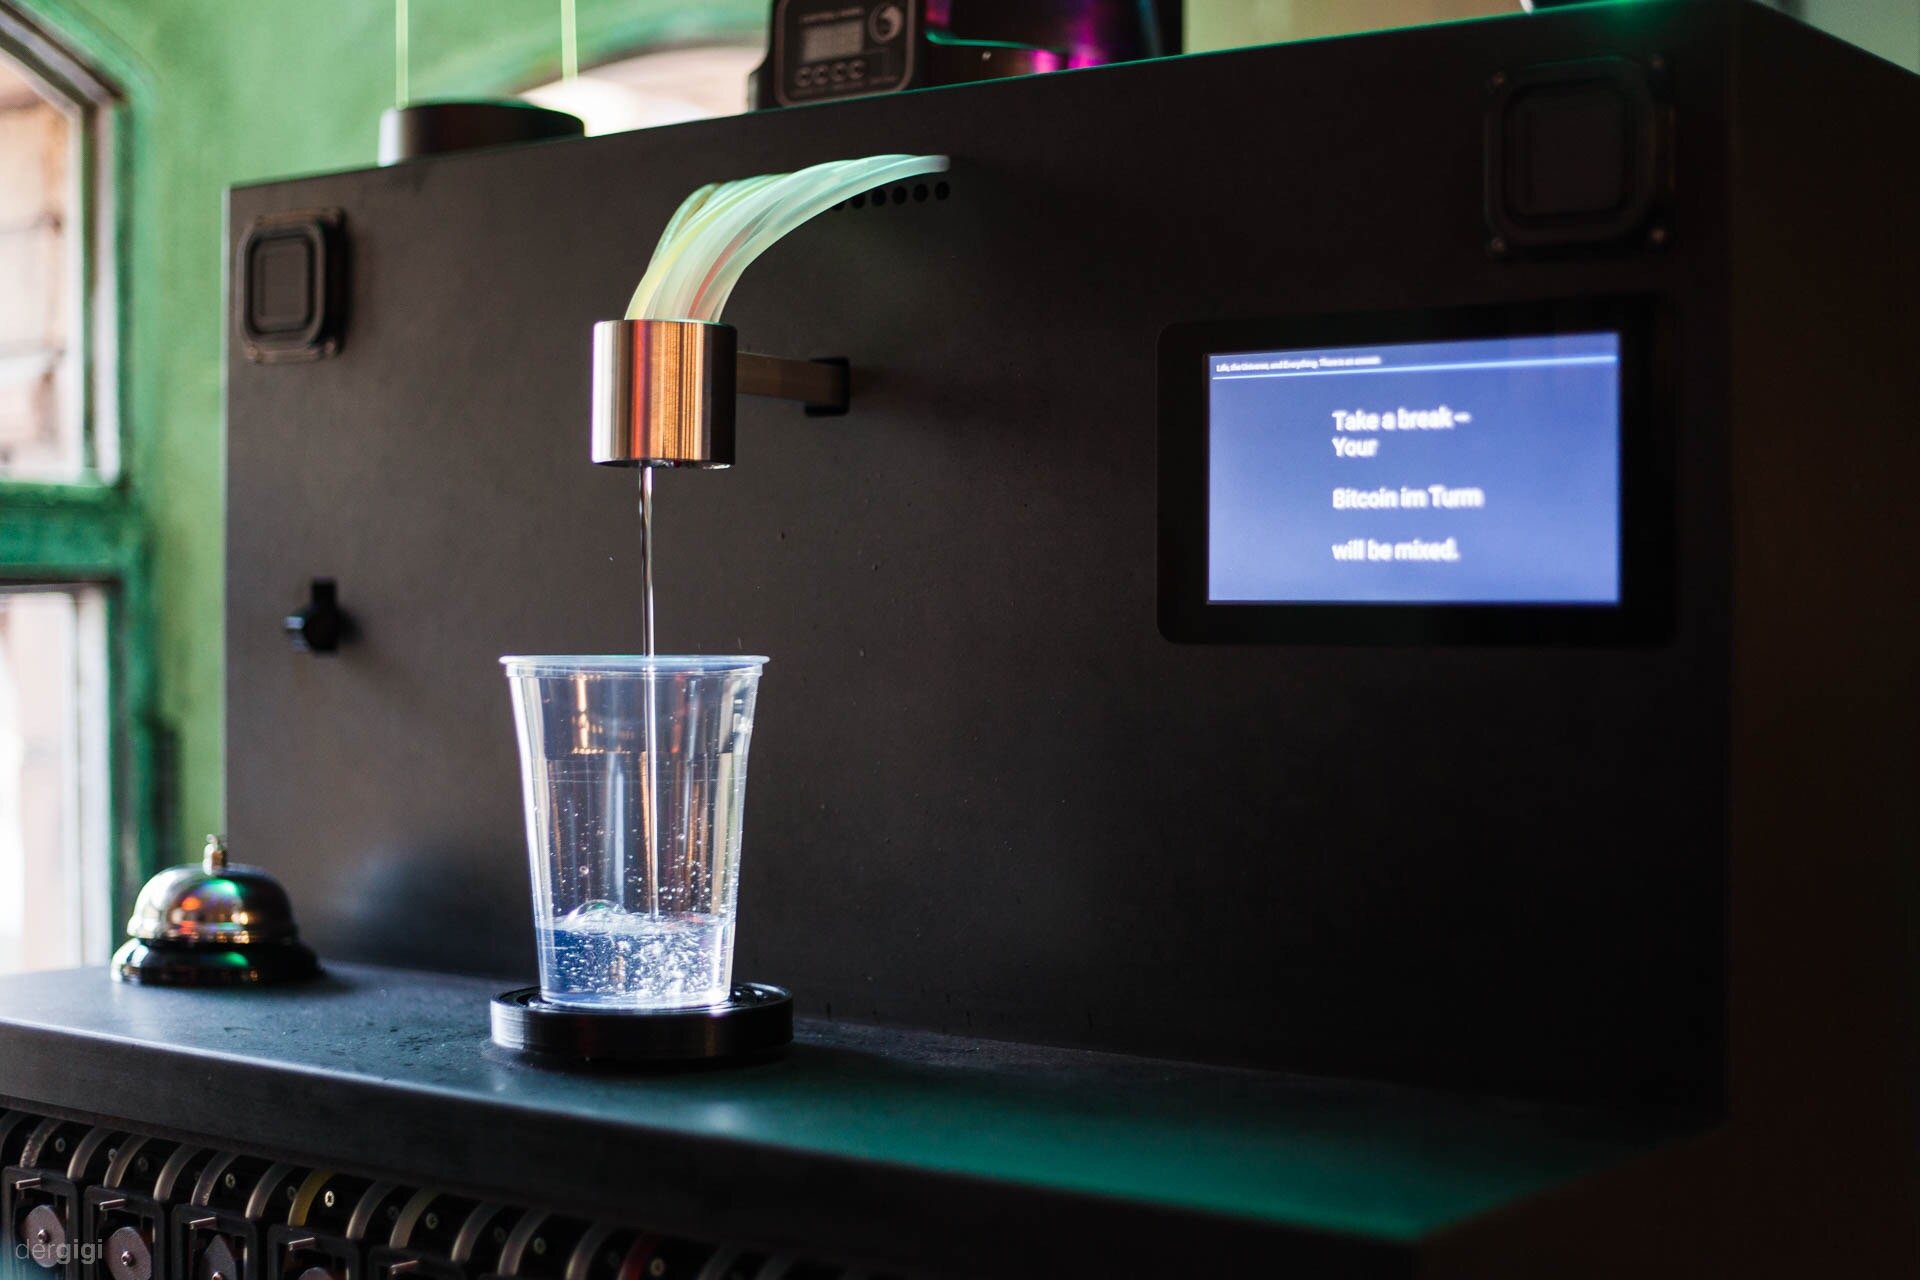
hector-start
To add a new Drink you have to modify the drinks.py file and add a new item into the array
{
    "name": "NAME OF DRINK",
    "recipe": [
        ("INGREDIENT1", AMOUNT1),
        ("INGREDIENT2", AMOUNT2)
    ]
}
All strings in UPPERCASE are placeholders, all lowercase strings have to be used literally in the definition. The INGREDIENTx names are not cleartext but are identifiers referencing into the ingredients list below in the same file. The AMOUNTx values are numerical values of the corresponding ingredient's amount in grams.
At the moment there are only some ingredients but feel free to put in some new.
# "NAME":("NICENAME", ISALCOHOLIC)
ingredients = {
	"gin": ("Gin", True),
	"rum": ("Rum", True),
	"vodka": ("Vodka", True),
	"tequila": ("Tequila", True),
	"tonic": ("Tonic Water", False),
	"coke": ("Coke", False),
	"oj": ("Orange Juice", False),
	"gren": ("Grenadine", False),
	"mmix": ("Margarita Mix", True)
Here each ingredient identifier is mapped into a tuple containing the NICENAME used in the UI and a flag that tells whether the ingredient contains alcohol. A future extension might allow multi-language UIs.
So because Hector has twelve valve channels you have 12 valves predefined (in servo_config.json and HectorHardware.py) to manage the mapping of each ingredient to a valve.
Therefore you have to edit the servo_config.json file and set the value field to the ingredient identifier you put into the channel.
Only drinks that have all the required ingredients set in the servo_config.json will be shown in the menu.
Example:
"pump_3": {
	"name": "Pump 3",
	"channel": 2,
	"value": "oj"
},
If you are not on the "real" Hector hardware you can set the var devEnvironment in Hectorhardware.py to True:
devEnvironment = True
The HectorHardware library will then emulate Hector's hardware to allow testing of the UI, for example.
If you are in production or are developing directly on Hector's Pi you should set this var to False.