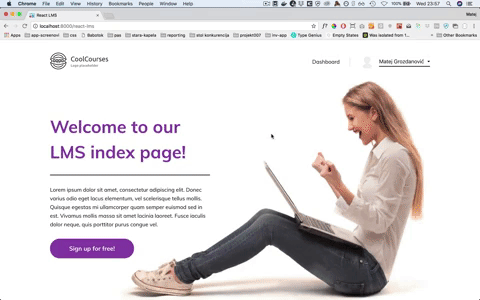
A project that explores creating an Open edX LMS frontend that's separated from the backend and communicates using API's.
This is by no means a production-ready app. It's an experiment, a developers playground used to empirically test and create a stable and dev-friendly framework for developing React frontend apps for Open edX.
React LMS is an app that plugs into the edx-platform LMS app server. The reason for it being built this way is that at this point we still don't have all the API's necessary to create a fully separate Open edX LMS frontend based on React and running on its own instance, just communicating with the backend via secure API's.
So, we have the Django app and the React frontend app (initially created using create-react-app).
Overall, we use the approach described above in this app because it gives us the following advantages:
- No need to hack the
edx-platform- we extend it and hack in our own app, while still having access to all the core functions and views - Speaking of hacking - since the idea is to come up with a good way to implement the React LMS frontend, and also map out which API endpoints we're missing (and what the ideal returning data structure is), this approach allows us to use API's that already exist, but also "butcher" certain views to get the data to test our app with
- Our React app simply binds to a hook in the single template our Django app has. It does not get any data from that template and all of its communication to the backend is done via API's. That means that, once the time comes, we can easily use only the React app that is developed, hook it up to the final API's that will be in the core platform by then, and deploy it however we'd like.
- Installation is fairly simple, and frontend development is exactly that - only frontend development. This allows frontend developers with less experience in poking around Open edX core platform to play with this app, and hopefully contribute.
- Because we're running our React app inside of the actual LMS Django app, we can use
same-originwhen fetching from existing (and hacked) API's. This, of course, is not good for any kind of production purposes, but it allows rapid development. The API endpoints were meant to be changed at a later point anyway.
- Python (2.7)
- Django (1.8)
- Open edX (Ginkgo)
- Node and Yarn installed on your machine
It is assumed you have an instance of Open edX Gingko running in either a devstack or production style environment.
-
Clone this repo into
path_to_your_devstack/src/ -
Shell into your Ginkgo devstack using
vagrant ssh -
Switch to the edxapp user -
sudo su edxapp -
Install the package using:
pip install -e /edx/src/react-lms/ -
Add the following to the
lms.env.jsonfile in your devstack::"ADDL_INSTALLED_APPS": [ "react_lms" ]
-
Add the following to the LMS URL schema in
edx-platform/lms/urls.py:urlpatterns += ( url(r'^react-lms/', include('react_lms.urls', namespace='react-lms')), ) -
Add the following into your env config file (or the common one) under
edx-platform/lms/envs/:from react_lms.settings import REACT_LMS
-
There is no eigth step :D You should be good.
-
Run the LMS in your devstack (using
paver). We like to use the--fastoption withpaver, so we don't spend our best years of life waiting for it. -
Go to
path_to_your_devstack/src/react-lms/frontendin your terminal and runyarn start(do this in your local machine, not in the devstack VM, and also make sure you have Node and Yarn installed on your machine). Note on this one - make sure you run theyarncommand in the/frontendfolder, not the app root folder. -
Point your browser to
localhost:8000/edx-figures -
Ta da!
The React app code can be found in the frontend/ folder. We use yarn to manage our packages and start the dev server (using yarn start).
The outline of the code organisation is:
frontend
├── config
├── public
├── scripts
├── src
│   ├── lms-base
|   |   ├── components
|   |   ├── config
|   |   ├── redux
|   |   ├── router
|   |   ├── sass-core
|   |   ├── static
|   |   └── views
│   ├── theme
|   |   ├── components
|   |   ├── config
|   |   ├── router
|   |   ├── sass-core
|   |   ├── static
|   |   └── views
│   ├── App.js
│   └── ...
├── README.md
└── ...
When developing the app, we add the code into lms-base.
What can be seen from the structure above is that the theme folder reflects the structure of the lms-base folder. The reason for this is to enable "theming" for the frontend we're building. Essentially, it works in a very similar fashion to Comprehensive Theming that is already used to theme Open edX sites. If you want to override a component, view, static asset or a sass file that's included somewhere in your React code, you mirror the path to it and the component in the theme folder and change the new file in a way you prefer.
For example, you want to override the following image included in a .jsx file: static/images/defaults/default-hero-bg.jpg. The full location of that asset is frontend/src/lms-base/static/images/defaults/. So, in order to use your new image asset that you want to use, you can name your new image the same as the original, then place it under frontend/src/theme/static/images/defaults/. The way the webpack config is set up, when resolving imports it will first look for the included asset in the theme folder, then (if not found) fall back to the default lms-base folder to load the asset.
This leads us to the convention for importing assets/components into your components and views..
The webpack setup allows for easy and very intuitive imports when you write your code. The convention here is that you don't include any assets using a relative path to the component, with exception of assets that are specific for that component and ship with it. A little more about that case in the convention for writing/packaging components. So for example, if you want to import an image from static assets, you use the following:
import heroBackground from 'static/images/defaults/default-hero-bg.jpg';
Note that you need to only use the path inside the lms-base folder.
Regarding SASS, we're using sass/css modules. That makes the classes prefixed in components, helping avoid overriding other components styles. We also have a central "sass library" - read more about it below.
Essentially, if a component is a wrapper for displaying a page in the LMS - it is a view and goes under views. Otherwise it goes under components. Components and views are also organised in sub-folders, essentially grouped by pure logic (components specific for the dashboard view are in the dashboard folder etc.)
Each component or view goes under its own folder named the same as the component/view, and that folder contains the components .jsx, .sass (specific styles for the component), component-specific static assets (such as svg).
This approach allows for modularity and more sanity when contributing new components.
The sass-core folder contains the common SASS styles that apply to the root element of the React app, but also different functions, variables, mixins, and base grid that can be used in component-specific SASS files.
When creating a new component, create a new SASS file named ComponentName.scss in the components folder, then at the beginning include the common styles:
@import '~sass-core/sass-core';
Notice we're using the alias here, meaning there's no need for relative paths when doing the include. You can also override the core-sass files when doing theming, meaning you can for example override the variables-main.scss file to override the variables.
TODO: document Redux, API calls, routing etc.