A plugin for the SwiftBar app, which presents content collected by Zapier.
Run the following command in Terminal:
/bin/bash -c "$(curl -fsSL https://raw.githubusercontent.com/cwernert/swiftbar-zapier/main/install-swiftbar-zapier.sh)"
If you would like to check what the script will do before running it, you can review the source here. In summary it will:
- Confirm that you are ready to proceed
- Close SwiftBar if it is already running
- Check for required dependencies (node, npm, swiftbar, homebrew)
- Install any dependencies that weren't already present
- Create the SwiftBar-Plugins directory and necessary subdirectories
- Download necessary resources from this GitHub repo into those directories
- Set executable permissions on the files which need to be executed
- Use
npm updateto download the required node modules into respective locations - Hide all files except the main plugin script, to prevent SwiftBar from running them as plugins
- Open the SwiftBar application
Once installed, you should see "Please add a Channel ID" in the MenuBar like this:

If not, see troubleshooting.
Now, you're ready to set up a "Channel", which will hold the information to be presented in swiftbar-zapier. To do this, you'll need:
- A Zapier account
- Access to the SwiftBar Zapier integration (currently "Private")
The integration is functional, but still in development, so it remains Private for the time being. Please contact me on Slack if you would like access.
- Create a new Zap, and add a "Set Channel Title & Content in SwiftBar" action to it (any event will do, but this one will allow you to populate the channel with content to verify a successful setup).
- At the "Choose Account" stage, click "Connect a new account" to see this page
- Use a UUID4 Generator to create a Channel ID, and copy/paste it into the "Channel ID" field
- (Optional) Enter a name for the channel. This will help to identify the connection in Zapier's UI and will be visible in SwiftBar when more than one Channel ID is configured, to differentiate content from each channel.
- Proceed to add some content to the channel by testing the Zap action
- Click "Please add a Channel ID" in your MacOS MenuBar to open the submenu
- Select "Add a new Channel ID" from the menu (see note below)
- Paste your UUID4 into the Terminal prompt
- Content set by Zapier will now be displayed in your MenuBar, and you can safely exit Terminal
During step 2 listed above, MacOS is likely to require that you grant SwiftBar permission to execute scripts in Terminal. In order to continue, please do so like this.
A detailed guide on SwiftBar syntax can be found here.
SwiftBar content is comprised of two primary elements; header and body. For the purposes of swiftbar-zapier, these are referred to as title and content respectively.
A Channel can contain a single Title and many lines of Content. Titles are displayed in the MacOS menu bar, while lines of Content are listed in the submenu which opens when swiftbar-zapier is clicked.
If more than one Channel is added to your swiftbar-zapier, Titles will be displayed one at a time in a loop, while the submenu is populated with the Content from all Channels, separated by their respective Channel Names.
The simplest way to add content to a channel is by adding values to a "Set Channel Title & Content" action like this.

To add more advanced content, such as links, checkmarks, custom formatting etc. you can refer to SwiftBar's documentation, or use the "Prepare custom Title/Content" action to generate SwiftBar syntax automatically, like this.
Like any other mapped value in Zapier, the output from a "Prepare custom Title/Content" action can be mapped to the "Set Channel Title & Content" action, like this:

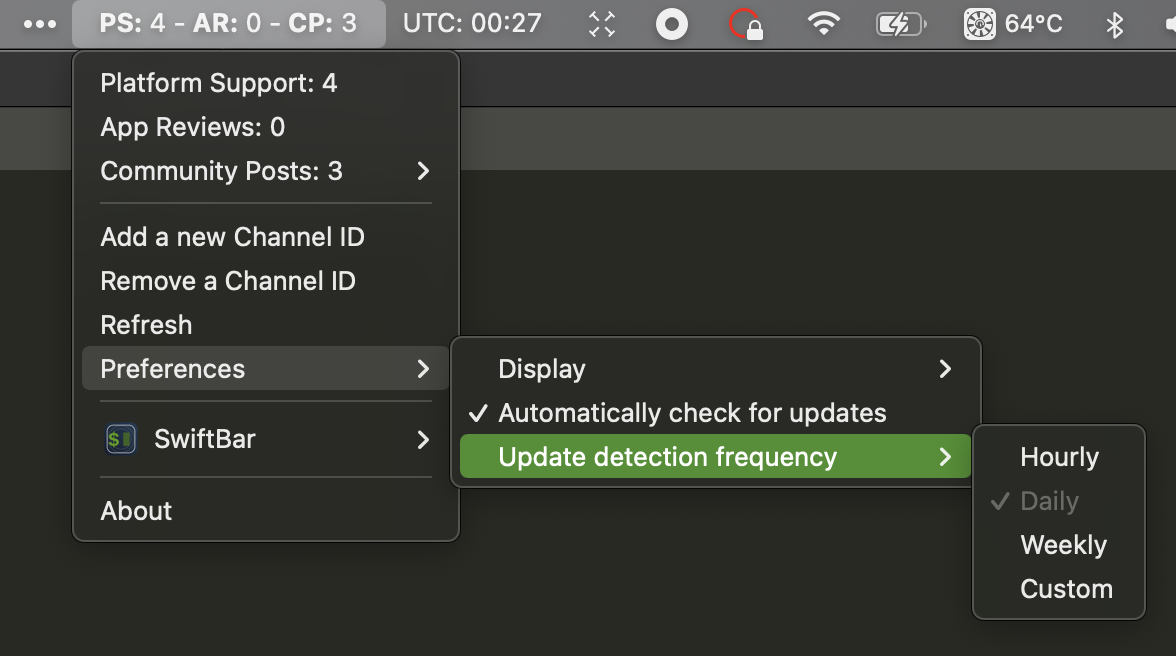
swiftbar-zapier automatically checks for updates each time it runs. If an update is available, your title content will be prepended with the update icon ⬆️ and a corresponding submenu item will be available:

Clicking this item will close SwiftBar, update swiftbar-zapier and reopen SwiftBar.
To remove swiftbar-zapier from your system, delete the directory at:
~/Applications/SwiftBar-Plugins/swiftbar-zapier
Note that this will not uninstall the dependencies (node, npm, swiftbar, homebrew) or any other SwiftBar plugins that you may have installed.
-
Check to ensure that your SwiftBar Plugin Directory is set to:
~/Applications/SwiftBar-Plugins/swiftbar-zapierThis can be done by opening SwiftBar preferences and clicking the "Change" button on the "General" tab.
-
Ensure that the plugin is enabled, by switching to the "Plugins" tab and checking the box beside "SwiftBar for Zapier".
-
Ensure that there is sufficient space available for SwiftBar in your MacOS MenuBar. I personally like to use Bartender to help with this, but other options are also available.


