GithubHelp home page GithubHelp logo

dsa_practice's Introduction

Hi there 👋

logo

Hi 👋, I'm Eloghene Otiede

🔥A passionate Software Engineer and Full Stack Web developer 🔥

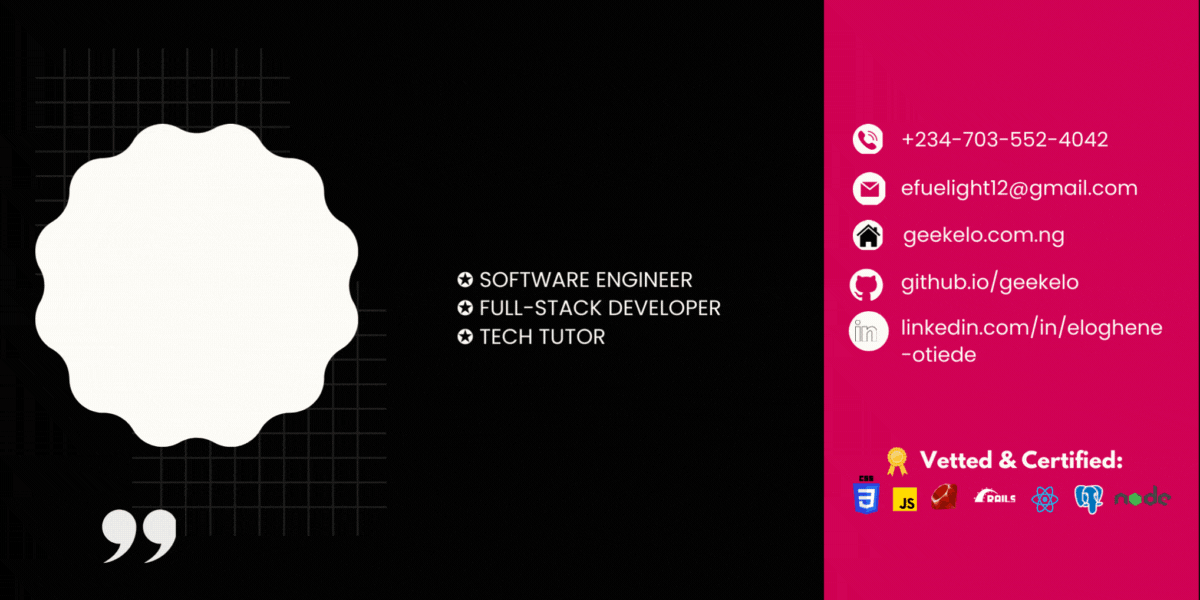
Hello, I'm Eloghene Otiede, a result-oriented software engineer and full-stack developer with over five years of experience designing and developing responsive and functional web applications. I am driven by client satisfaction and delivering exceptional projects. I constantly strive for continuous improvement and aim to add significant value to any organization I join.

Additionally, I have undergone advanced training at institutions like ALX Africa and Microverse. They are remote software development programs that use pair programming and project building to teach development. Having worked remotely and collaboratively across different time zones, I am well-versed in asynchronous communication.

Vetted and Certified by:

Skills


🔸HTML
🔸CSS
🔸JAVASCRIPT
🔸ES6
🔸REACT


🔸PYTHON
🔸C Programming
🔸Node
🔸Express
🔸Ruby On Rails


🔸Communication
🔸Pair programming
🔸Problem-solving
🔸Adaptability

[Eloghene's github stats

[Top Langs

Quick Links

Articles

🚀 Hey Dev, Exciting news! Discover the Data Structures & Algorithm Community – a welcoming space for enthusiasts at all levels. Join us to explore coding concepts, share insights, and connect with fellow learners. Embrace the opportunity to learn and grow together in a supportive environment. Your presence would be a valuable addition to our coding journey! 🌟 Don't miss out! Join our community now: http://tinyurl.com/geekspecials Looking forward to seeing you there! Best, Eloghene Otiede (Geekelo)


signature

Project Catalogue

Readme Card Readme Card Readme Card Readme Card Readme Card Readme Card Readme Card Readme Card Readme Card Readme Card Readme Card Readme Card Readme Card Readme Card Readme Card Readme Card Readme Card Readme Card

dsa_practice's People

Contributors

geekelo avatar

Watchers

 avatar

dsa_practice's Issues

How do you remove nil values in array using Ruby?

You can remove nil values from an array in Ruby using various methods. Here are a few approaches:

  1. Using compact method:
    The compact method removes nil values from an array.

    my_array = [1, 2, nil, 3, nil, 4]
    result_array = my_array.compact

    After this, result_array will contain [1, 2, 3, 4].

  2. Using reject method:
    The reject method can be used to exclude elements that meet a certain condition, and you can use it to exclude nil values.

    my_array = [1, 2, nil, 3, nil, 4]
    result_array = my_array.reject { |item| item.nil? }

    After this, result_array will also contain [1, 2, 3, 4].

  3. Using compact! method (modifies the original array):
    The compact! method removes nil values from the array in place.

    my_array = [1, 2, nil, 3, nil, 4]
    my_array.compact!

    After this, my_array will be [1, 2, 3, 4].

Choose the method that best fits your use case. If you want to keep the original array unchanged, use compact or reject to create a new array without modifying the original one. If you don't mind modifying the original array, you can use compact!.

JavaScript pattern matching

Given a string text and a pattern, evaluate if a given text string matches a specified pattern utilizing special characters for pattern matching. The pattern matching should adhere to the following rules. The symbol, full stop, represents any individual character. The symbol, asterisk, indicates zero or more occurrences of a character that appears just before it. Return true if the pattern corresponds exactly to the entire text string. If not, return false. Note, your implementation should be dependent on regular expression or similar convenience libraries. Your implementation should be able to handle all hidden test cases correctly. Example 1, the input text is aa. Pattern is a. Output is false. Explanation, the symbol a does not match the full text aa. Example 2, text is aa, pattern is a. Output, okay, pattern is a asterisk. Output is true. Explanation, the pattern a asterisk can represent aa as asterisk allows for repeating a. Example 3, input ab asterisk dot asterisk. Output is true. Explanation, the pattern dot asterisk can match any sequence of characters. Okay, constraints, one is less than equals text dot length less than equals 20. One is less than equals pattern dot length less than equals 20. Text contains only lowercase English letters. Pattern contains only lowercase English letters, dots and asterisks. It is guaranteed for each appearance of the character asterisk. There will be a previous valid character to match. Okay, and I'll be solving this using JavaScript. Alright.

Image

UML (Unified Modeling Language) Class Diagram Basics:

UML (Unified Modeling Language) Class Diagram Basics:

A UML class diagram visually represents the structure of a system by showing the classes of a system, their attributes, methods, and the relationships between the classes. Here are some key elements:

  1. Class:

    • Represents a blueprint for objects.
    • Consists of attributes (data members) and methods (functions).
    • Displayed as a rectangle with three compartments: class name, attributes, and methods.
  2. Association:

    • Represents a relationship between classes.
    • Can be one-to-one, one-to-many, or many-to-many.
    • Shown as a line connecting the related classes with optional multiplicity (e.g., 1, *, 0..1).
  3. Dependency:

    • Represents a relationship where one class depends on another.
    • Shown as a dashed line with an arrow pointing from the dependent class to the independent class.
  4. Generalization/Inheritance:

    • Represents an "is-a" relationship between a superclass and a subclass.
    • Shown as a solid line with an arrow pointing from the subclass to the superclass.

Drawing Dependency Flow Diagrams:

Dependency flow diagrams help visualize the flow of data and dependencies between components in an application. Use tools like draw.io to create these diagrams:

  1. Component:

    • Represents a modular part of the system.
    • Shown as a rectangle with the component name.
  2. Dependency Arrow:

    • Represents a dependency between components.
    • Shown as an arrow pointing from the dependent component to the component it depends on.
  3. Data Flow Arrow:

    • Represents the flow of data between components.
    • Shown as an arrow indicating the direction of data flow.

Designing a Complete Application:

  1. Input/Output Management:

    • Identify the sources of input (user interfaces, external systems) and outputs (databases, external systems).
    • Design classes or components responsible for handling input validation, processing, and generating output.
  2. Domain Models:

    • Define domain models representing the core entities and business logic of the application.
    • Identify relationships between entities and encapsulate business rules within the models.
  3. Scalable and Maintainable Architecture:

    • Consider modular design, separation of concerns, and adherence to SOLID principles.
    • Use design patterns where appropriate to address common architectural challenges.
    • Choose appropriate architectural patterns (e.g., MVC, MVVM) based on the nature of the application.
  4. Translating Requirements into Architecture:

    • Analyze functional requirements to identify key features and use cases.
    • Map features to components or classes in the architecture.
    • Ensure that the architecture aligns with non-functional requirements such as performance, scalability, and security.

Testability in Design:

  1. Separation of Concerns:

    • Isolate different aspects of the application (e.g., UI, business logic, data access) to facilitate testing.
  2. Dependency Injection:

    • Use dependency injection to inject dependencies into components, making it easier to replace real implementations with mock objects during testing.
  3. Unit Testing:

    • Design components to be easily testable in isolation.
    • Write unit tests for individual components, ensuring that each unit of code behaves as expected.
  4. Mocking:

    • Use mocking frameworks to create mock objects for dependencies that can't be easily replaced during testing.
  5. Automated Testing:

    • Implement automated testing for critical paths and key functionalities to ensure continuous integration and delivery.

Understanding these concepts and applying them in your application design process will contribute to the development of robust, scalable, and testable software architectures.

CDN

A Content Delivery Network (CDN) is a network of distributed servers strategically positioned to deliver web content, such as images, videos, stylesheets, JavaScript files, and other static assets, to users based on their geographic location. The primary goal of a CDN is to reduce latency, enhance website performance, and improve the overall user experience.

Here are key features and functions of CDNs:

  1. Content Distribution: CDNs cache static content in multiple servers located in various geographical regions. When a user requests a specific piece of content, the CDN serves it from the server that is physically closest to the user, reducing the time it takes for the content to travel over the internet.

  2. Load Balancing: CDNs distribute incoming traffic across multiple servers, preventing any single server from being overwhelmed. This helps in load balancing and ensures optimal performance even during periods of high traffic.

  3. Reduced Latency: By delivering content from servers that are closer to the user, CDNs significantly reduce latency. This is particularly important for websites with a global audience, as it improves page load times and overall responsiveness.

  4. Improved Scalability: CDNs provide scalability by allowing websites to handle increased traffic without relying solely on their origin server. The distributed nature of CDNs enables them to handle a large number of simultaneous requests efficiently.

  5. Distributed Caching: CDNs use caching mechanisms to store copies of static content at various locations. This reduces the load on the origin server and ensures faster access to content for users, even if the origin server experiences downtime.

  6. Security: CDNs often include security features such as DDoS (Distributed Denial of Service) protection, Web Application Firewall (WAF), and SSL/TLS encryption. These features help protect websites from various types of cyber threats.

  7. Content Optimization: Some CDNs offer features for optimizing content, such as image and video compression, minification of JavaScript and CSS files, and other performance-enhancing techniques.

  8. Analytics and Reporting: CDNs provide analytics and reporting tools that allow website administrators to monitor traffic, analyze performance, and gain insights into user behavior.

Common CDN providers include Akamai, Cloudflare, Amazon CloudFront, and Microsoft Azure CDN. Website owners and developers integrate CDN services by configuring their DNS settings to point to the CDN provider's servers. This enables the CDN to intercept requests for static content and deliver it from the nearest edge server, contributing to a faster and more reliable user experience.

Why are you interested n teaching

Hello, My name is Eloghene Otiede [nickname Geekelo]. I am a software developer with 8 years of experience. During these years, I have attended a few boot camps, worked on exciting projects, collaborated with stakeholders, and mentored over 150 African females in tech.

I found Scrimba in February 2024 via a LinkedIn post The Scrimba website was listed as a great platform to learn how to code. Since then, I have become fond of the platform's programs, courses, and events. But I’m mostly attracted to Scrimba it resonates with my passion for teaching.

I was raised in a family where almost everyone was a professional teacher and loved to teach. As a result, I was exposed to teaching methodologies, techniques, and tips at a very early age, which eventually inspired me to love and enjoy teaching. I developed a strong passion and skill for breaking down very complex concepts to anyone in a very simple, enjoyable, engaging, and insightful manner. As a result at age 12, I started my teaching journey. I progressed from teaching my neighbor's kids after school for fun to teaching in study groups at the university, and mentoring junior developers, interns, and tech students.

Within three weeks of teaching at age 12, I impressed the neighborhood by teaching a slow learner how to read, write, and spell. That led to a rapid increase from two kids to ten kids.

I have undergone a teacher training course at the Igbenedion University Okada, covering topics like Pedagogy and Teaching Methods, Curriculum Development, Assessment and Evaluation, Differentiation and Inclusion, and more. On my final assessment day, I had over 200 learners seated to listen to me teach on a very complex topic for just thirty minutes. After the session, the Chief Examiner gave a speech commending my ability to break down a complex topic within thirty minutes and my ability to engage everyone by making the topic easy to understand. At the end of the speech, he looked at me and said, "In all you do in life, make sure you teach. The world needs teachers like you". That day, over 80% of the hall was allowed to express how pleased they were with my session as the hall re-echoed with loud applause.

I must say I have followed that Chief Examiner's advice, by further developing my teaching skills, and by making coding very easy to understand for beginners through my YouTube channel, at Eloti Designs (a tech company) where I spent four years as a tech instructor and code reviewer, and through an online-based exclusive self-owned organization - known as Females in Tech, where I have taught 150 females for free, to learn to code and enjoy coding.

At the moment, I am thrilled by Scrimba's goal to help learners get personalized coding guidance, resolve queries in one-on-one mentor calls, benefit from code reviews, and access exclusive coding workshops. I believe joining Scrimba’s Teacher Talent Program will allow me to do more by participating in helping learners at Scrimba. I look forward to bringing to Scrimba, my passion, skills, and experience as an experienced teacher and a skilled software developer.

Two Sum

Given an array of integers nums and an integer target, return indices of the two numbers such that they add up to target.

You may assume that each input would have exactly one solution, and you may not use the same element twice.

You can return the answer in any order.

Example 1:

Input: nums = [2,7,11,15], target = 9
Output: [0,1]
Explanation: Because nums[0] + nums[1] == 9, we return [0, 1].
Example 2:

Input: nums = [3,2,4], target = 6
Output: [1,2]
Example 3:

Input: nums = [3,3], target = 6
Output: [0,1]

Constraints:

2 <= nums.length <= 104
-109 <= nums[i] <= 109
-109 <= target <= 109
Only one valid answer exists.

Explain each of the following operators and how and when they should be used: ==, ===, eql?, equal?.

Mock Technical Interview: Operator Explanation

Objective:

The goal of this technical interview question is to assess the candidate's understanding of different comparison operators in programming, specifically in languages like JavaScript and Ruby.

Operators:

  1. == Operator:

    • Explanation: This is the equality operator that checks if the values on both sides are equal after type coercion.
    • Use Case: It is commonly used for loose equality checks when you want to compare values but don't necessarily care about their types being the same.
  2. === Operator:

    • Explanation: This is the strict equality operator that checks if both the value and the type are the same.
    • Use Case: It is used for strict equality checks, ensuring that not only the values but also the types match.
  3. eql? Method:

    • Explanation: In Ruby, eql? is a method used for hash key comparison, but its behavior depends on the class.
    • Use Case: It is often used when dealing with custom objects in Ruby where you want to compare objects based on their content.
  4. equal? Method:

    • Explanation: In Ruby, equal? checks if both operands refer to exactly the same object in memory.
    • Use Case: It is used when you want to verify if two variables reference the exact same object instance.

Guidance for the Candidate:

  • == vs. ===: Emphasize the importance of type consideration in strict equality checks (===) compared to loose equality checks (==).
  • eql? vs. equal?: Explain the context in which these Ruby-specific methods are employed, highlighting scenarios involving custom objects and memory references.

Additional Notes:

  • Encourage candidates to provide examples in multiple programming languages to demonstrate versatility.
  • Evaluate not only correctness but also the candidate's ability to communicate technical concepts clearly.

Caesars Cipha

Caesars Cipher

One of the simplest and most widely known ciphers is a Caesar cipher, also known as a shift cipher. In a shift cipher the meanings of the letters are shifted by some set amount.

A common modern use is the ROT13 cipher, where the values of the letters are shifted by 13 places. Thus 'A' ↔ 'N', 'B' ↔ 'O' and so on.

Write a function which takes a ROT13 encoded string as input and returns a decoded string.

All letters will be uppercase. Do not transform any non-alphabetic character (i.e. spaces, punctuation), but do pass them on.

Submit a pull request to the main branch with your solution. Do not modify the tests. Once you have created a PR with passing tests, then you have successfully completed the exercise.

module.exports =  function rot13(str) {
  //Write your code here

  // ABCDEFGHIJKLMNOPQRSTUVWXYZ
  str = str.split('');
  const temp = [];
  let alpha = 'ABCDEFGHIJKLMNOPQRSTUVWXYZ';
  alpha = alpha.split('');

  for (char of str){
    if (alpha.includes(char)){
      const index = alpha.indexOf(char) + 1;
      const distance = index + 13;
      if (distance > 26){
	const leftover = 13 - (26 - index);
	temp.push(alpha[leftover - 1]);
      } else {
	temp.push(alpha[(index + 13) - 1]);
      }
    } else {
      temp.push(char);
    }
  }
  return temp.join('');
}

Test

const rot13 = require('./caesars-cipher')
const assert = require('assert')

describe('Tests', function () {
  it('rot13("SERR PBQR PNZC") should decode to FREE CODE CAMP', function () {
    assert(rot13('SERR PBQR PNZC') === 'FREE CODE CAMP')
  })
  it('rot13("SERR CVMMN!") should decode to FREE PIZZA!', function () {
    assert(rot13('SERR CVMMN!') === 'FREE PIZZA!')
  })
  it('rot13("SERR YBIR?") should decode to FREE LOVE?', function () {
    assert(rot13('SERR YBIR?') === 'FREE LOVE?')
  })
  it('rot13("GUR DHVPX OEBJA SBK WHZCF BIRE GUR YNML QBT.") should decode to THE QUICK BROWN FOX JUMPS OVER THE LAZY DOG.', function () {
    assert(
      rot13('GUR DHVPX OEBJA SBK WHZCF BIRE GUR YNML QBT.') ===
	'THE QUICK BROWN FOX JUMPS OVER THE LAZY DOG.'
    )
  })
})

Principles of OOP

Encapsulation:

Definition:
Encapsulation is the bundling of data and the methods that operate on that data within a single unit, known as a class in object-oriented programming. It restricts direct access to some of the object's components, promoting modularity and information hiding.

Usage:

  • Bundling Data and Methods: Encapsulation groups together data attributes and methods that manipulate those attributes.
  • Access Control: It restricts direct access to certain data or methods from outside the class, allowing controlled interaction.

Example:

// Simple JavaScript Example

class Car {
  constructor(make, model) {
    this.make = make;       // Public attribute
    let _model = model;     // Private attribute using naming convention

    this.getFullModel = function() {
      return `${this.make} ${_model}`;
    };
  }
}

const myCar = new Car('Toyota', 'Camry');
console.log(myCar.make);             // Accessing public attribute
console.log(myCar._model);           // Error: _model is not accessible directly
console.log(myCar.getFullModel());   // Accessing data through a method

In this example, the Car class encapsulates the make attribute and a private attribute _model. Direct access to _model is restricted, and the full model information is accessed through the getFullModel method, demonstrating encapsulation.

REACT

// Simple JavaScript Example

class Car {
  constructor(make, model) {
    this.make = make;       // Public attribute
    let _model = model;     // Private attribute using naming convention

    this.getFullModel = function() {
      return `${this.make} ${_model}`;
    };
  }
}

const myCar = new Car('Toyota', 'Camry');
console.log(myCar.make);             // Accessing public attribute
console.log(myCar._model);           // Error: _model is not accessible directly
console.log(myCar.getFullModel());   // Accessing data through a method


In this example, the Car class encapsulates the make attribute and a private attribute _model. Direct access to _model is restricted, and the full model information is accessed through the getFullModel method, demonstrating encapsulation.

What is the difference between the Object methods clone and dup?

In Ruby, both clone and dup are methods used to create a shallow copy of an object. However, there are some differences between the two:

  1. Handling of Frozen Objects:

    • clone will produce a copy of the object, including its frozen state. If the original object is frozen, the cloned object will also be frozen.
    • dup does not copy the frozen state. The duplicated object will not be frozen even if the original was.
  2. Handling of Tainted Objects:

    • clone copies the tainted state of the original object. If the original is tainted, the clone will also be tainted.
    • dup does not copy the tainted state. The duplicated object will not be tainted even if the original was.
  3. Initialization of Instance Variables:

    • Both clone and dup copy the instance variables of the original object to the new object. However, they do not call the initialize method on the new object.
  4. Module Inclusion:

    • clone preserves the singleton class and any modules that are included in the singleton class of the original object.
    • dup does not copy the singleton class or any included modules.

Here's an example to illustrate the differences:

module MyModule
  def my_method
    puts "Hello from MyModule!"
  end
end

class MyClass
  include MyModule
end

obj = MyClass.new
obj_clone = obj.clone
obj_dup = obj.dup

puts obj_clone.my_method # Outputs: Hello from MyModule!
puts obj_dup.my_method   # Raises NoMethodError

puts obj_clone.frozen?   # Outputs: true
puts obj_dup.frozen?     # Outputs: false

puts obj_clone.tainted?  # Outputs: true
puts obj_dup.tainted?    # Outputs: false

In this example, clone preserves the module inclusion and the frozen and tainted states, while dup does not. Choose the method that fits your specific use case and the behavior you desire.

Practice designing class hierarchies and relationships.

Certainly! Designing class hierarchies and relationships is an important aspect of object-oriented programming. Let's go through a simple example to illustrate this concept. We'll design a class hierarchy for a zoo simulation.

Zoo Simulation Example:

// Animal class as the base class
class Animal {
  constructor(name, sound) {
    this.name = name;
    this.sound = sound;
  }

  makeSound() {
    console.log(`${this.name} says ${this.sound}`);
  }
}

// Mammal class extends Animal
class Mammal extends Animal {
  constructor(name, sound, furColor) {
    super(name, sound);
    this.furColor = furColor;
  }

  walk() {
    console.log(`${this.name} is walking.`);
  }
}

// Bird class extends Animal
class Bird extends Animal {
  constructor(name, sound, featherColor) {
    super(name, sound);
    this.featherColor = featherColor;
  }

  fly() {
    console.log(`${this.name} is flying.`);
  }
}

// Reptile class extends Animal
class Reptile extends Animal {
  constructor(name, sound, scaleType) {
    super(name, sound);
    this.scaleType = scaleType;
  }

  crawl() {
    console.log(`${this.name} is crawling.`);
  }
}

// Zoo class that aggregates different animals
class Zoo {
  constructor() {
    this.animals = [];
  }

  addAnimal(animal) {
    this.animals.push(animal);
  }

  performDailyActivities() {
    console.log("Daily activities at the zoo:");
    this.animals.forEach(animal => {
      if (animal instanceof Mammal) {
        animal.walk();
      } else if (animal instanceof Bird) {
        animal.fly();
      } else if (animal instanceof Reptile) {
        animal.crawl();
      }

      animal.makeSound();
    });
  }
}

// Usage
const lion = new Mammal("Lion", "Roar", "Golden");
const parrot = new Bird("Parrot", "Squawk", "Colorful");
const snake = new Reptile("Snake", "Hiss", "Smooth");

const zoo = new Zoo();
zoo.addAnimal(lion);
zoo.addAnimal(parrot);
zoo.addAnimal(snake);

zoo.performDailyActivities();

In this example:

  • Animal is the base class with common properties and methods.
  • Mammal, Bird, and Reptile extend the Animal class, inheriting its properties and methods while adding their specific attributes.
  • Zoo is a class that aggregates instances of different animals and can perform daily activities for each type of animal.

This example demonstrates class hierarchies, inheritance, and polymorphism. Designing your class hierarchies thoughtfully can lead to more modular and maintainable code.

Design patterns in React and JS

Design patterns are reusable solutions to common problems that arise during software development. They provide a general template to solve a particular problem that can be adapted to fit the needs of different scenarios. Understanding design patterns is essential for writing clean, maintainable, and scalable code. In this response, I'll focus on some commonly used design patterns in JavaScript and React.

JavaScript Design Patterns:

  1. Singleton Pattern:

    • Purpose: Ensures that a class has only one instance and provides a global point of access to it.
    • Example in JS:
      const Singleton = (function () {
        let instance;
      
        function createInstance() {
          // Private constructor logic
          return {
            getInstance: function () {
              if (!instance) {
                instance = createInstance();
              }
              return instance;
            },
          };
        }
      
        return {
          getInstance: function () {
            if (!instance) {
              instance = createInstance();
            }
            return instance;
          },
        };
      })();
      
      const instance1 = Singleton.getInstance();
      const instance2 = Singleton.getInstance();
      
      console.log(instance1 === instance2); // true
  2. Module Pattern:

    • Purpose: Encapsulates private and public members within a single module, providing a way to structure and organize code.
    • Example in JS:
      const Module = (function () {
        // Private variables
        let privateVar = 0;
      
        // Private function
        function privateFunction() {
          console.log('Private function');
        }
      
        return {
          // Public variables
          publicVar: 1,
      
          // Public function
          publicFunction: function () {
            privateVar++;
            privateFunction();
            console.log('Public function');
          },
        };
      })();
      
      console.log(Module.publicVar);
      Module.publicFunction();
  3. Observer Pattern:

    • Purpose: Defines a one-to-many dependency between objects so that when one object changes state, all its dependents are notified and updated automatically.
    • Example in JS:
      class Subject {
        constructor() {
          this.observers = [];
        }
      
        addObserver(observer) {
          this.observers.push(observer);
        }
      
        notifyObservers(data) {
          this.observers.forEach(observer => observer.update(data));
        }
      }
      
      class Observer {
        update(data) {
          console.log(`Received update: ${data}`);
        }
      }
      
      const subject = new Subject();
      const observer1 = new Observer();
      const observer2 = new Observer();
      
      subject.addObserver(observer1);
      subject.addObserver(observer2);
      
      subject.notifyObservers('Some data has changed');

React Design Patterns:

  1. Container-Component Pattern:

    • Purpose: Separates the concerns of data fetching (container) and rendering (component) in React applications.
    • Example in React:
      // Container component
      class UserContainer extends React.Component {
        constructor(props) {
          super(props);
          this.state = {
            userData: null,
          };
        }
      
        componentDidMount() {
          // Fetch user data
          // Update state with fetched data
        }
      
        render() {
          return <UserComponent userData={this.state.userData} />;
        }
      }
      
      // Presentational component
      const UserComponent = ({ userData }) => {
        // Render UI using userData
        return <div>{userData ? userData.name : 'Loading...'}</div>;
      };
  2. Render Props Pattern:

    • Purpose: Passes a function as a prop to a component, allowing the component to render with the logic provided by the function.
    • Example in React:
      class MouseTracker extends React.Component {
        constructor(props) {
          super(props);
          this.state = { x: 0, y: 0 };
        }
      
        handleMouseMove = (event) => {
          this.setState({ x: event.clientX, y: event.clientY });
        };
      
        render() {
          return (
            <div style={{ height: '100vh' }} onMouseMove={this.handleMouseMove}>
              {this.props.render(this.state)}
            </div>
          );
        }
      }
      
      const App = () => (
        <MouseTracker
          render={({ x, y }) => (
            <div>
              <p>Mouse coordinates: ({x}, {y})</p>
            </div>
          )}
        />
      );
  3. Higher-Order Component (HOC) Pattern:

    • Purpose: A function that takes a component and returns a new component with additional props or behavior.
    • Example in React:
      const withLogger = (WrappedComponent) => {
        return class WithLogger extends React.Component {
          componentDidMount() {
            console.log(`Component ${WrappedComponent.name} is mounted`);
          }
      
          render() {
            return <WrappedComponent {...this.props} />;
          }
        };
      };
      
      const MyComponent = () => <div>My Component</div>;
      const MyComponentWithLogger = withLogger(MyComponent);

These examples provide a starting point for understanding and implementing design patterns in JavaScript and React. It's important to note that the choice of design pattern depends on the specific requirements and challenges of your application.

SOLID principles

The SOLID principles are a set of five design principles in object-oriented programming aimed at creating more maintainable, scalable, and flexible software systems. They were introduced by Robert C. Martin (also known as Uncle Bob) and have become fundamental concepts in software engineering. Here's a brief overview of each principle:

  1. Single Responsibility Principle (SRP):

    • A class should have only one reason to change.
    • Each class or module should have a single responsibility, encapsulating one cohesive aspect of the system's functionality.
    • This principle helps in making classes easier to understand, maintain, and refactor.
  2. Open/Closed Principle (OCP):

    • Software entities (classes, modules, functions, etc.) should be open for extension but closed for modification.
    • You should be able to extend the behavior of a module without modifying its source code.
    • This principle promotes the use of abstraction and inheritance to enable flexible and reusable code.
  3. Liskov Substitution Principle (LSP):

    • Objects of a superclass should be replaceable with objects of its subclasses without affecting the correctness of the program.
    • Subtypes must be substitutable for their base types without altering the desirable properties of the program.
    • Violating this principle can lead to unexpected behavior and breaks the principle of polymorphism.
  4. Interface Segregation Principle (ISP):

    • Clients should not be forced to depend on interfaces they don't use.
    • Interface segregation advocates for breaking down interfaces into smaller, specific ones tailored to the needs of the clients.
    • This helps in avoiding "fat" interfaces that include methods irrelevant to certain clients and reduces coupling between components.
  5. Dependency Inversion Principle (DIP):

    • High-level modules should not depend on low-level modules. Both should depend on abstractions.
    • Abstractions should not depend on details. Details should depend on abstractions.
    • This principle encourages loose coupling between modules by relying on abstractions, interfaces, or abstract classes to define dependencies, rather than concrete implementations.

Applying these SOLID principles can lead to code that is easier to understand, maintain, and extend, promoting better software design and architecture.

What is the difference between extend and include in Ruby?

In Ruby, both extend and include are used to mix in modules into classes, but they are used in different contexts and have different effects.

  1. include: This is used to mix a module's methods as instance methods in a class. When you include a module in a class, the methods of that module become available to instances of the class, but not to the class itself.

    module MyModule
      def my_method
        puts "This is a method from MyModule"
      end
    end
    
    class MyClass
      include MyModule
    end
    
    obj = MyClass.new
    obj.my_method  # This works
  2. extend: This is used to mix a module's methods as class methods in a class. When you extend a module in a class, the methods of that module become available at the class level, but not to instances of the class.

    module MyModule
      def my_method
        puts "This is a method from MyModule"
      end
    end
    
    class MyClass
      extend MyModule
    end
    
    MyClass.my_method  # This works
    obj = MyClass.new
    # obj.my_method    # This would raise a NoMethodError since my_method is not available to instances

So, in summary:

  • include is for mixing in instance methods.
  • extend is for mixing in class methods.

In many cases, you might see extend self used within a module, which effectively makes all its methods both class methods (accessible at the class level) and instance methods (accessible at the instance level).

Web socket

WebSocket is a communication protocol that provides full-duplex communication channels over a single, long-lived connection. It is designed to be implemented in web browsers and web servers but can also be used in any client-server or server-to-server scenario. Unlike traditional HTTP communication, which follows a request-response model, WebSocket allows for real-time, bidirectional communication between clients and servers.

Here are some key features and aspects of WebSocket:

  1. Full-Duplex Communication: WebSocket enables full-duplex communication, meaning both the client and server can send messages to each other independently at any time. This is in contrast to the traditional request-response model of HTTP.

  2. Persistent Connection: Once a WebSocket connection is established, it remains open, allowing for efficient communication without the overhead of opening and closing connections for each request.

  3. Low Latency: WebSocket reduces latency compared to traditional HTTP connections because it eliminates the need to establish a new connection for each communication. This makes it suitable for real-time applications where low latency is crucial, such as chat applications, online gaming, financial platforms, and live streaming.

  4. Lightweight Protocol: WebSocket has a lightweight protocol overhead, making it more efficient in terms of data transfer compared to HTTP, especially for scenarios with frequent small messages.

  5. Port 80/443 Compatibility: WebSocket connections can use the same ports as HTTP (ports 80 and 443), which are typically open in most network configurations. This makes it easier to deploy WebSocket applications without dealing with additional firewall settings.

  6. WebSocket API: Web browsers provide a JavaScript API called the WebSocket API that allows developers to establish WebSocket connections and handle WebSocket events in their web applications.

Here's a simple example of how WebSocket works in a web application using JavaScript:

// Client-side code
const socket = new WebSocket('ws://example.com/socket');

socket.addEventListener('open', (event) => {
  socket.send('Hello, server!');
});

socket.addEventListener('message', (event) => {
  console.log('Message from server:', event.data);
});

// Server-side code (in a WebSocket server implementation)
const WebSocket = require('ws');
const server = new WebSocket.Server({ port: 8080 });

server.on('connection', (socket) => {
  console.log('Client connected');

  socket.on('message', (message) => {
    console.log('Message from client:', message);
    // Process the message and send a response if needed
    socket.send('Hello, client!');
  });
});

WebSocket is widely used for building real-time web applications where instant communication and data updates are crucial. It provides a more efficient and responsive alternative to traditional HTTP-based communication for scenarios that require constant data exchange between clients and servers.

Add two sums

You are given two non-empty linked lists representing two non-negative integers. The digits are stored in reverse order, and each of their nodes contains a single digit. Add the two numbers and return the sum as a linked list.

You may assume the two numbers do not contain any leading zero, except the number 0 itself.

var addTwoNumbers = function(l1, l2) {
// if l1.next_node exists
};

Can you call a private method outside a Ruby class using its object?

No, you cannot call a private method outside a Ruby class using its object directly. Private methods in Ruby can only be called within the same class where they are defined. They cannot be accessed or invoked using the object of the class from an external scope.

If you attempt to call a private method from outside the class using the object, you will encounter a NoMethodError. Private methods are meant to be used internally within the class to encapsulate functionality and are not exposed for external use.

Here's an example to illustrate:

class MyClass
  def public_method
    puts "This is a public method"
    private_method   # Call private method internally
  end

  private

  def private_method
    puts "This is a private method"
  end
end

obj = MyClass.new
obj.public_method   # This works

# Attempting to call the private method directly from outside the class will result in an error
# obj.private_method  # This would raise a NoMethodError

In the example above, calling private_method directly on the object obj outside the class would result in an error. The private method can only be called from within the class itself, typically from a public method.

Load balancer

A load balancer is a networking device or software application that distributes incoming network traffic across multiple servers or resources. The primary purpose of a load balancer is to ensure that no single server bears too much traffic, preventing potential performance issues or failures. Load balancing is commonly used in various scenarios, such as distributing web traffic, managing application server loads, and ensuring high availability.

Here are some key aspects and functions of load balancers:

  1. Distribution of Traffic: Load balancers evenly distribute incoming network traffic across multiple servers. This helps in optimizing resource utilization and preventing any single server from becoming a bottleneck.

  2. Improving Performance and Scalability: By distributing the load among multiple servers, a load balancer helps enhance the overall performance and scalability of a system. As traffic increases, additional servers can be added to the pool to handle the load.

  3. High Availability: Load balancers contribute to high availability by ensuring that if one server fails or becomes unreachable, the traffic is redirected to other available servers. This helps in minimizing downtime and maintaining continuous service.

  4. Session Persistence: Some applications require that a user's session is maintained on a specific server to ensure continuity. Load balancers can be configured to support session persistence, ensuring that requests from the same user are directed to the same server.

  5. Health Monitoring: Load balancers constantly monitor the health of individual servers in the pool. If a server becomes unavailable or starts experiencing issues, the load balancer can redirect traffic away from that server until it recovers.

  6. SSL Termination: Load balancers can offload the SSL/TLS encryption and decryption process from application servers, improving overall efficiency and performance.

  7. Content-based Routing: Load balancers can make routing decisions based on the content of the incoming requests, directing them to specific servers based on factors like the type of content or the geographic location of the user.

There are various types of load balancers, including hardware-based ones that are dedicated devices, and software-based ones that run on general-purpose servers or virtual machines. Load balancing is a crucial component in the design of scalable and resilient systems, commonly employed in data centers, cloud environments, and large-scale web applications.

What is the difference between calling super and calling super()?

In Ruby, super and super() are related but serve different purposes. Both are used in the context of inheritance and method overriding.

  1. super: This is used within a method of a subclass to invoke the same-named method from its superclass. It passes the arguments that were passed to the current method in the subclass.

    class Parent
      def example(arg)
        puts "Parent class, arg: #{arg}"
      end
    end
    
    class Child < Parent
      def example(arg)
        puts "Child class"
        super  # invokes the 'example' method in the Parent class with the same 'arg'
      end
    end
    
    Child.new.example("Hello")

    In this example, super is used to call the example method of the parent class with the argument passed to the method in the child class.

  2. super(): This is used to invoke the same-named method from the superclass but without passing any arguments explicitly.

    class Parent
      def example(arg)
        puts "Parent class, arg: #{arg}"
      end
    end
    
    class Child < Parent
      def example(arg)
        puts "Child class"
        super()  # invokes the 'example' method in the Parent class without passing 'arg'
      end
    end
    
    Child.new.example("Hello")

    Here, super() is used to call the example method of the parent class without passing the argument explicitly.

In summary, super without parentheses passes along the arguments implicitly, while super() explicitly calls the superclass method without passing any arguments. The choice between them depends on the specific requirements of the overridden method in the subclass.

How do we do Microfrontends and how do we split the project into different domains

Microfrontends is an architectural approach that involves breaking down a front-end monolith into smaller, independent, and loosely coupled applications. Each microfrontend is developed, deployed, and maintained independently, promoting team autonomy and enabling scalability. Here are some key strategies and considerations for implementing microfrontends and splitting a project into different domains:

Key Strategies for Microfrontends:

  1. Independent Deployability:

    • Each microfrontend should be deployable independently without affecting other parts of the system.
    • Enables continuous integration and continuous delivery for individual components.
  2. Loose Coupling:

    • Microfrontends should be loosely coupled to minimize dependencies between them.
    • Use APIs and communication protocols (e.g., events, messaging) for inter-microfrontend communication.
  3. Isolation:

    • Encapsulate the styling, logic, and dependencies of each microfrontend to avoid conflicts with other parts of the system.
    • Use technologies like iframes, Web Components, or module bundlers (Webpack, SystemJS) to achieve isolation.
  4. Autonomous Teams:

    • Assign independent teams to work on different microfrontends.
    • Teams have ownership and control over their respective microfrontend, fostering autonomy and faster development cycles.
  5. Cross-Cutting Concerns:

    • Identify and address cross-cutting concerns, such as authentication, authorization, and routing, in a shared infrastructure layer.

Splitting a Project into Different Domains:

  1. Identify Bounded Contexts:

    • Define the boundaries of different business capabilities or domains within the application.
    • Bounded contexts represent areas of the application that can be independently developed and deployed.
  2. Separate User Interfaces:

    • Based on the identified bounded contexts, separate the user interfaces into distinct microfrontends.
    • Each microfrontend corresponds to a specific domain or business capability.
  3. Define APIs and Contracts:

    • Clearly define APIs and contracts between microfrontends to facilitate communication.
    • Use standard protocols like RESTful APIs, GraphQL, or custom events for interaction.
  4. Shared Infrastructure:

    • Establish a shared infrastructure layer for handling cross-cutting concerns.
    • Include shared services for authentication, authorization, routing, and other common functionalities.
  5. Routing and Navigation:

    • Implement a central routing mechanism or use client-side routing to navigate between different microfrontends.
    • Ensure a consistent user experience by managing navigation seamlessly.
  6. Integration and Composition:

    • Use a microfrontend composition strategy to assemble the overall user interface.
    • Strategies include server-side composition, client-side composition, or a combination of both.
  7. Independent Deployments:

    • Ensure that each microfrontend can be deployed independently, allowing for flexibility in scaling and updating different parts of the application.
  8. Versioning and Compatibility:

    • Establish versioning strategies for microfrontends to handle changes in APIs and contracts.
    • Ensure backward compatibility where necessary to avoid disruptions during updates.

Tools and Frameworks:

  1. Module Bundlers:

    • Use module bundlers like Webpack to manage dependencies and create isolated environments for microfrontends.
  2. Web Components:

    • Consider using Web Components to encapsulate UI elements and create reusable components that can be shared across microfrontends.
  3. Microfrontend Frameworks:

    • Explore microfrontend frameworks such as single-spa, Luigi, or Module Federation for managing the architecture.
  4. Containerization:

    • Consider containerization technologies (e.g., Docker) for packaging and deploying microfrontends independently.
  5. CI/CD Pipeline:

    • Implement a robust CI/CD pipeline to automate the testing, building, and deployment of each microfrontend.

Implementing microfrontends and splitting a project into different domains require careful planning, communication, and adherence to best practices. It allows teams to work independently, scale efficiently, and adapt to evolving business requirements.

Recommend Projects

  • React photo React

    A declarative, efficient, and flexible JavaScript library for building user interfaces.

  • Vue.js photo Vue.js

    🖖 Vue.js is a progressive, incrementally-adoptable JavaScript framework for building UI on the web.

  • Typescript photo Typescript

    TypeScript is a superset of JavaScript that compiles to clean JavaScript output.

  • TensorFlow photo TensorFlow

    An Open Source Machine Learning Framework for Everyone

  • Django photo Django

    The Web framework for perfectionists with deadlines.

  • D3 photo D3

    Bring data to life with SVG, Canvas and HTML. 📊📈🎉

Recommend Topics

  • javascript

    JavaScript (JS) is a lightweight interpreted programming language with first-class functions.

  • web

    Some thing interesting about web. New door for the world.

  • server

    A server is a program made to process requests and deliver data to clients.

  • Machine learning

    Machine learning is a way of modeling and interpreting data that allows a piece of software to respond intelligently.

  • Game

    Some thing interesting about game, make everyone happy.

Recommend Org

  • Facebook photo Facebook

    We are working to build community through open source technology. NB: members must have two-factor auth.

  • Microsoft photo Microsoft

    Open source projects and samples from Microsoft.

  • Google photo Google

    Google ❤️ Open Source for everyone.

  • D3 photo D3

    Data-Driven Documents codes.