GithubHelp home page GithubHelp logo

kdcconnaging's Introduction

KDC 연결 Test Automation

KTSync APP과 KDC 스캐너간 연결 테스트 자동화 아래의 스텝과 같이 UI Automation 동작을 수행함

  1. KDC 스캐너 연결
  2. 바코드 스캔 1회
  3. KDC 스캐너 연결 제해

실행 절차

1. VirtualBox 설치

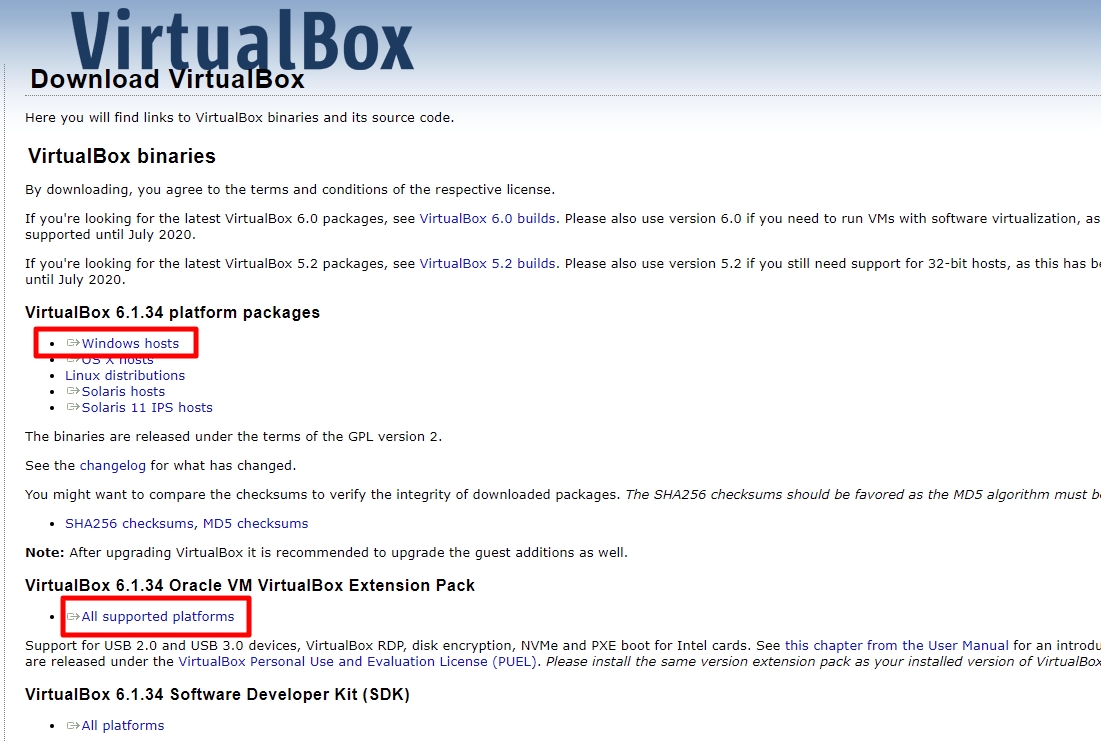
  1. VirtualBox 홈페이지(https://www.virtualbox.org/wiki/Downloads )에 접속
  2. platform packages와 Extension Pack을 다운로드 & 설치 enter image description here
2. VirtualBox 이미지 가져오기

  1. VirtualBox 이미지 다운로드
    다운로드1 : https://drive.google.com/file/d/1vWRoxXmR4BBe5UkHwdXfV5b6wgxtRw9e/view?usp=sharing
    다운로드2 : https://drive.google.com/file/d/1ctAurbVctcUSypXrMcTqLd0d2RCbIg8V/view?usp=sharing
  2. VirtualBox 실행
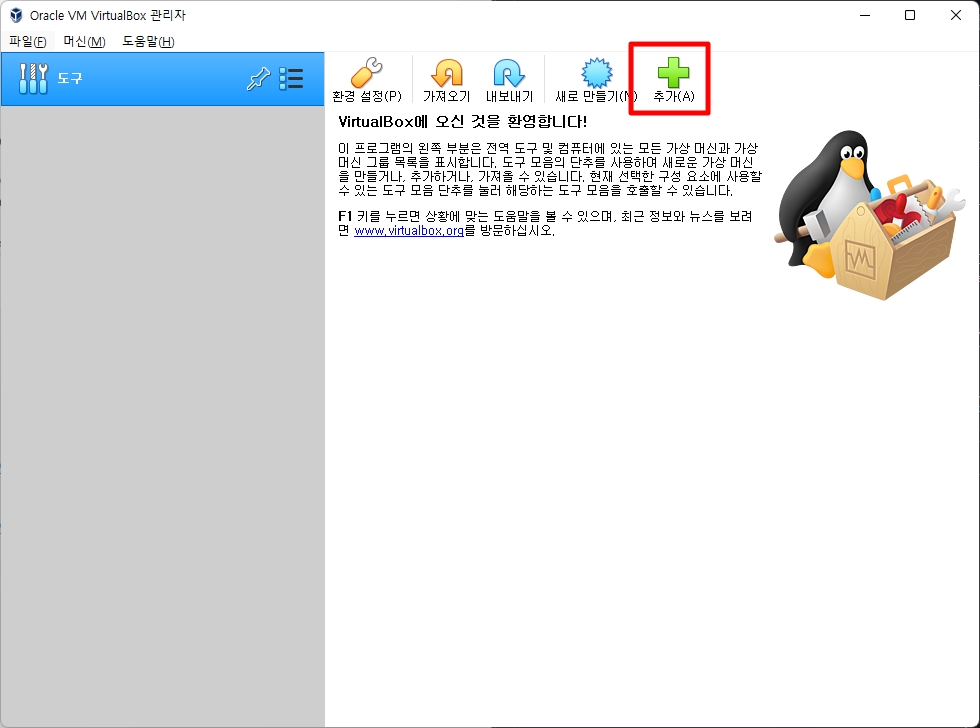
  3. 다운로드한 VM 추가
    1. 추가 클릭
      enter image description here
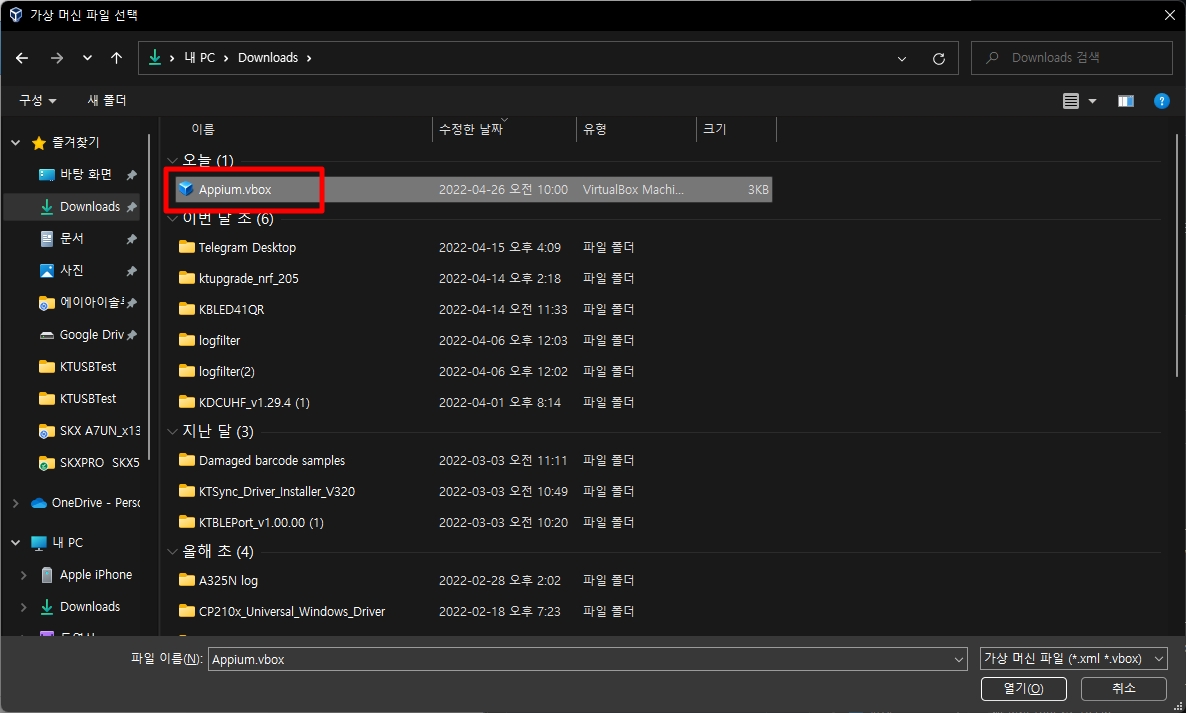
    2. 다운로드한 Appium.vbox 파일 선택
      enter image description here
  4. Host PC에 안드로이드 폰(삼성폰) 연결
  5. VM의 USB 설정
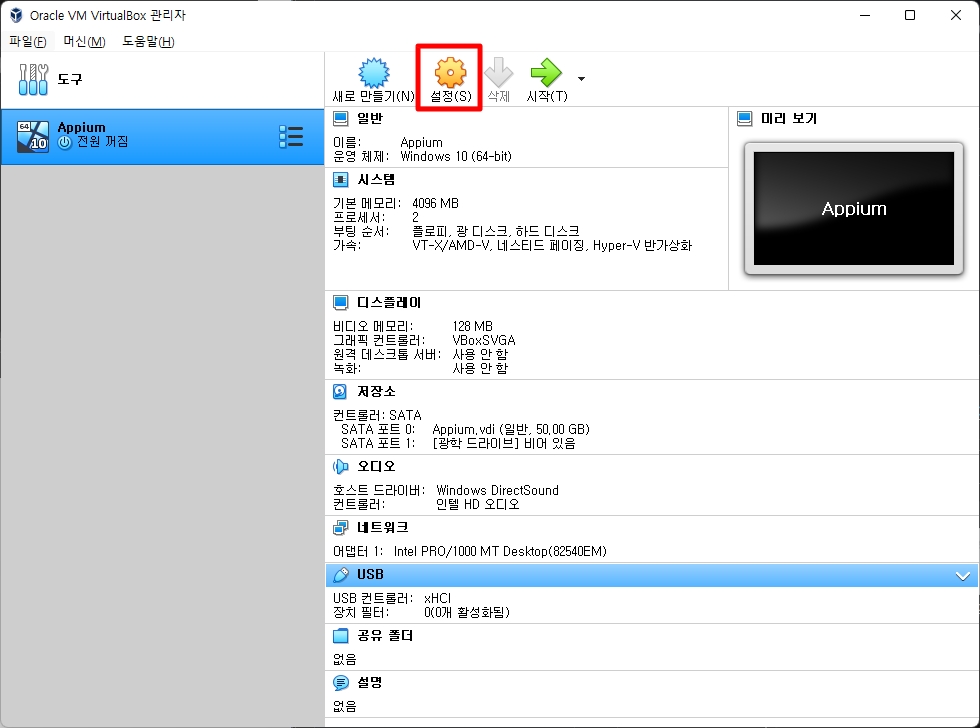
    1. 추가된 VM 클릭
    2. 설정 클릭
      enter image description here
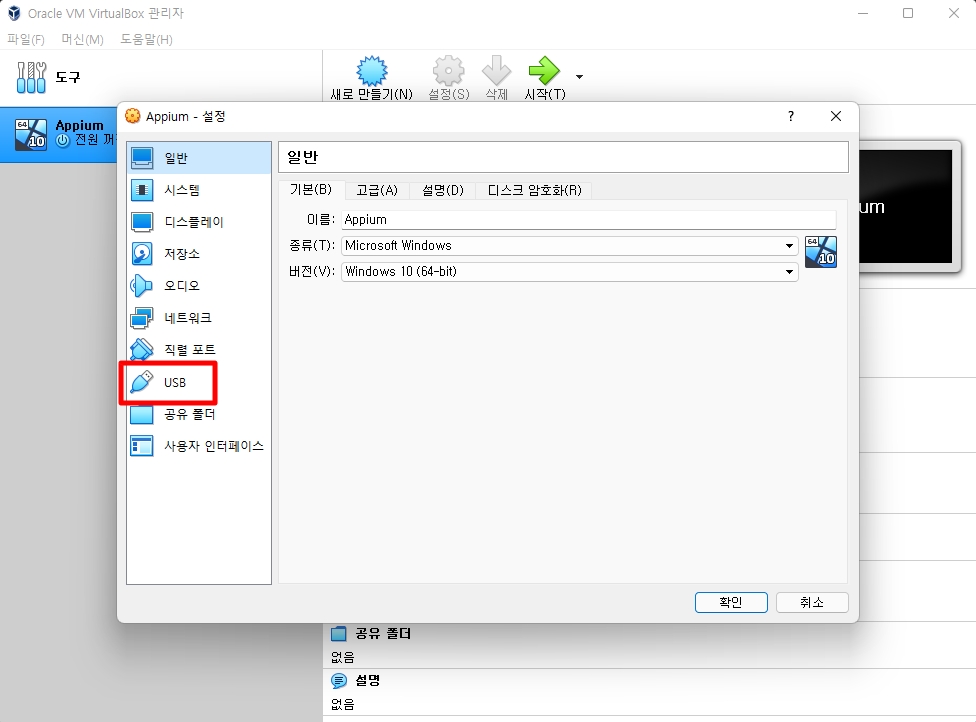
    3. USB 클릭
      enter image description here
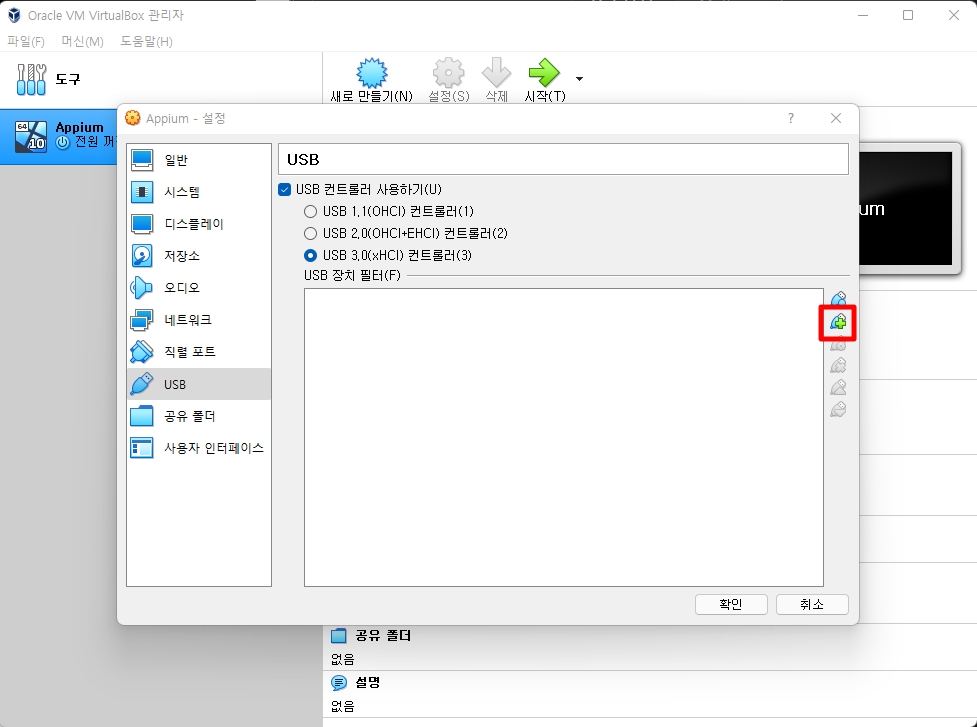
    4. 설정창 오른쪽의 + 클릭
      enter image description here
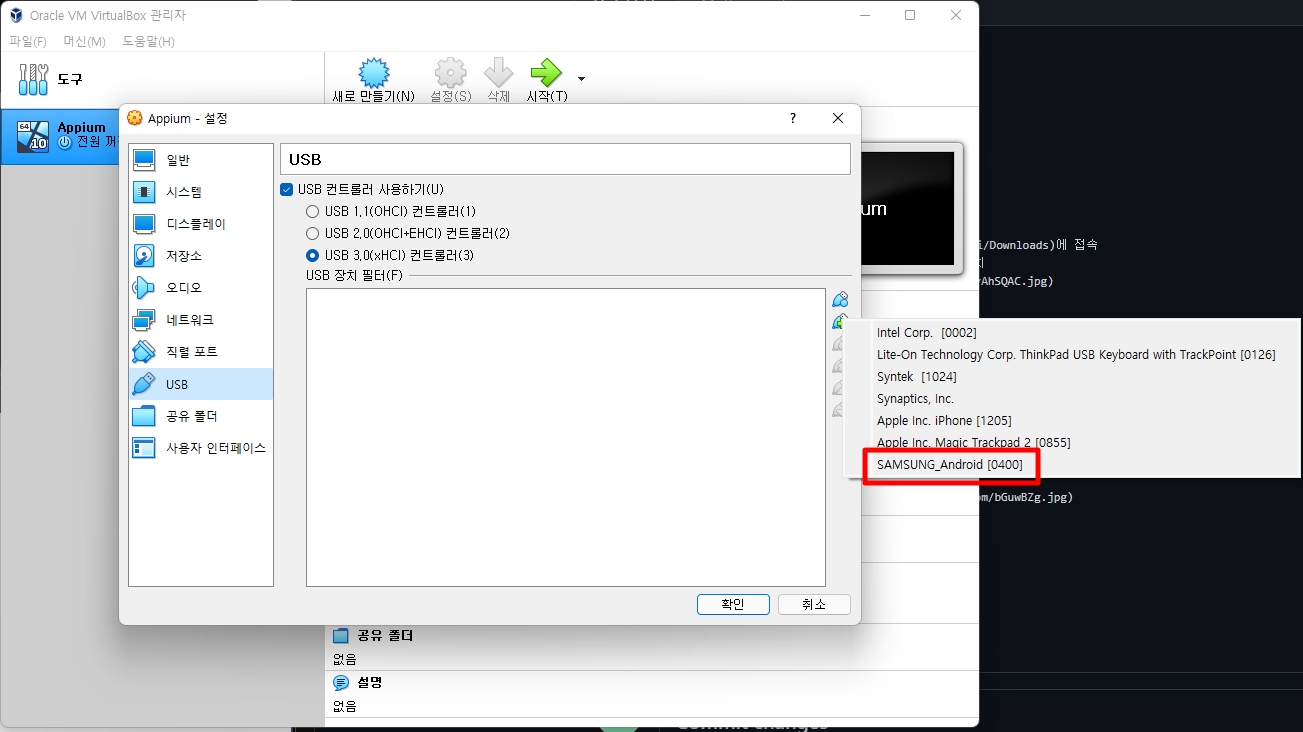
    5. 장치 목록에서 VM에 연결할 폰 선택
      enter image description here

3. 안드로이드 디버깅 설정

  1. 설정 > 휴대전화 정보 > 소프트웨어 정보 > 빌드번호를 연타하여 개발자 모드 활성화
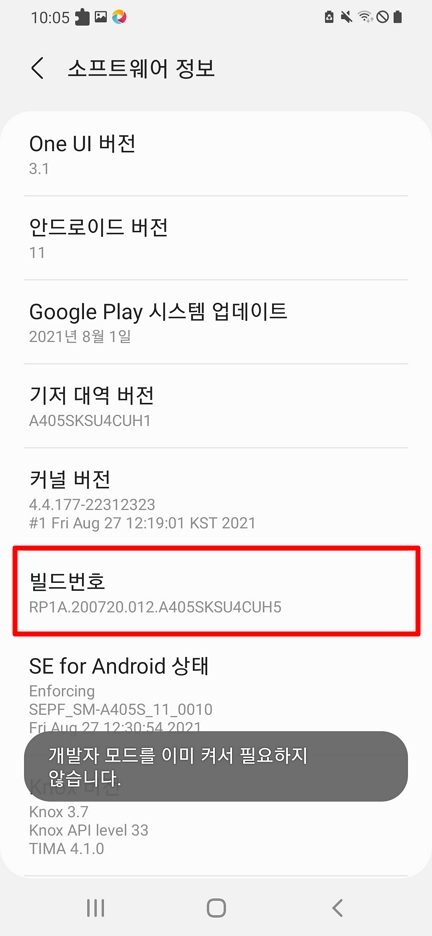
    enter image description here
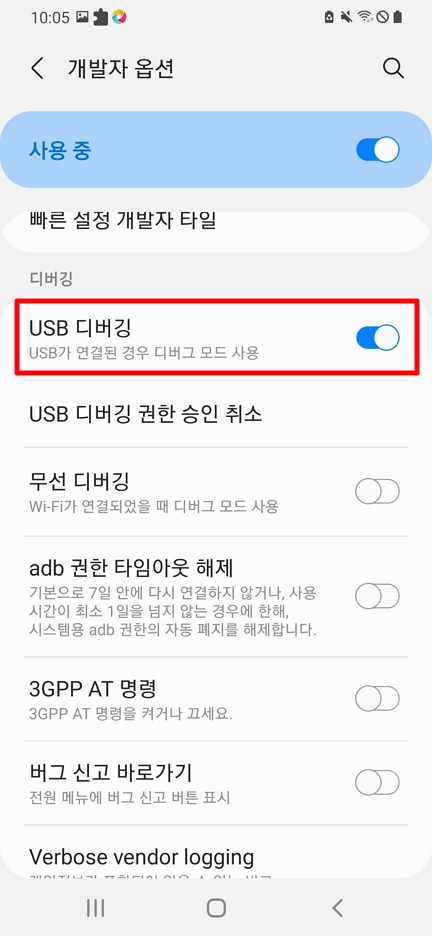
  2. USB 디버깅 활성화
    enter image description here
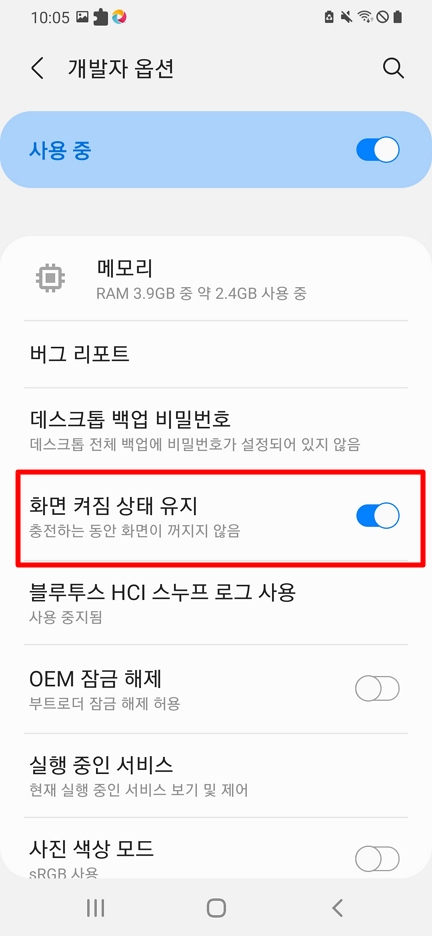
  3. 화면 켜짐상태 유지 활성화
    enter image description here

4. 스크립트 Clone

  1. VM 시작
  2. 바탕화면의 PyCharm 실행
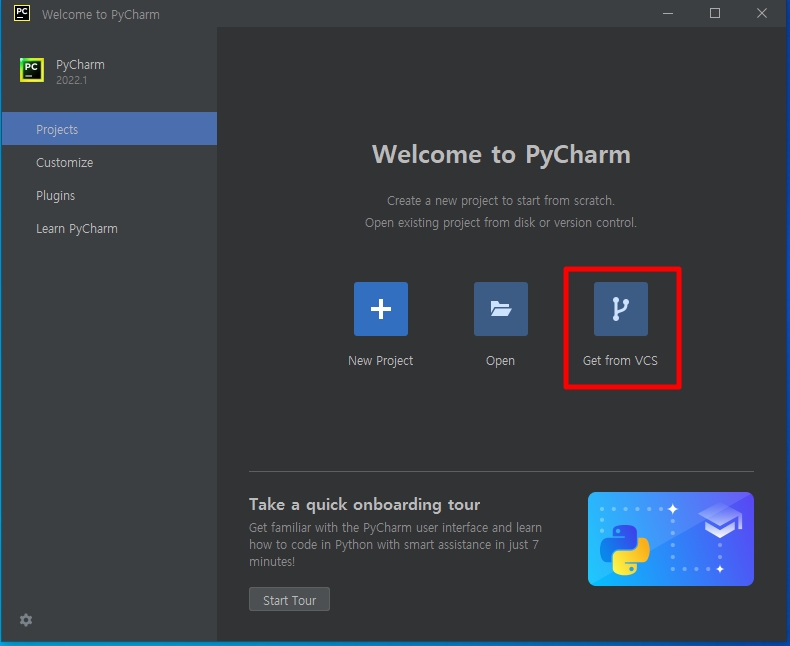
  3. Get From VCS 선택
    enter image description here
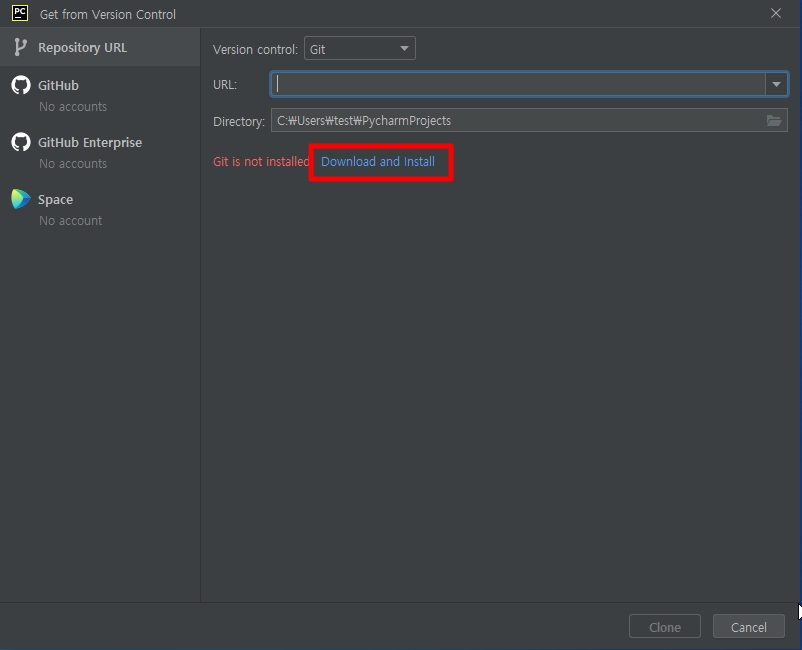
  4. Git 설치
    enter image description here
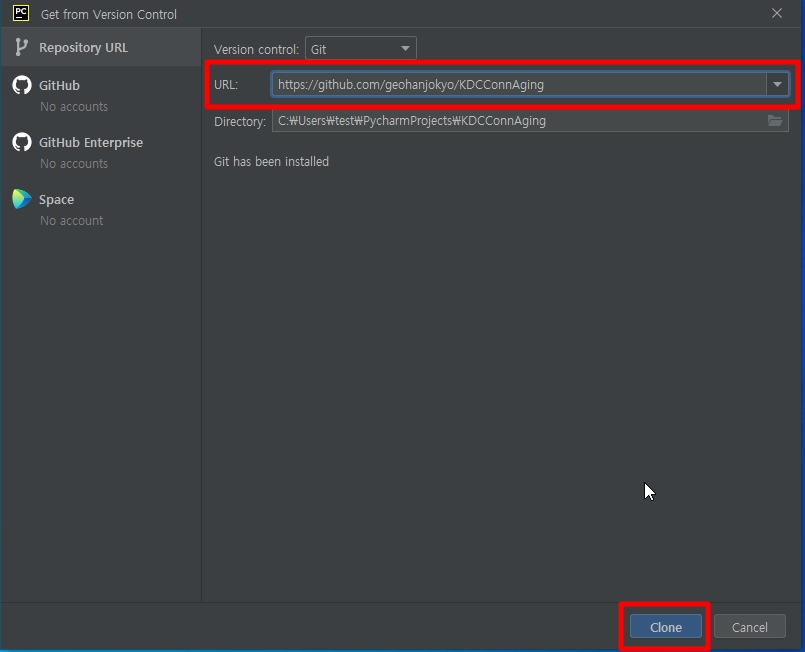
  5. git 주소를 입력 후 clone
    enter image description here
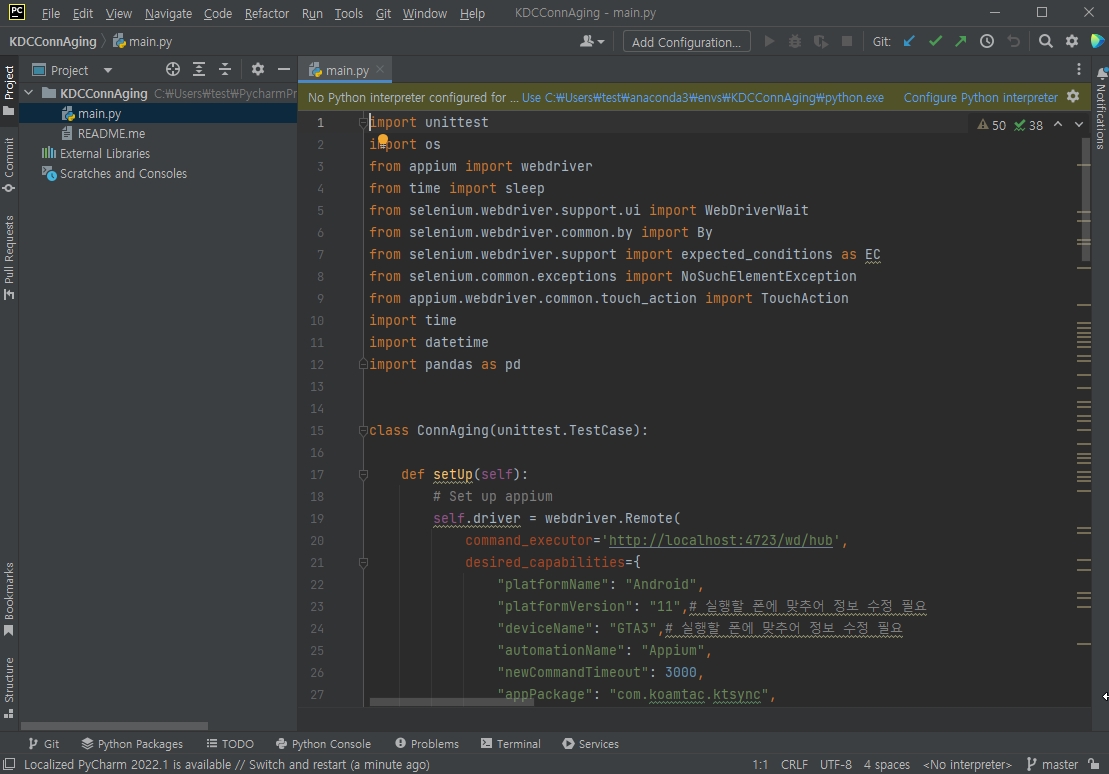
  6. 스크립트 clone 완료된 모습
    enter image description here

5. 스크립트 실행 준비

  1. 스크립트 편집
    1. platformVersion, deviceName정보를Appium 실행할 폰에 맞게 편집
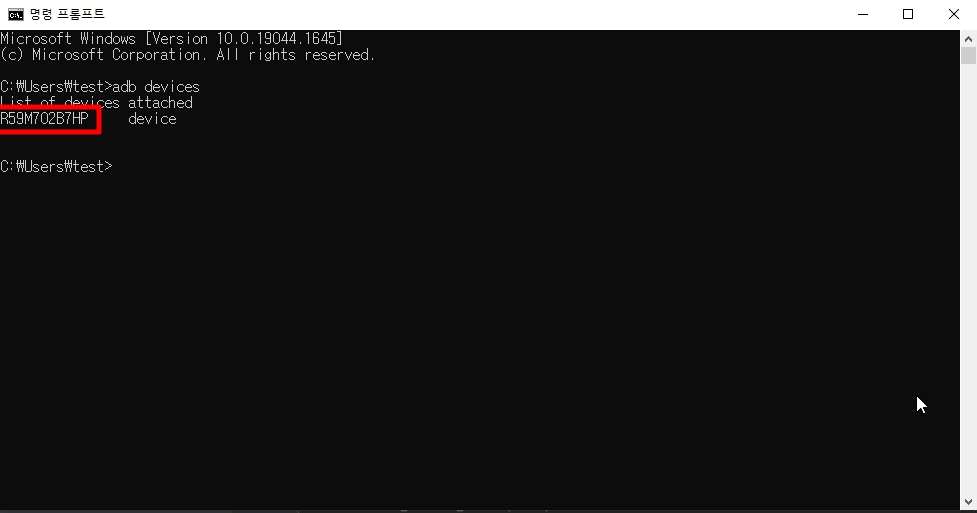
    2. CMD 실행 > adb devices 명령 실행
      enter image description here
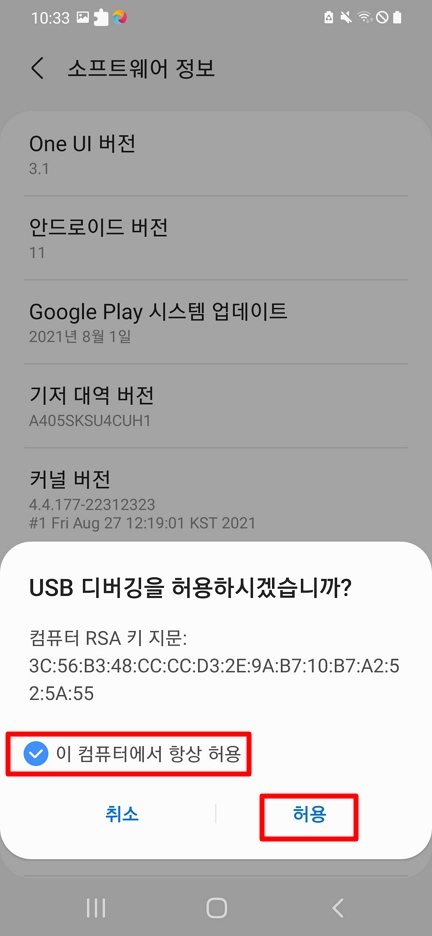
    3. 폰의 USB 디버깅 권한을 허용(항상 허용 체크)
      enter image description here
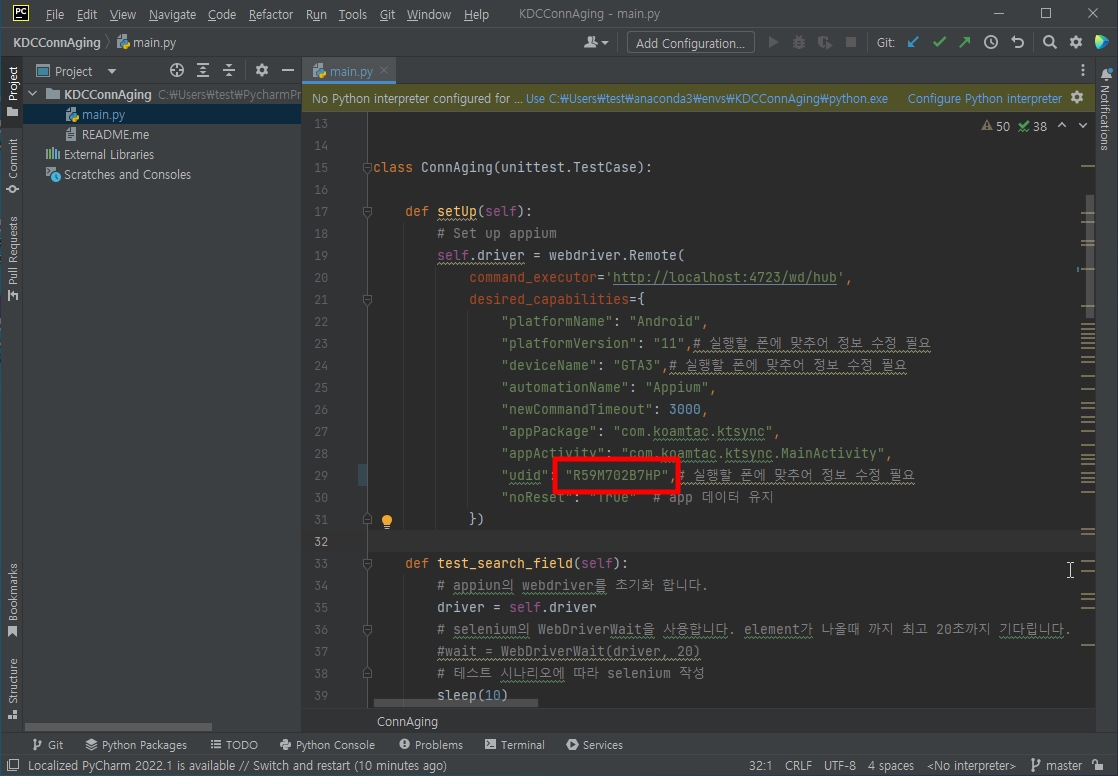
    4. 실행 결과 출력되는 장치 id를 스크립트 udid에 입력
      enter image description here
    5. 테스트할 바코드의 데이터를 bar_da 변수에 선언
      enter image description here
  2. Interpreter 선택
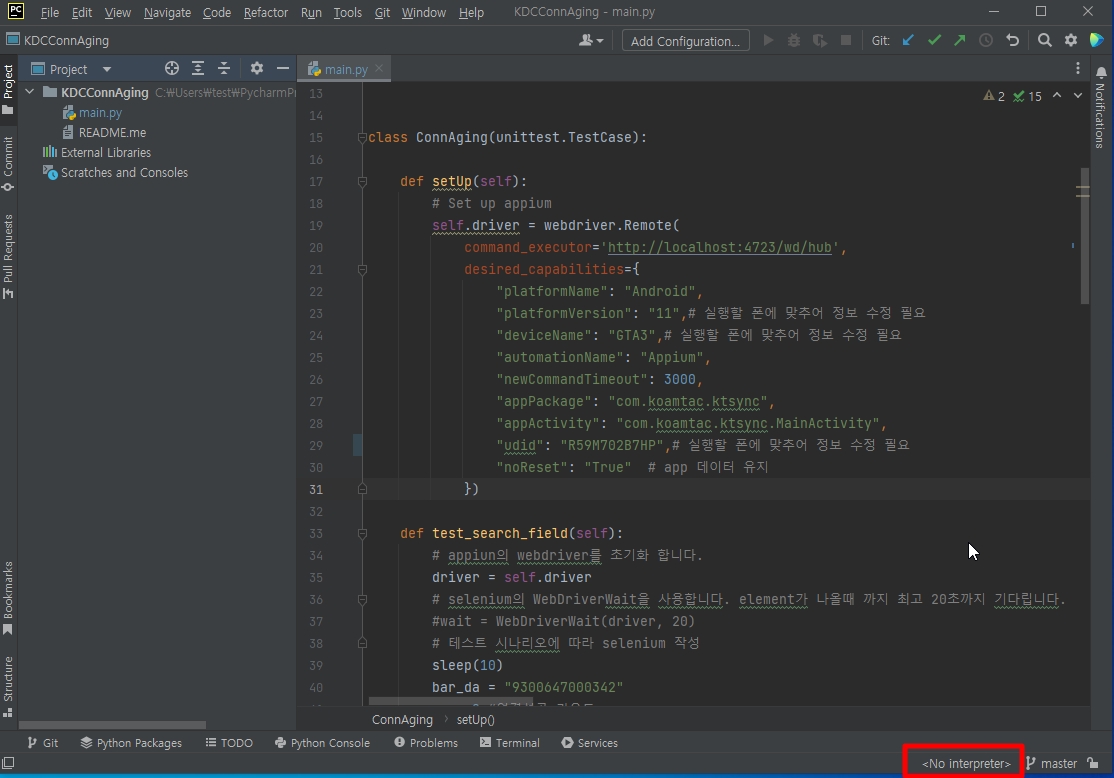
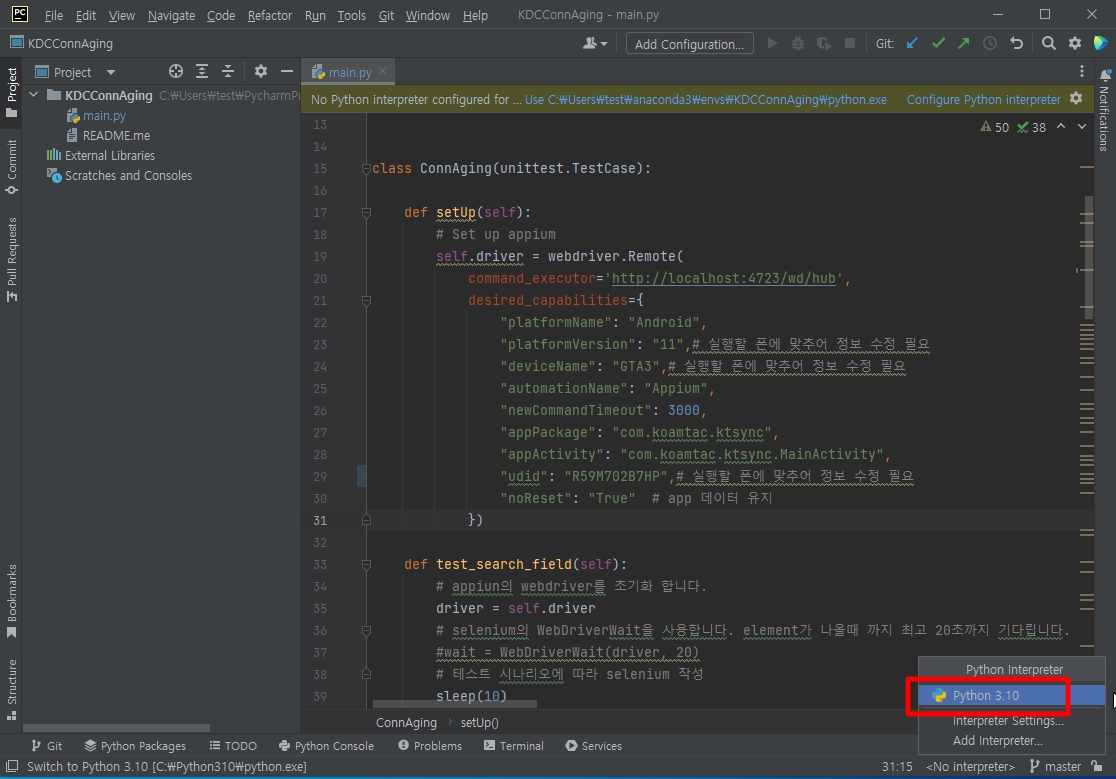
    1. Pycharm 우측 하단 No Interpreter 클릭
      enter image description here
    2. Python 3.10 클릭
      enter image description here
  3. Run Configuration 설정
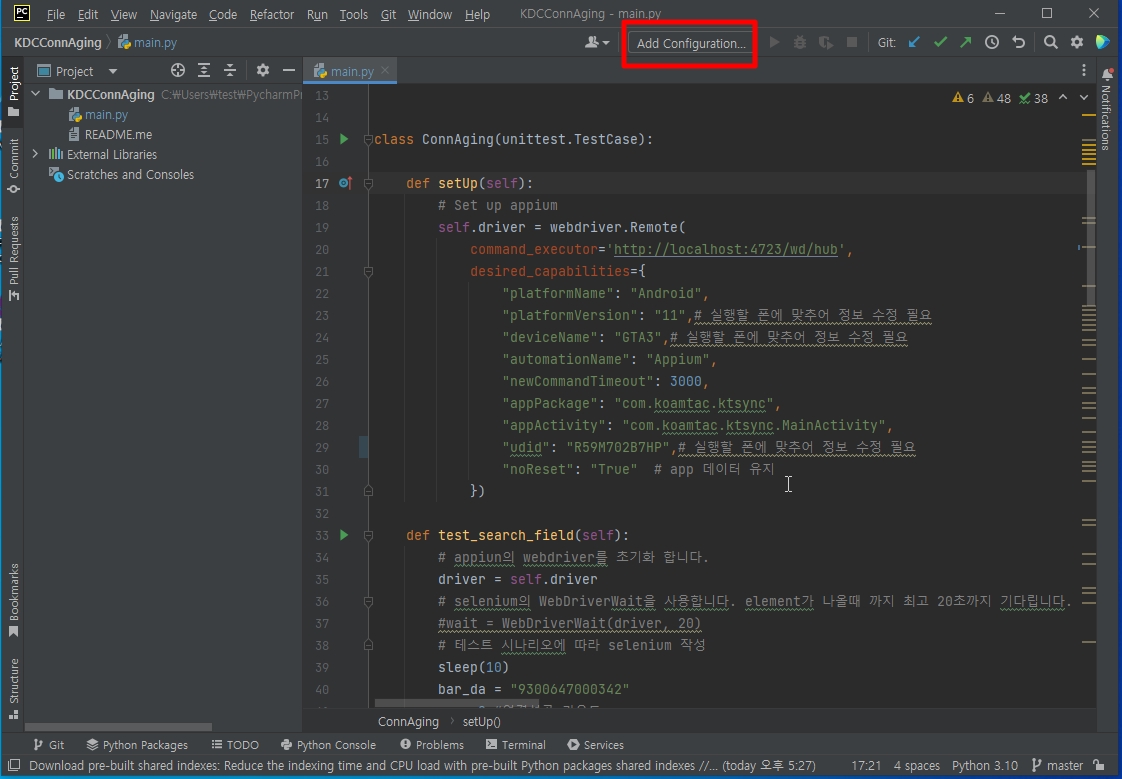
    1. Add Configuration 클릭
      enter image description here
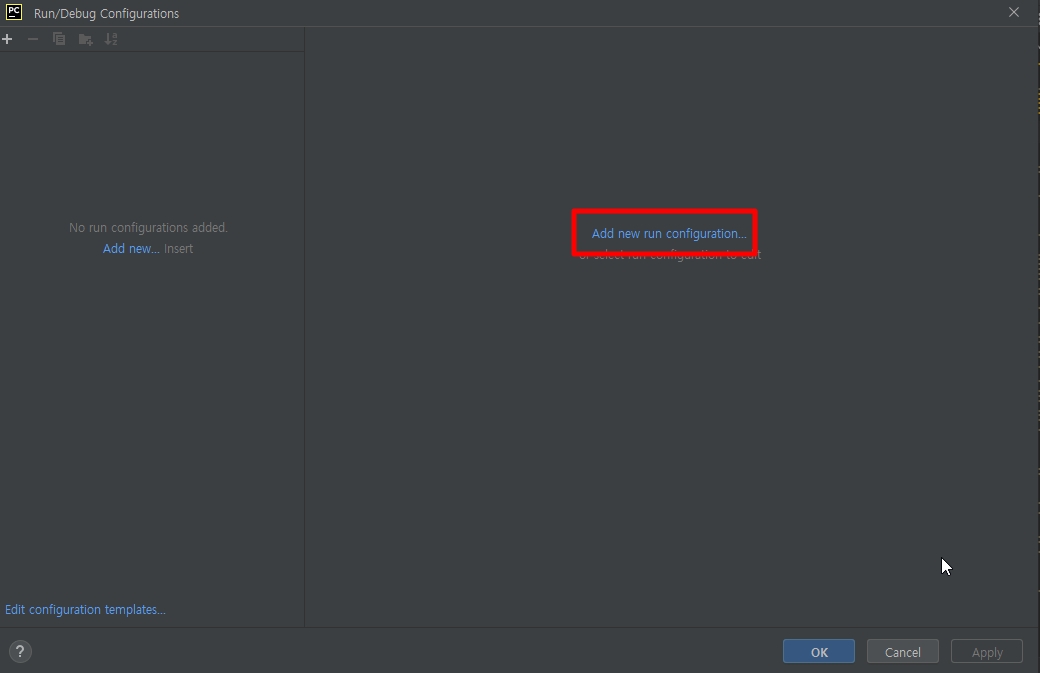
    2. ** Add New Configuration** 클릭
      enter image description here
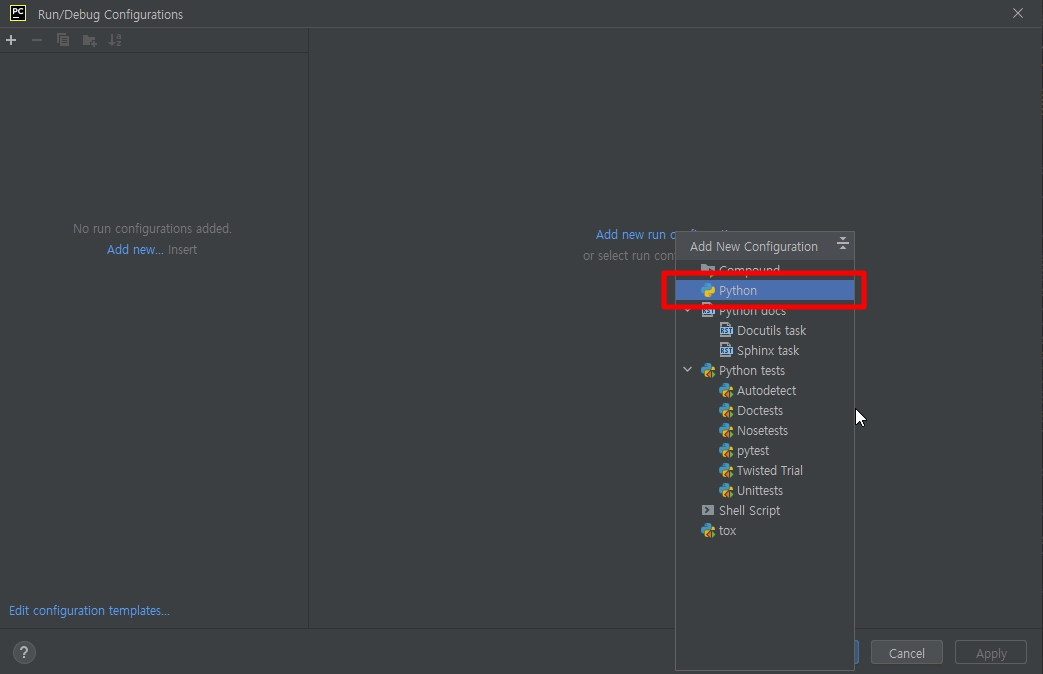
    3. Python 클릭
      enter image description here
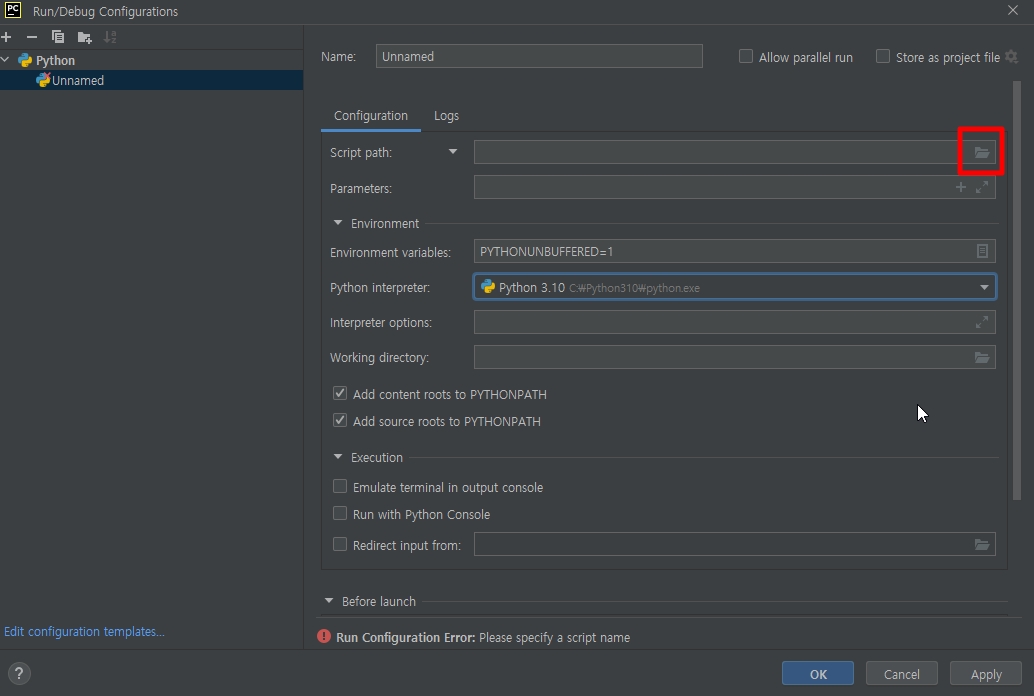
    4. Script Path > 폴더 클릭
      enter image description here
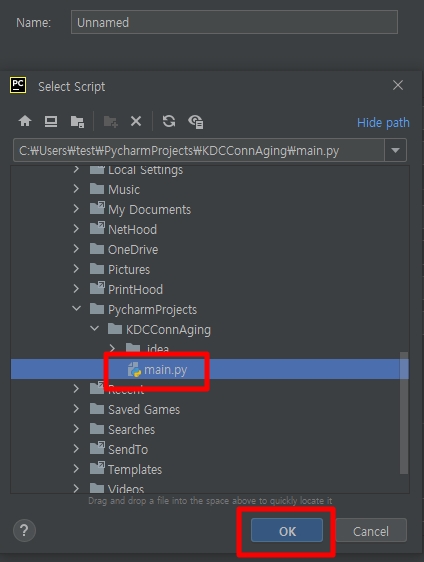
    5. main.py 선택 > OK 클릭
      enter image description here
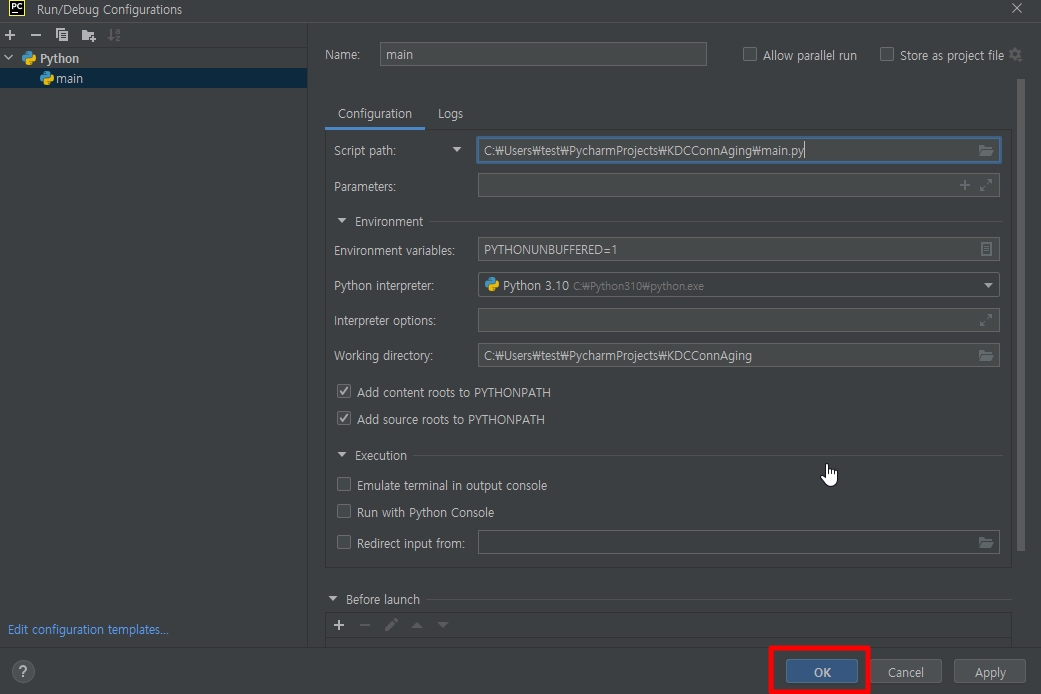
    6. OK클릭
      enter image description here

6. 스크립트 실행

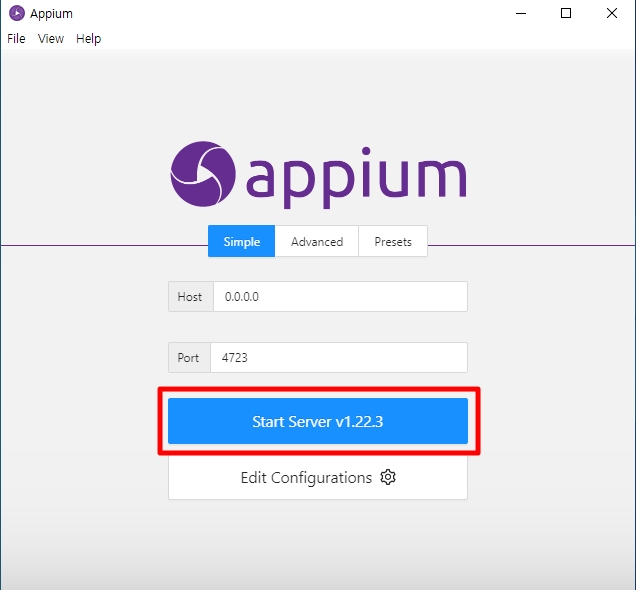
  1. Appium Server GUI 실행
  2. Start Server 클릭
    enter image description here
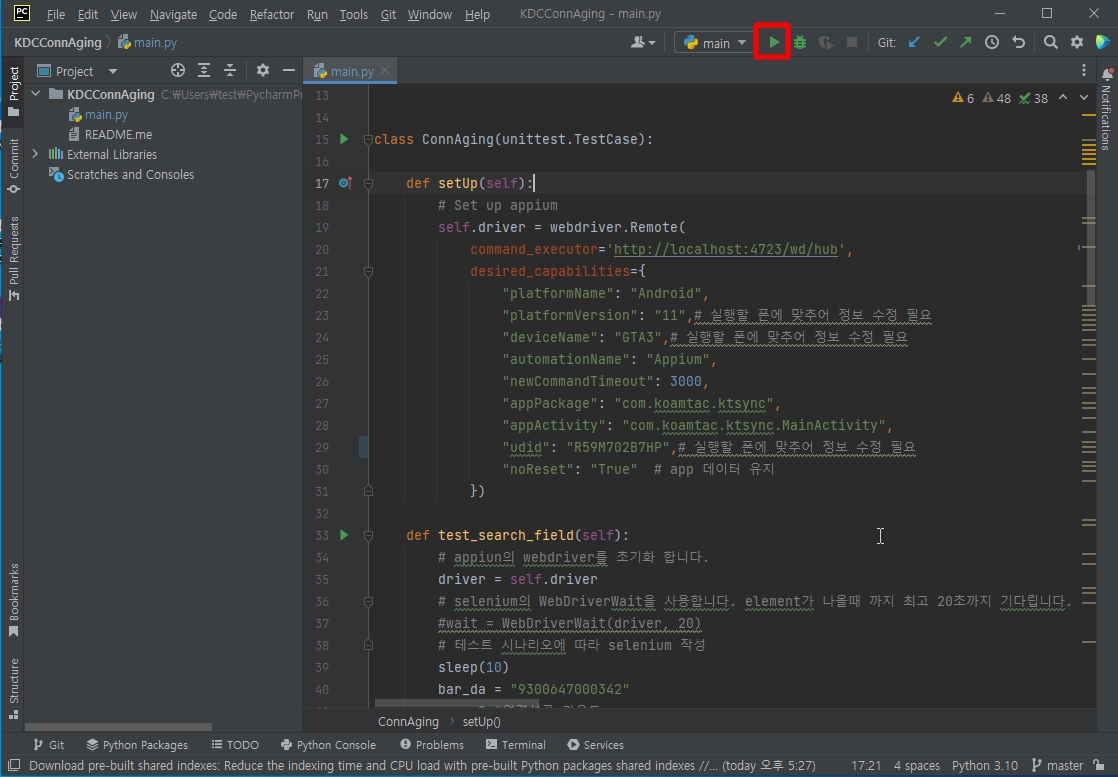
  3. PyCharm > RUN 클릭
    enter image description here

kdcconnaging's People

Contributors

geohanjokyo avatar

Watchers

 avatar

Recommend Projects

  • React photo React

    A declarative, efficient, and flexible JavaScript library for building user interfaces.

  • Vue.js photo Vue.js

    🖖 Vue.js is a progressive, incrementally-adoptable JavaScript framework for building UI on the web.

  • Typescript photo Typescript

    TypeScript is a superset of JavaScript that compiles to clean JavaScript output.

  • TensorFlow photo TensorFlow

    An Open Source Machine Learning Framework for Everyone

  • Django photo Django

    The Web framework for perfectionists with deadlines.

  • D3 photo D3

    Bring data to life with SVG, Canvas and HTML. 📊📈🎉

Recommend Topics

  • javascript

    JavaScript (JS) is a lightweight interpreted programming language with first-class functions.

  • web

    Some thing interesting about web. New door for the world.

  • server

    A server is a program made to process requests and deliver data to clients.

  • Machine learning

    Machine learning is a way of modeling and interpreting data that allows a piece of software to respond intelligently.

  • Game

    Some thing interesting about game, make everyone happy.

Recommend Org

  • Facebook photo Facebook

    We are working to build community through open source technology. NB: members must have two-factor auth.

  • Microsoft photo Microsoft

    Open source projects and samples from Microsoft.

  • Google photo Google

    Google ❤️ Open Source for everyone.

  • D3 photo D3

    Data-Driven Documents codes.