Check it out at: https://intense-depths-97149.herokuapp.com/
Today, we’ll get you up and running with a basic web application that you’ll then be able to build off of. But first, there are a few accounts you’ll need to set up and technologies you’ll need to install on your computer.
- Create a Heroku account (Make sure to set your primary language as "Node")
- Download and install Heroku's command line tools
- Create a GitHub account
- Download and install git (GitHub's command line tool)
- Download and install Node.js
- Download and install a text editor (we recommend Visual Studio Code) Use Google to search for any error messages you receive when installing the tools. Google is a great resource to get through roadblocks like these.
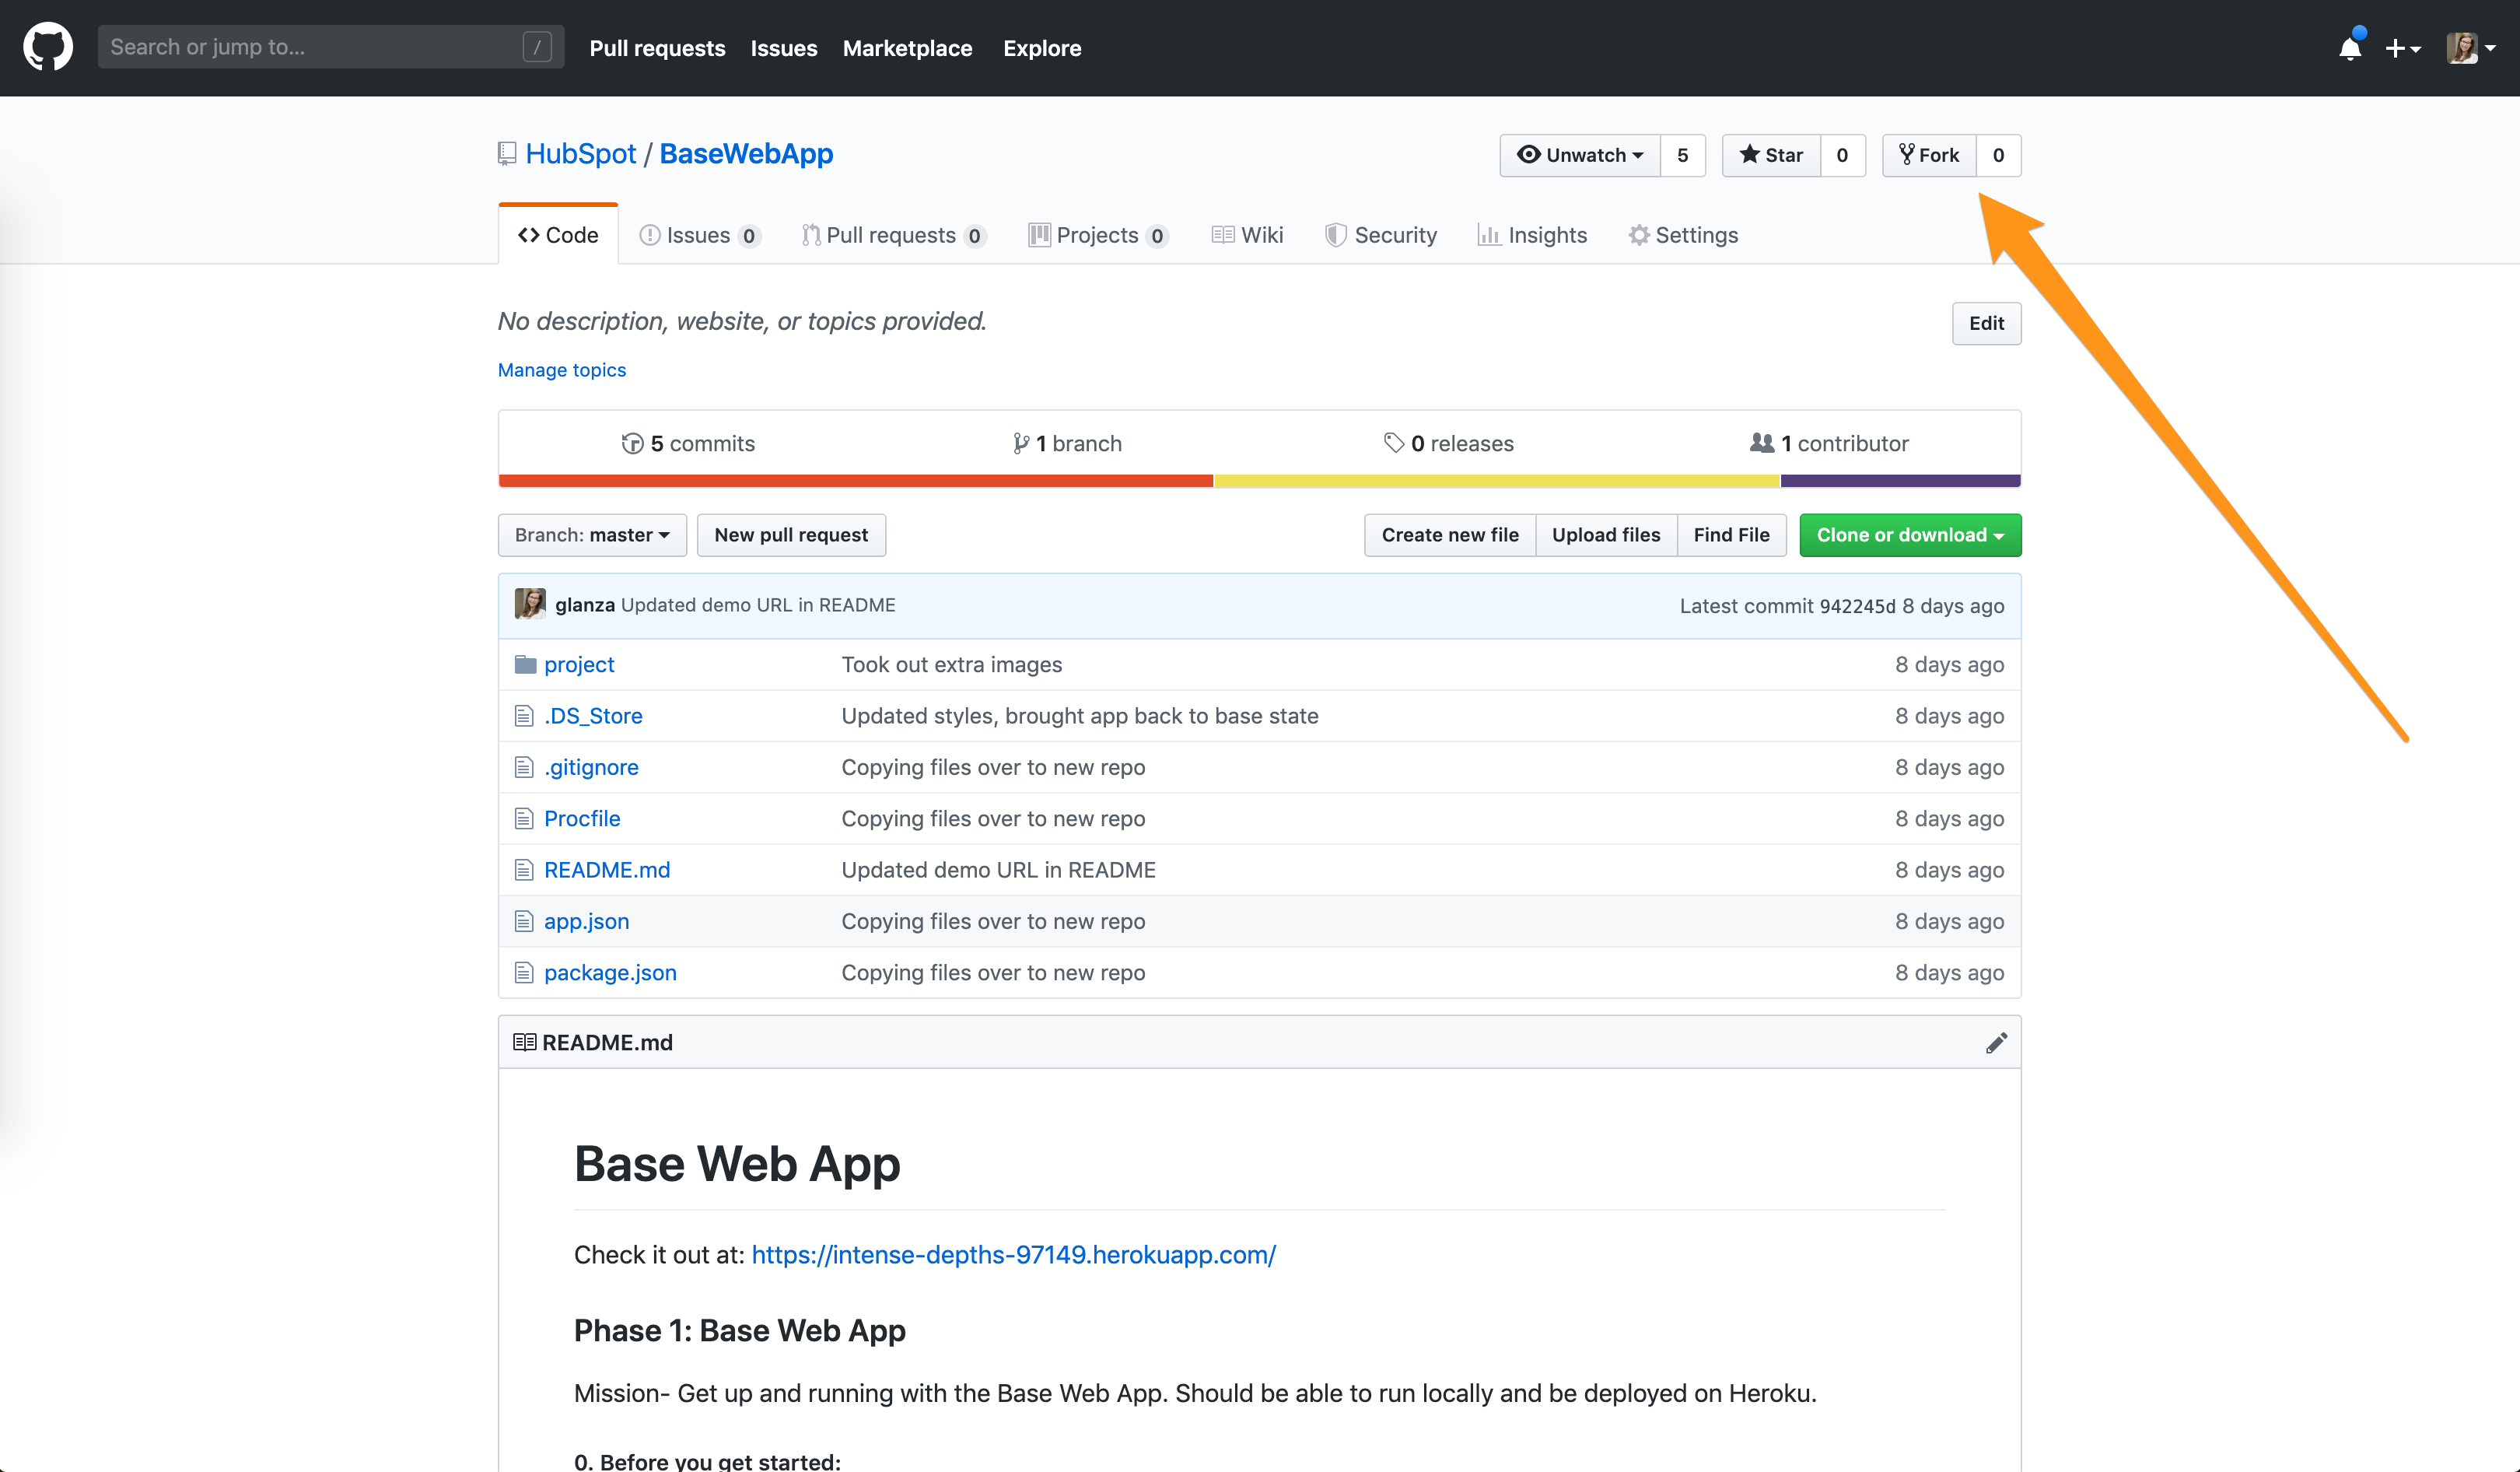
2. Make a copy of the existing project on GitHub by forking it at https://github.com/HubSpot/BaseWebApp.git
Since we believe that building a project that's all your own is more important than understanding how to set up a Node and Express app from scratch, you'll be copying a basic existing project today as a starting point. You do this by "forking" the repo, which creates a copy on your GitHub account.
The terminal is a basic way of interacting with your computer through text commands. It'll be very useful in setting your application up. On Windows, it might be called Command Prompt, Git Shell, or Git BASH.

cd ~/Desktop
Then, use the ls (on Mac) or dir (on PC) command to list all files in a directory. It will show you all the items on your desktop, like so:

When you create (or in this case, fork) a repository on GitHub, it exists as a remote repository — that means it exists on a server somewhere, but not on your machine. In order to edit the code, you can clone your repository to create a local copy on your computer and sync between the two locations. Use the command line to
- (1) clone your project from Github onto your own computer, making sure to replace YourUserName with, well, your username:
git clone https://github.com/YourUserName/BaseWebApp.git
Tip: Press enter after each line.
- (2) navigate into the project:
cd BaseWebApp
- (3) list all the files in the project:
ls
Use the command line to create an app on Heroku. Heroku is the server you'll be pushing your code to. This prepares Heroku to receive your source code (and creates a url for you): Once again, be sure to run these lines one at a time, pressing enter after each command
	heroku login
	heroku create
Note: On Windows, the first command might 'hang' for quite some time (even up to 10-15 minutes) - do not cancel and restart it, usually after this first 'long' run, it works without issues later on.
If you experience any issues with using Heroku on the command line, please refer to [this documentation] (https://devcenter.heroku.com/articles/heroku-cli#troubleshooting) and your error log file.
Dependencies are all the outside pieces of code your app needs to run. Install the project’s dependencies using npm, a tool used to install any other packages your project needs. View the dependencies your app needs here.
npm install
heroku local web
Open a browser and navigate to localhost:5000
Open the project with Visual Studio Code, or whichever text editor you have installed. Make a change to your code. For example, in index.ejs, you could change the header text. Then, refresh your web browser, and you should see the change.
EJS is a templating language that stands for embedded JavaScript. It's like HTML but with some useful tools added. It lets you add JavaScript that gets compiled to HTML before it's sent to the browser.
Next, you're going to connect GitHub to Heroku in order to save you steps when deploying your code. Heroku will monitor your repository, and whenever it sees you push a change, it will automatically re-deploy your application so that your changes are incorporated in your live site.
- Go to https://dashboard.heroku.com/apps
- Select your app
- Click the tab ‘Deploy’
- In ‘Deployment Method’, select ‘Connect to Github’
- Search for your Repo — remember, it's "BaseWebApp"
- Click 'connect' and then 'Enable Automatic Deploys'
*We use automatic deploys at HubSpot - but ours go to a 'QA' or 'staging' site. Can you think of why we might do that?
*If your server is still running from before (it probably is), you can press control + c to halt it. Note that on a Mac, it's still 'control' not 'command'
	git add .
	git commit -m “made my first change”
	git push origin master
Git is very powerful, and has lots of features. In order to learn more about git, we recommend this resource.
heroku open
A few tips before you begin:
- Test often- when you make a change, make sure it works. You don't want to add a bunch of stuff and spend tons of time tracking a small bug down.
- Google everything! - Google is a developer's best friend. No one actually just knows this stuff... you just get really good at knowing what to Google, then reading/incorporating the answers you find.
- Ask for help - People are dying to help you out! Don't be afraid to ask, no matter how silly you think your question is (because trust me, it's not). Ask a friend, or post on StackOverflow.
Option 1 - Personal website: Add additional pages, navigation, and styling to your app.
Option 2 - Incorporate an API: Learn about how APIs make dynamic web apps possible, and practice integrating one into your app.
Option 3 - Set up a database: Learn how to set up a database, do user authentication, and submit and display user-generated data.
Step-by-step instructions for these can be found in the repo READMEs.
Here are some external resources we've gathered to help you with further development.
Git and GitHub tutorials Version control is an important tool for every developer, and git is the most popular one. Learn more useful git commands, discover the branching and then check how to use GitHub for your own project.
Web App tutorials (HTML, CSS, JavaScript) There are plenty of different and more comprehensive tutorials and online resources to learn HTML, CSS and JavaScript.
-
FreeCode Camp interactive web development tutorial: https://www.freecodecamp.org/
-
Khan Academy free html and css tutorial: https://khanacademy.org/computing/computer-programming/html-css
-
Comprehensive web development tutorial/documentation by Mozilla: https://developer.mozilla.org/en-US/docs/Learn/Getting_started_with_the_web
-
CSS visual guide: https://cssreference.io/
-
Flexbox tutorial: http://flexboxfroggy.com/
-
HTML cheatsheet: http://www.hostingreviewbox.com/html5-cheat-sheet/
More Web App tutorials (FE frameworks) Once you have comfortability with JS, CSS and HTML, try out a frontend framework to take your skills to the next level.
- Learning React with create-react-app: https://medium.com/in-the-weeds/learning-react-with-create-react-app-part-1-a12e1833fdc
Inspiration and problem solving To practice your problem solving skills and find some inspiration, please check the following pages:
- StackOverflow is a great place to ask any question (or search for it first, because it’s very likely that someone has already asked the same question and got an answer :))
- Code Pen is a great source of inspiration with a lot of projects based on HTML, CSS and JavaScript
- Dev.to is a blog platform where you can find plenty of useful posts from other developers.
