geoform-template-js
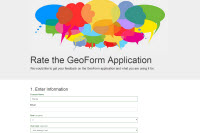
GeoForm is a configurable template for form based data editing of a Feature Service. This application allows users to enter data through a form instead of a map’s pop-up while leveraging the power of the Web Map and editable Feature Services. This will geo-enable data and support workflows by lowering the barrier of entry for completing simple tasks. This template can be used to gather input from outside of an organization and collect valuable content for collaboration.
- Map: Choose the web map used in your application.
- Title: Customize the title of the application.
- Logo: Choose a logo to display in the application.
- Description: Describe the form.
- Editable Layer: Choose the editable Feature Service used for collecting the input data.
- Fields: Select which fields to display and collect data within the form.
- Color Scheme: Choose the color scheme of the application.
- Mobile: A responsive web application that adapts to a resolution using Twitter’s Bootstrap framework.
- Share: Enable sharing using Twitter or Facebook or email.
The GeoForm template can be accessed via the ArcGIS template gallery or item details. The application source code can be downloaded for further customization and hosted on your own web server.
Instructions
- Download and unzip the .zip file or clone the repository.
- Web-enable the directory.
- Access the .html page.
- Start writing your template!
New to Github? Get started here.
Deploying
- To deploy this application, download the template from Portal/ArcGIS Online and unzip it.
- Copy the unzipped folder containing the web app template files, such as index.html, to your web server. You can rename the folder to change the URL through which users will access the application. By default the URL to the app will be
http://<Your Web Server>/<app folder name>/index.html - Change the sharing host, found in defaults.js inside the config folder for the application, to the sharing URL for ArcGIS Online or Portal. For ArcGIS Online users, keep the default value of www.arcgis.com or specify the name of your organization.
- ArcGIS Online Example:
"sharinghost": "https://" + “<your organization name>.maps.arcgis.com - Portal Example where
arcgisis the name of the Web Adaptor:"sharinghost": "https://" + "webadaptor.domain.com/arcgis"
- If you are using Portal or a local install of the ArcGIS API for JavaScript, change all references to the ArcGIS API for JavaScript in index.html to refer to your local copy of the API. Search for the references containing
"https://js.arcgis.com/3.35"and replace this portion of the reference with the url to your local install.
- For example:
"https://webadaptor.domain.com/arcgis/jsapi/jsapi"wherearcgisis the name of your Web Adaptor.
- Copy a map or group ID from Portal/ArcGIS Online and replace the default web map ID in the application’s defaults.js file. You can now run the application on your web server or customize the application further.
Note: If your application edits features in a feature service, contains secure services or web maps that aren't shared publicly, or generate requests that exceed 200 characters, you may need to set up and use a proxy page. Common situations where you may exceed the URL length are using complex polygons as input to a task or specifying a spatial reference using well-known text (WKT). For details on installing and configuring a proxy page see Using the proxy. If you do not have an Internet connection, you will need to access and deploy the ArcGIS API for JavaScript documentation from developers.arcgis.com.
Adding The Template To Your ArcGIS Online Organization
See how you can add this template to your organization as an early adopter.
More Information
See the ArcGIS Blog post for additional informationa bout this application.
Offline Editing
This template supports editing offline using the Esri Offline Editor JS. For more information on web offline editing see the github project linked above.
This template supports basic offline editing by saving the edits locally (including attachments) until a connection can be reestablished. As long as the browser window remains open or is reopened then the edits will get synched once an internet connection is restored. Support for offline with the Offline Editor JS is sufficient to handle workflows where connectivity is spotty. For a full picture on offline capabilities in ArcGIS we recommend you also research the following:
- Build cross-platform custom offline mapping native apps for your Desktop or Mobile device using AppStudio for ArcGIS
- Build custom offline mapping native apps with our ArcGIS Runtime SDKs (.Net, WPF, Java, iOS, Android, Qt/QML)
- Use out of the box mobile apps for data capture:
- Survey123 for ArcGIS for form-centric workflows
- Collector for ArcGIS for map-centric workflows
Limitations
- Currently only supports point editable feature layers.
- Offline editing only supports storing applyEdits and submitting upon reconnection.
- Offline does not cache tiles or services.
Requirements
- Notepad or HTML editor
- A little background with Javascript
- Experience with the ArcGIS Javascript API would help.
Bootstrap
This application uses the Bootstrap framework for CSS, layout, components and theming. Bootstrap on GitHub.
Configuring The Template
This template includes an application builder. If you're using this template via ArcGIS.com, you can take advantage of this builder while logged into ArcGIS and by configuring the published application.
If you are not using ArcGIS Online applications, you can configure this template by editing the defaults.js in the config folder.
New to Github? Get started here.
Configuring defaults.js
This topic will explain how to configure some of the more advanced settings in defaults.js
Webmap
Specify the webmap ID to use for this template.
"webmap": "5fd247b0e5d844d99b7b9af36286a535",
Application ID
If you've configured an application instead of using just a webmap, place the application ID here.
"appid": "be338760de9249f8b15df22a8e4ee586",
Defining the FeatureService Layer
Set the "form_layer" property to specify whic layer to use for generating the form. This is the ID of the layer as specified in a webmap. If you don't specify anything here, it will use the first feature layer it can find in the webmap.
For example, to use the layer from this webmap, I would inspect the webmap response to get the layer ID as so:
Setting the layer ID like so:
"form_layer": {
    "id": "GeoFormTryItLive_v3_7854"
},
If you'd like to use all layers:
"form_layer": {
  "id": "All"
},
Configuring Fields
By default, the fields property is an empty array. When an empty array, all fields from the layer will be dispalyed and they will use the default values. These fields can be configured by setting this fields array to tell the GeoForm what fields show and their properties. You can set each fields label, help text (optional description), visibility, default populated value and hint text (placeholder).
Default Fields property
"fields": {},
Modified fields property
fields:{
  "GeoForm_Sample_3731": [{
    "name": "email", // field ID
    "alias": "Email", // label
    "fieldDescription": "Let us contact you.", // help text
    "visible": true, // show this field?
    "typeField": false, // subtype field?
    "tooltip": "[email protected]", // placeholder text
    "displayType": "email" // text, checkbox, radio, textarea, url, email
  }]
}
Configuring Application Details
The GeoForm title, description and logo can be customized. If they are left empty, they will use the webmap's default title, image and summary. If both are empty or undefined, then the item will not show in the application.
"details": {
    "Title": "My Custom Geoform",
    "Logo": "http://www.mysite.com/MyLogo.png",
    "Description": "Check out my GeoForm!"
}
If you don't want them to appear, set both the application and webmap values to an empty string.
Theme
Change the way this app looks by changing its theme. See the themes.js file for all of the available options. These free themes for Bootstrap can be previewed on the Bootswatch website.
"theme": "basic",
Reset Map Extent
If you'd like the map to be reset after each submission, set this option to true. If you dont want the map extent to return to its default when a submission occurs, set to false.
"defaultMapExtent": true,
Attachment Text
Use this text option to tell users what kind of file to attach.
"attachmentInfo": {
  "GeoForm_Sample_3731": {
    "enableAttachments": false,
    "attachmentIsRequired": false,
    "attachmentLabel": "",
    "attachmentHelpText": ""
  },
  "Test_secured_geoform_9625": {
    "enableAttachments": true,
    "attachmentIsRequired": false,
    "attachmentLabel": "",
    "attachmentHelpText": ""
  }
}
Use Small Header
This option will use smaller sized text for the GeoForm title and description instead of the larger Bootstrap Jumbotron(2).
useSmallHeader": false,
Enable Sharing
This option displays sharing links when a submission occurs. If you wouldn't like to display the sharing links when a user submits an entry, set this option to false.
"enableSharing": true,
Symbol
Set the symbol to use when a user selects a location. See the pushpins.js file for all the available options. You can modify this file to add your own custom symbols.
"pushpinColor": "grey",
Sharing Host
Use this template in an ArcGIS organization or portal application by changing this sharinghost URL to point to the location of the portal or organizaton.
"sharinghost": "http://myorg.maps.arcgis.com",
Reset to default extent on submission
defaultMapExtent: true,
Basemap Toggle Dijit
enableBasemapToggle: false,
Basemap Toggle next basemap
nextBasemap: "hybrid",
Basemap Toggle default basemap
defaultBasemap: "topo",
Automatically locate user on page load
locate: false,
Localizing the template
If you'd like to use this template with a language that is not currently supported, please follow these instructions to translate the template for a new locale.
A language is loaded depending on what the browser's locale is set to and if the language is defined in the template.
- Modify the /js/nls/resources.js file to add a new language.
- Open up the file and scroll to the bottom. You will see a list of supported langauges by thier id string. such as '"ar": 1'.
- To add a new language, create a new property with the language code. This tells the template that the new language is available to be used. ex: "fr":1,
- Create the folder in /js/nls/ for the language. Make sure this name matches the language code. ex: /js/nls/fr/
- Copy the /js/nls/resources.js file into your new language folder ex: /js/nls/fr/resources.js
- Remove all the strings with '"locale": 1' from the copied file.
- Modify the language file and translate the strings into the new language. ex: /js/nls/fr/resources.js - modified with strings changed
If you'd like your language to always be loaded no matter which browser locale the user is running you can modify the dojoConfig to add the locale you wish to load. This is located in the /index.html file near the top.
var dojoConfig = {
    locale: "fr"
};
See Dojo's localization help for more information.
Resources
Issues
Find a bug or want to request a new feature? Please let us know by submitting an issue.
Contributing
Anyone and everyone is welcome to contribute. :)
Licensing
Copyright 2012 Esri
Licensed under the Apache License, Version 2.0 (the "License"); you may not use this file except in compliance with the License. You may obtain a copy of the License at
http://www.apache.org/licenses/LICENSE-2.0
Unless required by applicable law or agreed to in writing, software distributed under the License is distributed on an "AS IS" BASIS, WITHOUT WARRANTIES OR CONDITIONS OF ANY KIND, either express or implied. See the License for the specific language governing permissions and limitations under the License.
A copy of the license is available in the repository's license.txt file.


