- Build a picture game using a collection view controller
- Become familiar with data handling, view layout, and subclassing reusable views
- Determine the game winning sequence to trigger a segue and modally present another view controller
A collection view is an organized view with a customizable layout that manages an ordered collection of data items. Unlike a table view which is restricted to displaying only rows, collection views can display rows, columns, and other unique layouts.
There are two key parts to a collection view:
- Data (the information displayed in the view)
- Layout (how the information is displayed)
This lab will focus on implementing the necessary protocols to satisfy these key parts. Collection views can be difficult to understand at first but Apple's documentation is always a great resource for learning about the different parts of a collection view. Check out these pages for clarification on steps within the lab.
- UICollectionView
- UICollectionViewController
- UICollectionViewDataSource
- UICollectionViewDelegate
- UICollectionViewDelegateFlowLayout
- Open the project file and navigate to the
Main.storyboardfile. You will notice that it's empty. - Go to the Utilities sidebar and search the Object library for a Collection View Controller object.
- Drag a Collection View Controller object on to the canvas.
- With the controller selected, go the the Attributes inspector and set the controller as the initial view controller.
With the controller selected in the main storyboard, take a look at the Connections inspector. You will notice that the dataSource protocol and the delegate protocol are connected as referencing outlets. A collection view is like a table view in that it has protocols for providing data to the view and for listening to changes on the view (e.g., if a user selects a cell, etc.).
These referencing outlets are created automatically when a Collection View Controller object is dragged on to the canvas in interface builder. This means the controller conforms to the protocols and becomes the data source object and the delegate object of the collection view. These connections also carry over when a custom class is connected to the controller in the Identity inspector. That's what you will do next.
- Create a new swift file called
CollectionViewControllerand save it to the project file. - Change
import Foundationtoimport UIKit. - Create a class called
CollectionViewControllerthat inherits fromUICollectionViewControllerand leave the body of the class empty for the moment. - Go back to
Main.storyboardand connect the custom class you just created to the Collection View Controller via the Identity inspector.
Since the CollectionViewController class conforms to the data source protocol via interface builder, a minimum of two methods are required to provide data to the collection view:
collectionView(_:numberOfItemsInSection:)
collectionView(_:cellForItemAt:)
The first data source method, collectionView(_:numberOfItemsInSection:) returns an integer with the number of items to display in a section. The second method, collectionView(_:cellForItemAt:), returns a UICollectionViewCell with content to display at the specified index path.
- Add the two required methods to the
CollectionViewControllerclass. - For now, return
12incollectionView(_:numberOfItemsInSection:) - Before defining
collectionView(_:cellForItemAt:), go toMain.storyboard. Select the collection view cell from the document outline and set the Reuse Identifier as "puzzleCell". - Back inside
collectionView(_:cellForItemAt:), declare aUICollectionViewCellusingdequeueReusableCell(withReuseIdentifier:for:). The dequeue method is called on thecollectionViewproperty of the controller class (i.e.,self.collectionView.dequeue...). - Update the background color property of the cell by assigning a color value (e.g.,
UIColor.purple). - Return the cell to complete the
collectionView(_:cellForItemAt:)method. - Build and run the application. Your collection view should display 12 purple cells.
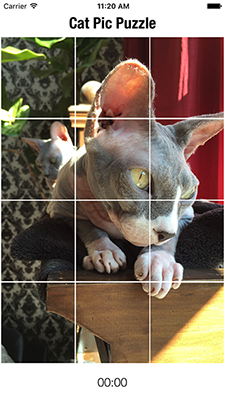
The collection view cell needs to include an image view in order to display the different image slices of the cat picture puzzle. An image view could be added to the cell directly inside of collectionView(_:cellForItemAt:) but a better approach is to subclass a UICollectionViewCell. This way the subclass can handle all the functionality that only relates to the cell. This approach is more organized and scalable. The good news is the subclass has already been created for you.
- Go to the
CollectionViewCell.swiftfile and review the subclass ofUICollectionViewCell. Note that there's animageViewproperty and two initializers that call the samecommonInit()method. - Go to
Main.storyboardand select the collection view cell in the document outline. - With the cell selected, add
CollectionViewCellas the custom class in the Identity inspector. - Go back to the
CollectionViewController.swiftfile to make some edits tocollectionView(_:cellForItemAt:). - Replace the statement that assigns the background color with a statement that accesses the
imageViewproperty of the custom cell class. Assign a value ofUIImage(named: "cats"). See the hint below to get this part working. - Build and run the application. You should see 12 repeating cat pictures.
Hint: Even though the custom cell class was connected to the cell in interface builder, dequeueReusableCell(withReuseIdentifier:for:) still returns a cell of type UICollectionViewCell. Is there something you could add on to the end of this statement to indicate the return should be of the custom type CollectionViewCell? Perhaps a force downcast could help?

