
This exercise allows you to practice and apply the concepts and techniques taught in class.
Upon completion of this exercise, you will be able to:
- Create and render React components with multiple props.
- Use props to pass data to components and display the data received through props within the components
- Use props and
props.childrento pass JSX to a component - Use inline styles to modify the appearance of components
In this exercise, you will practice working with 'props' in React. You'll learn how to pass data to React components using props, and how to access and utilize the data received through props inside components.
To see the expected result for each iteration, refer to the solution example: React Training - solution.
- Fork this repo
- Clone this repo
cd lab-react-props-training
npm install
npm run dev-
Upon completion, run the following commands:
git add . git commit -m "done" git push origin master -
Create a Pull Request and submit your assignment.
Inside of the src/ folder, create a new folder named components.
Use the components folder to store all the components that you create in the following iterations.
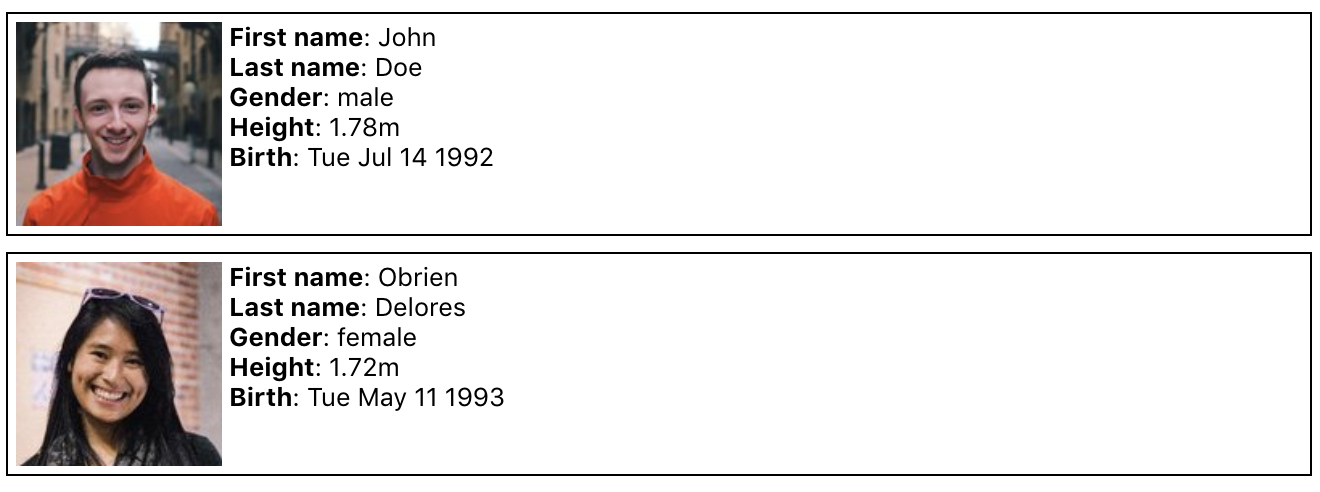
Create and render an IdCard component with 6 props:
lastName: A stringfirstName: A stringgender: A string,'male'or'female'height: A numberbirth: A datepicture: A string
Example:
<IdCard
  lastName='Doe'
  firstName='John'
  gender='male'
  height={178}
  birth={new Date("1992-07-14")}
  picture="https://randomuser.me/api/portraits/men/44.jpg"
/>

<IdCard
  lastName='Delores '
  firstName='Obrien'
  gender='female'
  height={172}
  birth={new Date("1988-05-11")}
  picture="https://randomuser.me/api/portraits/women/44.jpg"
/>
Expected Output:
Create a Greetings component with 2 props:
lang: A string that can have values:"de","en","es"or"fr"children: A text
The component should display a greeting text in the chosen language.
Example:
<Greetings lang="de">Ludwig</Greetings>
<Greetings lang="fr">François</Greetings>
Expected Output:

Create a Random component with 2 props:
min: A numbermax: A number
The component should display a random integer in the range between the min and the max number.
Example:
<Random min={1} max={6}/>
<Random min={1} max={100}/>
Expected Output:

Create a BoxColor component that displays a rectangle with a background color based on props. For this, you will need to add inline styles (documentation).
The component should take 3 props:
r: A number between0and255representing the amount of redg: A number between0and255representing the amount of greenb: A number between0and255representing the amount of blue
Example:
<BoxColor r={255} g={0} b={0} />
<BoxColor r={128} g={255} b={0} />
Expected Output:
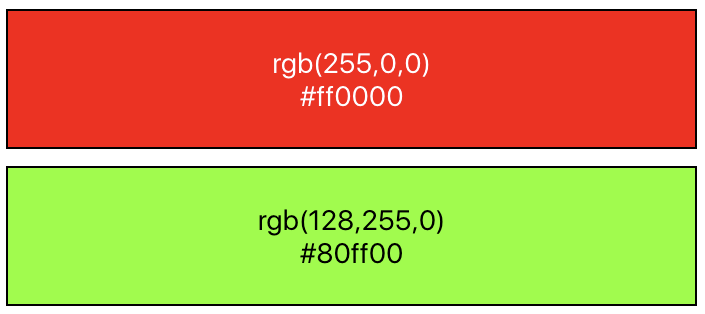
As a bonus, you can also display the hex values of the color (e.g., #ff0000 for red).
Create a CreditCard component that displays a rectangle with the information coming from the props.
The component should take 8 props:
type: A string that can be"Visa"or"Master Card"number: A string that is the number of the credit card. For security reasons, you should only display the 4 last digits 😉expirationMonth: A number that represents the month, between 1 and 12expirationYear: A number that represents the yearbank: A string that represents the name of the bankowner: A string that represents the name of the ownerbgColor: A string for the background color of the cardcolor: A string for the text color of the card
Take your time to make the component look as close to the expected output as possible. You'll probably want to use flexbox.
Example:
<CreditCard
  type="Visa"
  number="0123456789018845"
  expirationMonth={3}
  expirationYear={2021}
  bank="BNP"
  owner="Maxence Bouret"
  bgColor="#11aa99"
  color="white"
/>

<CreditCard
  type="Master Card"
  number="0123456789010995"
  expirationMonth={3}
  expirationYear={2021}
  bank="N26"
  owner="Maxence Bouret"
  bgColor="#eeeeee"
  color="#222222"
/>

<CreditCard
  type="Visa"
  number="0123456789016984"
  expirationMonth={12}
  expirationYear={2019}
  bank="Name of the Bank"
  owner="Firstname Lastname"
  bgColor="#ddbb55"
  color="white"
/>
Expected Output:

Create a Rating component that displays 5 stars. Depending on the value received, some stars should be empty (☆), and some should be filled (★).
The component should take 1 prop:
children: A number between0and5. The value can be a floating-point number. If the number received is3.9, the component should display 4 stars.
Example:
<Rating>0</Rating>
<Rating>1.49</Rating>
<Rating>1.5</Rating>
<Rating>3</Rating>
<Rating>4</Rating>
<Rating>5</Rating>
Expected Output:

Create a DriverCard component that displays a rectangle with content based on the received props.
The component should take 4 props:
name: A stringrating: A number between0and5. The value can be a floating point number.img: A stringcar: An object with propertiesmodelandlicensePlate.
Example
<DriverCard
  name="Travis Kalanick"
  rating={4.2}
  img="https://si.wsj.net/public/resources/images/BN-TY647_37gql_OR_20170621052140.jpg?width=620&height=428"
  car={{
    model: "Toyota Corolla Altis",
    licensePlate: "CO42DE"
  }}
/>

<DriverCard
  name="Dara Khosrowshahi"
  rating={4.9}
  img="https://ubernewsroomapi.10upcdn.com/wp-content/uploads/2017/09/Dara_ELT_Newsroom_1000px.jpg"
  car={{
    model: "Audi A3",
    licensePlate: "BE33ER"
  }}
/>
Expected Output:

Happy coding! 💙

