Build a Basic Web Server
Overview
In this lab, we are going to build a simple server in Node.js that can post a new message and respond with a list of messages.
Introduction
Imagine you've been hired by a client to build a prototype of a Node-based messaging server. For the moment, they just want a simple messaging API that they can use to test out various frontend UI/UX designs. The server doesn't need to persist the data (i.e. store it in a permanent database), but they do want the API to have the following capabilities:
- Message submission
- Message retrieval
- End-to-end encryption of messages
This will be fun! Let's go.
Getting Started
As usual, our development process here will follow the technique of test driven development. So begin by running the command: npm test. You should see an error because we've not yet installed the mocha testing library. Let's do that now:
npm install mocha --save-dev
npm install mocha-multi --save-dev
npm install chai --save-dev
Now when you run npm test, you should see that the tests are running, and one test for "has the correct devDepenencies" should be passing.
Now we need to install the other dependencies. You should be familiar with this process from the previous npm lab, so let's see if you can do it on your own. Remember that the tests in the /tests serve as a kind of specification for this project (a blueprint in a way). Look there to see what packages you may need to install.
Hello, World!
Now, as tradition demands, we should set up a "Hello, World" server don't you think? This will help introduce you to the basic pattern that we will use throughout the lab in order to build our server. As you may have noticed already, there is a test written for this use case, and naturally it is failing at the moment:
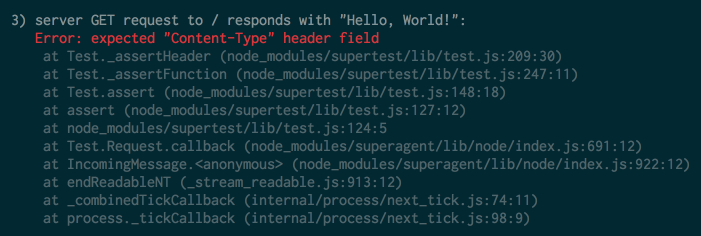
Because tests serve as a spec for the code we need to write (this is why they are so helpful!), we can see from the title of the test what it is we need to do: "GET request to / respond with 'Hello, World!'. We need to write code such that our server can accept a request of method "GET" to the root path / and then respond with a "Hello, World!" This shouldn't be too hard!
Let's see if you can get this test to work. Since we're just getting started here, we've placed some boilerplate code in the project to get you going in the right direction. Take a look at the server.js file. This will be the file that contains our server logic. Looking in this file you should see a snippet like this:
const router = new Router();

router.get('/', (request, response) => {
  // A good place to start!
  response.end();
});
So what do we have here? First of all, const router = new Router() instantiates our "router." You will encounter this term "router" frequently in the world of web applications. Essentially, a router is the piece of a web application that matches certain url requests to the right pieces of code, sometimes called "business logic", which then are responsible for returning the desired result.
Note: In our code we are using a pre-written router module for Node. You installed that package in the setup stage of this lab, and it is imported in the
server.jsfile with the command:const Router = require('router'). There are a great many such router modules; we are using this one, which has been extracted from the popular Express.js web server framework for Node. We will be learning about Express later in this unit!
The code snippet above, then, sets up a "route" from a request to the server root path, i.e. http://localhost:3000/ to the code that is contained within the function that is passed to the router's get method. There's a lot to talk about here actually.
First, notice that the method passed into get (written with the ES6 "fat arrow" syntax) takes two arguments: request and response. These are very important objects and we will be using them a lot when we work with Node. For now, what you should know is that the request object contains information as well as method relating to the "request" that has come in from the client. The response object, as you may have guessed, contains information and methods about the server's response.
Moving on, do you notice anything familiar about this function that we've passed into the get method? Do you recognize this pattern?
That's right. It's a callback! The asynchronous character of the process may not have been immediately obvious to you, but it's the same idea that was explained previously: The server is waiting for a GET request to the path /. When will that request come in? No one knows. It will happen at some indeterminate point in the future. And when it does, the get method will call the callback function that we supply.
Bottom line here: Congratulations, you're about to write some asynchronous JS code with callbacks!
You may remember from our lesson on callbacks that one way to explain a callback function is to say that it encapsulates the logic about how our program should continue in the future. Keeping this in mind how should our program proceed once a get request to / is received? At the moment, the only code inside the callback function is a comment, directed at you dear learner, and a call to a method end on the response object. This is an important function. Let's see if you can modify the code inside in this callback to get the test for this route in our testing file (test/server_test.js) to pass.
In order to get oriented here, it might be a good idea to take a look at the node documentation for the
endmethod on theresponseobject. Also, if you look at the test, you'll notice that the test checks to see if theContent-Type"Headers", which signal to the browser what kind of data has been set appropriately. In this case, we are just sending some text so we can use the type "plain/text".
When testing your code, you can of course run npm test to check if your code is passing the Hello World test passes. However, if you would like to do some manual testing, you can start the server by opening your terminal and running node run-server.js. This will start the server on port 3000. You can then test the server in your browser, by going to http://localhost:3000, or, better yet, test it by calling the browser using the curl command line tool, like so:
curl -X GET http://localhost:3000Note: We will be using the curl command line tool in the next section of this lab, so you may want to get familiar with it.
POSTing a Message
Okay, so you got the server to respond: "Hello, World!" Good job! To a large extent, the code the you've just made work represents the main pattern that you'll use through this lab. In each case, you'll define a route, and then within a callback function that you pass in, you will define the "business logic" that the server should follow to produce the desired response. With that in mind, let's move on.
Now that we've built our "Hello World" server, let's start to build out our messaging apparatus. The ability to add messages seems like a good place to start, no? Then we can work on our retrieval pathways.
So what do we need to do? First, of all we need place to store the messages. Let's just store our messages in memory to keep things simple. This will mean that the messages we create won't persist if we shut down the server, but that's okay for our purposes. To achieve this, let's define a variable messages that will start as an empty list or Array. You can put this somewhere near the top of your server.js file:
let messages = [];
Note, that in the line above we are using the new ES6 variable assignment keyword let. You will need to put the compiler into strict mode for this to work, otherwise you'll likely get an error when you run the code. (To put the compiler into strict mode, just add "use strict"; to the top of the file.)
Next let's define a new route for submitting messages. In order to send data to the server, we want to use a different HTTP request "method." For the Hello World server we used a standard GET request, but for sending messages we'll use the POST method. A code stub like this will get us started:
route.post('/message', (request, response) => {
  // Save the message and send the message id back to the client.
});
At this point, our server can catch a POST request to the path /message. Great! But how will we get our message data into the system? Now, normally you'd probably have a web frontend that submits the data through the browser. As mentioned above, we'll simulate this by using curl. The following command will submit a message to our new path:
curl -X POST http://localhost:3000/message -d '{"id":1,"message":"Our first message."}'Okay, so this is how we'll submit data, but how will we read in our route's logic? Here's where we will use the request object that is passed to our callback function as an argument. However, although this object contains a lot of information about the request being made to the server, by default it does not contain the data that we've sent across in our curl request in a way that is easily accessed. To make things a bit easier, we'll use another Express module called body-parser. As its name suggests, this module parses data that the server receives from the client in the request body. It then attaches this parsed data to the request object's body parameter.
The body-parser is also a special kind of module known as "middleware." You'll be using middleware frequently when programming in Node. As its name suggests, middleware is software that runs in between; that is, it is code that, in this case, is executed after a request is sent to the server, and before the server sends its response.

In order to run the body-parser middleware, we need to register it with our router, like so:
 // Import the body-parser. Place this line near your other imports
 // at the top of your server.js file.
 const bodyParser = require('body-parser');

 // Now register the middleware with our router, indicating that we
 // want to use the parser for JSON data.
 router.use(bodyParser.json());
Now that we've got the body-parser in place, we are finally in a position to submit our message to the server. Excited? Good, I hope so. Let's see if you can get those tests to pass by yourself. Here are a few hints and things to consider:
- Now that our body parser middleware is in place, you can access the data you pass to the server on the request object's body parameter:
request.body. - Note that unlike our Hello World server, the data we are sending back and forth here is JSON data. That's what our bodyParser is parsing. As such, we'll want to set the headers appropriately.
- How will we represent our messages on the server? Each of our messages needs an id, plus a text message. Maybe it's a good idea to create a javascript class? It's also possible that this would "over-engineer" the problem. What do you think?
Retrieving Messages
Okay, so now you've got a server that's able to accept a POST request to /message and save the supplied message in memory. Wonderful. Now let's teach our server to retrieve messages.
First, let's tackle the use-case where we just want to get all the messages. We'll use the route /messages. You should be able to do this by yourself. When you're done with that we'll move onto the slightly more complicated scenario in which we'd like the server to return a specific message specified by its id. As you are working on this part, remeber to set the response headers correctly. You will also need to transform your data into a JSON string before sending it to the server. Google a bit. You should be able to discover how to do this.
Retrieving a Specific Message
Okay, this step is a bit more challenging. Again, we have to deal with some server setup so that we can easily extract the id from the request. First, let's think about how we will indicate to the server which message we want. We'll use a GET request for this route, as we are attempting to get rather than send (or post) data. We do, however, need to send the id of the message that we want. One elegant way of doing this is to simply attach the id to the end of the url path, like so:
/message/1
That's nice and concise, no? Now let's imagine how that form could be generalized. Something like this maybe:
/message/:id
Yep that makes sense, and in fact it's a common convention used by many node modules and other web libraries and frameworks. In order to get our server to make sense of this convention, however, we're going to have to modify the setup options for our router module. We need to activate the mergeParams functionality by sending some options into our router's constructor method when we instantiate it:
const router = new Router({ mergeParams: true });Now we are ready to define our route:
router.get('/message/:id', (request, response) => {
  // Now the scope of this callback includes an `id` variable
  // that contains the id specified in each request.
});
Cool, huh? Let's see if you can now carry this one to the finish line on your own. I know you can! The trickiest part will be to locate the message in our list of messages. Have you ever used the array find method? You could certainly give that a try. It's fun and elegant to use. Also, what is going to happen if the user requests an id for a message that does not exist? We certainly wouldn't want the whole server to crash in that case, right? Anyway, you got this!
Encryption
Okay, we are mostly done here. But there's one last challenge here. And it's a pretty cool one. For the sake of security, our client wants to be able to ensure users that their messages cannot be interecepted by hackers or other potential hostile parties on the web.
This might sound immensely complex, but in fact -- thanks to some good node modules plus your cleverness as a developer -- this is eminently achievable! The basic idea is simple. We'll make it possible to set a query parameter on the /messages and message/:id routes called encrypt. When encrypt is set to true, the server will encrypt the messsage string before sending it across the wire back to the client.
The actual encryption will be handled by a tool commonly used to encrypt passwords called bcrypt. Bcrypt has a simple api that takes a string and encrypts it. The methods in this api, like our router's get and post methods, take a callback. So here too you'll be writing asynchronous JS.


