Because the world of 3D printing is a bit difficult for the uninitiated, I've put together this guide for using the printer here at Origin Code Academy.
I'll begin with some terms and then go into common workflows.
The FlashForge Creator Pro printer is of the fused deposition modeling (FDM) type. You build up a model by adding layer after layer of new material.

Think of this as the opposite of a CNC milling machine which starts with a block of something and then cuts down into it to progressively remove material from the original stock material.

Both types of machines use toolpath files which tell either the extruder (3D printer) or the drill (CNC) where to move. The most popular toolpath file contains GCODE.
The act of taking a 3D model and turning it into GCODE is calling "slicing" since all the instructions for the machine are layer-specific. A CNC machine will start from the top and make progressive slices down and a 3D printer will start from the bottom and work up.
My favorite slicer at the moment is Cura and includes a number of useful features. Given the many variables involved, it's best to have a mature slicer so that you can adjust those variables to ensure a great print.

The original acronym for model files which are ready to be sliced was STereoLithography but there are more useful backronyms like Standard Tesselation Language, for example, which is a better description of 3D printing.
An STL file will contain a 3D model of the part which is represented by an array of its usually-triangular faces. A synonym for STL is "mesh", for what it's worth.
Although this file allows you to slice it for your printer, it doesn't easy allow edits to the original 3D model itself. Simple transformations are possible, like rotating the model or scaling it, however.
There are a number of popular websites which host these STL/mesh files.
- Thingiverse biggest/most popular
- YouMagine Ultimaker's site
- Pinshape 3DPrinterOS's website
- MyMiniFactory all designs have been tested before inclusion
- GrabCAD targetted more to engineers
- Autodesk 123D a.k.a. TinkerCAD web-based
- Autodesk's Gallery contributions by owners of Autodesk Fusion 360
Computer-Aided Design software is used to create one or more models and then to export it/them as STL.
My favorite CAD software at the moment is Autodesk Fusion 360 since it is fairly advanced and full of features. Models created are stored in the cloud but can be exported and otherwise shared with others.
Having this model file allows others to edit the model, add onto it and to completely modify the design. Note that the STL/mesh file does not allow this capability.
Here is an overview of a typical activity which results in a plastic part. I am describing the process I use at home. A separate workflow for the FlashForge printer will appear next.
- Using Autodesk Fusion 360:
- create a 2D sketch
- expand that sketch into the third dimension
- iteratively select a surface and repeat this, noting that a negative expansion cuts into the model's surface
- finally, select the solid object and export it as STL
- Using Cura, slice the STL file for my printer and a particular filament I intend to use, saving as a GCODE file
- Using OctoPrint, upload the GCODE file to the printer's embedded computer and start the print job

Note that my printer at home includes an embedded computer with a web service interface and wi-fi connectivity. Although the printer includes an LCD screen, most interaction with the printer is via the web interface. Note that it is unnecessary to stay connected to this interface for the job to continue to completion.

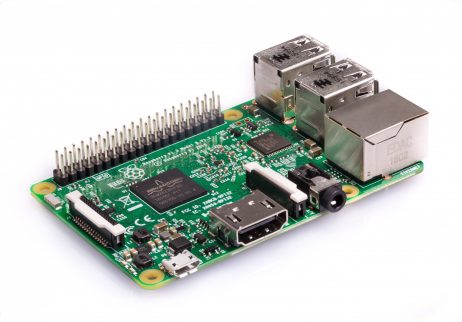
The GCODE is physically stored in a microSD card which is inserted into the Raspberry Pi 3 embedded computer. It is easy to upload files to this card without removing it or physically connecting to the printer.
- Using Autodesk Fusion 360, for example:
- create a 2D sketch
- expand that sketch into the third dimension
- iteratively select a surface and repeat this, noting that a negative expansion cuts into the model's surface
- finally, select the solid object and export it as STL
- Using ReplicatorG, slice the STL file for the printer, then export as an X3G file
- By removing the SD card from the printer and inserting it into your workstation, add the X3G file to the /ENG folder, replace the card back into the printer and start the print job from the LCD menu
Note that the Creator Pro has a heated bed which allows the initial layers of a print job to adhere better as well as helping to prevent some parts from curling off the bed as they cool.
The printer includes a USB Type B adapter cable so it's possible to connect your laptop to it and print directly from ReplicatorG. If the job takes four hours, your laptop would need to be tethered to it for four hours, unfortunately, so it's best to initiate jobs only from the LCD menu.
There are many types of filaments which are popular now in the 3D printing world. They vary in price and suitability.
Each type of plastic has its own characteristics which then determine how hot it should be extruded as well as the heat of the bed. For this reason, the slicer needs to know not only which printer you intend to use but which extruder, the nozzle size and the filament as well.
Here is a short list of filaments in the 1.75mm diameter:
- PLA - Polylactic Acid is biodegradable filament made from corn starch
- ABS - Acrylonitrile butadiene styrene is a filament made from styrene
- PVA - Polyvinyl alcohol is a water-soluble filament used to create supports and other non-part features which then wash away when the part is submersed
Given that a particular slicing session will produce GCODE which works for a particular printer and filament, properly naming files is important, for example: MyPart-CreatorPro-PLA-Left.gcode.
A good slicer will include many configurations to allow you to "dial in" a good print.
- Rafts: A raft looks a bit like something that Huckleberry Finn would have sat on. Somewhat larger than the base of your part, it assists with adhesion to the bed.
- Supports: A support is a usually vertically-oriented column which then will provide somewhere for a roof to be printed, for example.
- Infill: The inner parts of model don't show when it's complete so there are options for minimizing the plastic used, maximizing strength and adjusting the speed during this part of the print.
- Quality: Often, there will be several quality-related profiles for the printer to allow fast parts versus smooth outer surfaces.
For some of my more complicated parts I might have printed several versions before finding a perfect combination of model/STL/GCODE to make it work.
I wouldn't say that 3D printing is yet at the phase where it would be considered "consumer-friendly". There are too many frustrating and often-misunderstood variables.
- First-layer adhesion: Probably the #1 problem for everyone using a printer is the inability to get the first layer to adhere correctly. Extruder and bed temperature are two of the variables, to also include layer height, extrusion amount, part fan speed, humidity, room temperature and nozzle size to name a few. The #1 problem is usually the z-offset, as adjusted, but I have done this for you (see the next item). When printed, the first layer should look like a rectangle by cross-section rather than having either a curved top surface or a u-shaped profile.
- Print bed uneven: It's crucial for the moving extruder assembly to have an even playing field. A poorly-leveled bed is the usual cause of this. The Creator Pro includes three manually-set thumb screws which I have expertly adjusted for you. Please don't attempt to re-adjust these without the proper training and supervision.
- Poor print quality: There are a number of reasons for this and it all depends upon how the quality is suffering. The slicer settings could have asked for extruder movements which are too fast, too little or too much extrusion, the wrong temperature, too little or too much cooling...
- Bad filament: Even brand-new filament could be poorly wound on the spool, resulting in cross-threading lockups later in the print. Some filaments are susceptible to absorbing water vapor which then makes them brittle. Cheaper filaments might have poor quality control over the diameter of the strand itself or even bubbles appearing it its surface.
- Wrong filament: With a printer like the Creator Pro, it's too easy to accidentally select the wrong extruder and thus, the wrong filament for a particular job. This would result in the wrong temperatures settings and for our current configuration, the wrong part color as well.
- Incorrect slicing options: The slicing software allows options such as to include a raft and/or part supports. Omitting a support for a small house with a ceiling would result in a roof which doesn't work out, for example.
- Incorrect slicing orientation: Once you've had a chance to do some of these, you'll begin to figure out which way the part should be oriented to produce a good-looking part.
- Print bed covering material: Your Creator Pro's print bed has a good-quality covering so it is unnecessary to use painter's tape, hairspray, glue or other gimmicks to assist with adhesion or to worry about their buildup.
This is possibly the most problematic aspect to employing a 3D printer in a venue such as yours. Some of my parts take as long as four days to print, believe it or not.

Other print jobs only take a couple of hours, for example.

The OCA-styled pencil holder which I've just printed at home is about 3" x 1" x 1" and took a total of ten hours to complete at the highest quality setting. A rough estimate then might be three hours per cubic inch of printed material at the highest quality within a factor of two, say.

The OCA-styled coin which I've printed is 3.5mm x 25mm and took forty minutes at the highest setting and twelve minutes at the lowest.


(Click the photo below for a time-lapse video.)

As for items which students might print, I would like to design an OCA-themed medallion/coin/keychain fob which isn't too thick in order to lower the required print time to something more reasonable.
Next to my printer at home, I keep a collection of things which seem to make printing work out for the best.
- digital calipers for accurately measuring parts, bolts or other "other" items which go into the assembly
- tweezers for removing any remnant/hot filament from the end of the extruder before a job starts
- part spatula for carefully removing a part from the print bed surface without damaging either
- freezer for chilling down the removed bed after a print to make part separation easier (five minutes for thin parts)
- knife for removing any remaining pieces of rafts and supports from the part itself
- green kitchen-style scrubbing pad for cleaning off the extruder while it's hot
- hex-end aluminum bolts, bearings and axles for connecting parts together
- needle-nodes pliers for removing supports
- soldering tools and wiring for connecting electronic parts embedded inside plastic parts
- good lighting in the work area allows you to see inside the printer, for example
- desiccant and ziplock bags are necessary for storing partially-used filament to prevent the absorption of too much water
Sometimes, you'll need to physically remove rafts and supports from the part itself.
There are times when I use a rasp or sandpaper for slight touch-ups.
For larger parts, I might use wax paper and a clothing iron to slightly smooth flatter surfaces.
There are times when a long print job is interrupted and you want to start from where it left off. Although this isn't something that most people do, it might be necessary to do some cleanup work afterwards by melting in some extra filament from the side and using the heat from an iron to smooth it down.
I've been working with the processing required to do electro-plating of plastic parts and may have something to show later with this.
I hope to create a step-by-step guide to allow each of you to feel comfortable using the Creator Pro printer, at least to produce parts from files made available to you.
Given that the OCA coins are small and several could be printed per print job, you could consider stock-piling them and using them for some sort of counter or token in an incentive system. I've printed several coins and will bring them in for review.
- Select a file from the SD card and print it to produce a part (relatively easy)
- Using ReplicatorG, bring in an STL file, position the part on the virtual bed and produce GCODE and an X3G file for the SD card (moderately difficult if you don't already have the software installed, easy enough otherwise)
- Using Autodesk Fusion 360, create a model and export it as STL (fairly steep learning curve to get started but it gets easier with experience)
- Removing a freshly-printed part from the print bed (can be difficult to impossible if you don't have a part spatula)
- Removing/replacing the SD card, the metallic side of the card faces you and is pointing down, noting that this should only be removed when it's not actively printing (easy enough)
- Understanding that the lower-most power outlet next to the printer switches off after a timeout (plug it into the top outlet for continuous power)
- Aborting a running print job, press the center button and follow the prompts (easy enough)
The 3D printing world has been moving perhaps a little too fast to fully evaluate the health risks involved in this hobby. Here are a few of those risks.
The reasonable concensus for PLA printing is that the health risks are minimal. There appears to be some concern that ABS produces nano-sized particles of styrene which have been connected to breathing problems for some users.
Given the diversity of your collection of students and instructors, printing with PLA may be the safest choice for the long-term.
Obviously, a hot extruder at 200°C can burn the skin. I'd suggest keeping the door closed once the SD card has been re-inserted in the printer.
Once the print job has completed, the extruder assembly will retire to the back of the printer, making it easier to remove the part from the bed.
There are health concerns about the safety of storing foods in 3D-printed parts. This goes beyond just the plastic in the filament but also to the existence of lead in some hotends/nozzles.
For these reasons, it's probably not a good idea to suggest that these parts be used to store food or drinks unless adequate research is done.
For my own printer, it includes a Raspberry Pi 3 embedded computer inside which includes Raspbian as the operating system and a forked version of OctoPrint to provide a web interface and to drive the LCD screen menu.
Although much of the machine-related programming is done in Python, the interface is classic HTML/JS/CSS and there are plenty of opportunities to tweak things within the interface as well as to create your own plugins since it's all open-source.
I've just completed an OctoPrint plugin to ignore autoleveling commands as seen in a GCODE file, something which is useful if you manually level instead.
Additionally, I've recently completed a CLI application written in the Go compiler for extracting slicing information from a GCODE file. I am also working on an OctoPrint plugin version of same. I've just finished a CLI application written in the Go compiler for chopping a GCODE file into sub-files so that multiple colors, for example, may be used in the same part.
My modified printer now does photography and time-lapse videos. I plan to add a remote-shutter capability to my Nikon camera as well, taking photos from commands in a GCODE file.
It's entirely possible to write multiple stand-alone services on this platform which could do almost anything you could think about. The Raspberry Pi 3 includes a very useful GPIO (General Purpose I/O) interface for controlling physical pins on its header. This is useful for doing any number of things in the world of hardware.
Many 3D printers, especially those in the crowd-funded areas, aren't mature products in the consumer market and arrive with a number of problems in the design areas.
For this reason, many 3D printer enthusiasts become 3D printer modding hobbyists as they attempt to fix these many problems. My own printer sports a number of upgrades and fixes and I will likely continue this trend until I am entirely happy with the resulting printer.

