A image processing library on Android, base on the libyuv.
上篇文章Android libyuv使用系列(一)Android常用的几种格式:NV21/NV12/YV12/YUV420P的区别中我们了解了YUV相关的知识,而本篇文章我会介绍libyuv是什么,以及如何使用libyuv进行相应的图像数据处理。
当我们在 Android 中处理 Image 时,常因为 Java 性能和效率问题导致达不到我们期望的效果,例如进行Camera 采集视频流的原始帧时我们需要每秒能够获取足够的帧率才能流畅的显示出来,这也是为什么美颜 SDK 和图像识别等这类 SDK 都是基于 C / C++ 的原因之一。语言的特性也是关键因素点,所以常常会在 Java 中调用 C / C++ 的 API 来进行相关操作。
因最近工作需求是替代 Camera 的原始打视频流,数据源是 Bitmap 格式的,如果使用 Java 的方法来进行Bitmap 的旋转,转换为 YUV 类型的 NV21 、YV12 数据的话,那么少说也要 15FPS 的视频就尴尬的变成了5FPS的PPT幻灯片了。关于YUV的各种格式区别请见我的博客:直播必备之YUV使用总结 —— Android常用的几种格式:NV21/NV12/YV12/YUV420P的区别,而Google提供了一套Image处理的开源库[libyuv](git clone https://chromium.googlesource.com/libyuv/libyuv)(科学上网),可高效的对各类Image进行Rotate(旋转)、Scale(拉伸)和Convert(格式转换)等操作。
libyuv官方说明
libyuv is an open source project that includes YUV scaling and conversion functionality.
- Scale YUV to prepare content for compression, with point, bilinear or box filter.
- Convert to YUV from webcam formats.
- Convert from YUV to formats for rendering/effects.
- Rotate by 90/180/270 degrees to adjust for mobile devices in portrait mode.
- Optimized for SSE2/SSSE3/AVX2 on x86/x64.
- Optimized for Neon on Arm.
- Optimized for DSP R2 on Mips.
简单来讲,libyuv 就是一个具有可以对 YUV 进行拉伸和转换等操作的工具库。
几个重要的功能:
- 可以使用 point,bilinear 或 box 三种类型的压缩方法进行YUV的拉伸
- 旋转 90/180/270 的角度以适配设备的竖屏模式
- 可将 webcam 转换为 YUV
- 还有一些列的平台性能优化等等
大概了解了libyuv的功能后,我们来看看普通方式和libyuv之间的差距。
我的硬件环境是Macbook Pro和PC,硬件环境如下:
| Hardware | Macbook Pro Retina, 13-inch, Early 2015 | PC |
|---|---|---|
| OS | MacOS Sierra 10.12 | Windows 10 |
| CPU | 2.7 GHz Intel Core i5 | i5 6500 |
| RAM | 8 GB 1867 MHz DDR3 | 16G 2400MHz DDR4 |
| HDD | 128 SSD | 256 SSD |
我们使用一张XXX的Bitmap来做一下对比测试,看看不同的系统环境下,效果如何。
数据源是 Bitmap,项目中会涉及以下几种格式:
| Bitmap | YUV |
|---|---|
| ARGB_8888 | NV21 (YUV420SP) |
| RGB_565 | YV12 (YUV420P) |
StackOverFlow上有网友给出了手动转换BitmapToYuv的方式:
  /**
     * Bitmap转换成Drawable
     * Bitmap bm = xxx; //xxx根据你的情况获取
     * BitmapDrawable bd = new BitmapDrawable(getResource(), bm);
     * 因为BtimapDrawable是Drawable的子类,最终直接使用bd对象即可。
     */
    public static byte[] getNV21(int inputWidth, int inputHeight, Bitmap srcBitmap) {
        int[] argb = new int[inputWidth * inputHeight];
        if (null != srcBitmap) {
            try {
                srcBitmap.getPixels(argb, 0, inputWidth, 0, 0, inputWidth, inputHeight);
            } catch (Exception e) {
                e.printStackTrace();
                return null;
            }
			// byte[] yuv = new byte[inputWidth * inputHeight * 3 / 2];
			// encodeYUV420SP(yuv, argb, inputWidth, inputHeight);
            if (null != srcBitmap && !srcBitmap.isRecycled()) {
                srcBitmap.recycle();
                srcBitmap = null;
            }
            return colorconvertRGB_IYUV_I420(argb, inputWidth, inputHeight);
        } else return null;
    }

    private static void encodeYUV420SP(byte[] yuv420sp, int[] argb, int width, int height) {
        final int frameSize = width * height;
        int yIndex = 0;
        int uvIndex = frameSize;

        int a, R, G, B, Y, U, V;
        int index = 0;
        for (int j = 0; j < height; j++) {
            for (int i = 0; i < width; i++) {

                a = (argb[index] & 0xff000000) >> 24; // a is not used obviously
                R = (argb[index] & 0xff0000) >> 16;
                G = (argb[index] & 0xff00) >> 8;
                B = (argb[index] & 0xff) >> 0;

                // well known RGB to YUV algorithm
                Y = ((66 * R + 129 * G + 25 * B + 128) >> 8) + 16;
                U = ((-38 * R - 74 * G + 112 * B + 128) >> 8) + 128;
                V = ((112 * R - 94 * G - 18 * B + 128) >> 8) + 128;

			/* NV21 has a plane of Y and interleaved planes of VU each sampled by a factor of 2 				meaning for every 4 Y pixels there are 1 V and 1 U.  Note the sampling is 					every otherpixel AND every other scanline.*/
                yuv420sp[yIndex++] = (byte) ((Y < 0) ? 0 : ((Y > 255) ? 255 : Y));
                if (j % 2 == 0 && index % 2 == 0) {
		    if (uvIndex < yuv420sp.length) {
                        yuv420sp[uvIndex++] = (byte) ((V < 0) ? 0 : ((V > 255) ? 255 : V));
                        yuv420sp[uvIndex++] = (byte) ((U < 0) ? 0 : ((U > 255) ? 255 : U));
		    }
                }
                index++;
            }
        }
    }

    public static byte[] colorconvertRGB_IYUV_I420(int[] aRGB, int width, int height) {
        final int frameSize = width * height;
        final int chromasize = frameSize / 4;

        int yIndex = 0;
        int uIndex = frameSize;
        int vIndex = frameSize + chromasize;
        byte[] yuv = new byte[width * height * 3 / 2];

        int a, R, G, B, Y, U, V;
        int index = 0;
        for (int j = 0; j < height; j++) {
            for (int i = 0; i < width; i++) {
                //a = (aRGB[index] & 0xff000000) >> 24; //not using it right now
                R = (aRGB[index] & 0xff0000) >> 16;
                G = (aRGB[index] & 0xff00) >> 8;
                B = (aRGB[index] & 0xff) >> 0;

                Y = ((66 * R + 129 * G + 25 * B + 128) >> 8) + 16;
                U = ((-38 * R - 74 * G + 112 * B + 128) >> 8) + 128;
                V = ((112 * R - 94 * G - 18 * B + 128) >> 8) + 128;

                yuv[yIndex++] = (byte) ((Y < 0) ? 0 : ((Y > 255) ? 255 : Y));

                if (j % 2 == 0 && index % 2 == 0) {
                    yuv[vIndex++] = (byte) ((U < 0) ? 0 : ((U > 255) ? 255 : U));
                    yuv[uIndex++] = (byte) ((V < 0) ? 0 : ((V > 255) ? 255 : V));
                }
                index++;
            }
        }
        return yuv;
    }
上面的方式如果在不苛求性能的情况下是可以满足使用的,然而每秒也就能够达到5~8FPS的水平(与设备的硬件配置也有关系),显然达不到我的需求。那么使用libyuv后的结果如何呢?别着急,我们先看看如何编译libyuv。
将libyuv git clone下来后,我们可以看到结构目录如下:
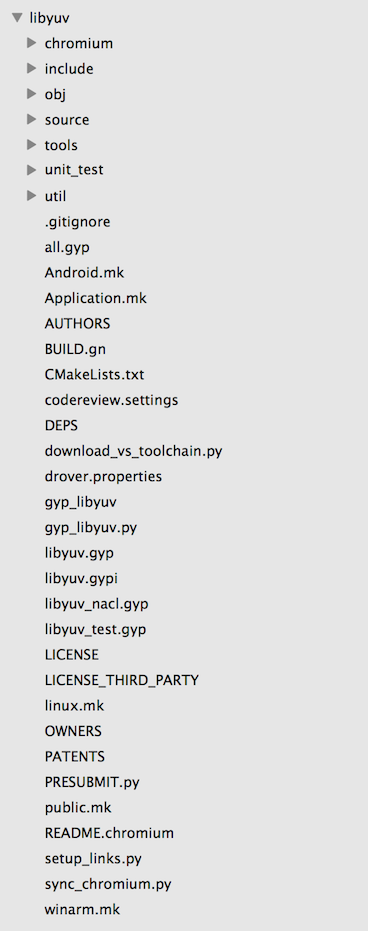
libyuv给出了三个平台的MakeFile文件,可以Build出Windows / Mac OS / Linux三种平台的资源包。因为我使用的是Android,这里以Android.mk为例:
# This is the Android makefile for libyuv for both platform and NDK.
LOCAL_PATH:= $(call my-dir)

include $(CLEAR_VARS)

LOCAL_CPP_EXTENSION := .cc

LOCAL_SRC_FILES := \
    source/compare.cc           \
    source/compare_common.cc    \
    source/compare_neon64.cc    \
    source/compare_gcc.cc       \
    source/convert.cc           \
    source/convert_argb.cc      \
    source/convert_from.cc      \
    source/convert_from_argb.cc \
    source/convert_to_argb.cc   \
    source/convert_to_i420.cc   \
    source/cpu_id.cc            \
    source/planar_functions.cc  \
    source/rotate.cc            \
    source/rotate_argb.cc       \
    source/rotate_mips.cc       \
    source/rotate_neon64.cc     \
    source/row_any.cc           \
    source/row_common.cc        \
    source/row_mips.cc          \
    source/row_neon64.cc        \
    source/row_gcc.cc	        \
    source/scale.cc             \
    source/scale_any.cc         \
    source/scale_argb.cc        \
    source/scale_common.cc      \
    source/scale_mips.cc        \
    source/scale_neon64.cc      \
    source/scale_gcc.cc         \
    source/video_common.cc

# TODO(fbarchard): Enable mjpeg encoder.
#   source/mjpeg_decoder.cc
#   source/convert_jpeg.cc
#   source/mjpeg_validate.cc

ifeq ($(TARGET_ARCH_ABI),armeabi-v7a)
    LOCAL_CFLAGS += -DLIBYUV_NEON
    LOCAL_SRC_FILES += \
        source/compare_neon.cc.neon    \
        source/rotate_neon.cc.neon     \
        source/row_neon.cc.neon        \
        source/scale_neon.cc.neon
endif

LOCAL_EXPORT_C_INCLUDES := $(LOCAL_PATH)/include
LOCAL_C_INCLUDES += $(LOCAL_PATH)/include

LOCAL_MODULE := libyuv_static
LOCAL_MODULE_TAGS := optional
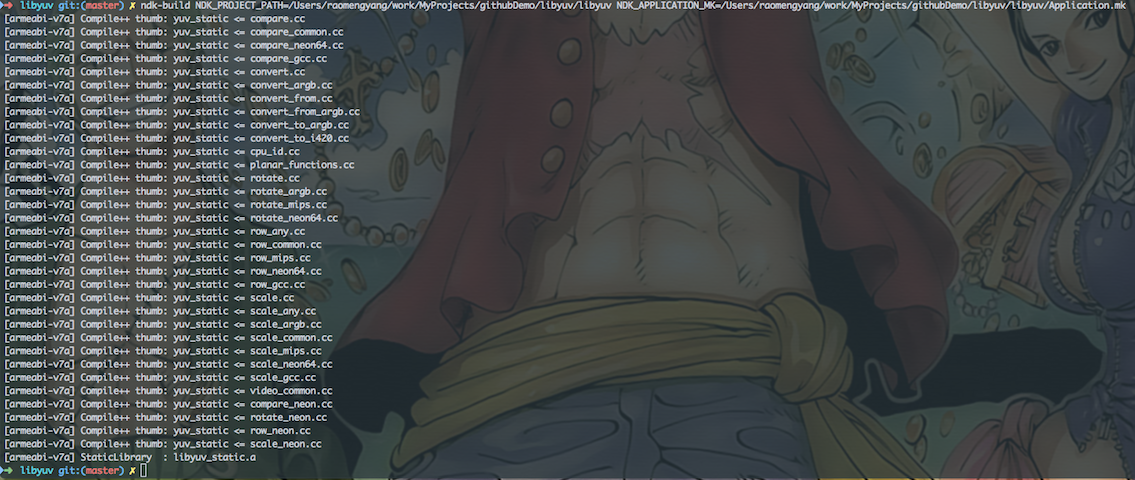
include $(BUILD_STATIC_LIBRARY)常用两种编译方式:
- 直接引入源码
通过Gradle使用脚本的方式代替手动编译。在构建项目的同时将libyuv编译引入,通过Gradle来构建编译,具体方法是在app层级的build.gradle中加入对应的Build Task,指定相关路径,同时构建项目和编译。
- 预先手动将libyuv编译成动态库so文件,放入对应的jniLibs目录下
使用ndk-build命令进行编译,每次执行ndk-build之前都需要ndk-build clean一遍才行,不然不会将新的改动编译进去。
如果使用JNI并且要在 c / c++ 层使用libyuv的话,上述两种方式都需要在项目中的 Android.mk 文件中加入 libyuv 的引用,如:
LOCAL_PATH := $(call my-dir)

include $(CLEAR_VARS)
LOCAL_LDLIBS := -llog
LOCAL_LDFLAGS += -ljnigraphics
LOCAL_SHARED_LIBRARIES := libyuv
LOCAL_MODULE := yuv_utils
LOCAL_SRC_FILES := com_rayclear_jni_YuvUtils.c
include $(BUILD_SHARED_LIBRARY)

include $(CLEAR_VARS)
LOCAL_MODULE := yuv
LOCAL_SRC_FILES := $(LOCAL_PATH)/libyuv.so
include $(PREBUILT_SHARED_LIBRARY)
到这里libyuv的编译工作就基本完成了,准备工作做完后,在需要使用的Activity或者Application初始化的时候添加如下代码进行引入:
public class MyApplication extends Application {

    /**
     * so文件默认前缀带lib,在此引用时需要去掉"lib"和后缀".so"
     * */
    static {
        System.loadLibrary("yuv_utils");
        System.loadLibrary("yuv");
    }

    private static Context sContext;

    @Override
    public void onCreate() {
        super.onCreate();
        initContext();
    }

    private void initContext() {
        sContext = getApplicationContext();
    }

    public static Context getContext() {
        return sContext;
    }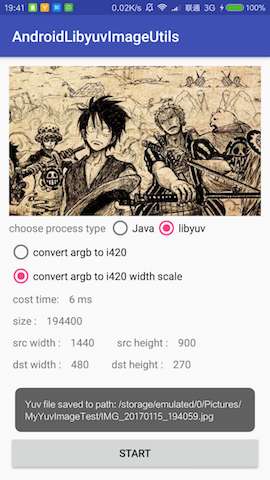
}先上图看看区别:
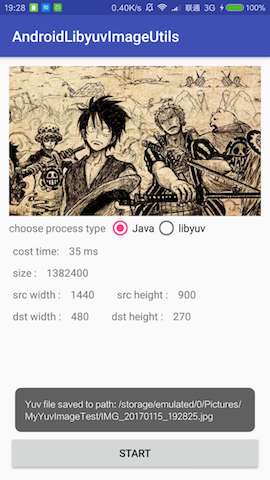

使用Java进行Bitmap转换为YUV时,一张1440 x 900 的Bitmap耗时大概35 ~ 45ms左右,而使用libyuv则花费14~22 ms左右,性能提升一倍,而更暴力的来了,如果同时进行拉伸缩放和格式转换,例如1440 x 90 —> 480 x 270,可以实现 5 ~ 13 ms,性能提升了3 ~ 6倍。这意味着1000 ms可以满足我们不低于25FPS的需求。
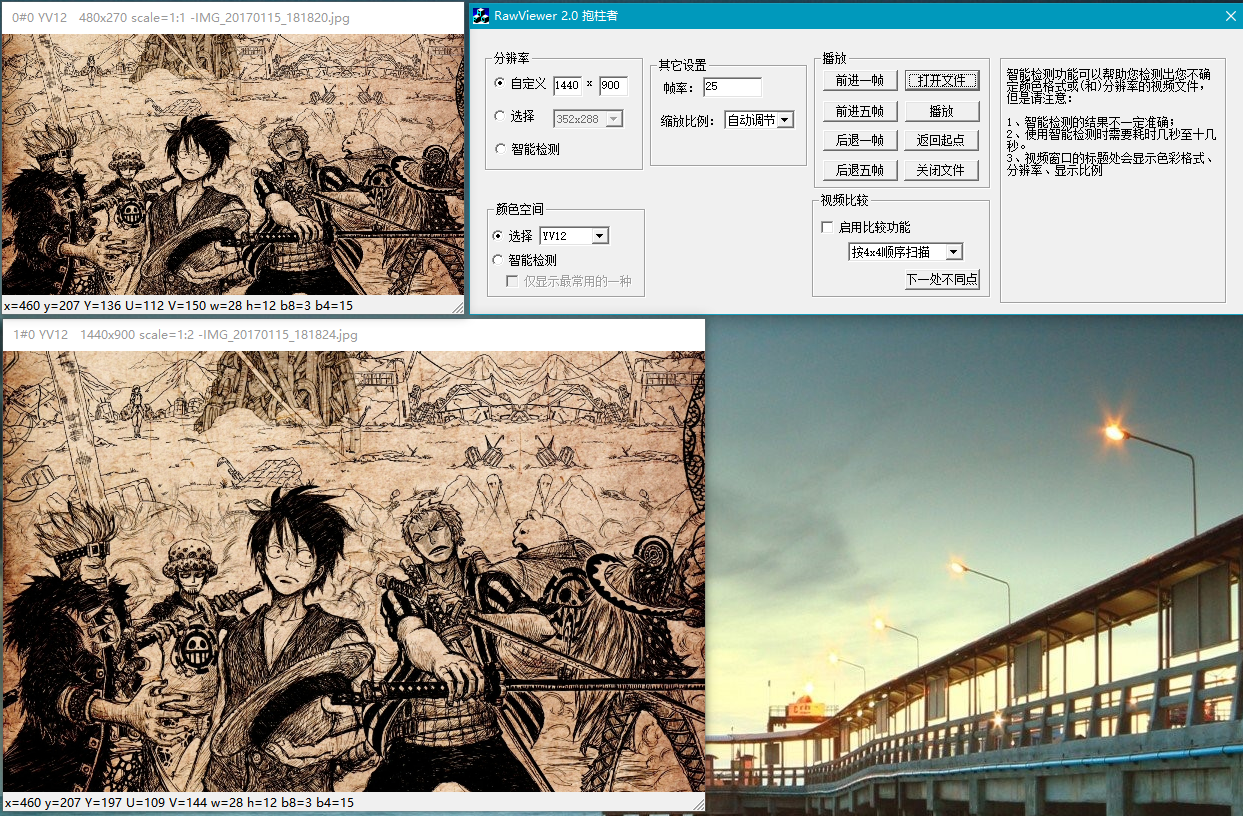
上篇文章中提供了RawViewer的下载地址,但是具体的使用方式还没说,在Demo中有方法FileUtil.saveYuvToSdCardStorage(dstYuv)用于保存YUV文件(.jpeg为后缀的)到存储中,从设备中取到这个文件使用RawViewer打开,打开前先进行RawViewer的参数配置,否则可能会闪退。我们预先设定分辨率及格式后打开即可。如下图所示: