Pixel Art Showcase Frame
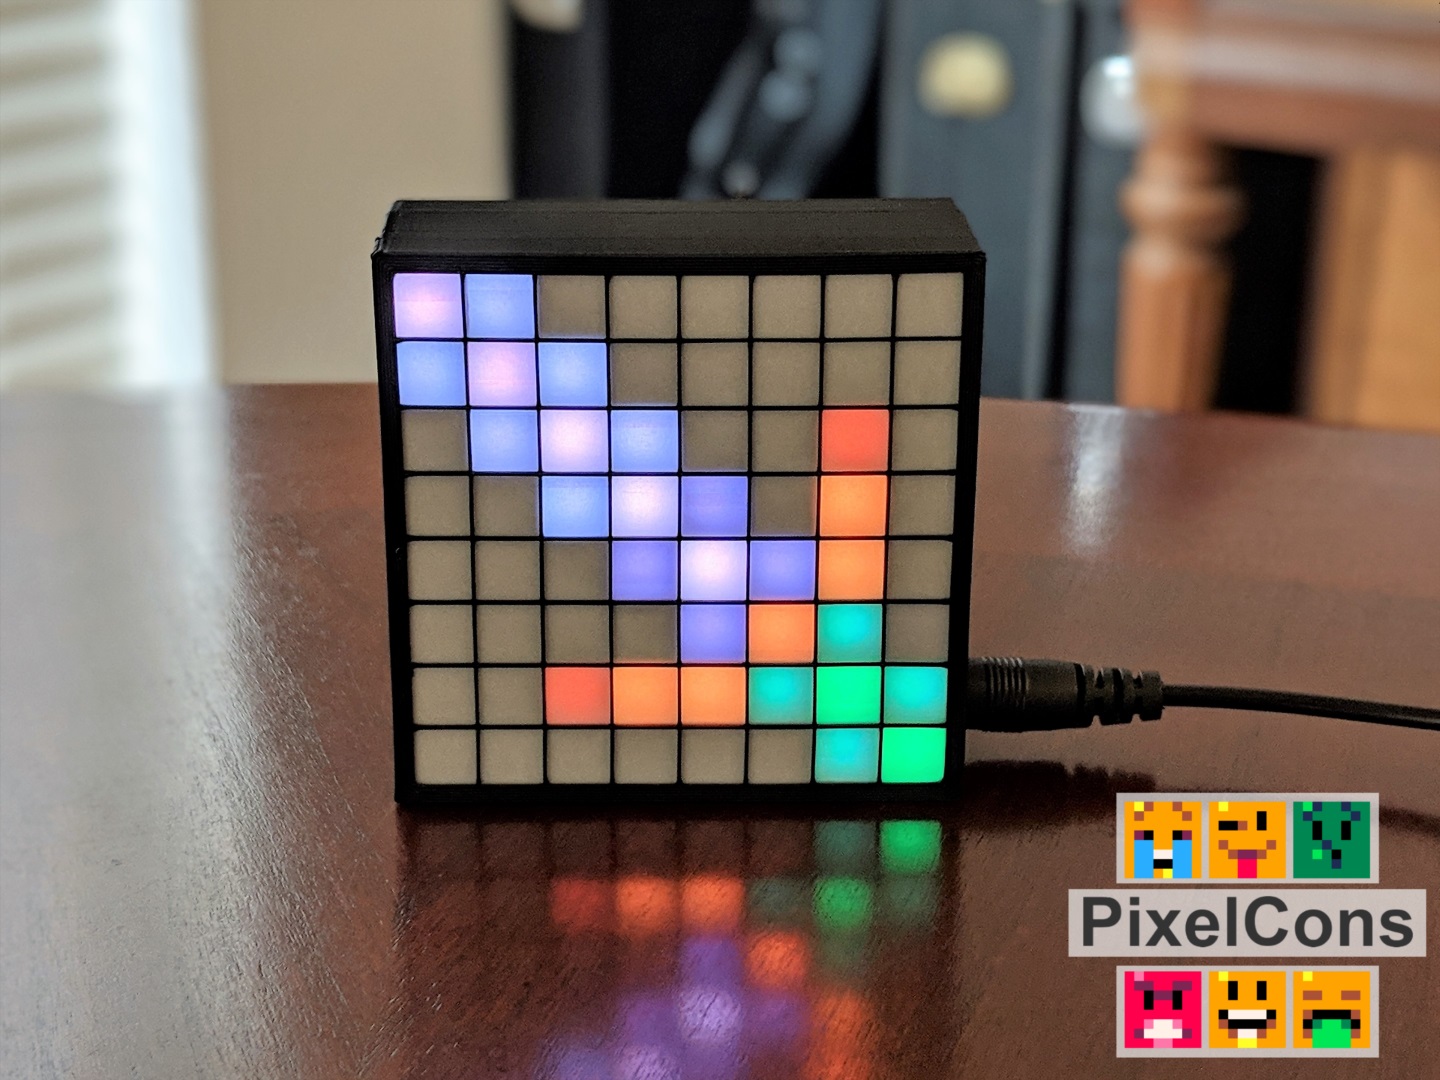
The PixelCon Frame is small device that displays pixel art (known as PixelCons) from the web. The pixel art is displayed on a bright 8x8 matrix of LEDs and is powered by the inexpensive WiFi enabled esp8266 board. Everything is enclosed in a 2.75in square 3D printed case.
Pixel art displayed on the frame comes from the PixelCon ecosystem on the Ethereum blockchain. Anyone can make and explore PixelCon and using the power of the Ethereum blockchain, each PixelCon can be owned, collected, and traded like a cryptocurrency.
Refer to the User Guide here for more information on using/setting up the PixelCon Frame once it's been assembled.
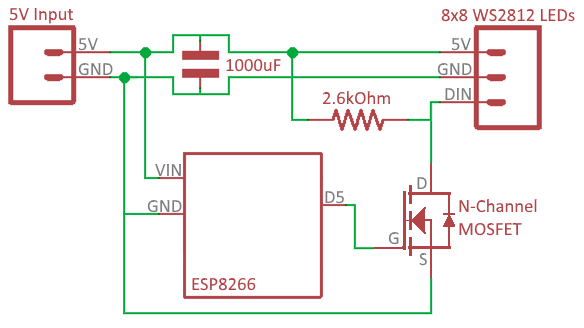
The PixelCon Frame consists of two main components, the NodeMCU ESP8266 microcontroller dev board and an 8x8 matrix of WS2812 LEDs. Other smaller passive components needed include an electrolytic capacitor, n-channel transistor and a single resistor.
- NodeMCU ESP8266 (Amazon)
- 8x8 WS2812 LEDs (Amazon)
- 5V 3A Power Supply (Amazon)
- NPN Transistor
- DC Barrel Jack
- 8pin Female Headers (x2)
- 1000uF Capacitor
- 2.6kOhm Resistor
All software for the PixelCon Frame is run on the ESP8266 microcontroller and was designed to use the Arduino IDE for flashing the code. To flash the code to the NodeMCU ESP8266 board, follow these steps:
- Download and install the arduino IDE here.
- Add the ESP8266 boards to the Arduino IDE by following this tutorial.
- Download the source code here and unzip into a folder labeled ‘PixelCon-Frame’.
- Add the WiFi Manager library development branch to the Arduino IDE by downloading it here and unzip into a folder labeled ‘WiFiManager’ in the directory ‘Documents\Arduino\libraries’.
- Open the PixelCons-Frame.ino file in the Arduino IDE and click the ‘Verify’ button to make sure everything compiles successfully. Refer back to the earlier tutorial here for uploading the code to the ESP8266 on the NodeMCU dev board.
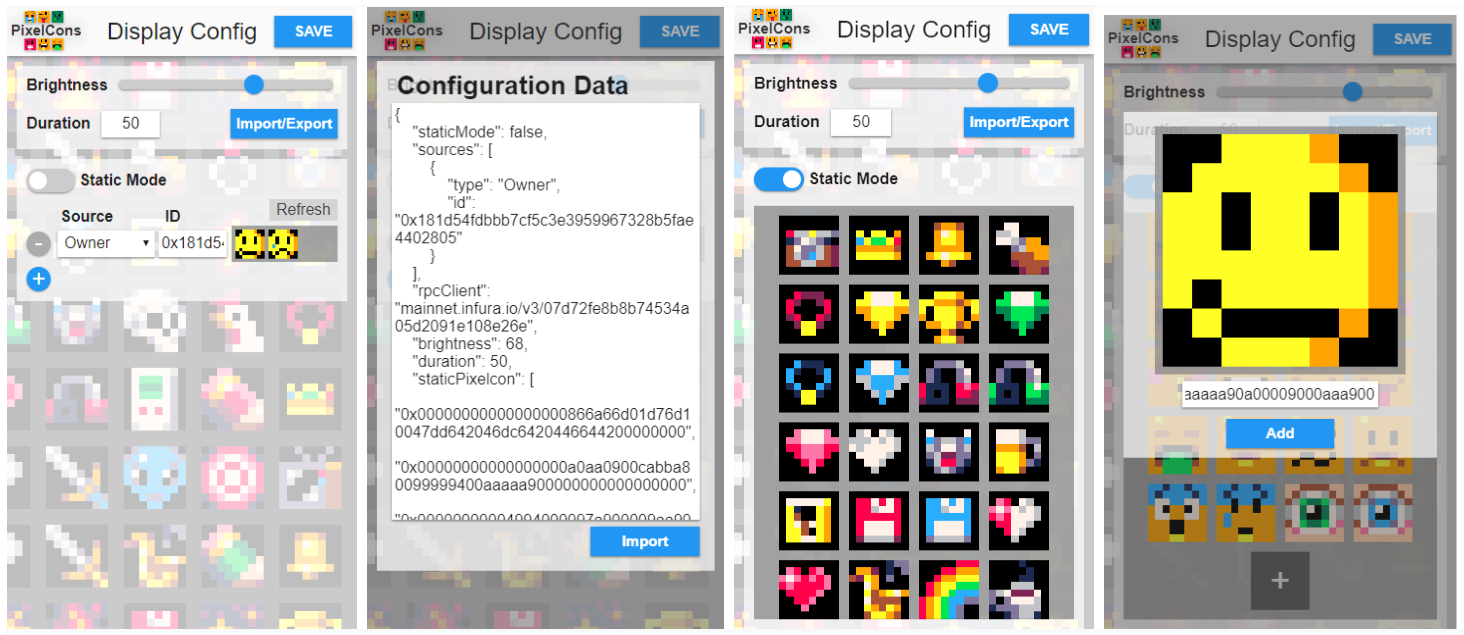
Packed inside of the code is the web interface for configuring the behavior of the PixelCon Frame. Refer to the User Guide here for an explanation of using the software.
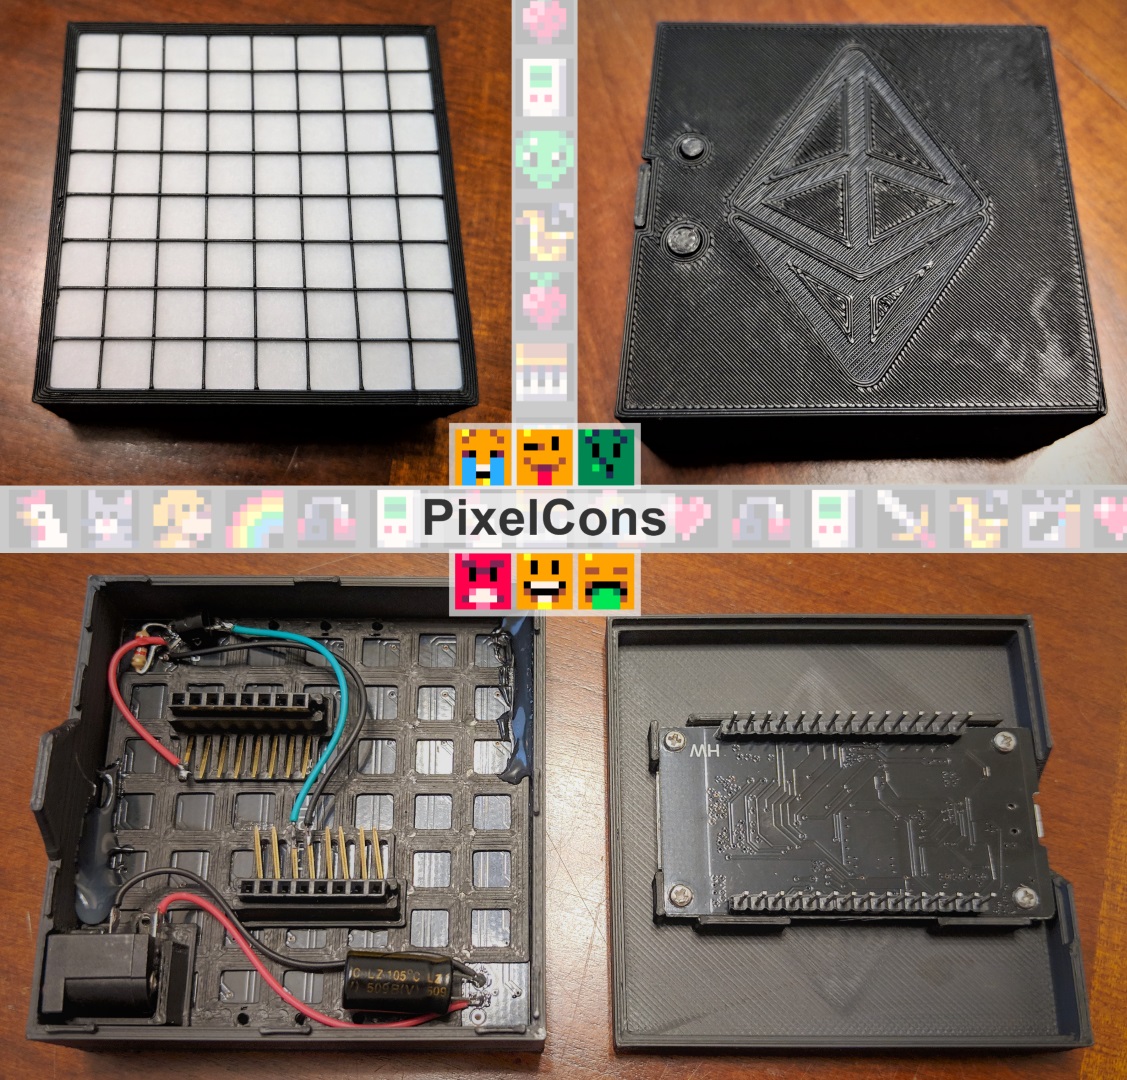
The PixelCon Frame body can be 3D printed from the STL files found here in the stl folder. To make your own, simply print them out and follow these assembly steps:
- Place a cut piece of paper in between the 'frame' and the 'front' prints and snap in place.
- The ESP8266 board should be screwed into into the 'backplate' with the 'buttons' in place.
- Super glue the 'bracket' onto the back of the LED matrix with all of the components in place.
- Wire and solder the correct components together according to the schematic.
- Hot glue the LED matrix into the 'frame' so that the DC jack lines up with the hole in the 'frame'.
- Push the 'backplate' into place at the back of the 'frame', seating the ESP8266 pins into the female headers.
Currently, there is only the mini design, but it should be possible to create larger or even smaller versions and add features like an internal battery. Look forward to future software updates and more hardware revisions.
Remember to check the User Guide here for more information on how to use the PixelCon Frame.


