GithubHelp home page GithubHelp logo

umenu's Introduction

uMenu

Simple MicroPython library to create nested and multifunctional menu with callbacks and custom menu items.

uMenu Example on Video

Installation

Just copy the umenu.py module into your MicroPython board, or just add into root dir, or just in a /lib folder. It's strongly reccomended to froze it into a MicroPython binary image - just place the file inside the ports/<board>/modules folder when building MicroPython from source, then flash to the board as usual.

Usage

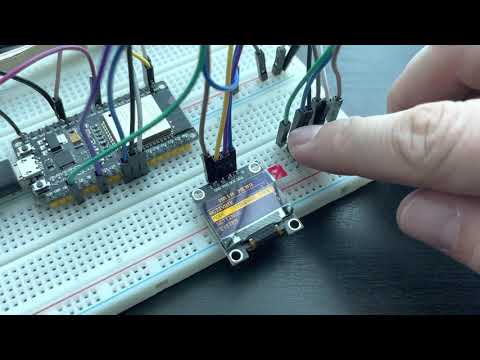
To build simple menu, you should initialize display first (can be any driver which supports framebuf, I use ssd1306). Then create menu object, specify how many items you want to display on one screen and size of one element.

In my example I knnow that menu looks nice when you use 5 lines and 10px height each or 4 lines and 12px height.

import ssd1306
from machine import Pin, I2C
from umenu import *

i2c = I2C(1, scl=Pin(4), sda=Pin(5))
display = ssd1306.SSD1306_I2C(128, 64, i2c)

menu = Menu(display, 5, 10)
menu.add_screen(MenuScreen('Main Menu'))
menu.draw()

Example above will draw empty menu with title Main Menu on top.

Library allows you to add nested screens, as also implement your own screens with logic.

Menu Navigation

To walk through menu items you have to trigger methods from Menu class.

  • Menu.move(direction: -1|1) with go to next or previous item.
  • Menu.click() select current item and execute callable, or go into SubMenu.
  • Menu.reset() reset current menu state and go to very beginning.
  • Menu.draw() redraw menu with current state.

Menu Items

This package already contains some basic Menu Items objects which can be used to build your menu

SubMenuItem

Creates new sub-menu with list of items

Arguments (common for all MenuItems):

  • name - to define name visible on screen
  • decorator - decorator is a text or symbol aligned to right side of screen, can be also callable which return proper string. Default: >
  • visible - determine if current section should be visible (read more in Visibility section)

InfoItem

Dummy Item, shows only specified text, with no action.

Arguments:

See SubMenuItem, default decorator here is empty.

CallbackItem

Item on menu which is able to trigger any callback specified in argument. After callback, parent screen is returned, but can be disabled by setting return_parent to False.

Specific Arguments:

  • callback - callable to trigger on click on item (more in section Callback)
  • return_parent - to determine if parent should be returned or not

EnumItem

Selected List, here you can define list which will be displayed after click, and on select that element will be passed to callback

Specific Arguments:

  • items - list of items, can be also list of dicts {'value': 'xxx', 'name': 'Fance name'}, where name will be displayed on screen and value passed to callback
  • callback - callable called after selecting specific position
  • selected - define which element should be selected (index or dict key)

ValueItem

Widget to adjust values, by incrementing or decrementing by specified amount.

Specific Arguments:

  • value_reader - callable to read current value as start to adjust
  • min_v - minimum value for range
  • max_v - maximum value for range
  • step - step to increment / decrement
  • callback - callback called on every change of value, value will be passed as last argument

CustomItem

Abstract class to override by custom logic, see example below. Also you can check ValueItem implementation which extends CustomItem.

ToggleItem

Item to handle toggles, like on/off actions. You can specify state, and callback which will be called to change state. ToggleItem is an extension for CallbackItem

Specific Arguments:

  • state_callback - callback to check current state
  • change_callback - callback to toggle current state (True/False)

ConfirmItem

Implementation of CallbackItem with prompt screen before calling custom function. Can be used when we need confirmation for specific action. If user select "no" option, callback won't be triggered.

Specific Arguments:

  • question - can be None, then question "Are you sure?" will be visible
  • answers - tuple for yes and no, it'll simply override default tuple ('yes', 'no')

Example menu

menu.set_screen(MenuScreen('Main Menu')
    .add(SubMenuItem('WiFi')
        .add(ToggleItem('Activate', wifi.get_status, wifi.activate)))
    .add(SubMenuItem('Lights')
        .add(ToggleItem('Headlight', (config.get_status, 1), (config.toggle, 1)))
        .add(ToggleItem('Backlight', (config.get_status, 2), (config.toggle, 2)))
    .add(SubMenuItem('Main Info')
        .add(InfoItem('Status:', 'ok'))
        .add(InfoItem('Temp:', '45.1')))
)
menu.draw()

Generated Menu

Callbacks

In all MenuItems callbacks can be single callable if no parameters should be passed, or tuple where wirst element is callable, and second is a single arg or tuple with *args. For example:

CallbackItem('Print it!', (print, 'hello there'))
# will print: hello there > like print('hello there')
CallbackItem('Print it!', (print, (1, 2, 3)))
# will print: 1 2 3 > like print(*args) where *args are taken from tuple

Visibility

Every item can be hidden separately by setting named argument visible to False or by passing callable to check conditions if element should be vissible. Callable should return True or False.

CustomItem

To create your own menu logic, you can extend abstract class CustomItem class and implement at least draw() and select() function.

draw() is called once you click on specifiv CustomItem position, so basically it can do anything you want, what more that object has included display, so you can simply draw anything on OLED using driver's methods.

Example usage of CustomItem, to draw some status page:

class DrawCustomScreen(CustomItem):

    def __init__(self, name):
      super().__init__(name)
  
    def select(self):
        return self.parent  # this is needed to go back to previous view when SET button is pushed

    def draw(self):
        self.display.fill(0)
        self.display.rect(0, 0, self.display.width, self.display.height, 1)
        self.display.text('SHOW SOME TEXT', 0, 10, 1)
        self.display.hline(0, 32, self.display.width, 1)
        self.display.show()

menu.add_screen(MenuScreen('Main Menu')
    .add(DrawCustomScreen('Text in frame'))
)

See examples/rotary_encoder_menu.py.

License

Copyright (C) 2021, Paweł Ługowski

This program is free software: you can redistribute it and/or modify it under the terms of the GNU General Public License as published by the Free Software Foundation, either version 3 of the License, or (at your option) any later version.

umenu's People

Contributors

plugowski avatar

Stargazers

 avatar Mohammad Reza Ebadollah avatar  avatar  avatar Gonzo Gear avatar Takuda Sean Matare avatar  avatar  avatar  avatar lkfrota avatar Maciej Frydrych avatar  avatar Radson Almada avatar Eli McRae avatar Austin St. Aubin avatar  avatar Miguel Santana avatar  avatar  avatar Dmytro avatar

Watchers

 avatar

umenu's Issues

adding items to a menu after MenuScreen is defined

I'm trying to use this with some settings in json format. I would like to be able to add settings just by adding an entry into the json file. To do this more easily, I would like to iterate over the imported json list to add menu items. Interestingly I've found that if I declare and set the MenuScreen first, then add items, all ValueItems through a display fault.

i.e.
this works:

menu.set_screen(MenuScreen('Settings')
                .add(ValueItem('Speed', 10, 1, 100, 1, print))
                .add(EnumItem("Mode", ['Option 1', 'Option 2'], print, 0))
) 

this doesn't:

menu.set_screen(MenuScreen('Settings'))
menu.main_screen.add(ValueItem('Speed', 10, 1, 100, 1, print))
menu.main_screen.add(EnumItem("Mode", ['Option 1', 'Option 2'], print, 0))

and it fails with the self.display being a NoneType object. Any thoughts on a way to rectify this? It seems to only impact ValueItem, since it has its own defined draw(). It does display the item in the main menu, it just throws the exception when it is selected.

Example code for ValueItem big font

Hello @plugowski,
you created really nice menu. I use raspberry pico and ValueItem menu item, but can't find, how to use bigger font when change value. My font is only small size as normal menu item. In your video you use really nice big pixel font while changing value, and your code also contains support for "rich_text" display, can you please send a example code how to use it? Do you use some special oled driver for support of bigger fonts? Thanks a lot.

how to force refresh of InfoItem

Hi
Thank you very much for your work.
if would like to know if it is possible to create a background routine in order to for the refresh of InfoItem
typically I have the following in my menu
(InfoItem('WIFI:', (mq_client.WifiStatus())))
and I wonder how to update it without explicit action from user (menu.draw() does dot seems to be the solution)
Is there a solution?
Thank you again

Error from example

Hi
I have run you example code in this repo but the error occur after reset my esp32
" umenu.py line 373 in draw
umenu.py line 382 in item_line"

Please help me. Thanks.

Just a question about switches.

Hi there so I have been having success so far getting basic menus made with this code but have been trying to add some tactile switches as navigation buttons but have been having some issues. I took this code below from the rotary encoder example so am not sure if it is not for the tactile switches themselves or just a click function on the rotary encoder?

sw = Pin(17, Pin.IN, Pin.PULL_UP) def menu_click(pin): time.sleep_ms(50) if pin.value() == 0: menu.click() sw.irq(menu_click, Pin.IRQ_FALLING)

I have tried adjusting this to my correct gpio pin for the switch on the board, however Im not sure if in your video you have both leads of the switch connected to gpio or one to gpio and one to ground. I am wondering if I need pull up resistors as I didnt think I saw any in your video and was just wondering how you went about wiring this up and how you wired the up, down, and select buttons for the menu. I had tried changing the menu.click to menu.down(-1) and it still wasnt working and tried changing the pull up to down, and none without much success. If you could just give some pointers on the wiring and coding that would be very much appreciated!!!! Thank you!

side note: also curious before I go deeper into this gui if I would be able to have a menu open to a submenu which reads the names of text files on the card and make them selectable and then could open that text file into a scrollable string so the text can fill the screen and it could be read. Sorry if that was poorly explained haha, can try to clarify more. Would that be possible with this gui library before I keep going? Thank you very much for all your work!

Recommend Projects

  • React photo React

    A declarative, efficient, and flexible JavaScript library for building user interfaces.

  • Vue.js photo Vue.js

    🖖 Vue.js is a progressive, incrementally-adoptable JavaScript framework for building UI on the web.

  • Typescript photo Typescript

    TypeScript is a superset of JavaScript that compiles to clean JavaScript output.

  • TensorFlow photo TensorFlow

    An Open Source Machine Learning Framework for Everyone

  • Django photo Django

    The Web framework for perfectionists with deadlines.

  • D3 photo D3

    Bring data to life with SVG, Canvas and HTML. 📊📈🎉

Recommend Topics

  • javascript

    JavaScript (JS) is a lightweight interpreted programming language with first-class functions.

  • web

    Some thing interesting about web. New door for the world.

  • server

    A server is a program made to process requests and deliver data to clients.

  • Machine learning

    Machine learning is a way of modeling and interpreting data that allows a piece of software to respond intelligently.

  • Game

    Some thing interesting about game, make everyone happy.

Recommend Org

  • Facebook photo Facebook

    We are working to build community through open source technology. NB: members must have two-factor auth.

  • Microsoft photo Microsoft

    Open source projects and samples from Microsoft.

  • Google photo Google

    Google ❤️ Open Source for everyone.

  • D3 photo D3

    Data-Driven Documents codes.