If you want to become a professional data scientist, it’s important to take a little time to “set yourself up for success” by installing and learning to use the right tools on your computer. In this lesson, you will install Git and Anaconda and in the next lesson you will setup a virtual environment. If you already have Git and Anaconda installed, feel free to skip to the next lesson to get started with cloning, virtual environment setup, and testing!
You will be able to:
- Install Git
- Install Anaconda
- Python - There are many languages that can be used for data science, but these days most data scientists are using Python to write their code.
- Jupyter Notebook - Most of those data scientists use Jupyter Notebook for writing their Python code. Jupyter Notebook is a tool that allows you to mix comments in-between your code snippets so you can document and share your thought process and make it easier for others to review, replicate, and expand on your work. It's also what we're using for almost all of our lessons in this course!
- Anaconda - Anaconda is one of the most popular ways for data scientists to install Python and Jupyter on their computers. It also provides package management and virtual environments so you can get all the latest data science tools running, like NumPy, SciPy, and Tensorflow, and so you can use different versions of Python and your packages for different projects without them conflicting with each other.
- Git - Git is a version control system. It’s a way of keeping track of all the changes made across your project. Think of it like “track changes” in Word - but with the ability to track changes across multiple documents. At Flatiron School, we use Git to keep track of all of the lessons we create and all the changes we make to them.
- GitHub - GitHub is a website where data scientists (and programmers) can save their work in case their computer breaks, and share it with their team or the world! At Flatiron School, we store all of our lessons on GitHub.
It’s going to take us a few minutes to get this all installed, but once we do, not only will you be set-up for working through the course, but you’ll also have a professional data science setup on your computer for any future courses or projects you want to work on!
There are many amazing computing devices available these days, but not all of them will allow you to do data science. We love smartphones, flip phones, Chromebooks, tablets (including iPads), game boys, Nintendo switches, roku’s and arduino’s. You’re not going to be able to complete this course on any of those devices - sorry.
You’re going to need a computer (laptop or desktop). It should be running a recent (last 3-4 years) version of MacOS, Windows or Linux, and ideally, it should have 8Gb of RAM and at least 20Gb free hard drive space. More information here:
Assuming you have a computer that meets the requirements, let’s start by getting Git and Anaconda installed.
For each tool, we’ll provide installation instructions for the two most common operating systems - Windows and MacOS.
Please note - the exact names and versions will change over time.
Overview:
- Download the install package from here
- Double click to open the downloaded exe file
- It may open a window asking if you want to allow this application to make changes to your device, click “Yes”
- Click “Next” to accept the license
- Select Components on the next screen - make sure to keep the “Windows Explorer integration” options checked *
- Choose a default editor that you are comfortable with, or choose either Nano or Visual Studio Code if you have not used an editor before
- If you know or have used vi/vim, feel free to use it (otherwise it is not recommended)
- Adjust your PATH environment - select “Use Git from the Windows Command Prompt”
- The first option is also fine, as you’ll mainly be using Git from the new “Git Bash” program that is being installed, but the second option is ideal as it’ll give you the option of using it through either Git Bash or the Windows Command Prompt in the future if you wish
- Choose HTTPS transport backend- select the “Use the OpenSSL library” option
- Configure line-ending conversions - select the default option for handling line endings
- Use MinTTY as the default terminal emulator
- Configure extra options to enable file system caching and the git credential manager
- Wait while Git is installed onto your computer
- Click "Finish" to complete set-up
* It is strongly suggested that you select any options to install and use the "Git Bash" shell - it's generally included by default. The Git Bash shell will allow students with either Windows or Mac computers to run the same set of commands.
Note - if there are any differences in the options provided in the installer you download, accept the defaults.
Step 4 - Select components:

Step 5 - Choose a default editor:

Step 6 - Adjust your PATH environment

Step 7 - Choose HTTPS transport backend

Step 8 - Configure line-ending conversions

Step 9 - Configure the terminal emulator to use with Git Bash

Step 10 - Configure extra options

Step 11 - Installation

Step 12 - Complete!

If you are comfortable with the command line and have installed homebrew, you should install Git by running the command brew install git in a terminal window. If you have no idea what the last sentence meant, please disregard and follow the below steps.
Overview:
- Download the install package from here.
- Double click on the downloaded dmg file to open a small Finder window
- Double click on the .pkg file to run it
- When you try to do that you might get a security warning pop up. If that happens:
- Click on the apple at the top left of the screen
- Select “System Preferences” from the drop-down menu
- Select “Security and Privacy”
- Select the “General” tag
- Click on the lock to make changes at the bottom of the window (you will need to enter your password when prompted)
- Below the “Allow apps downloaded from” option, you should see a message stating that an app was blocked from opening (if you don’t see this message, double click on the .pkg file again and then look back at the Security & Privacy screen and it should pop up). Click the “open anyway” button.
- When you try to do that you might get a security warning pop up. If that happens:
- Click on the “Open” button when the pop-up message asks "Are you sure you want to open it?" in order to open the installer window
- Click "Continue" on each screen, then "Install"
- You will need to enter your password when prompted
- When the installation is complete, click the "Close" button
Step 2 - Finder window that appears when you double click the downloaded dmg file

Step 3 - Security warning that may appear

Step 4 - Yes, you really want to open the app

Step 5 - Installer screen

Step 6 - Click "Close" when the Installation is completed successfully

To confirm you have installed Git successfully:
-
Open a terminal window
- On Windows, using the start menu, open the “Git Bash” program to open a terminal window
- On a Mac, open the “Terminal” app in the “Utilities” folder within your “Applications” folder - or, find the "Terminal" app in your Launchpad
-
Type
git --version: It should return the version of git you are running
While you’re in the terminal, you should also set up your name and email address:
-
In your terminal window, type
git config --global user.name- If it returns your name, you’re set!
-
If it returns nothing or displays an error message, type
git config --global user.name “Your Name”- replacing Your Name with your name inside the quotes -
Type
git config --global user.email- If it returns your email address, you’re set!
-
If it returns nothing or displays an error message, type
git config --global user.email [email protected]- replacing [email protected] with your email address
The easiest way to get set up with Python and Jupyter Notebook so you can start coding is to install the Anaconda distribution.
Overview:
-
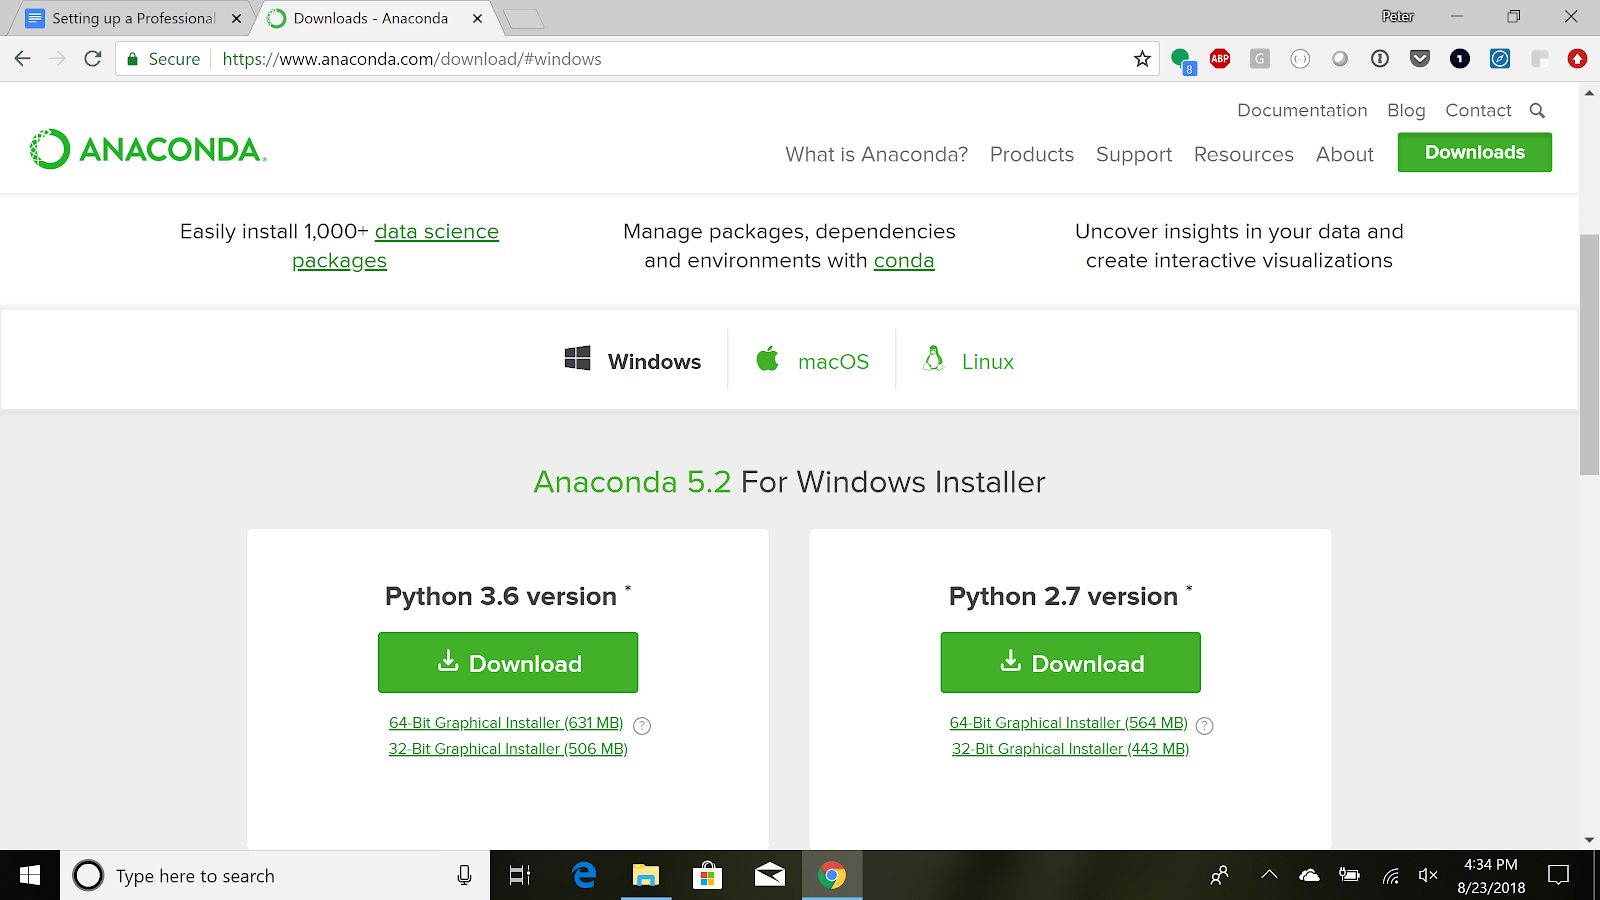
Download the latest version of Anaconda here - use Python 3.x (ignore Python 2.7)
- A window may pop up asking if you want to give Anaconda your information in return for a cheat sheet - you do not need to do so unless you want to
-
Open the exe file once it has downloaded to open the Anaconda installer
- Option 1: When the exe file is finished downloading, click the arrow to the right of the name of the file at the bottom of your browser, and select "Open"
- Option 2: Navigate to your "Downloads" folder and double click on the Anaconda exe file to open it
-
Click "Next", then "I agree" to accept the license
-
Install for "Just me" and click "Next"
-
Select the destination folder - it is recommended that you stick with the default destination
-
Choose both Advanced Installation Options - although you will see a warning from the installer, make sure to choose "Add Anaconda to my PATH environment" !!
-
Wait while Anaconda is installed on your computer
-
When the Anaconda installation is complete, click "Next"
- You can skip the Visual Studio Code installation
-
When it thanks you for installing Anaconda, click "Finish"
- You do not need to learn more about your installation, and can close the browser window if it opens
Step 1 - Download Anaconda for Python 3.x
Step 2 Option 1 - Open the exe file from the browser

Step 2 Option 2 - Open the exe file from your Downloads folder

Step 3 - Continue through the Anaconda installer

Step 5 - Choose install location

Step 6 - Advanced Installation Options: make sure to check the "Add Anaconda to my PATH environment" checkbox

Step 7 - Installing Anaconda

Step 8 - Completing the install

You can skip the Visual Studio Code installation

Step 9 - Finish the install

You can close any browser window opens to an Anaconda page

Overview:
-
Download the latest version of Anaconda here - use Python 3.x (ignore Python 2.7)
-
Open the pkg file once it has downloaded to open the Anaconda installer
- Option 1: When the pkg file is finished downloading, click to the right of the name of the file at the bottom of your browser, and select "Open"
- Option 2: Navigate to your "Downloads" folder and double click on the Anaconda pkg file to open it
-
Click "Continue" to run the package to determine if the software can be installed
-
When the Installation window opens, click "Continue"
-
Look at the Read Me, then click "Continue"
-
Accept the license by clicking "Continue", then click "Agree" in the pop-up window
-
Accept the default destination
-
Click "Install" to install the software
- You will need to enter your password when prompted
-
Wait while Anaconda is installed on your computer
-
You can skip the option to install Microsoft VSCode by clicking "Continue"
-
Click "Close" when the installation was completed successfully
-
If you're asked whether you'd like to move the Installer to Trash, click "Move to Trash"
Step 1 - Download Anaconda for Python 3.x

Step 2 Option 1 - Open the pkg file from the browser

Step 2 Option 2 - Open the pkg file from your "Downloads" folder

Step 3 - Determine if the software can be installed

Step 4 - Anaconda Installer

Step 5 - Accept the Read Me

Step 6 - Accept the License

Click "Agree" in the pop-up window

Step 8 - Install

You may need to enter your password

Step 9 - Installing Anaconda

Step 10 - You do not have to install Microsoft VSCode

Step 11 - Completing the install

Step 12 - Move Installer to Trash

To test your installation:
- On Windows, click on Start and then Anaconda Navigator in the program list (or search for Anaconda in the search bar and select Anaconda Navigator)
- On a Mac, open up the finder, and in the Applications folder, double click on Anaconda-Navigator
From now on, screenshots will be from a Mac, but we’ll highlight any material differences in the experience between the operating systems.
The Anaconda Navigator is one of the ways you’ll be able to run Jupyter Notebooks. Click on the “launch” button in the Jupyter notebook tile.

On a Mac, you’ll see a terminal window pop up.

On both Windows and a Mac, you’ll see a window in your web browser that allows you to open existing Jupyter notebooks or create a new one.

Click on the “New” button in the top right corner.

And select “Python 3” from the drop-down list.
When you do, you’ll see a new notebook in your browser window that looks something like this:

To make sure it’s working, click in the cell and type the following:
import sys
print(sys.version)
Then hold down the shift key and hit return/enter (shift+return) to run the code in the cell. You should see an output something like this:

Don’t worry if the version number or date is slightly different. If you get a similar output (something that isn’t an error message), congratulations! You’ve got Anaconda, Python and the Jupyter notebook installed successfully!
To shut down Jupyter notebook, just close the tabs in your browser containing the notebook and the list of notebooks. On a Mac, you should also click on the terminal window, hold down the control key and hit C (control+C) to close the notebook.

You’ll then have to hit “y” and return/enter to confirm that you want to close down Jupyter notebook.

Congratulations! If you've gotten this far and everything has worked, you have successfully installed Git and Anaconda on your computer! Next, you'll learn what a virtual environment is - and set one up!


