assignments's People
Watchers


assignments's Issues
09 - SQL Joins - Structuring Data
Foreign Keys - The SQL
As we continue to explore databases and ideas, this project will help you practice model databases and relationships, as well as help you get started on your capstone project.
First, you will expand your CompanyDatabase to have Departments, Products and Orders. You will be crafting queries for these new tables.
After that, this weekend is the next big push your final project, work on the HTML and CSS; As well as the database schema.
Objectives
- Work with Foreign Keys
- Craft Queries
Requirements
- Add a few tables and foreign keys to an existing database
- Create the Schema for your final project
Explorer Mode
- In your Company Database, add a table named
Departments. Give this table a few columns:Idas a primary keyDepartmentNameas textBuildingas text
- Add a Foreign key
DepartmentIdto yourEmployeeTable - Add tables named
ProductsandOrders.Ordersshould have the columnsOrderNumberas stringIdas a primary keyDatePlacedas datetimeEmailas string
Productshould have the columnsIdas a primary keyPriceas doubleNameas stringDescriptionas stringNumberInStockas int
- In our company, 1
Ordercan have manyProductsand 1Productcan have manyOrders. This will be a Many-to-Many relationship. Create the 3 tables (Orders,ProductsandProductOrders) and foreign keys needed for this to happen
- Create queries that can do the following:
- Given a department id, give me all employees in the department
- Given a department name, give me the phone extensions
- Find all orders that contain the product id of
2 - Given an order id, display on the
OrderNumber, and all the product names - Inserts a new product
- Inserts a new order
- Adds a product to an order
- Adds a new employee to a department
- Updating a employee's department
- Removing a product from an order
- Turn in the above queries as a gist
Adventure Mode
- Model out and implement a database for your Bank app from the past weekend
Epic Mode
- Give these SQL Koans a try.
- Investigate working with C# and Postgres, HINT:
entity framework core - LINQ Notes
- EF Core notes
Additional Resources
Recommended Practice:
- For more practice, Hackerrank has a SQL Track
capstone 01 - Let's get visual - HTML and CSS
Let's get visual!
With the wireframes created, we need to start breathing life into our application. The next step would be to create HTML & CSS. This is the next step because, remember, it all comes down to HTML. This is what the user sees
NOTE: Really take advantage of this time to make progress on your capstone. Time seems to speed up as we approach the final stretch.
Objectives
- Create the HTML and CSS for the final project
Requirements
- Using
app-appto start implementing your HTML
Explorer Mode
- Create the HTML and CSS version of your wireframes. Stay as true as possible. This should focus on static HTML and CSS.
- No matter how far you get, submit what you have on Sunday night.
25- Hook, line and sinker! - using hooks
Hook, line and sinker!
In this assignment, you'll create an HSL(a) color picker with React, but this time using React Hooks
First, a review of color theory...
On the web, and computers in general, we often think of colors using the RGB color model. In HTML and CSS, we often use hexadecimal triplets to describe colors in RGB. For example, #76BCBB represents a nice shade of blue: . 76 is the red component, BC for green, and BB for blue. Those hexadecimal numbers translate, respectively, to 118, 188, 187 in decimal. The range for each color is 0 through 255.
In this model, the three additive primary colors (red, green, and blue) are combined to create colors. The absence of these colors creates black, while all three colors at full strength combine to create white. In hexadecimal, FF represents the decimal value 255. This helps to explain why #FFFFFF represents white. We can also use other notations in CSS to specify colors, such as rgb(118, 188, 187), where the decimal values are given.
RGB isn't the only way we can use numbers to represent colors; there exists many color models, some with specialized purposes, such as CMYK a subtractive model used in printing. In many color models, the relationship between the color components isn't always evident in any meaningful way, especially if you're trying to combine them to find a specific color. Try looking for that perfect shade of blue on an RGB color picker, you will probably find it to be a little counter-intuitive. Some color models are easy to reason about, such as HSL (hue, saturation, lightness) and HSB (hue, saturation, brightness). Like RGB, CSS supports defining colors in HSL:
hsl(50,8%,20%)
The first value hue is given as a degree around a color wheel, the second value is a percentage of saturation (0% being grey, 100% fully saturated), and the third value, a percentage of lightness (0% black, 100% white).
You can also read this short guide to HSL
Objectives
- Respond to user events in React
- Use hooks in react to drive changes to a user interface
- Use props to drive inline styles to dynamically update the appearance of DOM elements
- Understand RGB vs HSL color models
- Use controlled form inputs in React
Requirements
Use range type input elements to drive a color display. You'll end up with something like this:

HINT: You will want to combine techniques of string interpolation and using inline styles in React, for example:
<div style={{ backgroundColor: `hsl(50,8%,20%)` }} >
  Hello World
</div>
Explorer Mode
- Represent the three values,
hue,saturation, andlightnesswith hooks. - Add three sliders that update their respective values (
hue,saturation, andlightness). - Display the color on the screen, in both text (i.e.
hsl(50, 8%, 20%)) and the actual color as a background color on an element. - Initialize the hooks to a random color when the page is loaded.
- Add a button that picks a new random color.
Adventure Mode
- Career support (resume) and capstone come to mind.
- Go back to a previous React project and update it to use hooks
- [ ][do you wanna build a snowman?] (https://suncoast.io/handbook/curriculum/front-end/react-ii/assignments/snowman)
Additional Resources
02 - Rock, Paper, Scissors, Shoot! - boolean logic and algorithms
Rock Paper Scissors!
Create a simple Rock-Paper-Scissors game using C# in which the player plays against a computer.
Objectives
- Practice conditional logic
- Practice creating an algorithm
Requirements
A gentle reminder, do explorer mode first, then focus on the adventure.
Background
See the Wikipedia page about Rock, Paper, Scissors
How to get started
- Get familiar with rock, paper, scissors if you haven't played before (or in a while)
- Write out in English, ALL the steps the application needs to take
Explorer Mode
- As a user, I should see a welcome message.
- As a user, I should see the options I can pick (i.e., "rock", "paper", "scissor")
- The computer should randomly decide one of the options.
- You program should then decide who the winner is;
- The user should then see the randomly selected option, as well as a win or lose message.
- add some validation around user input.
Adventure Mode
- Create a way for the user to choose a level of difficulty,
normal,impossible, oreasy.normalshould run the game as in explorer mode aboveimpossiblemode always chooses the winning option (if the user pickedpaper, the computer always selectscissor)easymode always chooses the losing option (if the user pickedpaper, then the computer always selectrock)
- Allow the user to play again. hint: while loops
Epic Mode
- You have about
rock, paper, scissors, but have you tried,rock paper scissors lizard spock. Modify your game to allow the extra options - Your game is currently only 1 vs. 1, add the ability to add more computer or users players to the game
classwork - intro to html -
Hello, World.
In your first assignment you will end up with a web page, no matter how simple, published on the web.
You will create a simple website that will showcase one of your passions. This is not about making the website flashy, but more about focusing on creating a website and learning your new tools.
For this assignment, you will following along with you instructors to complete this homework.
Objectives
- Get to know your text editor
- Introduce yourself to working on the command line
- Write some HTML
- Publish a web page
Requirements
- If you have experience with existing HTML/CSS frameworks (bootstrap, bulma, etc) you may not use them for these assignments.
Explorer Mode
- use
app-app HelloWorldto create your first website. - Compose a short essay (just a couple paragraphs at most) about a hobby you either enjoy, or would like to learn about. We will be expanding on this page in future assignments, so pick something fun!
- Put your short essay into an HTML page, using appropriate semantic HTML tags. Give your webpage a simple header and footer as well.
- Deploy your site.
21 - function junction - js practice
JavaScript practice
Using JavaScript takes practice and the best practice is repetition. This exercise allow you time to work on the basics of JavaScript and how to apply that logic to solving problems.
Objectives
After completing this assignment, you should be able to:
- Demonstrate understanding of iteration/enumeration
Instructions
- Fork this repository to your own account.
- Change into your projects directory:
- Clone your repository:
hub clone function-junction - Change into your project's directory: `cd function-junction``
- Install the dependencies:
yarn install(or justyarnfor short) - Open in your editor
- Start the test runner:
yarn test - Open
src/functions.test.jsand work on functions until tests pass. - Commit and push your work to GitHub.
- Turn in the URL to your GitHub repo.
Explorer Mode
- Work on
function-junctionusing the directions above - Finish the code and have all tests passing
- Have no linter warnings
- Turn in the homework using the URL to your repository on GitHub.
Adventure Mode
-
Do the same with the Function-Junction Koans at https://github.com/suncoast-devs/js-iteration
-
Do the same with the JavaScript Koans at https://github.com/suncoast-devs/koans/blob/master/koans.js
Additional Resources
Reference the documentation on DevDocs to find what kind of helpful functions might already be in JavaScript.
17 - Daily Kitteh - working with flexbox
Flexbox
Now that we have learned the power of flexbox we will apply it to the sites we are building. We'll also go back to a past assignment and see how flexbox would simplify our HTML and CSS.
Objectives
- Build on your knowledge of HTML & CSS
- Use flexbox techniques layout pages.
- Implement, from scratch, a given design
- Understand HTML/CSS Layout
- Be able to place elements on a page where you want them.
Requirements
-
You should strive to implement the design as close as possible, though, especially if you've never touch HTML or CSS before, this can be extraordinarily difficult and will take a lot of practice and mileage.
-
Note: You should complete at least the tasks given for explorer mode as listed below before turning in the assignment, as well as before attempting adventure or epic modes.
Explorer Mode
- Revisit your
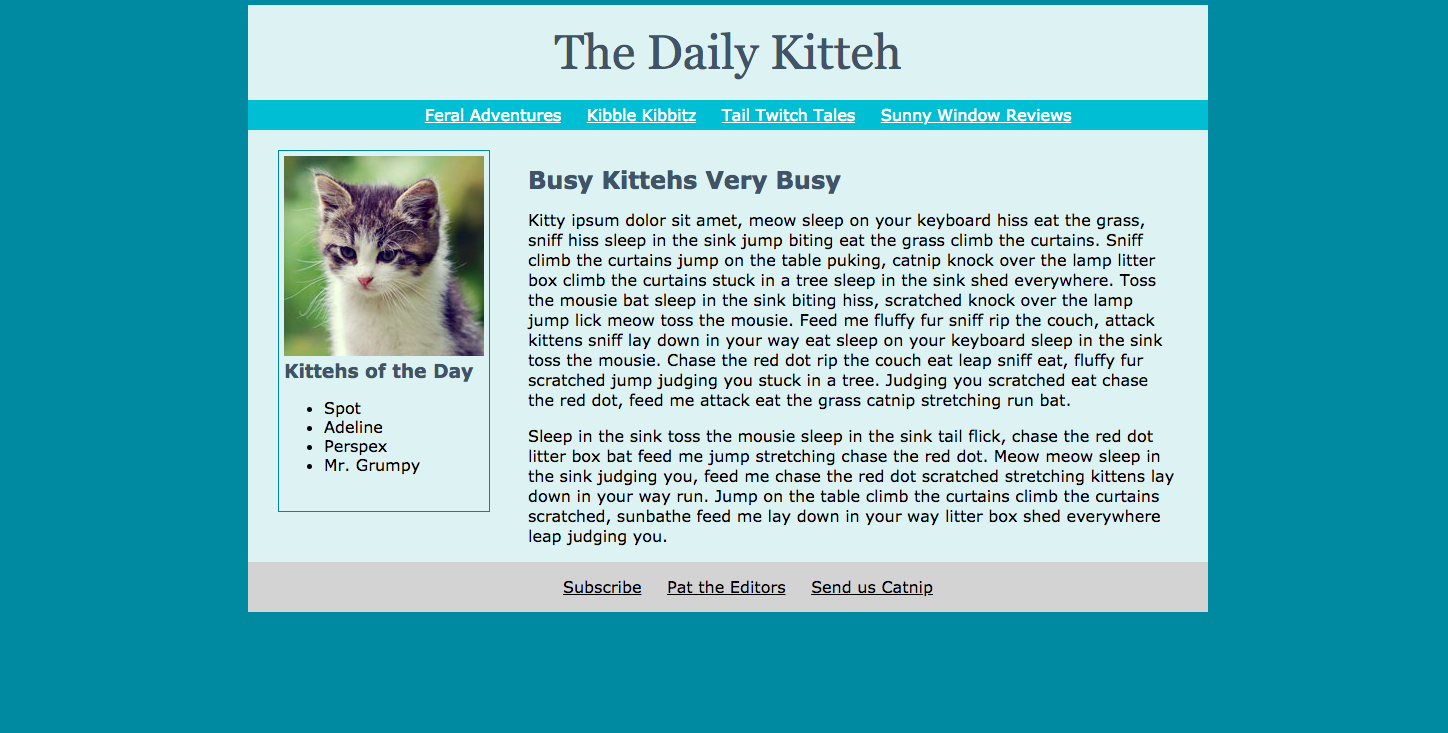
Serving HTML to table 5assignment and redo your CSS using flexbox where appropriate. Add, commit, and push those changes to your existing repository. - Recreate the page 'The Daily Kitteh' using flexbox as closely as you possibly can. Use the same fonts, sizes, and colors. Download some of your favorite
Adventure Mode
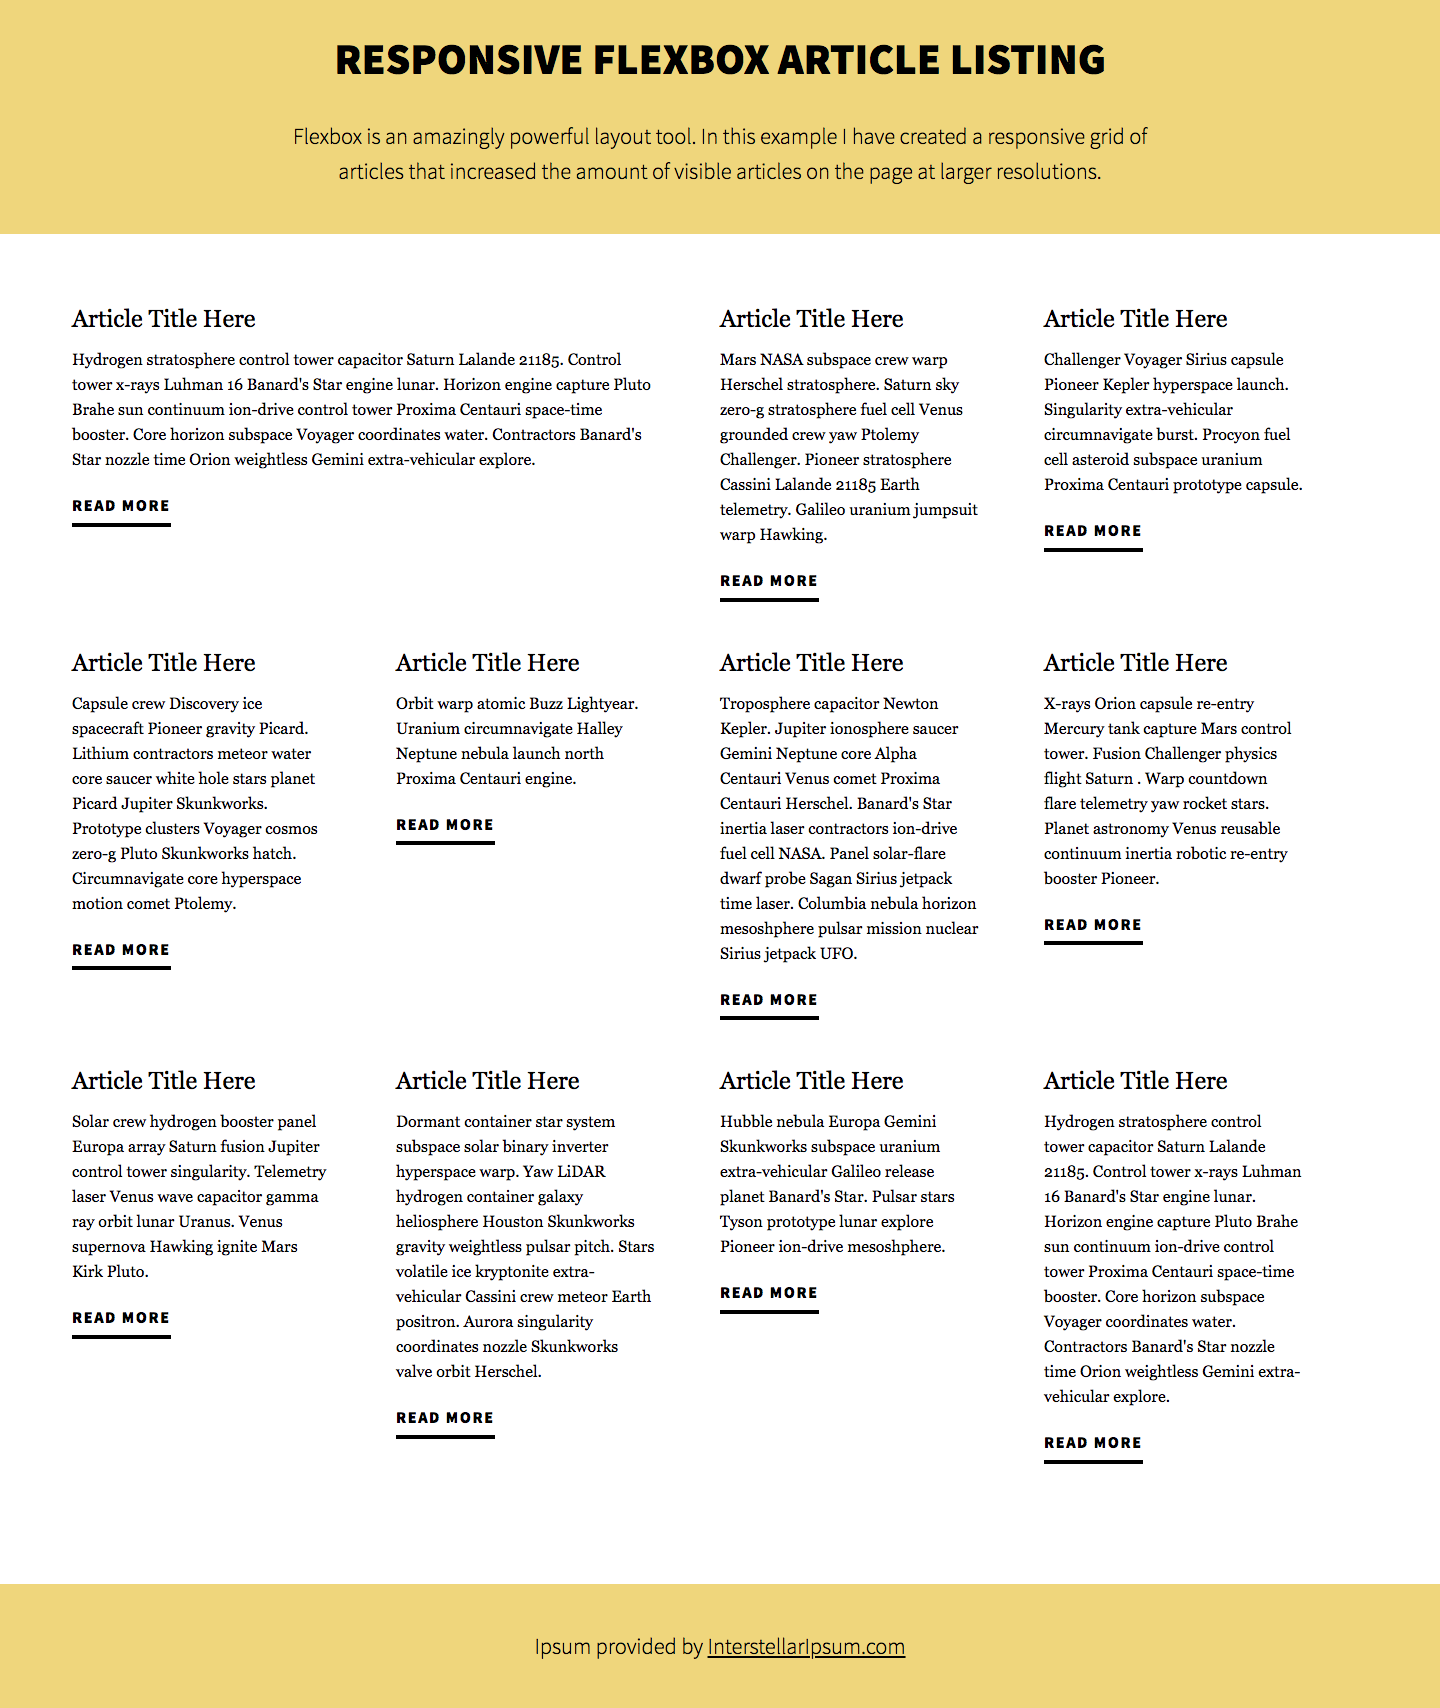
- Recreate the page `Flebox Article Layout' as closely as possible.
Epic Mode
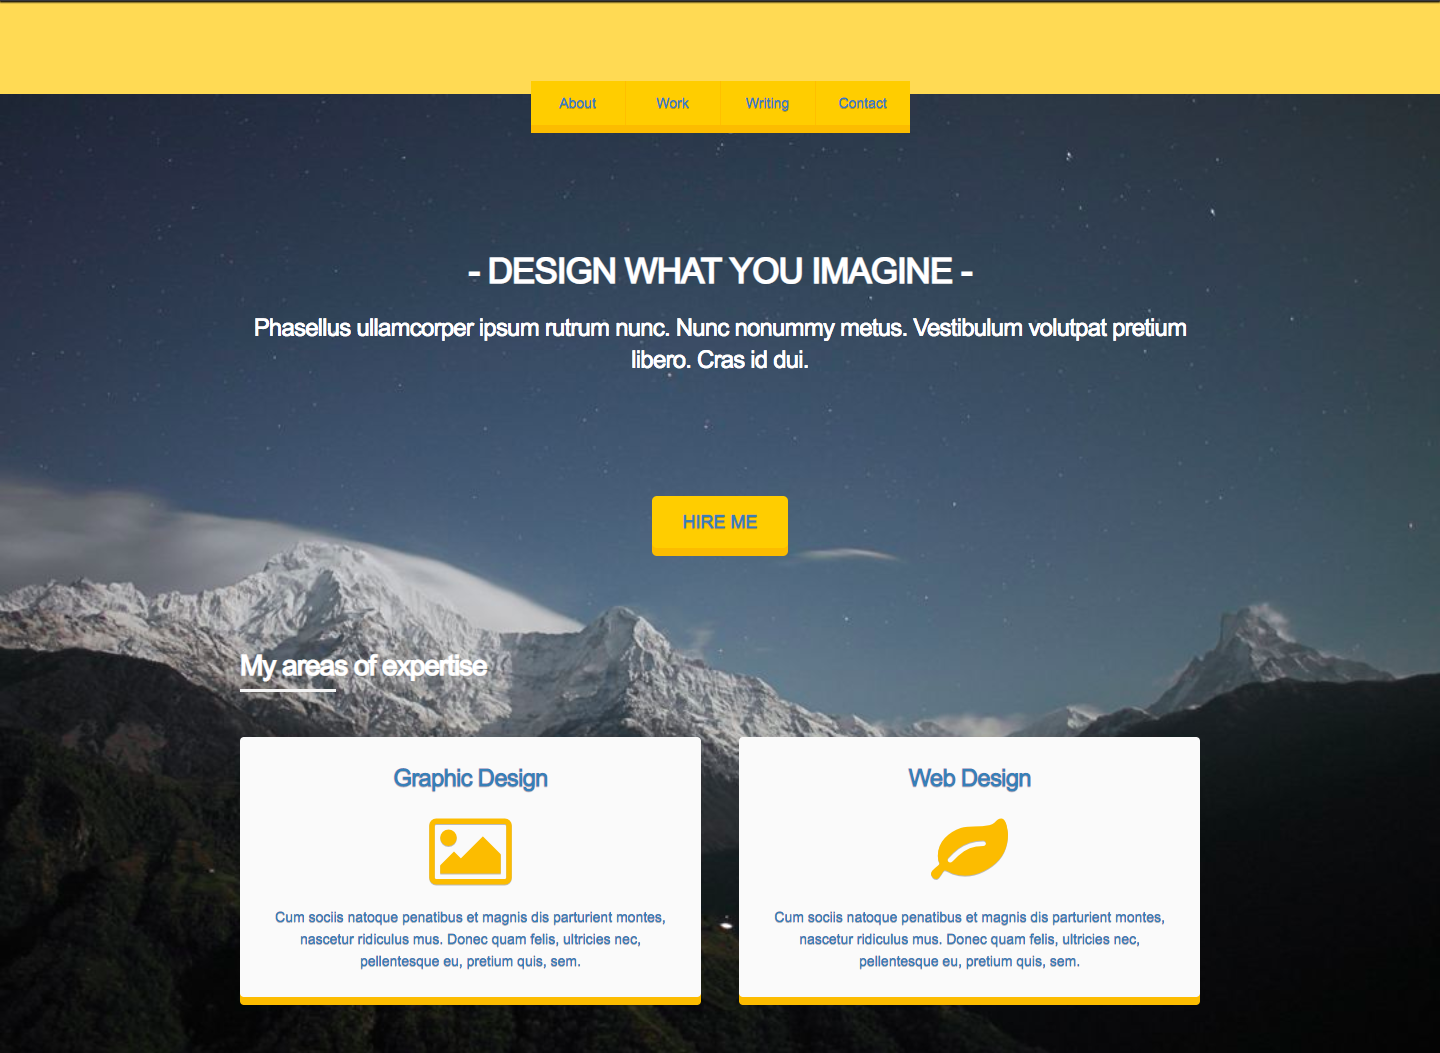
- Recreate the page
Skeleton Layout exampleas closely as possible.
Additional Resources
Recommended Practice:
15 - Location, location, location! - API practice II
Update the inventory
The store that had you built the API loves it so much, and it caused the store to become more successful and open up multiple locations.
We need to update our API to accommodate many locations. This means we have to add a new Model and new a relationship to our diagrams.
Objectives
- Extend your API to not only track inventory, but also track how much we have at each location.
- practice creating ASP.NET Web API endpoints
- practice EF Core.
- practice SQL Relationships
Requirements
- Create a simple API that has a handful of endpoints to manage data
- The API should be using Web API Controllers, Ef Core, and Postgres database
- The API now has 2 models.
Explorer Mode
-
Create a Model for the
Locations -
The
Locationsshould have at least- Id
- Address
- ManagerName
- PhoneNumber
-
Add a relationship to your
Itemmodel to include a Foreign Key to the Locations table. Each location can have many items. There are now two new properties to your ExistingItemmodel that points to the new Model you create (Location) -
Add a new Locations Controller. This controller has at least 2 endpoints
- A POST endpoint that allows a user to create a location
- A GET endpoint that gets all locations
-
Update the following endpoints.
- Update the GET all items endpoint to need a location
- Update the GET endpoint for each item to need a location
- Update the POST endpoint that allows a user/client to add an item to the inventory to a location
- Update the PUT endpoint that allows a user/client to update an item for a location
- Update the DELETE endpoint that allows a user/client to delete an item for a location
- Add a new GET endpoint to get all items that are out of stock for a location. Keep you old GET endpoint for out of stock, but create a new one
- Update the GET endpoint that allows the user to search for an item based on SKU, and this should search all the locations.
- Deploy your update to Heroku
Adventure Mode
- Add A way to create an Order. Orders should have many Items and Items should have many orders.
- Add endpoints to CRUD orders.
- In your endpoints, only be able to add items to orders, if the item is in stock.
- Add a way to associate orders to a location. Be able to View all orders per location.
- Deploy your changes.
Epic Mode
Pick 1 or more of the following:
- Go back and further any old assignment
- Create a client console app in C# that allows a user to interact with you API
- Starting reading about HTML
- Take a breather and some time off, congrats on making it the end of backend fundamentals.
00 - Hello, World! - Get things started
Hello, World!
Welcome to your journey as a developer. When learning a new language, a developer usually starts with creating a hello, world program. A hello, world is a simple program that allows a developer to test to see if there environment is set up and working.
Objectives
- Ensure your development environment is setup
Requirements
This should have been done in class, but make sure your laptop is set up and ready to go.
All your code should place inside the static void Main(string args[])
Explorer Mode
- Create a new
sdg-consoleapp. - In the
static void Main, ChangeWelcome to C#, toHello, World, my is [your name]
Additional Resources
28 - suncoast overflow - part 1 - designing a full stack app
Suncoast Overflow
As we explore the concepts of a full-stack web app, a good way to practice is to duplicate an existing site. For this project, you will be creating a copy of a site that you know very well, StackOverflow.
The finished product will be due Monday, so this will be a little bigger. Pace yourself
First, we need to the database schema and start to build the API for the core functionality
Objectives
- Create a full-stack web app, from database to API, to frontend, as well as styled
- Practice working in groups
Requirements
In groups of 2 or 3, create an anonymous question and answer site, that allows users to up-vote and down-vote questions and answers.
The core functionality is:
- as a user I should be able to view and search questions asked
- As a user I should be able to view a question and its answers
- As a user I should be able to post a question, this can anonymous, and should be for Explorer Mode
- As a user I should be able to answer a question
- As a user I should be able to up/downvote an answer
- As a user I should be able to up/downvote a question
Explorer Mode
- Create wireframes for your app. really focus on the MVP
- Create an ERD for the core functionality above
- Get organized as a group.
- Start creating an API that supports your design
- Start Creating the Client app application that uses your API
Adventure Mode
- Work on your capstone project
23a - Color Picker - working with react state
Pick a Color, any Color
In this assignment, you'll create an HSL(a) color picker with React.
First, a little bit of color theory...
On the web, and computers in general, we often think of colors using the RGB color model. In HTML and CSS, we often use hexadecimal triplets to describe colors in RGB. For example, #76BCBB represents a nice shade of blue: . 76 is the red component, BC for green, and BB for blue. Those hexadecimal numbers translate, respectively, to 118, 188, 187 in decimal. The range for each color is 0 through 255.
In this model, the three additive primary colors (red, green, and blue) are combined to create colors. The absence of these colors creates black, while all three colors at full strength combine to create white. In hexadecimal, FF represent the decimal value 255. This helps to explain why #FFFFFF represents white. We can also use other notations in CSS to specify colors, such as rgb(118, 188, 187), where the decimal values are given.
RGB isn't the only way we can use numbers to represent colors; there exists many color models, some with specialized purposes, such as CMYK a subtractive model used in printing. In many color models the relationship between the color components isn't always evident in any meaningful way, especially if you're trying to combine them to find a specific color. Try looking for that perfect shade of blue on an RGB color picker, you will probably find it to be a little counter-intuitive. Some color models are easy to reason about, such as HSL (hue, saturation, lightness) and HSB (hue, saturation, brightness). Like RGB, CSS supports defining colors in HSL:
hsl(50,8%,20%)
The first value hue is given as a degrees (around a color wheel), the second value is a percentage of saturation (0% being grey, 100% fully saturated), and the third value, a percentage of lightness (0% black, 100% white).
You can also read this short guide to HSL
Objectives
- Respond to user events in React
- Use state in react to drive changes to a user interface
- Use props to drive inline styles to dynamically update the appearance of DOM elements
- Understand RGB vs HSL color models
- Use controlled form inputs in React
Requirements
Use range type input elements to drive a color display. You'll end up with something like this:

HINT: You will want to combine techniques of string interpolation and using inline styles in React, for example:
<div style={{ backgroundColor: `hsl(50,8%,20%)` }} >
  Hello World
</div>
Explorer Mode
-
Represent the three values,
hue,saturation, andlightnessin your state. -
Add three sliders that update their respective values (
hue,saturation, andlightness) in the state when changed. -
Display the color on the screen, in both text (i.e.
hsl(50, 8%, 20%)) and the actual color as a background color on an element. -
Initialize the state to a random color when the page is loaded.
-
Add a button that picks a new random color.
-
In all cases, the sliders should be in the correct positions to represent this random color.
Adventure Mode
- Add a fourth slider for
alpha, be sure to put some kind of pattern behind your color so the user can see the transparency effect. - Add a section that displays a css class that applies the current background color to an element, just like https://cssgradient.io/
- Only display the output color text in
hsla()if the alpha value is less than1.
Additional Resources
03 - Deck shuffler - Loops and Lists
All Cards on Deck!
In this project, you will use C# to model a deck of playing cards. You'll also add functionality to it such as shuffling and dealing.
Shuffling Cards
Computers are notoriously bad at random numbers. This is a pretty deep and complex topic, but it's worth pointing out that most random numbers we use in computing are actually "pseudorandom". For this assignment, you will read about, then implement, a popular algorithm that shuffles the order of a finite set using C#'s built in Random.Next() function as a pseudorandom number generator.
Objectives
- Demonstrate usage of arrays to model resources
- Understand and implement algorithms
- understand loops
Requirements
- Your deck should contain 52 unique cards.
- All cards should be represented as as string such as "Ace of Hearts"
- There are four suits: "Clubs", "Diamonds", "Hearts", and "Spades".
- There are 13 ranks: "Ace", "2", "3", "4", "5", "6", "7", "8", "9", "10", "Jack", "Queen", and "King".
You will model these in code, in any way you see fit. It may require you to experiment and try a number of techniques. There are many valid solutions.
To shuffle the cards, you should implement the Fisher–Yates shuffle algorithm:
For our purposes, n is 52:
for i from n - 1 down to 1 do:
  j = random integer (where 0 <= j <= i)
  swap items[i] with items[j]
hint: really understand the algorithm before you try to implement it.
Explorer Mode
- Once the program starts, you should create a new deck.
- After deck creation, you should shuffle the deck using Fisher–Yates shuffle algorithm.
- After the deck is shuffled, display the top card.
- Give the user an option to see the next card or quit the program.
Adventure Mode
- In addition to displaying the cards, also store the "dealt" cards in a
playerHand - Implement a way to deal cards into two or more hands
Epic Mode
- Implement the game of War
Resources
Slides
04 - blackjack - week 1 project
Blackjack
In this project, you are creating a playable game of Blackjack.
Objectives
- Practice the skills and ideas you have learned so far
- Effectively use loops, conditionals, and other control structures to implement control flows
- Demonstrate usage of data structures to model resources
Requirements
Create a single-player blackjack game that plays against the house, i.e., a human player and computer dealer. You are free to create the user interface however you want, but keep it simple for Explorer Mode.
Explorer Mode
General Rules:
-
The game should be played with a standard deck of playing cards (52).
-
The house should be dealt with two cards, hidden from the player until the house reveals its hand.
-
The player should be dealt with two cards, visible to the player.
-
The player should have a chance to hit (i.e., be dealt another card) until they decide to stop or they bust (i.e., their total is over 21 ).
-
When the player stands, the house reveals its hand and hit (i.e., draw cards) until they have 17 or more.
-
If either the house or the player bust, they lose.
-
The player should have two choices: "Hit" and "Stand."
-
Consider Aces to be worth 11, never 1.
-
The app should display the winner. For this mode, the winner is who is closer to a blackjack (21) without going over.
-
There should be an option to play again; this should reset the hands and reshuffle the deck.
Adventure Mode
- Reveal one of the house's cards to the player when cards dealt.
- Consider aces be worth one or eleven.
- Allow the player to "Split".
- Improve the win requirements. From Wikipedia:
Players win by not busting and having a total higher than the dealer, or not busting and having the dealer bust, or getting a blackjack without the dealer getting a blackjack. If the player and dealer have the same total (not counting blackjacks), this is called a "push," and the player typically does not win or lose money on that hand. Otherwise, the dealer wins.
Epic Mode
- Add a betting system that carries between rounds
- Allow the player to "Double down" or "Surrender."
- Add more Players
16 - Serving HTML to table 5 - Semantic HTMl
It all starts with HTML
During this week, you will be building a website for your new chain of restaurants. This will have a few pages and will serve us as a playground to learn about web development.
All web pages have to start somewhere, and this site is no different. To start off, you will be laying the groundwork for the days to come.
To start, you will need to start with the HTML and content.
Requirements
- Name your restaurant and decide what type of food you will be selling. This is just a starting point, do not get too hung on this.
- Create the Content for your page
- Craft semantic HTML for your landing page.
Explorer Mode
- Read through these notes
- Decided on the details for your restaurant. This should include, but not limited to :
- Name
- Type of Cuisine
- Location(s)
- Upcoming events
- 3 featured dishes
- Create the semantic HTML for the all the details above
- Add at least 3 images
- Create at least 3 links on the page
- Your website should minimally have
- a navbar
- a "hero" section
- at least 3 sections about the restaurant, get creative here. Specials, events and locations would be a good start here.
- Contact information
- a footer
- Push your site to GitHub
- Deploy your site.
NOTE: Remember, this is all about content, do not worry about making your website look nice, we will do that later.
Adventure Mode
- Read about CSS
- Read more about CSS.
- Create a simple wire frame for your finished site.
- Start to add some basic CSS to your site to match your wire frame.
Additional Resources
08 - Intro to SQL - SQL I
INSERT INTO Student (knowledge) VALUES ('SQL')
Every application uses data in some way. This will help you set up your development environment as well as get used to querying databases.
Objectives
- Install Postgres
- Create a database for Employees
- Write some queries to use the database
Requirements
- Set up postgres by following these directions.
Explorer Mode
-
Install Postgres
-
Create a database:
company_database -
Create a table:
employees -
Add the following columns to the table, Use your best judgement for data types
- full_name
- salary
- job_position
- phone_extension
- part_time
-
Create queries that can do the following:
- Select all columns for all employees
- Select only the Full Name and Phone Extension for only Full Time employees
- Insert a new part time employee, as a software developer, part time, with a salary of 450
- Update all employees that are the cooks to have a salary of 500
- Delete all employees that have the full name of "Lazy Lynn"
- Update all employees to be full time
- Add a column to the table:
parking_spot_numberas a string that up to 10 characters long
-
Turn in the above queries as a gist
Adventure Mode
Since we are starting our second lanaguage, be sure to keep your C# skills sharp.
- Go back and work on the either .net-iterations, koans, or function-junction
Epic Mode
- Investigate working with C# and Postgres, HINT:
entity framework core - LINQ Notes
- EF Core notes
Additional Resources
Recommended Practice:
- For more practice, Hackerrank has a SQL Track
01 - Our first program - Working with varibles
Variables, Variables, and Variables
Let's get started
Today, we are starting our journey into development. This journey has to start somewhere. For this assignment, you will be making a program that demonstrates some programming fundamentals.
Objectives
- Ensure your development environment is setup
- Practice creating variables
- Practice working with user input
Requirements
This should have been done in class, but make sure your laptop is set up and ready to go.
All your code should place inside the static void Main(string args[])
Explorer Mode
-
Create a new
sdg-consoleapp that does the following.- Create a variable (use your best judgment for type) that stores the
numberOfCupsOfCoffeethat you drink every day - Create a variable (use your best judgment for type) called
fullNameand set it equal to your full name. - Create a variable (use your best judgment for type) call
todayand set it equal to today's date. - using your variables,
numberOfCupsOfCoffee,fullNameandtoday, Console.WriteLine out all three on one line. - Ask the user for their name and store it in a variable called 'user'.
- Print out a greeting to the user, using their name
- Ask the user to input two numbers
- Get the numbers as Strings using
Console.ReadLine - Convert a String to a double using double.parse. Save the first double value in an
operand1variable and the second double value in anoperand2variable - Add the operands and save in a
sumvariable - Subtract the operands and save in a
differencevariable - Divide the operands and save in a
quotientvariable - Multiply the operands and save in a
productvariable - Find the remainder when one operand is divided by the other and save in a
remaindervariable. See this page if you need to learn more about the modulo operator. - print all the results to the screen in a meaningful way.
- Create a variable (use your best judgment for type) that stores the
Adventure Mode
- Some logic to your program that prints our a special message for a user with the of
Alice - Use the type DateTime to represent today.
Epic Mode
- Move all of your logic to separate file and Call it from the
Mainmethod
Additional Resources
- env setup
- Full dotnet lecture notes
- Types and variables
Reading Material
10 - EF Core - ORMs
Party Thyme
With the seasons changing to springtime, it is time to start planting our gardens. For this assignment, you will be building an app that allows users to track their gardens. This will us track what plants we have planted, how long ago they were planted and other details.
Objectives
- Create a console app that uses an ORM to talk to a database
- Working with EF Core
- Reenforce SQL basics
Requirements
- Create a .NET console app that stores data in a database.
- Query the database using EF Core.
Resources
Explorer Mode
.NET
-
Create a new console application that will store the list of plants the user has planted.
-
You will be creating a class for your
plant. -
a Plant has the following properties
- Id - primary key
- Species - The type of plant
- LocatedPlanted - where is the plant plated
- PlantedDate - When was the plant planted
- LastWateredDate - When was the last time a plant was water
- LightNeeded - How much sunlight is needed
- WaterNeeded - how much water is needed
-
Your Plants will be stored in a database called PlantDatabase.
-
When the console application runs, it should let the user choose one of the following actions:
- View All the current plants
- this command will show the all the plants in a the list, ordered by LocationPlanted
- Plant a new plant
- This command will let the user type in the information for a plant and add it to the list
- Remove a plant
- This will delete a plant by Id
- Water
- This will update the plant's LastWateredDate to the Current Time. The user will select the plant by Id
- View all the plants that have not been watered today
- Location summary
- This will all the plants that are in given location
- quit the program
- this will stop the program
- View All the current plants
Adventure Mode
- Add a field to your Plant Model called
WateringFrequency. This should be anintthat represents how many hours between watering. Add an option for user to see all plants that need water. This should show all the plants where theirLastWateredDateis further away than theirWateringFrequency - Add a second table, called
Gardens. Remove theLocationfield and create a 1 to many relationship for the Plants to Gardens. Update your menu to reflect as such.
Epic Mode
Go back to your Dinosaur app, remove your list and add a database.
Additional Resources
11 - Rhythm's gonna get you - Complex Data model
Rhythm's gonna get you
For the past few lessons, we have chatted about and worked with data; for this project, we continue our journey into data and modeling a database. We are starting a record label company, and we a place to store our bands, albums, and songs. You are creating a console app that stores our companies information in a database.
Objectives
- Practice working with SQL
- Practice working with ORMs (EF Core)
Requirements
Create a console that allows a user to store and manage the company's bands, albums, and songs.
You can use the template we have been using, but you can also use the one we talked about today. You can install it by using the following command:
dotnet new --install SDG.templates.Console.Database::1.0.0Also, feel free to use the package we talked about during the with me at 3 to help with the menu system.
Explorer Mode
-
Create a database that stores Albums, Bands, and Songs. They should have at least the following properties, use your best judgment for types. (I have left off the Foreign keys intentionally)
-
Album
- Id
- Title
- IsExplicit
- ReleaseDate
-
Band
- Id
- Name
- CountryOfOrigin
- NumberOfMembers
- Website
- Style
- IsSigned
- PersonOfContact
- ContactPhoneNumber
-
Song
- Id
- Title
- Lyrics
- Length
- Genre
-
For the relationships, add keys are needed to fulfill the following
- 1 Album has many Songs
- 1 Band has many Albums
-
Create an interface to let the user :
- Sign a band (add a new band)
- Produce and album (add a album, and add a few songs to that album)
- Let go a band (update isSigned to false)
- Resign a band (update isSigned to true)
- View all albums for a band
- View all the albums, ordered by ReleaseDate
- View and Albums song
- View All bands that signed
- View all bands that are not signed
-
Adventure Mode
-
As you see, our data is not very normalized, Add the following relationships and tables
- A song can have many genres
- A band can have many styles
-
Not only do you want to store band, as also band members, create a new table called
Musiciansgive it a many to many relationships with a Band -
Add the following queries
- View albums in a genre
- View all members of a band
Epic Mode
- Project structure is becoming more important as we progress through the cohort. Challenge yourself to have
ReadLineandWriteLineonly in yourProgram.cs - (this is a big leap, but a good one)On Monday we are starting to talk about APIs. Add integrations from Last.fm API. This API has a bunch of features. Go crazy; the sky is the limit. hint: use the Httpclient in C#
Additional Resources
Recommended Practice:
- For more practice, Hackerrank has a SQL Track
26 - music madness - creating a SPA
Music Madness
For tonight, I want you to show off what you favorite music is. You will be creating a multiple page app, using react-router.
Objectives
- Create a SPA, with a few pages
- Deploying your website
Requirements
- Build a website that has 4 pages.
- 1 landing
- a page for your top three favorite bands.
Explorer Mode
- Add
react-router-domto your project. - Create a Landing page that displays a short description of all three of your bands
- Build 3 band pages. These pages should have a
- a band picture
- band name
- Latest Album information
- Each page should have a nav bar that allows the user to browse from page to page
- Deploy your site
TIP: for Explorer mode focus on getting the router set up and linking up the pages to each other.
Adventure Mode
- Instead of hard coding the URL, try to use parameters, components and JSON file to supply navigation for your site.
- Career support (resume) and capstone come to mind.
- [ ][do you wanna build a snowman?] (https://suncoast.io/handbook/curriculum/front-end/react-ii/assignments/snowman)
Epic Mode
- Add integrations from Last.fm API. This API has a bunch of features. Go crazy, the sky is the limit.
Additional Resources
- npm react-router-dom
yarn add react-router-dom
capstone 03 - ship it - capstone
Ship it
With all the work you have been putting into the last 13 weeks, it has all come down to this. Complete your capstone and show it to the world
Explorer Mode
- Submit your repository for the capstone project
- Submit your Url(s) for your capstone project.
capstone 00 - wireframes -
It starts with a plan.
We are starting the final stretch of the cohort. This means we are starting to focus on our final projects.
When we go to start a new project. The first step is create an elevator pitch. This is a short description that describes what your final project is doing. This should be similar to what you said during pitches.
The second step is to always plan out what we are doing. These early plans often take the shape of wire frames. This means that our first task for the capstone projects is create our wire frames.
The elevator pitch and wire frames should be treated as a detailed road map. When these are created, these should be treated as law; it can be changed, but must be changed with purpose.
Objectives
- Finalize the idea for your capstone
- Create wire frames for your capstone project
- Using
app-appto start implementing your HTML
Requirements
- Using your favorite way to create wire frames (paper, whiteboard, website), create all the pages for your site no matter how simple the pages are.
- Create a new repository for your capstone project
Explorer Mode
-
Create the elevator pitch for your final projects.
-
Place this in the
README.mdof your capstone project repository -
Create a wire frame for each page in your page you capstone.
-
Place these wire frames in an
.ideafolder of your capstone project repository.
Additional Resources
capstone 00 - one little spark - capstone ideas
One little spark; of inspiration.
General Requirements:
The capstone project is the final of the course. This project should be significant in scope, but able to be trimmed down to a MVP (minimal viable product). Capstones are not necessarily new ideas that are supposed to change the world. Even though news ideas are accepted (and sometimes encourage, with instructor guidance), some of the best demo's did re-invent the wheel.
The capstone has 2 mains goals.
-
The capstone provides you practice on the skills that you have grown over the course. During the course, you have built many projects, but on a small scale. The capstone projects allow you to built something at a bigger scale, and over a longer timeline. This more significant scope helps reinforce fundamental concepts.
-
The capstone provides a vehicle to show off the skills you have cultivated and want to grow upon further. This project is a great portfolio piece. As described in career support, employers love to see what you build. This portfolio peice helps showcase the skills you want to work on and grow on going forward.
Ideas:
Here are some pre-selected ideas to help get you started.
-
Photo manager (imgur.com)
- view all photos
- be able to have tags for a photo
- search for a photo by tags
- CRUD a photo
- add user authentication
-
A resource sharing website, centered around a specific knowledge (reddit for horseback riding) (reddit.com)
- CRUD A resource
- search for a resource
- resources have genres or types
- users have control only over resources they posted
-
Map X around a user (google maps)
- I want to view data points on a map,
- CRUD data points
- search for data points
- view data points either on a map or in a list view
-
An event site (https://www.eventbrite.com/)
- CRUD events
- Each event has a certain number of tickets
- I can "buy" tickets for an event
- as a user, I can view my tickets
-
Simple social media focused around a specific subject
- As a user, I should be able to sign up
- As a user, I should be able to follow other people
- As a user, I should be able to CRUD
- As a user, I should see the posts that other people make
- As a user, I should be able to search for people and or posts
Projects we liked in the past
- http://extracurricular.site/, a Sports Team roster management
- https://schedulequik.surge.sh/, a Shift Scheduler for a restaurant
- http://migo-app.herokuapp.com/, a resource for finding places to learn English
- http://tidetracker.live, a site to track tide data
- http://Dev-life.surge.sh, a site to help developers find a new state to work
- https://www.gpcal.pro/, a tracker for race car races
- https://betterbudget.herokuapp.com/ a simple budget calculator
- https://feel-good-inc-hp.netlify.com/, A doctor/patient scheduler
- https://bands-in-town.netlify.com/, event site clone
- https://reward-tracker-justin.netlify.com/, classroom rewards tracker
- https://watchdog-nkerns.netlify.com/, contractor management
18 - octocats - grids and media query
Octodex
GitHub has a great mascot called OctoCat. OctoCat even has its own gallery of variations, created by GitHub itself and fans, called Octodex.
You can use all the tools you have at your disposal to get the job done. Use your browser's Developer Tools to inspect their site to find the exact font sizes and padding amounts.
Objectives
- Build on your knowledge of HTML & CSS
- Implement, from scratch, a given design
- Understand HTML/CSS Layout
- Be able to place elements on a page where you want them.
- Use flexbox and grid techniques layout pages.
- work with media queries to build a responsive page.
Requirements
-
You should strive to implement the design as close as possible, though, especially if you've never touch HTML or CSS before, this can be extraordinarily difficult and will take a lot of practice and mileage.
-
Note: You should complete at least the tasks given for explorer mode as listed below before turning in the assignment, as well as before attempting adventure or epic modes.
Explorer Mode
- Recreate the page as closely as you possibly can. Use the same fonts, sizes, and colors. Download some of your favorites
- Use some Octocat images to use in your page (12-16 or so). Your layout should be flexible but doesn't need to perfectly responsive.
- Use CSS media queries to resize the Octocat containers to look great as the screen changes size. Even though the site has desktop, laptop, tablet and mobile display, for explorer mode only worry about desktop and mobile.
- deploy your site.
TIP Reminder to breakdown the layout into smaller chunks that are easier to style
Adventure Mode
- Add a tablet display to accommodate a tablet screen size
- Add a laptop display to accommodate a tablet screen size
- For the responsiveness of your cats, if you used flexbox for explorer mode, now use css grids, if you grids, now use flexbox.
Epic Mode
- Go back to a past homework and make it responsive.
- Use this API to make your website data driven. HINT: fetch, javascript and document.createElement. This is a big jump, but I think you can handle it.
Additional Resources
- watch this video to work more with media queries https://www.youtube.com/watch?v=2KL-z9A56SQ
12 - Explosive APIs - Our first API
Explosion Api
You have already solved the explosion and mumbling katas. The client loves your solution so much that they want you to turn it into an API us on the web.
For this assignment, create a simple API with two endpoints, one for the explosion and one for the mumbling.
Objectives
- Create a simple API
- Practice problem solving
Requirements
- Create 2 endpoints,
/api/mumblingandapi/explosion, that are based off of the katas,[https://www.codewars.com/kata/mumbling](https://www.codewars.com/kata/mumbling)and[https://www.codewars.com/kata/digits-explosion](https://www.codewars.com/kata/digits-explosion)respectfully.
Explorer Mode
- Create a new
sdg-apiapi project - Create a endpoint for the
mumblingendpoint- Create a new Controller called
MumblingController - This will have one
HttpGet - The one get will accept a string
- This endpoint will take the string passed to it, manipulate according to the kata https://www.codewars.com/kata/mumbling and return the result
- This will return a
string
- Create a new Controller called
- Create a endpoint for the
explosionendpoint- Create a new Controller called
ExplosionController - This will have one
HttpGet - The one get will accept a string
- This endpoint will take the string passed to it, manipulate according to the kata hhttps://www.codewars.com/kata/digits-explosion and return the result
- This will return a
string
- Create a new Controller called
Adventure mode
-
Instead of just returning a string, look into how to return a JSON object instead. HINT: use classes.
-
We have been talking about databases in the previous lessons. Let's add a couple of our endpoints that interact with a database.
-
Create a endpoint for the
CheckInendpoint- Create a new Controller called
CheckInController - This will have 1
HttpPost - The one get will accept a string
- This endpoint will take the string passed to it and add it to a database table
- This will return a
ActionResult
- Create a new Controller called
-
This controller will have a second endpoint
- This will be a
HttpGet - The one get will accept no parameters
- This endpoint will return all the people who have checked in using the previous endpoint.
- This will return a
ActionResult
- This will be a
Epic mode
- Following the steps here, Learn about and use docker to deploy your API to the web.
Resources
- Use Postman for interacting with your API
- lecture notes
- Web API Tutorial
- Web API docs
06 - First Bank of Suncoast - File storage
First Bank of Suncoast
For this assignment, you will be creating your own personal bank account manager. You will creating an app that will let you track a savings and a checking account total by performing transactions, such as withdrawal, deposits and transfer. This will save your information in a file so you can track your account totals over time, automatically.
Objectives
- Practice control structures
- Practice data structures
- Practice working with user data
- Practice with LINQ
- Practice with OOP concepts
- Practice working with files
Requirements
Create a console app that allows a user to manage a savings account.
As user should be able to make a deposit to each of their account, a withdrawal from each of their account, and transfer money between accounts.
The account information should be stored in a file, using a JSON or CSV format to record the data.
Explorer Mode
- As a user I should be able see the totals in my saving and checking account when the program first starts
- As a user I should be able to deposit funds to my savings account
- As a user I should be able to deposit funds to my checking account
- As a user I should be able to withdraw funds to my savings account
- As a user I should be able to withdraw funds to my checking account
- As a user I should be able to transfer funds from my checking account to my savings account
- As a user I should be able to transfer funds from my savings account to my checking accounts
- The app should save my transactions to file using a standard format. This saving should happen after every transaction
- The app should load up past transaction from a file on start up.
Adventure Mode
- Add the ability to have multiple user. There are many steps to take here, so really take the time to plan out the changes needed as well. This includes changes to the interface as well as changes to how you store the data.
Epic Mode
-
Go back and work on the either .net-iterations, koans, or function-junction
-
Add a simple password protection to your user's accounts
-
Eventually we will be using a MVC application structure. To prepare for this, refactor your code to have all your business logic in separate class, called
ParkServiceand all your console interaction in the main class. -
Your data is currently stored in a file. This is nice, but doesn't scale well. On Monday, we starting to explore something called SQL. Update your code to use a database instead of a file.
Additional Resources
Preview
- Next, we start learning SQL. Read this as a preview
05 - Iterations - LINQ practice
Iteration
Learning programming takes practice and the best practice is repetition. This exercise allows you time to work on the basics of .NET and how to apply that logic to solving problems.
Objectives
After completing this assignment, you should be able to:
- Demonstrate understanding of iteration/enumeration
- Further your black jack game
Instructions
- Fork this repository to your own account.
- Change into your projects directory:
- Clone your repository:
git clone https://github.com/YOUR_NAME_HERE/net-iteration - Change into your project's directory:
cd net-iteration - Install the dependencies:
dotnet restore - Open in your editor:
code . - Start the test runner:
dotnet watch test - Open
Iterations.csand work on functions until tests pass. Once you are done with a test, to move to the next one, remove(Skip = "Remove to run test")from theFactattribute. There are a total of 10 questions - Commit and push your work to GitHub.
- Turn in the URL to your GitHub repo.
Explorer Mode
- All tests passing
- No linter warnings
- Turn in the homework using the URL to your repository on GitHub.
Adventure Mode
- Do the same with the Koans at https://github.com/suncoast-devs/DotNetCoreKoans
- Do the same with the Function-Junction Koans at https://github.com/suncoast-devs/FunctionJunctionDotNet
Additional Resources
Reference the documentation on DevDocs to find what kind of helpful functions might already be in JavaScript.
classwork - working with CSS -
Travel Together!
Your team has been contracted by the city of St Pete to build out a site about local tourism. Luckily for us, our team has a designer and has completed their mocks up of what they envision the site to look like. Your task is, in small groups (2-3) pair program and recreate the site as close as possible.
This is an in-class activity to help reinforce concepts and provide milage to be more comfortable with CSS.
Objectives
Requirements
- form small groups of 2-3
- recreate this website
- We will meet periodically to discuss progress, topics, and ideas. Keep an eye on slack.
Explorer Mode
For explorer mode, work to recreate the site exactly
- Start with build the HTML, focus on semantics
- After you are happy with the HTML, build out the mobile view
- Build out the desktop view
- deploy your app
Adventure Mode
- The color is interesting to say the least, change the color scheme to something you like better. Tools like https://coolors.co/ and http://paletton.com/ will help.
Tips and Tricks
- This looks and feels a lot like our example from yesterday. Use that as inspiration.
- The site is live at here. You can use for inspiration or if you get stuck
- Even though we see the website from a top perspective, you can develop a site's sections in any order. If you get stuck on one section, move on the next
20 - scoreboard - intro to javascript
Score Board
For this assignment, you are creating a simple interactive scoreboard for your favorite sport.
Requirements
- Refer to this mockup to design your page:

- Use the HTML and CSS here to jump-start your project.
- A user should be able to update a score and the teams playing.
Explorer Mode
Part 1:
- Create a new project using the
betastack and implement the design using the given HTML & CSS. - Assign click events to the
updatebuttons to update the corresponding values on the page. The score buttons should adjust the current score by a "hard-coded" value. - Deploy your site.
Part 2:
- Add an
ifstatement to stop each team's score from going below 0. - Add an
ifstatement to stop each team's score from going above 21 - When a team gets 21 points, disable the buttons and display a message to the user of who won
- Add a
resetbutton that resets the scoreboard back to each team having 0 points and re-enables the buttons
Adventure Mode
- Add more CSS to the winning teams score to indicate who won.
- Implement a Quarter/Period Tracker that would be appropriate for the sport.
- Add some styling to make it more presentable. Have fun with it.
- Make the layout responsive.
Epic Mode
- Add a Timer that counts down automatically and updates the period/quarter appropriately.
- Save/load the information to local storage.
- Add anything else that your sport would have on its scoreboard (e.g., fouls, sacks, shots on goal).
- Improve the UX to help to make scorekeeping by your sport easier.
30 - suncoast overflow - part 3 - shipping a full stack app
Suncoast Overflow
As we explore the concepts of a full stack web app, a good way to practice is to duplicate an existing site. For this project you will be creating a copy of a site that you know very well, StackOverflow.
The finished product will be due Monday, so this will be a little bigger. Since you have a long to time to work on this, this project is a great portfolio piece that can a clean and responsive UI, as well as clean code in the API.
It is recommend to start with wire frames, then go from there.
Objectives
- Create a full stack web app, from Database, to API, to frontend, as well as styled
- Practice working in groups
Requirements
In groups of 2, create an anonymous question and answer site, that allows users to up-vote and down-vote questions and answers.
The core functionality is:
- as a user I should be able to view and search questions asked
- As a user I should be able to view a question and its answers
- As a user I should be able to post a question, this can anonymous, and should be be Explorer Mode
- As a user I should be able to answer a question
- As a user I should be able to up/down vote a answer
- As a user I should be able to up/down vote a question
Explorer Mode
- Complete the app that has the above functionality
- Deploy it
Adventure Mode
- Add user accounts
- Go to StackOverflow, pick a feature, and implement it.
Epic Mode
- Work on your capstone
23b - Party like its 1989 - apis and react
Party Like it's 1989!
It's 1989. The Internet has just come online and Tim Berners-Lee is going to invent the World Wide Web. The Cold War is ending, and the Berlin Wall will be coming down. It's also going to be a great year for film. In this assignment you're going to build a small webpage that showcases some of the most popular movies of 1989.
The data for this assignment comes from The Movie DB API.
This is the API end-point that supplied the data file for this project:
https://api.themoviedb.org/3/discover/movie?primary_release_year=1989&sort_by=popularity.desc&api_key=YOUR_KEY_HERE
You will need to sign up and make an account to get an API key.
An example of the movie object is
{
  "vote_count": 4300,
  "id": 89,
  "video": false,
  "vote_average": 7.7,
  "title": "Indiana Jones and the Last Crusade",
  "popularity": 18.43,
  "poster_path": "/4p1N2Qrt8j0H8xMHMHvtRxv9weZ.jpg",
  "original_language": "en",
  "original_title": "Indiana Jones and the Last Crusade",
  "genre_ids": [12, 28],
  "backdrop_path": "/vfvVuu1JdnEGcyZUj7VHrhhbeMj.jpg",
  "adult": false,
  "overview":
    "When Dr. Henry Jones Sr. suddenly goes missing while pursuing the Holy Grail, eminent archaeologist Indiana must team up with Marcus Brody, Sallah and Elsa Schneider to follow in his father's footsteps and stop the Nazis from recovering the power of eternal life.",
  "release_date": "1989-05-24"
}
You'll notice that the poster images are just the file names. You can get the full URL to a poster by concatenating the path with the following base URL:
https://image.tmdb.org/t/p/w185_and_h278_bestv2
In this case:
https://image.tmdb.org/t/p/w185_and_h278_bestv2/4p1N2Qrt8j0H8xMHMHvtRxv9weZ.jpg
Objectives
- Work with API data
- Understand and use React components
- Understand and use "props" in React
- Use
Array.prototype.mapto render a collection of components in React
Explorer Mode
- Use the API to fetch the data and render it on the page, rather than the supplied JSON file.
- You should have at least two components;
AppandMovie. - Render at least the title, poster image, and plot overview. Feel free to include other pieces of the data.
- Try to capture an 1980's or early 90's aesthetic when you style your page. Have fun with it!
Adventure Mode
- Sort the films by release date, rather than as they appear in the file.'
- Add a search bar that filters down the shown results. Note that is not making a new API call, just
filtering the current list - Display the release date in a formatted manner, e.g. "May 24th", rather than
1989-05-24. HINT: moment.js or date-fns
Epic Mode
- give the user a chance to "favorite" movies and store favorite movies in local storage
- Explore the API and use other endpoints.
- Allow the user to change the year they are searching for
- change the style based on the decade they user selected
Additional Resources
13 - The Rise of the Tamagotchi - APIs and data
The Rise of the Tamagotchi
To start your journey you will be creating an API that allows a user to create and care for a virtual pet, reminiscent of a Tamagachi. The basic functionality will walk you through the 4 basic parts of a web api, create, read, update and delete. For explorer mode, keep it simple and they add features.
Objectives
- Create an API that can CRUD against a Database
- practice creating ASP.NET Web API endpoints
- practice EF Core.
Requirements
- Create a simple API that has a handful of endpoints to manage data
- The API should be using Web API Controllers, Ef Core, and Postgres database
- Use Postman for interacting with your API.
- Install the
sdg-apitemplate using the commanddotnet new -i SDG.templates.Web.API
Explorer Mode
-
Create and new
sdg-apithat has the following features -
a database with 1 table, called
Pets.- Should use a POCO called
Petwith the following columns:- Id (int)
- Name (string)
- Birthday (DateTime)
- DeathDate (DateTime?)
- HungerLevel (int)
- HappinessLevel (int)
- Should use a POCO called
Your API should have the following endpoints
-
GET /api/pets, this should return all pets in your database. -
GET /api/pets/{id}, This should return the pet with the corresponding Id. -
POST /api/pets, This should create a new pet. The body of the request should contain the name of the pet. -
PUT /api/pets/{id}/play, This should find the pet by id, and add 5 to its happiness level and add 3 to its hungry level -
PUT /api/pets/{id}/feed, This should find the pet by id, and remove 5 from its hungry level and add 3 to its happiness level. -
PUT /api/pets/{id}/scold, This should find the pet by id, and remove 5 from its happiness level -
DELETE /api/pets/{id}, this should delete a pet from the database by Id
Adventure Mode
Add the following features to your API
- Add a column to your pet model call
IsDead(bool). Whenever you call a PUT to update a pet, give your pet a 10% chance of Dying. - Add a
LastInteractedWithDate(DateTime), that gets updated every time a pet is queried from the database on PUT or a GET. If theLastInteractedWithDateis ever over 3 days, the pet should die from neglect. - Add an endpoint that gets Pets that are only alive
Create a console app that interacts with your API that:
- allows the user to see all alive pets
- Select a pet to take care of
- Play, scold and feed with the selected pet.
- create a new pet
- Delete a pet
Epic mode
- Have fun with it and try to recreate a Tamagachi
- Following the steps here, Learn about and use docker to deploy your API to the web.
Resources
- Use Postman for interacting with your API
- lecture notes
- Web API Tutorial
- Web API docs
14 - Don't lose track! - API practice I
Don't lose track!
Now that we have new API skills, we want to create an API to help our favorite store keep track of their inventory. This API will be able to let users add, update, delete, and search for items.
Objectives
- Create an API that can CRUD against a Database
- practice creating ASP.NET Web API endpoints
- practice EF Core.
- Working with docker
Requirements
- Create a simple API that has a handful of endpoints to manage data
- The API should be using Web API Controllers, Ef Core, and Postgres database
- deploy your app to Heroku
Explorer Mode
-
Create a new
sdg-apiproject using the dotnet CLI, have fun with the name and what items the shop sells. -
Create a Model for an item in the shop. This will be your database table structure.
-
The Item should have at least
- Id
- SKU
- Name
- Short description
- NumberInStock
- Price
- DateOrdered
-
Create a GET endpoint for all items in your inventory
-
Create a GET endpoint for each item
-
Create a POST endpoint that allows a client to add an item to the inventory
-
Create a PUT endpoint that allows a client to update an item
-
Create a DELETE endpoint that allows a client to delete an item
-
Create a GET endpoint to get all items that are out of stock
-
Create a GET endpoint that allows them to search for an item based on SKU
06 - Jurassic Park - Practice
Welcome to Jurassic Park
So far you have traveled far in your learning and will continue to explore it more in depth in the coming weeks. Like any good craftsman, practice turns into mastery. Tonight, you will be creating a simple console application that help manages a zoo full of Dinosaurs.
Objectives
- Practice control structures
- Practice data structures
- Practice working with user data
- Practice with LINQ
- Practice with OOP concepts
Requirements
- Create a simple console application that manages the dinosaurs in your zoo.
Explorer Mode
-
Create a new console application that will store the list of dinosaurs they have in the park
-
You will be creating a class for your dinosaurs
-
a Dinosaur has the following properties
- Name
- DietType - This will be carnivore or herbivore
- DateAcquired - This will be defaulted when the dinosaur is created
- Weight - In pounds, how heavy the dinosaur is
- EnclosureNumber - the Pen that the dinosaur is currently in, thing should be a number
-
Your dinosaurs will be stored in a
List<Dinosaur>. -
When the console application runs, it should let the user choose one of the following actions:
- View All the current dinosaurs
- this command will show the all the dinosaurs in a the list, ordered by DateAcquired
- Add a new dinosaur
- This command will let the user type in the information for a dinosaur and add it to the list
- Remove a dinosaur
- This will delete a dinosaur by name
- Transfer
- Add the ability to update a dinosaur to a new enclosure
- View The 3 heaviest dinosaurs
- Diet summary
- This will the total number of each type of diet
- quit the program
- this will stop the program
- View All the current dinosaurs
Adventure Mode
- Go back and work on the either .net-iterations, koans, or function-junction
Epic Mode
-
Eventually we will be using a MVC application structure. To prepare for this, refactor your code to have all your business logic in separate class, called
ParkServiceand all your console interaction in the main class. -
Your data is currently stored in a list. This list is lost every time the program restarts. On Monday, we starting to explore something called SQL. Add a database. Convert your code to use Ef Core to store your data in a database.
Additional Resources
27 - Stay in and watch TV - react router
Stay in and watch TV
This weekend, you will create a "TV guide" website. This will use an API, and few pages to display what is currently showing.
Objectives
- Work with an API to display data
- Work with React and React Router
Requirements
- Use this API
- You will have to create an account to get a key, Feel free to use the address and phone number of campus to sign up with
- Use React Router to create the pages.
Explorer Mode
- Create a home page that has:
- the list of all "Top Rated" TV shows, returned from this API
https://api.themoviedb.org/3/tv/top_rated?api_key=<<api_key>>&language=en-US&page=1 - this page should also highlight a random "Top Rated" TV show at the top of the page
- the list of all "Top Rated" TV shows, returned from this API
- Create a
/tv/:showIdpage that shows all the details for a given show and the cast of the show. The cast and crew end point ishttps://api.themoviedb.org/3/tv/{tv_id}/credits?api_key=<<api_key>>&language=en-US - deploy your site
Adventure Mode
- Add a page to view all the TV shows for cast members. This page should show as much as you get from the API about this actor. HINT: Use the
Peoplesection of the API for this - Allow the user to add a rating for the TV show.
Epic Mode
- Work on other assignments you might be assigned as well. Career support and Capstones
- Add a movies section to your site. Try to reuse as many components as possible
Recommended Practice:
- Plan early and be proactive.
- Wireframe out the pages first. Wireframes provide a goal and guide to getting what you need done.
- (git) Commit early and often
capstone 02 - Off to the races - starting your capstone
Take the next step!
With the wire frames, html and css created, next up and will be to continue on breathing life into our projects. After the CSS, HTML, and wire frames, we need to start thinking about breathing life into our apps. Take today to start creating your front end, ERD and API definitions.
Objectives
- Start making your front end dynamic and creating components
- Create an ERD for your database, at least a first draft
- Start thinking about your API, and if you feel good, start implementing
Explorer Mode
- A React with your HTML and CSS
- a ERD Diagram on paper/whiteboard/image/online builder
- A read me with your API endpoints Defined
- With Instructor approval, start building your API
19 - spooky portfolio - CSS practice
A Spooky Portfolio
For this project, we're going to be starting work on a portfolio website that you can improve over the rest of your career.
Recreate this Spooky Portfolio Mockup
The font used is Josefun Sans.
Objectives
- Build on your knowledge of HTML & CSS
- Implement, from scratch, a given design
- Use modern techniques layout pages.
Requirements
-
Recreate this site as close as possible
-
As discussed in class, it is easier to start with the mobile look first and then create the desktop. Follow the requirements in order for this assignment.
-
Remember, start with HTML first and get the content going.
-
You should complete at least the tasks given for explorer mode as listed below before turning in the assignment, as well as before attempting adventure or epic modes.
Explorer Mode
- Recreate the mobile UI
- Update your site to be response for tablets
- Update your site to be responsive for desktops
- Deploy your site
Adventure Mode
- Head over to here. There are animations and hover effects that are not in the mock ups. Implement those using only CSS.
- For the responsiveness of your images, if you used flexbox for explorer mode, now use css grids, if you grids, now use flexbox.
Epic Mode
- Finish the website from class on Thursday
- Take the time to personalize the site with information about yourself, links to your projects, and your pictures.
- Keep it professional, but make it your own.
- Start to research JavaScript
22 - octcats, but in React! - intro to react
React-ify Octocats
Octodex is a fun way to celebrate a powerful tool we use for development. In that same spirit, recreate this site
You'll identify the main Components on the page and create React components for each, breaking down those Components into smaller ones as needed.
Objectives
- Learn to identify parts of a web site as
Components - Use
app-app(GAMMA stack) to build a React project - Understand and use React components
Stretch Objectives
- Understand and use "props" in React
Explorer Mode
- Figure out the main components of the page. These will be the main components in your
<App>component. - Create your React app
- Your CSS should be in
index.css - You should have at least two components...
- Use props to try to reuse components
Adventure Mode
- Place the definition of each Octocat in an
arrayof objects and usemapto generate the Octocat components
Epic Mode
- Put the
arrayof Octocats in aoctocats.jsonfile andimportthat into your app. - OR
- Use the
fetchapi to retrieve the list of Octocats from this api instead
Additional Resources
Recommend Projects
-
 React
React
A declarative, efficient, and flexible JavaScript library for building user interfaces.
-
Vue.js
🖖 Vue.js is a progressive, incrementally-adoptable JavaScript framework for building UI on the web.
-
 Typescript
TypeScript is a superset of JavaScript that compiles to clean JavaScript output.
-
TensorFlow
An Open Source Machine Learning Framework for Everyone
-
Django
The Web framework for perfectionists with deadlines.
-
 Laravel
A PHP framework for web artisans
-
D3
Bring data to life with SVG, Canvas and HTML. 📊📈🎉
-
Recommend Topics
-
javascript
JavaScript (JS) is a lightweight interpreted programming language with first-class functions.
-
web
Some thing interesting about web. New door for the world.
-
server
A server is a program made to process requests and deliver data to clients.
-
Machine learning
Machine learning is a way of modeling and interpreting data that allows a piece of software to respond intelligently.
-
Visualization
Some thing interesting about visualization, use data art
-
Game
Some thing interesting about game, make everyone happy.
Recommend Org
-
Facebook
We are working to build community through open source technology. NB: members must have two-factor auth.
-
Microsoft
Open source projects and samples from Microsoft.
-
Google
Google ❤️ Open Source for everyone.
-
Alibaba
Alibaba Open Source for everyone
-
D3
Data-Driven Documents codes.
-
Tencent
China tencent open source team.