Table of Contents
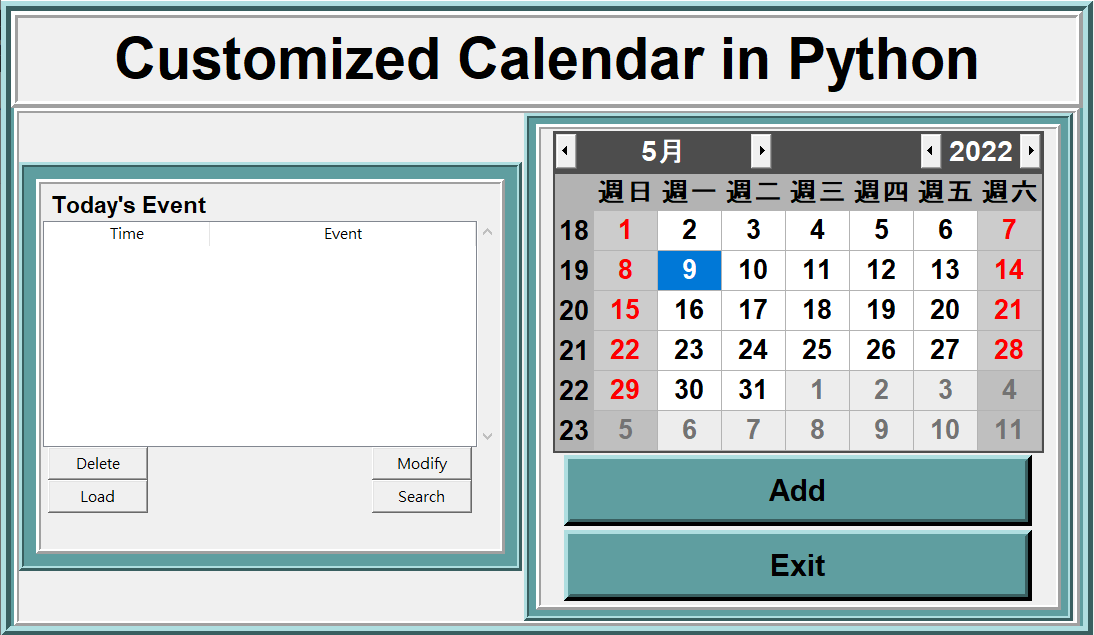
This repository is a tutorial for the Customized Calendar using python. Users can add, delete, modify, and search for the events they created in the GUI.
This Graphical User Interface is convenient and easily used for every users.
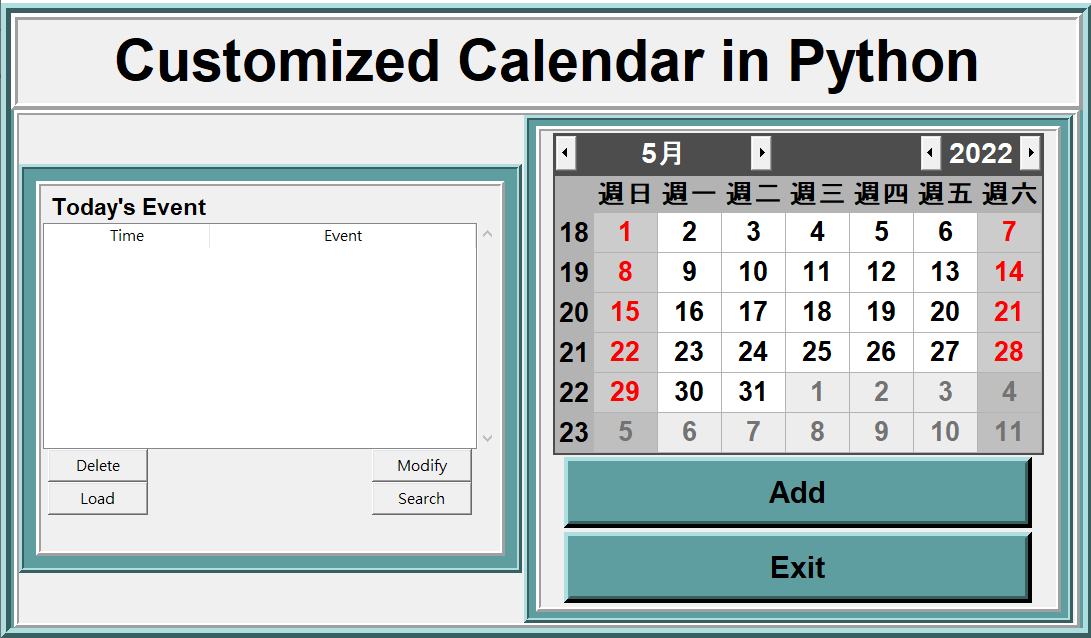
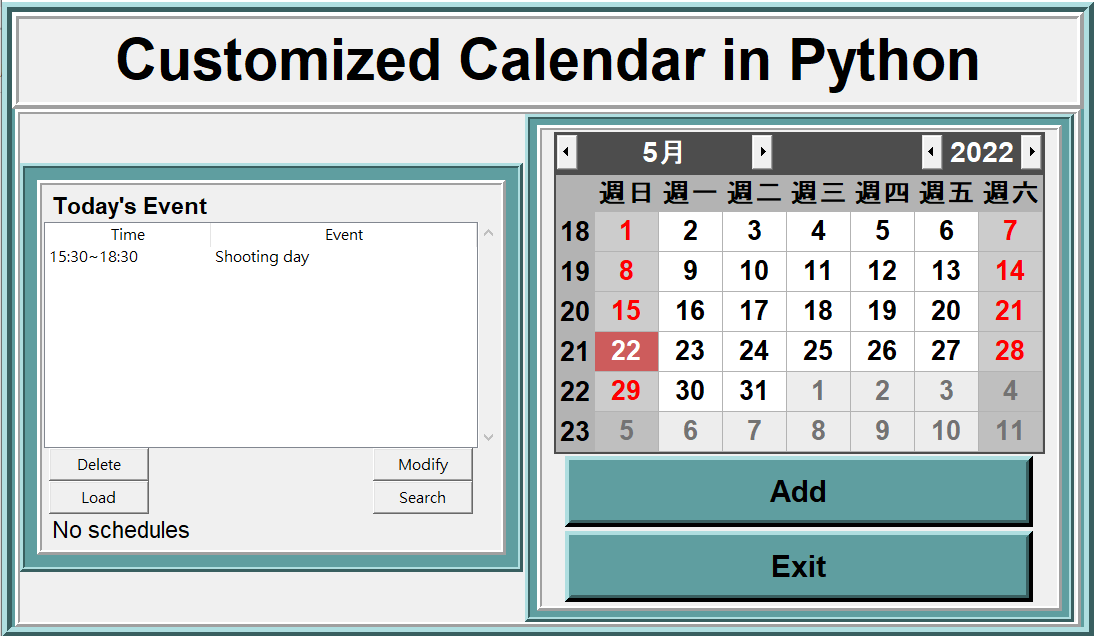
- The right-hand-side of this interface is the calendar, default is today's date. As you can see, today's date is 2022/5/9.
- Below the calendar, there are two buttons. The Add button is for adding new events into the calendar. Afetr pressing the Add button, you will see the following window.
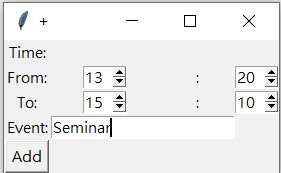
You can type up the time slot and the name of the event
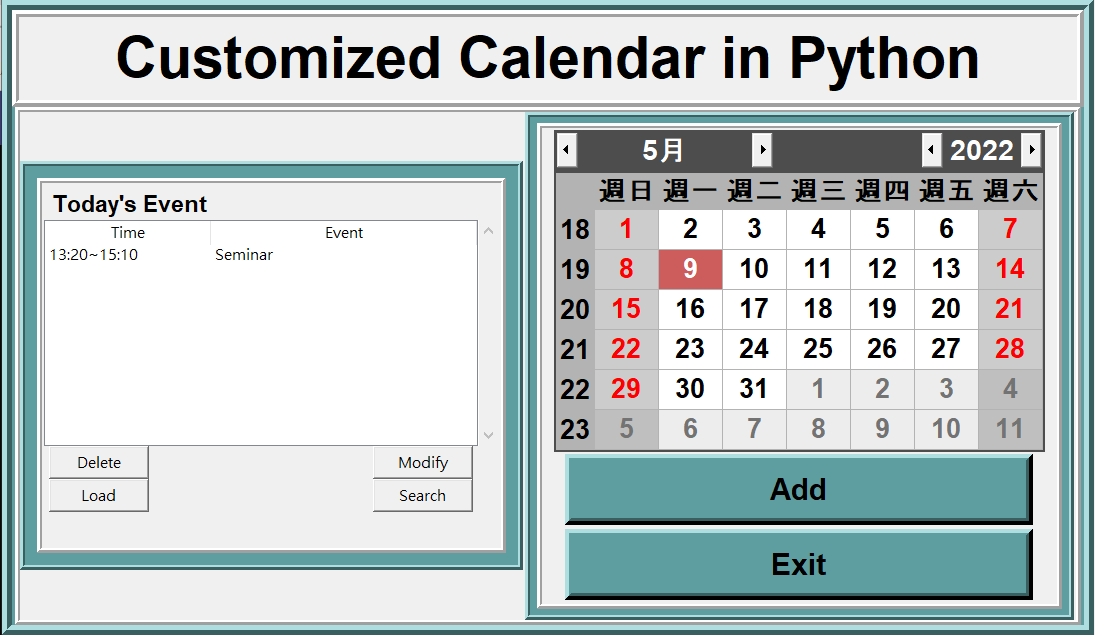
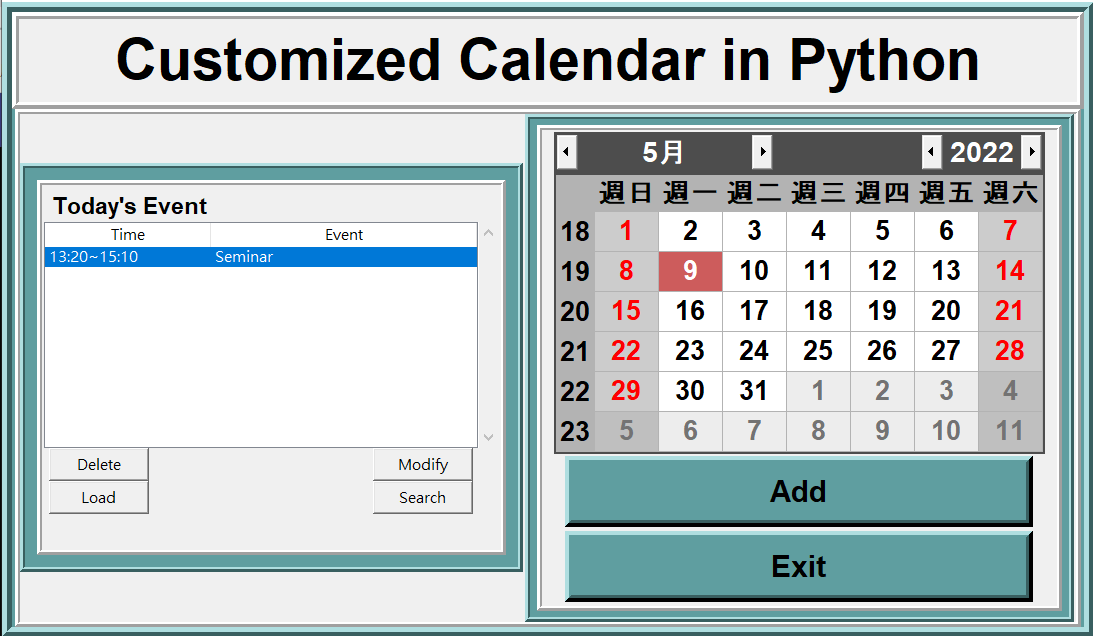
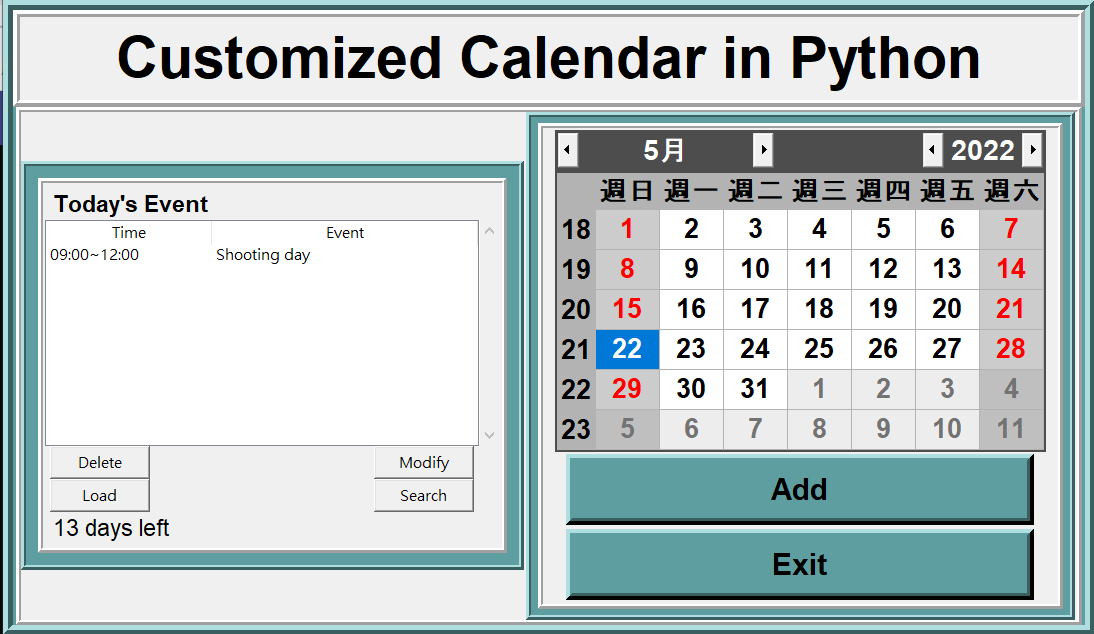
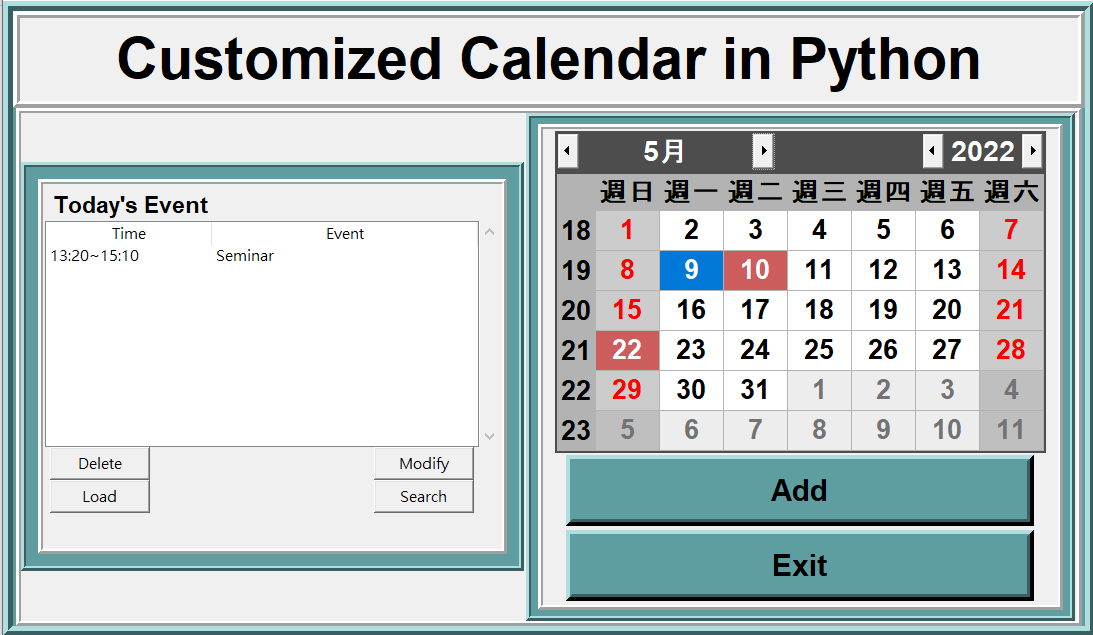
After adding the event into the calendar, the color of the date will change, and you can see the details of the event on the left-hand-side.
- The left-hand-side of this interface is the details of the events at the specific date, and there are four buttons below.
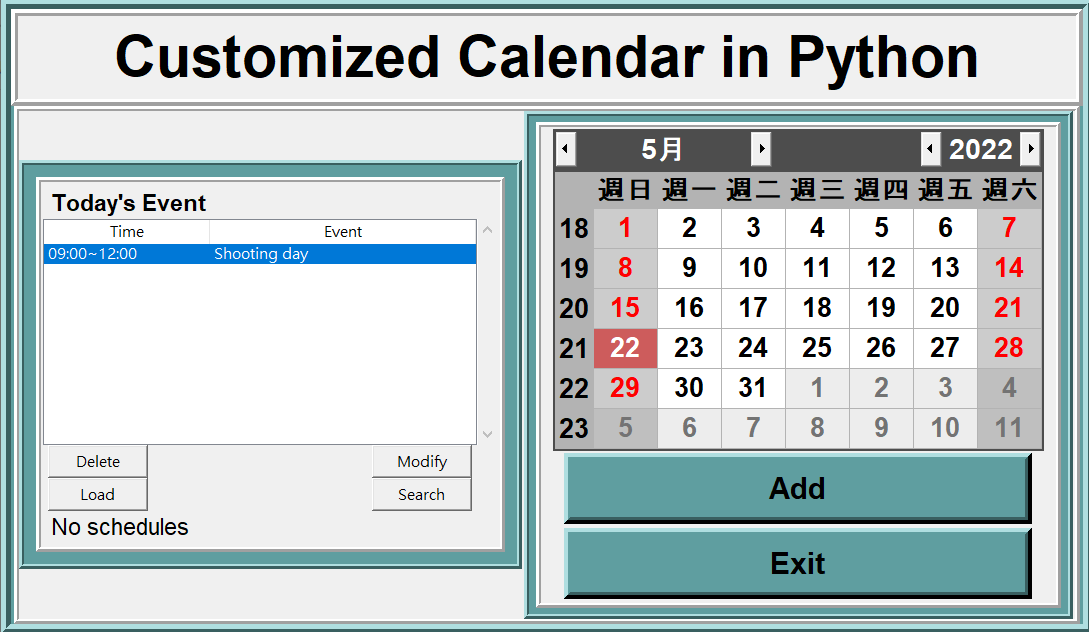
- Fist, select an event you want to delete, and press the delete button.
- After pressing the button, you will see the following window:

- Typing up the event name you want to delete, and press the Delete button. The event on the left-hand-side is disappeared, and the color on 2022/5/9 is gone, too.
- If adding an event into the calendar at 2022/5/22, closing the program and re-running it again and pressing the Load button, it will show the event you added and how many days left of the event.
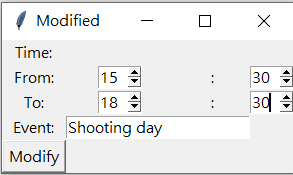
After you add the new event to the calendar, but you want to modify the time slot, you can use this button to revise the time.
- First, double-click with the left mouse button on the event. Second, you press the Modify button.
- After pressing the Modify button, the following window will show up, you can type up the time slot you want.
Note: The name of the event's name should be the same
- After pressing the Modify button, the time slot is changed.
After you add the events into so many days, but you forget which event is on which day, then you can use the Search button to do that
- As you can see, there are three days have the event on the calendar. You remember you have the shooting day, but you forget which day, so just press the Search button
- After pressing the Search button, you will see the folowing window:
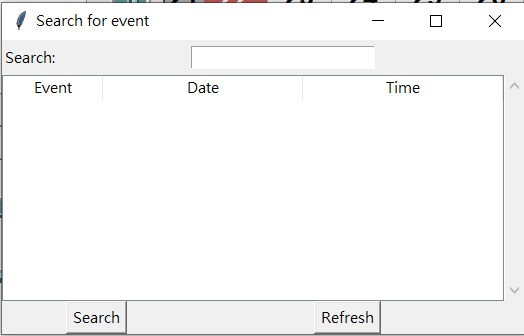
- Then you type the event's name, and press the Search button, it will tell you on what day and what time you will have the shooting day

- The csv file used in this calendar is to store the event on the specific date
- When you press the Add button on the right-hand-side and adding the event on the specific date, the event will be stored in the csv file
- After you re-run the program, and press the Load button, you will see the details of the event you already added
- First, we import the tkinter, tkcalendar, datetime, time, and pandas
from tkinter import *
from tkinter import ttk
from tkcalendar import *
from tkcalendar import Calendar, DateEntry
import tkinter.messagebox
from datetime import date, datetime, timedelta
from time import strftime
import os.path
import pandas as pd- This is for writing the csv file we need in this calendar
global schedule
if os.path.isfile("./schedules_table.csv"):
    schedules = pd.read_csv("./schedules_table.csv", index_col=0)
else:
    schedules = pd.DataFrame(columns=["event", "date", "time"])
    schedules.to_csv("./schedules_table.csv")

global marked_day
marked_day = ''
global add_time
add_time = 0- This is the whole frame of the calendar
root = Tk()
root.resizable(True, True)
space = " "
root.title(185 * space + "Customized Calendar")

root.geometry("1500x900+56+0")

MainFrame = Frame(root, bd=10, width=400, height=700, relief=RIDGE, bg="cadetblue")
MainFrame.grid()

TitleFrame = Frame(MainFrame, bd=7, width=400, height=100, relief=RIDGE)
TitleFrame.grid(row=0, column=0)

TopFrame3 = Frame(MainFrame, bd=5, width=400, height=500, relief=RIDGE)
TopFrame3.grid(row=1, column=0)
#Left-hand-side
LeftFrame = Frame(TopFrame3, bd=5, width=400, height=600, padx=2, bg="cadet blue", relief=RIDGE)
LeftFrame.pack(side=LEFT)
LeftFrame1 = Frame(LeftFrame, bd=5, width=200, height=180, padx=2, pady=4, relief=RIDGE)
LeftFrame1.pack(side=TOP, padx=10, pady=12)
#Right-hand-side
RightFrame1 = Frame(TopFrame3, bd=5, width=50, height=400, padx=2, bg="cadet blue", relief=RIDGE)
RightFrame1.pack(side=RIGHT, padx=2)
RightFrame1a = Frame(RightFrame1, bd=5, width=50, height=300, padx=2, pady=2, relief=RIDGE)
RightFrame1a.pack(side=TOP, padx=5, pady=6)
#The title on the top of the window
lblTitle = Label(TitleFrame, font=("arial", 35, "bold"), text="Customized Calendar in Python", bd=7)
lblTitle.grid(row=0, column=0, padx=88)
#To show how many days left for the specific event on the left-hand-side
lblCountDown = Label(LeftFrame1, font=("arial", 20, "bold"), text="Activity Countdown", bd=7)
lblCountDown.grid(row=1, column=0)- The function for the Exit button
def iExit():
    iExit = tkinter.messagebox.askyesno(
        "Customized Calendar", "Confirm if you want to exit"
    )
    if iExit > 0:
        root.destroy()
return- The function for the Load button
todos = {}

def insert_Data_timetable():
    global marked_day
    day = str(cal.selection_get())

    if day != marked_day:
        countdown_label.config(text = "No schedules")
        for index, row in schedules.iterrows():
            if day == row["date"]:
                treev.insert("", index , values = (row['time'], row['event']))
                Days = (cal.selection_get() - date.today()).days
                countdown_label.config(text = str(Days)+ " days left")
                marked_day = day
    else:
        pass

countdown_label = Label(LeftFrame1, text = " ", font = ("Helvetica", 14))
countdown_label.grid(row=8, column=0, sticky=W, padx=5)