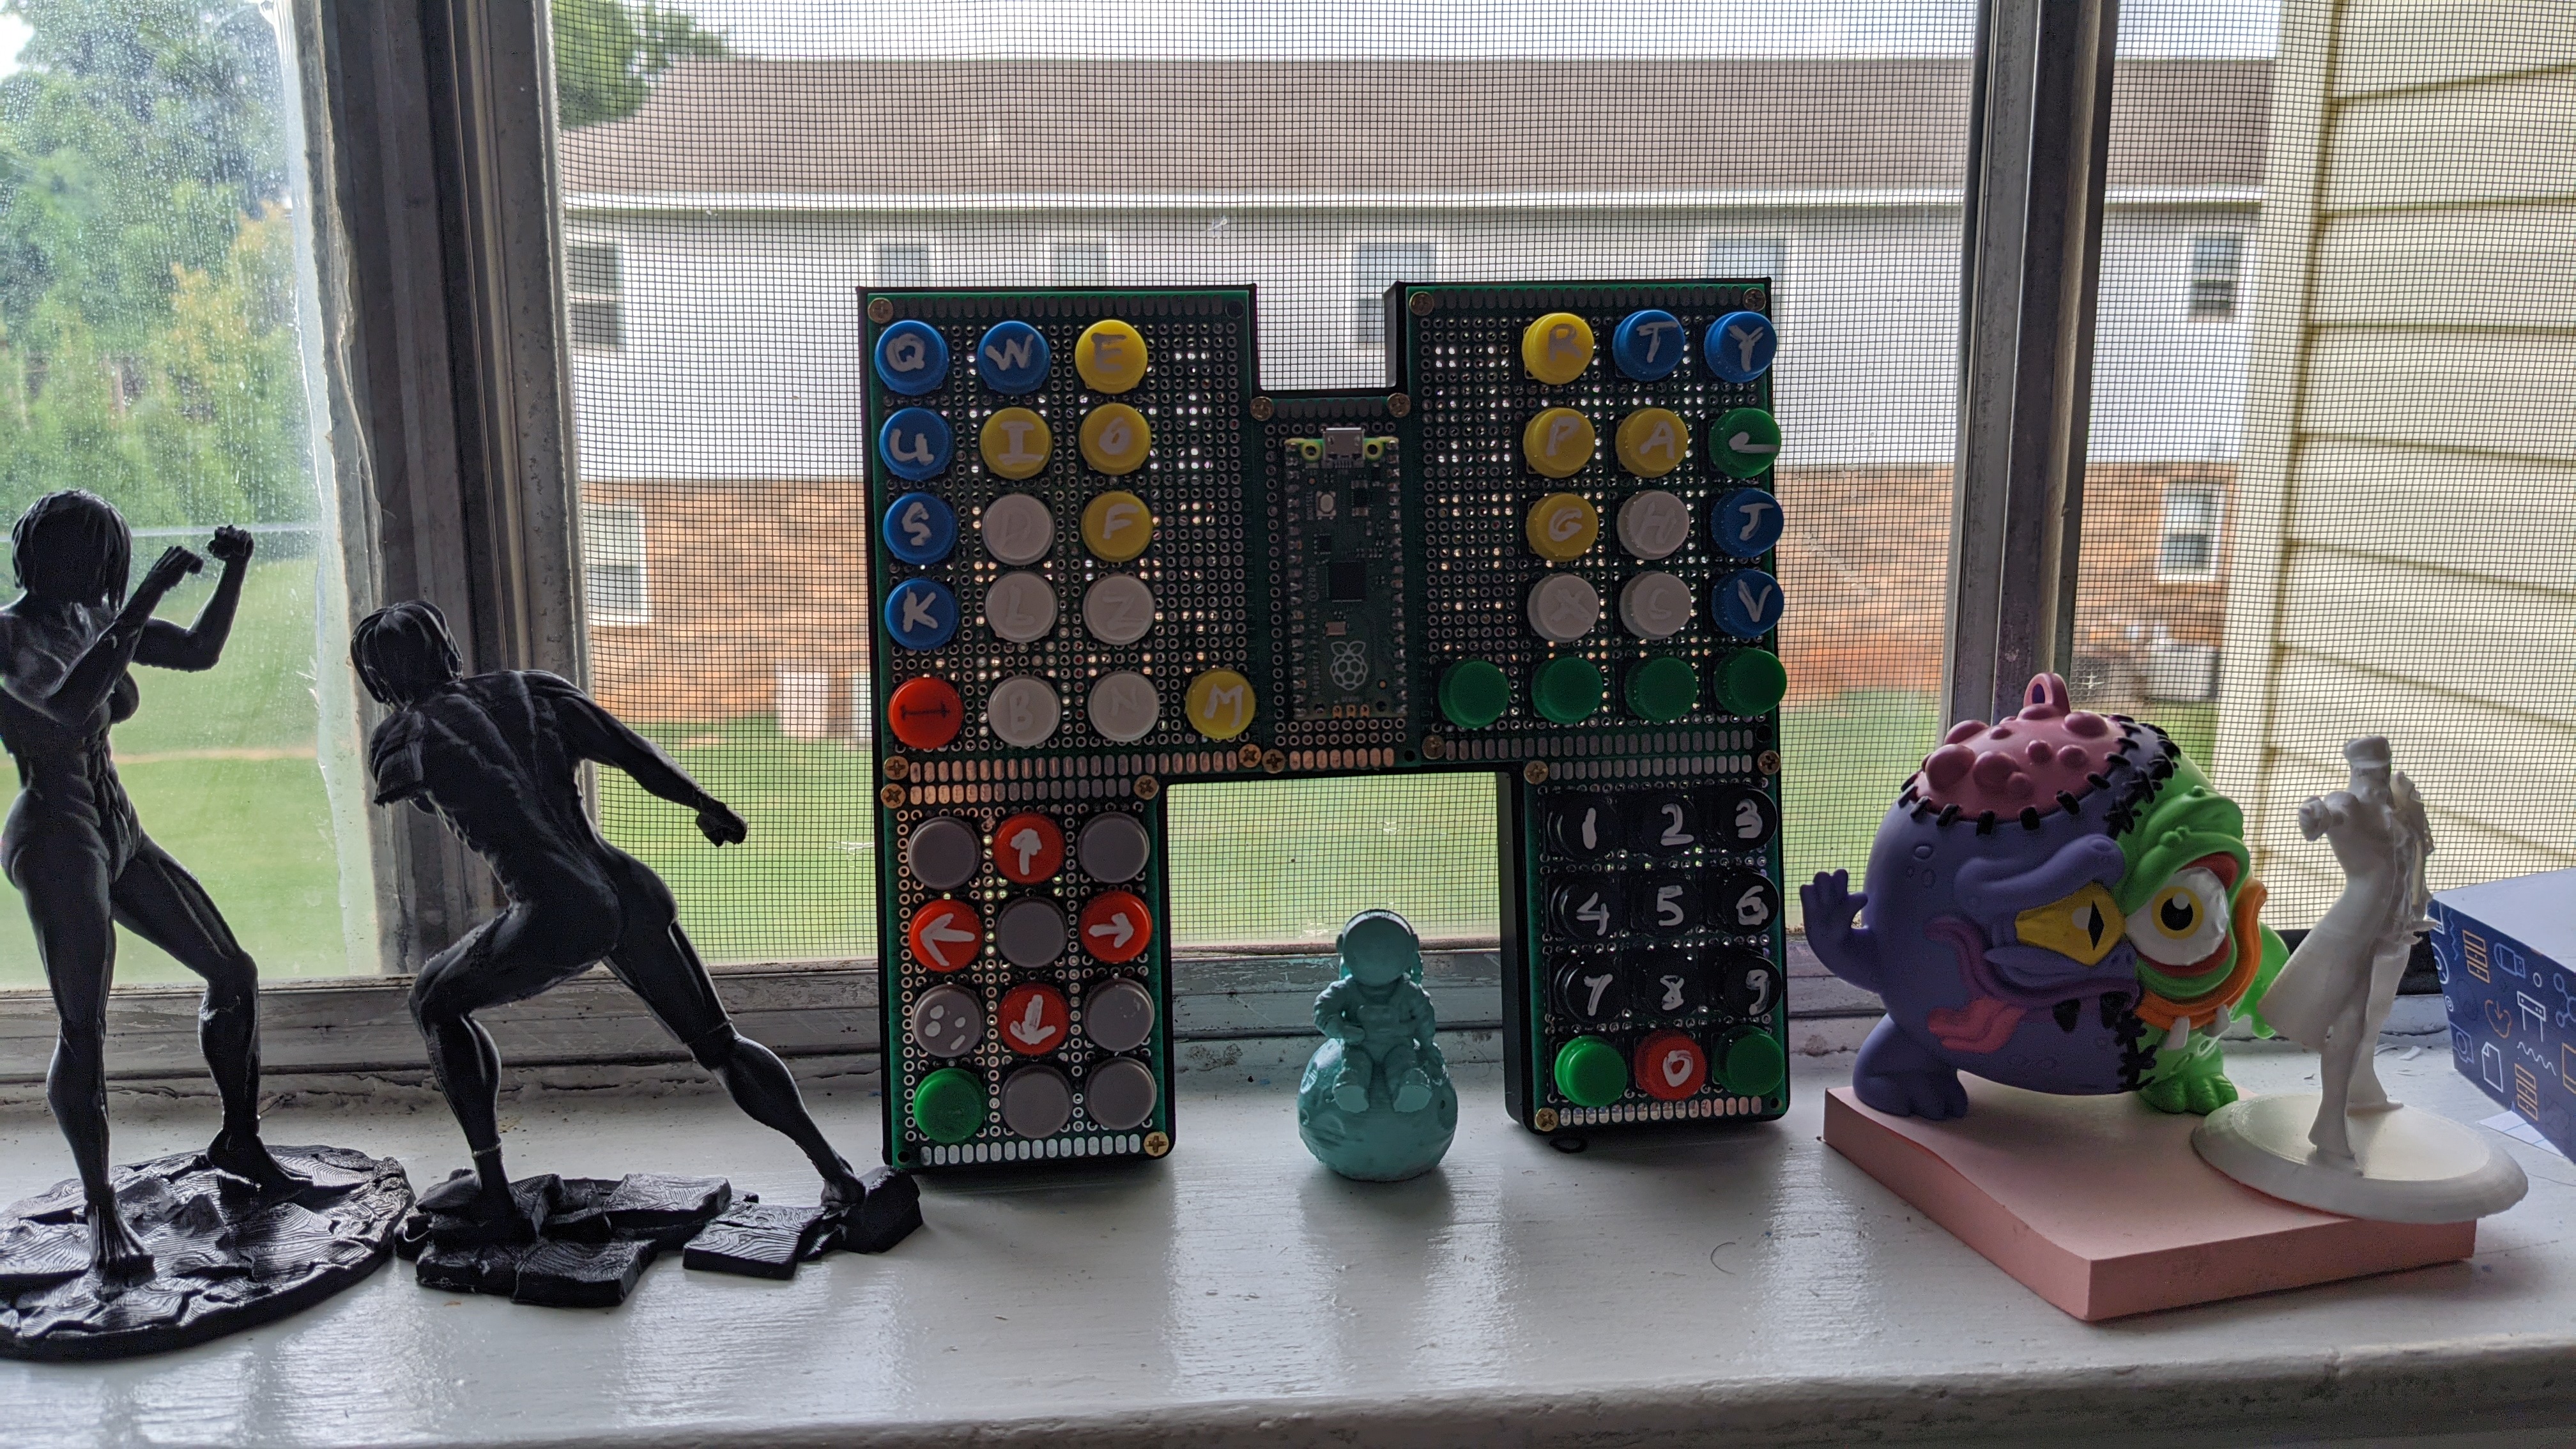
This is a handheld keyboard a 56% custom layout made with a raspberry pi pico with the use of the KMK Python firmware
This was built as a part of a portable setup used alongside a raspberry pi 4 tablet (custom built by me)

The keyboard was hand-soldered (painfully) with a 8x9 matrix (using up 17 GPIO keys in total). Although not all keys in the matrix were used, resulting in a 56 keys layout (for aesthetic reasons)

56 tactile buttons was used as "key switches" for portability and because of the "handheld" nature of the keyboard *I always imagined sitting by the lake and doing some coding with this
Below are some of the hand-written notes on key layout and soldering instructions for reference


The links for all the parts are as follows (amazon is much preferred by me due to a good shipping rate & speed, which is good for rapid prototyping)
Instructions:
-
Picking perfboards In this keyboard, I used a 3x7 (cm) perfboarf for the headers pin to plug the pico into (for re-usability), twio 7x9 boards for the first 32 keys, and two 5x7 boards for the other 24 keys.
-
Soldering This is probably the hardest and most frustrating part as you need to "overlap" your soldering to make sure they don't touch. Also, making connections of a perfboard is known to be super hard, so don't beat yourself up over it. I hope looking at my soldering pics would give you some idea. I recommend getting a wire stripper because you will have to strip wires at least 50 times or more. Also, a fume extractor to make sure you have a working lung at the end of the project is highly recommended.
Also, looking at my code and hand note should give you an idea of which rows & columns go for which GPIO pins on the Pico.
- Testing & Programming Lucky for you, I have done the harsh part of looking thru the documentation and coming up with an optimal code. But if you still want to play around or come up with another custom layout, here is a summary. Some great people came up with the KMK firmware (Micropython) for the chipset of the Raspbery Pi Pico. Even though the documentation needs some work here and there, I would argue this is so much easier to work with than the OP firmware known as QMK for other chipset. The only problem I had was that I didn't have enough documentation to look at to get the layers working.
All you have to do is to follow KMK instruction, and paste my main.py file onto the Pico. Remember to check make sure that main.py and boot.py are the only two python scripts on the main directory of the Pico.
Also, if you noticed, there are no diodes in this build, as I never seems to have any problem with any of my past build without diodes. But if you still incline, a reference for the use of diodes and keyboard matrix theory is included below
-
Assembly Now that you made sure all keys are working fine, let's carefully put them together I have included the link for an stl file for the casing if you want to print it straight out as well as a step file if you want to put in your own modifications. I used my ender 3 printer with a speed of 80mm/s at 0.4 mm layer height % 20% infill and it turned out great! I used some wood screw in this build as they're cheap, with the small sizes being easy to find.
-
Having fun with it. Now you have a perfectly working keyboard! Paint the "keycaps" any way you like. I used some old ink eraser for mine and loved the retro look.
Also, one last note. Everytime you detach the Pico from a pc or a raspberry pi, remember to Eject it first!
Tactile buttons: https://www.amazon.com/gp/product/B07CG7VTGD/ref=ppx_yo_dt_b_search_asin_title?ie=UTF8&psc=1
Perfboards: https://www.amazon.com/gp/product/B07FFDFLZ3/ref=ppx_yo_dt_b_search_asin_title?ie=UTF8&psc=1
Raspberry pi Pico: https://www.amazon.com/seeed-studio-Raspberry-Microcontroller-Dual-core/dp/B08TQSDP28/ref=sr_1_3?dchild=1&keywords=pi+pico&qid=1632246937&sr=8-3
Female & Male Header Pins: https://www.amazon.com/gp/product/B074HVBTZ4/ref=ppx_yo_dt_b_search_asin_title?ie=UTF8&psc=1
Jumper Cables: https://www.amazon.com/gp/product/B01EV70C78/ref=ppx_yo_dt_b_search_asin_title?ie=UTF8&psc=1 (Trust me you'll need a lot of these)
Soldering station & Solder: https://www.amazon.com/gp/product/B087767KNW/ref=ppx_yo_dt_b_search_asin_title?ie=UTF8&psc=1
Fume extractor: https://www.amazon.com/gp/product/B07VWDN29F/ref=ppx_yo_dt_b_search_asin_title?ie=UTF8&psc=1
Solder Pump (optional): https://www.amazon.com/gp/product/B0739LXQ6N/ref=ppx_yo_dt_b_search_asin_title?ie=UTF8&psc=1
Wood Screw: https://www.harborfreight.com/hardware/screws/500-piece-brass-plated-wood-screw-assortment-67678.html
Reference (KMK firmware): Getting started: https://github.com/KMKfw/kmk_firmware/blob/master/docs/Getting_Started.md Keyboard matrix theory: http://pcbheaven.com/wikipages/How_Key_Matrices_Works/


