dev branch v 5.1.0-beta:
master branch v 5.0.43-prod:
After a mayor refactor from 5.0 to 5.1 we are now entering dev testing and QA.
This should last until end of October 2019 giving us one month of polish and testing
before production release to master branch.
Ideally you should run your own instance, but if that is not an option or you just want to give it a try you can use our live server(s):
Production: https://prototype.iotnxt.io
development: https://prototype.dev.iotnxt.io
Ideally run linux. Ubuntu does fine.
https://www.pluralsight.com/guides/typescript-react-getting-started
We now rely on mongodb change streams https://pusher.com/tutorials/mongodb-change-streams instead of redis. This is not set in stone, and dependant on 5.1 beta phase tests. To get change streams to work you have to set mongo into replica/sharded mode:
Edit mongod.conf and add:
replication:
  replSetName: "rs"
Restart the service with sudo service mongod restart
Then open the mongo client by running:
mongo
You should see rs:PRIMARY if not then run:
rs.initiate()
You might notice that database object format has also changed and is now more consistent between the API and the storage format. You might experience workflow scripts need to migrate to the new data structure:
// instead of:
state.payload.data
// now:
state.data
Also data is optional on incoming packets.

Live: https://prototype.iotnxt.io
Discord: https://discord.gg/rTQmvbT
IoT framework for general purpose remote monitoring/control.
Built using typescrypt, webpack,react, mongoDB, express and socket.io.
- Simple as possible to connect your devices. See /examples or the documentation below.
- Multi protocol support: HTTP/S, MQTT, socketio, raw TCP, USB serialports and more.
- Opensource so you can be sure what happens with your data.
- Runs on windows/mac/linux, in the cloud or even a raspberry pi.
- Fast mongodb for the data.
- Extendable plugin architecture.
- Edit code in the browser using the VSCode editor with intellisense autocompletion and deploy custom code instantly.
- Multithreaded/Cluster support through redis.
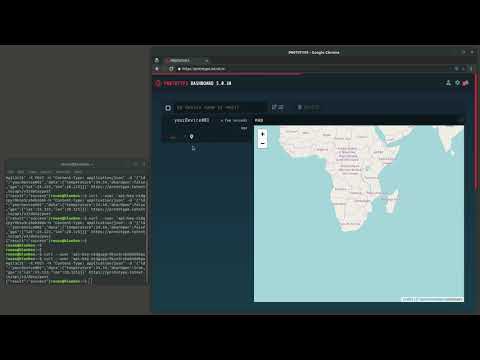
See a live realtime list of your devices, when they were last active and a summary of the raw data state.
You can set javascript code to process the device JSON data server side (using sandboxed VM) to make REST calls or perform different actions depending on the state of other devices.
Clone the repo.
git clone https://github.com/IoT-nxt/prototype.gitYou'll need to install Node.js and MongoDB as a minimum.
systemctl enable mongod.service
Useful additional tools include Visual Studio Code, Robo 3T,
cd prototype/client # client folder
npm i               # install node_modules for client side
npm run buildwatch  # build automatically on file changes
npm run build # or just build oncecd prototype # main server folder
npm i # install node_modules for server side
# if you're installing on Windows, you'll need to install webpack dependencies
npm install webpack-dev-server
npm run buildwatch # build automatically on server file changes for development
npm run build # or build for productionInstall nodemon globally (if server filewatch is needed)
npm install -g nodemonRun the server start command
npm run watchserveror
cd build/server
node main.js        # runs the server

# or even better, auto restart on file changes:
nodemon main.js     # npm i nodemon -g
Go to http://localhost:8080/ and log in with the default account:
email: [email protected]
password: admin
Optionally you can use a config file with prototype.
Create a text file named iotconfig.json and place it 2 folders up from prototype.
So your folder structure should look something like:
# PLACE CONFIG FILE HERE
~/iot/iotconfig.json    # config file

# ANY SUB FOLDER
# git clone https://github.com/IoT-nxt/prototype.git
~/iot/prod                     # any folder name (we use different branch names here)

# PROTOTYPE REPO
# after cloneing in "prod" folder your should have prototype sub folder
~/iot/prod/prototype           # prototype main folder
~/iot/prod/prototype/build
~/iot/prod/prototype/client
~/iot/prod/prototype/src
~/iot/prod/prototype/package.json
Contents of config file:
All values are optional. See /src/config.ts for defaults values.
{
  "ssl": true,
  "sslOptions": {
    "certPath": "/etc/letsencrypt/live/prototype.iotnxt.io/fullchain.pem",
    "keyPath": "/etc/letsencrypt/live/prototype.iotnxt.io/privkey.pem"
  },
  "httpPort": 80,
  "httpsPort": 443,
  "mongoConnection": "testuser:[email protected]:27017/prototype"
}This was the stealth phase. It has been built and is being used on a daily basis by multiple parties.
- Users can register. (Landing page, registration, email verification)
- Users can add (any*) device, (Documentation)
- Devices can send data in various protocols/formats. (HTTP/SOCKETIO/MQTT/TELTONIKA etc..)
- Devices can be linked to IoTnxt platform. (IoTnxt gateway management, bidirectional)
- Platform can emit commands to devices. (From commander to device)
- Users can reprogram how the platform handles and propagates data. (Workflow/processing functionality)
During this phase we focus on building the foundation strong and elegantly. With our end goals in sight there will be basic functionality or structure we'd need to refine to be able to build the functionality we plan to meet.
-
Dashboard - Basic widgets for viewing historical data. As well as the api/db calls needed to make this happen.
* Calendar (DONE)
* Line graphs (DONE)
* Gauge widget (DONE)
* UI Button widget (DONE)
-
3D capability - Built to handle current and future demand on spacial awareness. (Factory/Space/City) This includes VR interface to view data as well as set up areas for triggers.
* 3D Widget (80%) * VR compatible * Vector math functions in workflows * 3D area triggers * Documentation for the workflow/processing editor -
Social - Here we will focus on the social aspects of IoT. Sharing of devices, security and permissions, groups and ease of use. We need to make it possible to copy paste a URL, and the new user would be able to simply click the link and directly gain the value of the information shared. This could be a local weather station device, traffic camera, parking sensor and so on. From here it should be as simple as possible to link this data to a third party service (api), website (embed snippet) and so on.
* Extend API documentation/ * Develop tutorial content * Embeddable snippet of html -
Branding/Themeing (white labeling) - Simplification of the stylesheets, with some basic white label theme as default. This will enable partners to easily/quickly modify prototype and enable them to resell to their customers/industry.
* Colour/logo variables at the top of the scss stylesheet * Simplification/optimization of style classes * Cleanup of hardcoded react html code -
Streamlining adding devices - Prototype/develop some IoT devices that are SUPER easy to add to the platform.
* ESP32 + LDR light sensor. Software flashes a block of pixels to transfer connection information.
* Arduino temperature sensor.
* Embeddable snippet for monitoring your website.
-
Mission critical dashboards - Harden the system to survive severe data spikes or timeouts. Maintain uptime and handle high datarates.
-
Mobile - Fix all mobile usage issues for chrome browser. Investigate possibility of converting React app to apple/android app.
-
High datarate streams - Video/audio/telemetry or even realtime robotic control. Enable the system to handle raw video/audio and telemetry data streams. Perform cloud machine vision, backup and retrieval. Another use case would be highdata rate vehicle telemetry like racecars, aerospace and drones.
-
Integrations - At this stage we should have a large amount of devices/individuals/companies using the platform. We need to enable deep integration between these and develop the components that are missing. Integrations from home assistant and other IoT platforms can enable rapid growth and increased capability.
To get started we recommend using the HTTP REST api at first. After you've logged into your account using the web interface you will find your api key and pregenerated HTTP Authorization headers at the bottom of the screen:

GET http://localhost:8080/api/v3/version
Returns the server version:
{ "version": "5.0.30", "description": "prototype" }GET http://localhost:8080/api/v3/account
Returns your account information:
{
  "_id": "5bd359c27e6e3a36fc4dbfa4",
  "uuid": "v856q9myqoc0bozhyj835liy7ketfc9oqrimt2vm7buzdjyxn6tz9ds71lvtpi3smlzuq3urbyvi1r80ovwmj6ra37bh7yx2xhjw288ite658yv94zens9naflylo5tz",
  "created": { "unix": 1540577730242, "jsonTime": "2018-10-26T18:15:30.242Z" },
  "lastSeen": { "unix": 1540577730242, "jsonTime": "2018-10-26T18:15:30.242Z" },
  "ip": "",
  "ipLoc": null,
  "userAgent": "defaultAdmin",
  "emailverified": false,
  "email": "[email protected]",
  "apikey": "mfradh6drivbykz7s4p3vlyeljb8666v",
  "level": 100,
  "settingsMenuTab": 3
}
POST http://localhost:8080/api/v3/data/post
You can post JSON formatted data to the api as a device.
{
  "id": "yourDevice001",
  "data": {
    "temperature": 24.54,
    "doorOpen": false,
    "gps": {
      "lat": 25.123,
      "lon": 28.125
    }
  }
}
RESPONSE:
{ "result": "success" }GET http://localhost:8080/api/v3/states
Returns your account's summarized device states.
[
  {
    "id": "usb-Unknown_Arduino_M0_Pro_396E300A514D30324A4B2020FF0F311F-if00",
    "data": {
      "device": {
        "manufacturer": "Unknown",
        "serialNumber": "396E300A514D30324A4B2020FF0F311F",
        "pnpId": "usb-Unknown_Arduino_M0_Pro_396E300A514D30324A4B2020FF0F311F-if00",
        "locationId": null,
        "vendorId": "2a03",
        "productId": "804f",
        "comName": "/dev/ttyACM0"
      },
      "options": { "baudRate": 115200 },
      "raw": "{\"id\":\"flowMeter\",\"data\":{\"up\":59446000,\"flow\":0}}",
      "datajson": { "id": "flowMeter", "data": { "up": 59446000, "flow": 0 } },
      "err": "",
      "connected": true
    },
    "meta": { "method": "serialport" },
    "timestamp": "2018-10-27T13:45:32.765Z"
  },
  {
    "id": "flowMeter",
    "data": { "up": 59446000, "flow": 0 },
    "level": 1,
    "serial": {
      "device": {
        "manufacturer": "Unknown",
        "serialNumber": "396E300A514D30324A4B2020FF0F311F",
        "pnpId": "usb-Unknown_Arduino_M0_Pro_396E300A514D30324A4B2020FF0F311F-if00",
        "locationId": null,
        "vendorId": "2a03",
        "productId": "804f",
        "comName": "/dev/ttyACM0"
      },
      "options": { "baudRate": 115200 },
      "raw": "{\"id\":\"flowMeter\",\"data\":{\"up\":59446000,\"flow\":0}}",
      "datajson": { "id": "flowMeter", "data": { "up": 59446000, "flow": 0 } },
      "err": "",
      "connected": true
    },
    "meta": { "method": "serialport" },
    "flowtotal": 7462,
    "err": "",
    "timestamp": "2018-10-27T13:45:32.764Z",
    "totalup": 50422000
  }
]Returns your account's full device states. Includes additional meta data as well as workflow processing code on each device.
[
  {
    "_id": "5bd3739e915407a02b04ea81",
    "apikey": "mfradh6drivbykz7s4p3vlyeljb8666v",
    "devid": "usb-Unknown_Arduino_M0_Pro_396E300A514D30324A4B2020FF0F311F-if00",
    "payload": {
      "id": "usb-Unknown_Arduino_M0_Pro_396E300A514D30324A4B2020FF0F311F-if00",
      "data": {
        "device": {
          "manufacturer": "Unknown",
          "serialNumber": "396E300A514D30324A4B2020FF0F311F",
          "pnpId": "usb-Unknown_Arduino_M0_Pro_396E300A514D30324A4B2020FF0F311F-if00",
          "locationId": null,
          "vendorId": "2a03",
          "productId": "804f",
          "comName": "/dev/ttyACM0"
        },
        "options": { "baudRate": 115200 },
        "raw": "{\"id\":\"flowMeter\",\"data\":{\"up\":59623000,\"flow\":0}}",
        "datajson": {
          "id": "flowMeter",
          "data": { "up": 59623000, "flow": 0 }
        },
        "err": "",
        "connected": true
      },
      "meta": { "method": "serialport" },
      "timestamp": "2018-10-27T13:48:29.743Z"
    },
    "meta": {
      "user": {
        "email": "[email protected]",
        "uuid": "v856q9myqoc0bozhyj835liy7ketfc9oqrimt2vm7buzdjyxn6tz9ds71lvtpi3smlzuq3urbyvi1r80ovwmj6ra37bh7yx2xhjw288ite658yv94zens9naflylo5tz"
      },
      "created": {
        "unix": 1540648109743,
        "jsonTime": "2018-10-27T13:48:29.743Z"
      },
      "ip": "",
      "ipLoc": {},
      "userAgent": null,
      "uuid": "otxbkytav97vonsllim4uajcpbvm51uxe4eh9t9nx505e2t296a47od8fv0mqam6hg0euv3gws8hmy8f73noikyz4qyl4crdajts4z7ke5usckh1uos69fgj9jnxjd1o",
      "method": "serialport"
    }
  },
  {
    "_id": "5bd37c71915407a02b062f23",
    "apikey": "mfradh6drivbykz7s4p3vlyeljb8666v",
    "devid": "flowMeter",
    "payload": {
      "id": "flowMeter",
      "data": { "up": 59623000, "flow": 0 },
      "level": 1,
      "serial": {
        "device": {
          "manufacturer": "Unknown",
          "serialNumber": "396E300A514D30324A4B2020FF0F311F",
          "pnpId": "usb-Unknown_Arduino_M0_Pro_396E300A514D30324A4B2020FF0F311F-if00",
          "locationId": null,
          "vendorId": "2a03",
          "productId": "804f",
          "comName": "/dev/ttyACM0"
        },
        "options": { "baudRate": 115200 },
        "raw": "{\"id\":\"flowMeter\",\"data\":{\"up\":59623000,\"flow\":0}}",
        "datajson": {
          "id": "flowMeter",
          "data": { "up": 59623000, "flow": 0 }
        },
        "err": "",
        "connected": true
      },
      "meta": { "method": "serialport" },
      "flowtotal": 7462,
      "err": "",
      "timestamp": "2018-10-27T13:48:29.748Z",
      "totalup": 50599000
    },
    "meta": {
      "user": {
        "email": "[email protected]",
        "uuid": "v856q9myqoc0bozhyj835liy7ketfc9oqrimt2vm7buzdjyxn6tz9ds71lvtpi3smlzuq3urbyvi1r80ovwmj6ra37bh7yx2xhjw288ite658yv94zens9naflylo5tz"
      },
      "created": {
        "unix": 1540648109748,
        "jsonTime": "2018-10-27T13:48:29.748Z"
      },
      "ip": "",
      "ipLoc": {},
      "userAgent": "api",
      "uuid": "vgkhkkklbu7c8jkxhpy75jnhmchmx43z15hlfptu7zsjynzsy187l2mpoaennjdgei5afbroizjqycz7imhe7gmd2y9dmwv4d35du8uqztxb87ayqrkpoyo2fc9mlqht",
      "method": "serialport"
    },
    "workflowCode": "\ncountTotal(packet.data.flow, \"flowtotal\")\ncountTotal(1000,\"totalup\")\n\ncallback(packet); \n\n\nfunction countTotal(val, varname) {\n\n    if (state.payload[varname]) {\n        packet[varname] = state.payload[varname] + val;\n    }  else {\n        packet[varname] = val;\n    }\n\n}"
  }
]Enables linking device state bidirectionally to the Iot.nxt cloud.


The serialports plugin enables autodetection of arduino or similar serialport devices. Also enables the serialports object in process scripts that enables listing of devices and writing to ports.
Fork the main repo to your account.
# Add the remote and call it 'upstream'.

git remote add upstream https://github.com/IoT-nxt/prototype

# Fetch all the branches of that remote into remote-tracking branches

git fetch upstream

# Merge upstream changes in to your downstream repository.

git merge upstream/master

# Create a new branch of where you want to work. or use the existing dev branch.

git checkout -b 'branch_name' # Without the single quotes

# Perform your work locally using standard local repo workflow.

# Then push your changes in to your Downstream remote repository.

git push origin branch_name

# Repeat above steps whenever you need to update your repository with the work that has occurred upstream since the last merge was performed.
sudo npm i pm2 -g
pm2 start main.js -i 0
https://tecadmin.net/install-redis-ubuntu/
# install
sudo apt-get install redis-server

# run
sudo systemctl enable redis-server.service
Add redis to iotconfig.json
"redis": {
  "host": "localhost",
  "port": 6379
}Create service config file:
nano /etc/systemd/system/prototype.serviceContents:
In this example we use forever to keep the service running, however you can also use pm2.
[Unit]
Description=Prototype
After=network.target

[Service]
WorkingDirectory=/home/yourusername/prototype/build
ExecStart=/home/yourusername/n/lib/node_modules/forever/bin/forever main.js
Restart=on-failure
User=yourusername

[Install]
WantedBy=multi-user.target
# enable the service
systemctl enable prototype.service

# control the service
systemctl start prototype.service
systemctl stop prototype.service
systemctl status prototype.service
systemctl restart prototype.service
# If you need to modify the config file make sure to:
systemctl daemon-reload
systemctl restart prototype.service
# view realtime stdout logs
sudo journalctl -u prototype -fsource: https://www.axllent.org/docs/view/nodejs-service-with-systemd/
cd client
npm run buildsw
openssl req -nodes -new -x509 -keyout server.key -out server.cert


