The Official Dropbox Swift SDK for integrating with Dropbox API v2 on iOS or macOS.
Full documentation here.
- System requirements
- Get started
- Register your application
- [Obtain an OAuth 2.0 token](#obtain-an-OAuth 2.0-token)
- SDK distribution
- Configure your project
- Try some API requests
- Examples
- Documentation
- Stone
- Modifications
- Bugs
- iOS 9.0+
- macOS 10.11+
- Xcode 8.0+
SwiftyDropbox currently supports Swift 3, Xcode 8 and iOS 10. However, there appears to be a bug with the Keychain in the iOS simulator environment where data is not persistently saved to the Keychain.
As a temporary workaround, in the Project Navigator, select your project > Capabilities > Keychain Sharing > ON.
You can read more about the bug here.
Before using this SDK, you should register your application in the Dropbox App Console. This creates a record of your app with Dropbox that will be associated with the API calls you make.
All requests need to be made with an OAuth 2.0 access token. An OAuth token represents an authenticated link between a Dropbox app and a Dropbox user account or team.
Once you've created an app, you can go to the App Console and manually generate an access token to authorize your app to access your own Dropbox account. Otherwise, you can obtain an OAuth token programmatically using the SDK's pre-defined auth flow. For more information, see below.
You can integrate the Dropbox Swift SDK into your project using one of several methods.
To use CocoaPods, a dependency manager for Cocoa projects, you should first install it using the following command:
$ gem install cocoapodsThen navigate to the directory that contains your project and create a new file called Podfile. You can do this either with pod init, or open an existing Podfile, and then add pod 'SwiftyDropbox' to the main loop. Your Podfile should look something like this:
use_frameworks!

target '<YOUR_PROJECT_NAME>' do
    pod 'SwiftyDropbox'
end
Then, run the following command to install the dependency:
$ pod installOnce your project is integrated with the Dropbox Swift SDK, you can pull SDK updates using the following command:
$ pod updateNote: SwiftyDropbox requires CocoaPods 1.0.0+ when using Alamofire 4.0.0+. Because of this requirement, the CocoaPods App (which uses CocoaPods 1.0.0) cannot be used.
You can also integrate the Dropbox Swift SDK into your project using Carthage, a decentralized dependency manager for Cocoa. Carthage offers more flexibility than CocoaPods, but requires some additional work. You can install Carthage (with Xcode 7+) via Homebrew:
brew update
brew install carthage
To install the Dropbox Swift SDK via Carthage, you need to create a Cartfile in your project with the following contents:
# SwiftyDropbox
github "https://github.com/dropbox/SwiftyDropbox" ~> 4.2.0
Then, run the following command to install the dependency to checkout and build the Dropbox Swift SDK repository:
carthage update --platform iOSIn the Project Navigator in Xcode, select your project, and then navigate to General > Linked Frameworks and Libraries, then drag and drop SwiftyDropbox.framework (from Carthage/Build/iOS). Then to add SwiftyDropbox's Alamofire dependency, drag and drop Alamofire.framework (from Carthage/Build/iOS) to Linked Frameworks and Libraries, as well.
Then, navigate to Build Phases > + > New Run Script Phase. In the newly-created Run Script section, add the following code to the script body area (beneath the "Shell" box):
/usr/local/bin/carthage copy-frameworks
Then, navigate to the Input Files section and add the following path:
$(SRCROOT)/Carthage/Build/iOS/SwiftyDropbox.framework
$(SRCROOT)/Carthage/Build/iOS/Alamofire.framework
carthage update --platform MacIn the Project Navigator in Xcode, select your project, and then navigate to General > Embedded Binaries, then drag and drop SwiftyDropbox.framework (from Carthage/Build/Mac). Then to add SwiftyDropbox's Alamofire dependency, drag and drop Alamofire.framework (from Carthage/Build/Mac) to Linked Frameworks and Libraries, as well.
Then navigate to Build Phases > + > New Copy Files Phase. In the newly-created Copy Files section, click the Destination drop-down menu and select Products Directory, then drag and drop SwiftyDropbox.framework.dSYM (from Carthage/Build/Mac).
Finally, you can also integrate the Dropbox Swift SDK into your project manually with the help of Carthage. Please take the following steps:
Create a Cartfile in your project with the same contents as the Cartfile listed in the Carthage section of the README.
Then, run the following command to checkout and build the Dropbox Swift SDK repository:
carthage update --platform iOSOnce you have checked-out out all the necessary code via Carthage, drag the Carthage/Checkouts/SwiftyDropbox/Source/SwiftyDropbox/SwiftyDropbox.xcodeproj file into your project as a subproject.
Then, in the Project Navigator in Xcode, select your project, and then navigate to your project's build target > General > Embedded Binaries > + and then add the SwiftyDropbox.framework file for the iOS platform.
Finally, to retrieve SwiftyDropbox's Alamofire dependency, drag the Carthage/Checkouts/Alamofire/Alamofire.xcodeproj project into your project (as you did with SwiftyDropbox.xcodeproj). Then, in the Project Navigator in Xcode, select your project, and then navigate to your project's build target > General > Linked Frameworks and Libraries > + and then add the Alamofire.framework file for the iOS platform.
carthage update --platform MacOnce you have checked-out out all the necessary code via Carthage, drag the Carthage/Checkouts/SwiftyDropbox/Source/SwiftyDropbox/SwiftyDropbox.xcodeproj file into your project as a subproject.
Then, in the Project Navigator in Xcode, select your project, and then navigate to your project's build target > General > Embedded Binaries > + and then add the SwiftyDropbox.framework file for the macOS platform.
Finally, to retrieve SwiftyDropbox's Alamofire dependency, drag the Carthage/Checkouts/Alamofire/Alamofire.xcodeproj project into your project (as you did with SwiftyDropbox.xcodeproj). Then, in the Project Navigator in Xcode, select your project, and then navigate to your project's build target > General > Linked Frameworks and Libraries > + and then add the Alamofire.framework file for the macOS platform.
Once you have integrated the Dropbox Swift SDK into your project, there are a few additional steps to take before you can begin making API calls.
If you are compiling on iOS SDK 9.0, you will need to modify your application's .plist to handle Apple's new security changes to the canOpenURL function. You should
add the following code to your application's .plist file:
<key>LSApplicationQueriesSchemes</key>
    <array>
        <string>dbapi-8-emm</string>
        <string>dbapi-2</string>
    </array>
This allows the Swift SDK to determine if the official Dropbox iOS app is installed on the current device. If it is installed, then the official Dropbox iOS app can be used to programmatically obtain an OAuth 2.0 access token.
Additionally, your application needs to register to handle a unique Dropbox URL scheme for redirect following completion of the OAuth 2.0 authorization flow. This URL scheme should have the format db-<APP_KEY>, where <APP_KEY> is your
Dropbox app's app key, which can be found in the App Console.
You should add the following code to your .plist file (but be sure to replace <APP_KEY> with your app's app key):
<key>CFBundleURLTypes</key>
    <array>
        <dict>
            <key>CFBundleURLSchemes</key>
            <array>
                <string>db-<APP_KEY></string>
            </array>
            <key>CFBundleURLName</key>
            <string></string>
        </dict>
    </array>
After you've made the above changes, your application's .plist file should look something like this:

There are three methods to programmatically retrieve an OAuth 2.0 access token:
- Direct auth (iOS only): This launches the official Dropbox iOS app (if installed), authenticates via the official app, then redirects back into the SDK
- Safari view controller auth (iOS only): This launches a
SFSafariViewControllerto facillitate the auth flow. This is desirable because it is safer for the end-user, and pre-existing session data can be used to avoid requiring the user to re-enter their Dropbox credentials. - Redirect to external browser (macOS only): This launches the user's default browser to facillitate the auth flow. This is also desirable because it is safer for the end-user, and pre-existing session data can be used to avoid requiring the user to re-enter their Dropbox credentials.
To facilitate the above authorization flows, you should take the following steps:
From your application delegate:
import SwiftyDropbox

func application(_ application: UIApplication, didFinishLaunchingWithOptions launchOptions: [UIApplicationLaunchOptionsKey: Any]?) -> Bool {
    DropboxClientsManager.setupWithAppKey("<APP_KEY>")
    return true
}import SwiftyDropbox
func applicationDidFinishLaunching(_ aNotification: Notification) {
DropboxClientsManager.setupWithAppKeyDesktop("<APP_KEY>")
}You can commence the auth flow by calling authorizeFromController:controller:openURL method in your application's
view controller.
From your view controller:
import SwiftyDropbox

func myButtonInControllerPressed() {
    DropboxClientsManager.authorizeFromController(UIApplication.shared,
                                                  controller: self,
                                                  openURL: { (url: URL) -> Void in
                                                    UIApplication.shared.openURL(url)
                                                  })
}import SwiftyDropbox
func myButtonInControllerPressed() {
DropboxClientsManager.authorizeFromController(sharedWorkspace: NSWorkspace.shared(),
controller: self,
openURL: { (url: URL) -> Void in
NSWorkspace.shared().open(url)
})
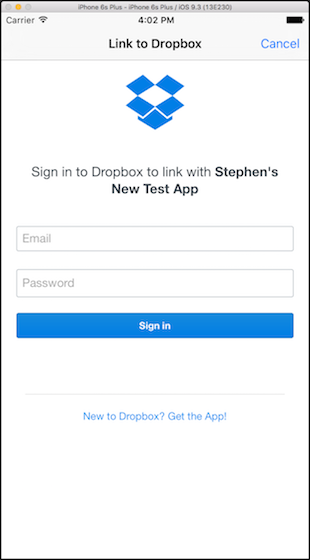
}Beginning the authentication flow via in-app webview will launch a window like this:
To handle the redirection back into the Swift SDK once the authentication flow is complete, you should add the following code in your application's delegate:
import SwiftyDropbox

func application(_ app: UIApplication, open url: URL, options: [UIApplicationOpenURLOptionsKey : Any] = [:]) -> Bool {
    if let authResult = DropboxClientsManager.handleRedirectURL(url) {
        switch authResult {
        case .success:
            print("Success! User is logged into Dropbox.")
        case .cancel:
            print("Authorization flow was manually canceled by user!")
        case .error(_, let description):
            print("Error: \(description)")
        }
    }
    return true
}import SwiftyDropbox
func applicationDidFinishLaunching(_ aNotification: Notification) {
...... // code outlined above goes here
NSAppleEventManager.shared().setEventHandler(self,
andSelector: #selector(handleGetURLEvent),
forEventClass: AEEventClass(kInternetEventClass),
andEventID: AEEventID(kAEGetURL))
}
func handleGetURLEvent(_ event: NSAppleEventDescriptor?, replyEvent: NSAppleEventDescriptor?) {
if let aeEventDescriptor = event?.paramDescriptor(forKeyword: AEKeyword(keyDirectObject)) {
if let urlStr = aeEventDescriptor.stringValue {
let url = URL(string: urlStr)!
if let authResult = DropboxClientsManager.handleRedirectURL(url) {
switch authResult {
case .success:
print("Success! User is logged into Dropbox.")
case .cancel:
print("Authorization flow was manually canceled by user!")
case .error(_, let description):
print("Error: \(description)")
}
}
// this brings your application back the foreground on redirect
NSApp.activate(ignoringOtherApps: true)
}
}
}After the end user signs in with their Dropbox login credentials via the in-app webview, they will see a window like this:
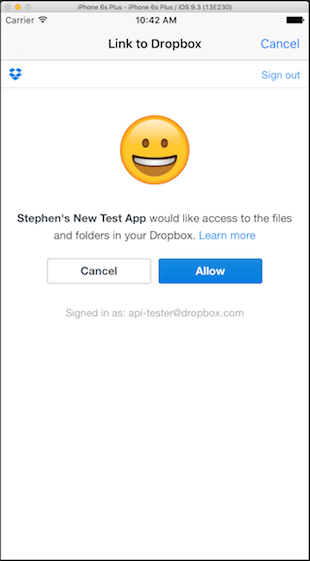
If they press Allow or Cancel, the db-<APP_KEY> redirect URL will be launched from the webview, and will be handled in your application
delegate's application:handleOpenURL method, from which the result of the authorization can be parsed.
Now you're ready to begin making API requests!
Once you have obtained an OAuth 2.0 token, you can try some API v2 calls using the Swift SDK.
Start by creating a reference to the DropboxClient or DropboxTeamClient instance that you will use to make your API calls.
import SwiftyDropbox

// Reference after programmatic auth flow
let client = DropboxClientsManager.authorizedClient
or
import SwiftyDropbox

// Initialize with manually retrieved auth token
let client = DropboxClient(accessToken: "<MY_ACCESS_TOKEN>")The Dropbox User API and Business API have three types of requests: RPC, Upload and Download.
The response handlers for each request type are similar to one another. The arguments for the handler blocks are as follows:
- route result type (
Voidif the route does not have a return type) - network error (either a route-specific error or generic network error)
- output content (
URL/Datareference to downloaded output for Download-style endpoints only)
Note: Response handlers are required for all endpoints. Progress handlers, on the other hand, are optional for all endpoints.
client.files.createFolder(path: "/test/path/in/Dropbox/account").response { response, error in
    if let response = response {
        print(response)
    } else if let error = error {
        print(error)
    }
}let fileData = "testing data example".data(using: String.Encoding.utf8, allowLossyConversion: false)!
let request = client.files.upload(path: "/test/path/in/Dropbox/account", input: TestData.fileData)
.response { response, error in
if let response = response {
print(response)
} else if let error = error {
print(error)
}
}
.progress { progressData in
print(progressData)
}
// in case you want to cancel the request
if someConditionIsSatisfied {
request.cancel()
}// Download to URL
let fileManager = FileManager.default
let directoryURL = fileManager.urls(for: .documentDirectory, in: .userDomainMask)[0]
let destURL = directoryURL.appendingPathComponent("myTestFile")
let destination: (URL, HTTPURLResponse) -> URL = { temporaryURL, response in
return destURL
}
client.files.download(path: "/test/path/in/Dropbox/account", overwrite: true, destination: destination)
.response { response, error in
if let response = response {
print(response)
} else if let error = error {
print(error)
}
}
.progress { progressData in
print(progressData)
}
// Download to Data
client.files.download(path: "/test/path/in/Dropbox/account")
.response { response, error in
if let response = response {
let responseMetadata = response.0
print(responseMetadata)
let fileContents = response.1
print(fileContents)
} else if let error = error {
print(error)
}
}
.progress { progressData in
print(progressData)
}Dropbox API v2 deals largely with two data types: structs and unions. Broadly speaking, most route arguments are struct types and most route errors are union types.
NOTE: In this context, "structs" and "unions" are terms specific to the Dropbox API, and not to any of the languages that are used to query the API, so you should avoid thinking of them in terms of their Swift definitions.
Struct types are "traditional" object types, that is, composite types made up of a collection of one or more instance fields. All public instance fields are accessible at runtime, regardless of runtime state.
Union types, on the other hand, represent a single value that can take on multiple value types, depending on state. We capture all of these different type scenarios under one "union object", but that object will exist only as one type at runtime. Each union state type, or tag, may have an associated value (if it doesn't, the union state type is said to be void). Associated value types can either be primitives, structs or unions. Although the Swift SDK represents union types as objects with multiple instance fields, at most one instance field is accessible at runtime, depending on the tag state of the union.
For example, the /delete endpoint returns an error, Files.DeleteError, which is a union type. The Files.DeleteError union can take on two different tag states: path_lookup
(if there is a problem looking up the path) or path_write (if there is a problem writing -- or in this case deleting -- to the path). Here, both tag states have non-void associated values (of types Files.LookupError and Files.WriteError, respectively).
In this way, one union object is able to capture a multitude of scenarios, each of which has their own value type.
To properly handle union types, you should pass each union through a switch statement, and check each possible tag state associated with the union. Once you have determined the current tag state of the union, you can then access the value associated with that tag state (provided there exists an associated value type, i.e., it's not void).
client.files.delete(path: "/test/path/in/Dropbox/account").response { response, error in
    if let response = response {
        print(response)
    } else if let error = error {
        switch error as CallError {
        case .routeError(let boxed, let requestId):
            print("RouteError[\(requestId)]:")

            switch boxed.unboxed as Files.DeleteError {
            case .pathLookup(let lookupError):
                switch lookupError {
                case .notFound:
                    print("There is nothing at the given path.")
                case .notFile:
                    print("We were expecting a file, but the given path refers to something that isn't a file.")
                case .notFolder:
                    print("We were expecting a folder, but the given path refers to something that isn't a folder.")
                case .restrictedContent:
                    print("The file cannot be transferred because the content is restricted...")
                case .malformedPath(let malformedPath):
                    print("Malformed path: \(malformedPath)")
                case .other:
                    print("Unknown")
                }
            case .pathWrite(let writeError):
                print("WriteError: \(writeError)")
                // you can handle each `WriteError` case like the `DeleteError` cases above
            case .other:
                print("Unknown")
            }
        case .internalServerError(let code, let message, let requestId):
            ....
            ....
            // a not route-specific error occurred
        ....
        ....
        ....
        }
    }
}In the case of a network error, errors are either specific to the endpoint (as shown above) or more generic errors.
To determine if an error is route-specific or not, the error object should be cast as a CallError, and depending on the type of error, handled in the appropriate switch statement.
client.files.delete(path: "/test/path/in/Dropbox/account").response { response, error in
    if let response = response {
        print(response)
    } else if let error = error {
        switch error as CallError {
        case .routeError(let boxed, let userMessage, let errorSummary, let requestId):
            // a route-specific error occurred
            // see handling above
            ....
            ....
            ....
        case .internalServerError(let code, let message, let requestId):
            print("InternalServerError[\(requestId)]: \(code): \(message)")
        case .badInputError(let message, let requestId):
            print("BadInputError[\(requestId)]: \(message)")
        case .authError(let authError, let userMessage, let errorSummary, let requestId):
            print("AuthError[\(requestId)]: \(userMessage) \(errorSummary) \(authError)")
        case .accessError(let accessError, let userMessage, let errorSummary, let requestId):
            print("AccessError[\(requestId)]: \(userMessage) \(errorSummary) \(accessError)")
        case .rateLimitError(let rateLimitError, let userMessage, let errorSummary, let requestId):
            print("RateLimitError[\(requestId)]: \(userMessage) \(errorSummary) \(rateLimitError)")
        case .httpError(let code, let message, let requestId):
            print("HTTPError[\(requestId)]: \(code): \(message)")
        case .clientError(let error):
            print("ClientError: \(error)")
        }
    }
}Some routes return union types as result types, so you should be prepared to handle these results in the same way that you handle union route errors. Please consult the documentation for each endpoint that you use to ensure you are properly handling the route's response type.
A few routes return result types that are datatypes with subtypes, that is, structs that can take on multiple state types like unions.
For example, the /delete endpoint returns a generic Metadata type, which can exist either as a FileMetadata struct, a FolderMetadata struct, or a DeletedMetadata struct.
To determine at runtime which subtype the Metadata type exists as, pass the object through a switch statement, and check for each possible class, with the result casted accordingly. See below:
client.files.delete(path: "/test/path/in/Dropbox/account").response { response, error in
    if let response = response {
        switch response {
        case let fileMetadata as Files.FileMetadata:
            print("File metadata: \(fileMetadata)")
        case let folderMetadata as Files.FolderMetadata:
            print("Folder metadata: \(folderMetadata)")
        case let deletedMetadata as Files.DeletedMetadata:
            print("Deleted entity's metadata: \(deletedMetadata)")
        }
    } else if let error = error {
        switch error as CallError {
        case .routeError(let boxed, let requestId):
            // a route-specific error occurred
            // see handling above
        case .internalServerError(let code, let message, let requestId):
            ....
            ....
            // a not route-specific error occurred
            // see handling above
        ....
        ....
        ....
        }
    }
}
This Metadata object is known as a datatype with subtypes in our API v2 documentation.
Datatypes with subtypes are a way combining structs and unions. Datatypes with subtypes are struct objects that contain a tag, which specifies which subtype the object exists as at runtime. The reason we have this construct, as with unions, is so we can capture a multitude of scenarios with one object.
In the above example, the Metadata type can exists as FileMetadata, FolderMetadata or DeleteMetadata. Each of these types have common instances fields like "name" (the name for the file, folder or deleted type), but also instance fields that are specific to the particular subtype. In order to leverage inheritance, we set a common supertype called Metadata which captures all of the common instance fields, but also has a tag instance field, which specifies which subtype the object currently exists as.
In this way, datatypes with subtypes are a hybrid of structs and unions. Only a few routes return result types like this.
It is possible to configure the networking client used by the SDK to make API requests. You can supply custom fields like a custom user agent or custom delegates to manage response handler code, or a custom server trust policy. See below:
import SwiftyDropbox

let transportClient = DropboxTransportClient(accessToken: "<MY_ACCESS_TOKEN>",
                                             baseHosts: nil,
                                             userAgent: "CustomUserAgent",
                                             selectUser: nil,
                                             sessionDelegate: mySessionDelegate,
                                             backgroundSessionDelegate: myBackgroundSessionDelegate,
                                             serverTrustPolicyManager: myServerTrustPolicyManager)

DropboxClientsManager.setupWithAppKey("<APP_KEY>", transportClient: transportClient)import SwiftyDropbox
let transportClient = DropboxTransportClient(accessToken: "<MY_ACCESS_TOKEN>",
baseHosts: nil,
userAgent: "CustomUserAgent",
selectUser: nil,
sessionDelegate: mySessionDelegate,
backgroundSessionDelegate: myBackgroundSessionDelegate,
serverTrustPolicyManager: myServerTrustPolicyManager)
DropboxClientsManager.setupWithAppKeyDesktop("<APP_KEY>", transportClient: transportClient)By default, response/progress handler code runs on the main thread. You can set a custom response queue for each API call that you make via the response method, in the event want your response/progress handler code to run on a different thread:
let client = DropboxClientsManager.authorizedClient!

client.files.listFolder(path: "").response(queue: DispatchQueue(label: "MyCustomSerialQueue")) { response, error in
    if let result = response {
        print(Thread.current)  // Output: <NSThread: 0x61000007bec0>{number = 4, name = (null)}
        print(Thread.main)     // Output: <NSThread: 0x608000070100>{number = 1, name = (null)}
        print(result)
    }
}The Swift SDK includes a convenience class, DropboxClientsManager, for integrating the different functions of the SDK into one class.
For most apps, it is reasonable to assume that only one Dropbox account (and access token) needs to be managed at a time. In this case, the DropboxClientsManager flow looks like this:
- call
setupWithAppKey/setupWithAppKeyDesktop(orsetupWithTeamAppKey/setupWithTeamAppKeyDesktop) in integrating app's app delegate - client manager determines whether any access tokens are stored -- if any exist, one token is arbitrarily chosen to use
- if no token is found, call
authorizeFromController/authorizeFromControllerDesktopto initiate the OAuth flow - if auth flow is initiated, call
handleRedirectURL(orhandleRedirectURLTeam) in integrating app's app delegate to handle auth redirect back into the app and store the retrieved access token (using aDropboxOAuthManagerinstance) - client manager instantiates a
DropboxTransportClient(if not supplied by the user) - client manager instantiates a
DropboxClient(orDropboxTeamClient) with the transport client as a field
The DropboxClient (or DropboxTeamClient) is then used to make all of the desired API calls.
- call
unlinkClientsto logout Dropbox user and clear all access tokens
For some apps, it is necessary to manage more than one Dropbox account (and access token) at a time. In this case, the DropboxClientsManager flow looks like this:
- access token uids are managed by the app that is integrating with the SDK for later lookup
- call
setupWithAppKeyMultiUser/setupWithAppKeyMultiUserDesktop(orsetupWithTeamAppKeyMultiUser/setupWithTeamAppKeyMultiUserDesktop) in integrating app's app delegate - client manager determines whether an access token is stored with the
tokenUidas a key -- if one exists, this token is chosen to use - if no token is found, call
authorizeFromController/authorizeFromControllerDesktopto initiate the OAuth flow - if auth flow is initiated, call
handleRedirectURL(orhandleRedirectURLTeam) in integrating app's app delegate to handle auth redirect back into the app and store the retrieved access token (using aDropboxOAuthManagerinstance) - at this point, the app that is integrating with the SDK should persistently save the
tokenUidfrom theDropboxAccessTokenfield of theDropboxOAuthResultobject returned from thehandleRedirectURL(orhandleRedirectURLTeam) method tokenUidcan be reused either to authorize a new user mid-way through an app's lifecycle viareauthorizeClient(orreauthorizeTeamClient) or when the app initially launches viasetupWithAppKeyMultiUser/setupWithAppKeyMultiUserDesktop(orsetupWithTeamAppKeyMultiUser/setupWithTeamAppKeyMultiUserDesktop)- client manager instantiates a
DropboxTransportClient(if not supplied by the user) - client manager instantiates a
DropboxClient(orDropboxTeamClient) with the transport client as a field
The DropboxClient (or DropboxTeamClient) is then used to make all of the desired API calls.
- call
resetClientsto logout Dropbox user but not clear any access tokens - if specific access tokens need to be removed, use the
clearStoredAccessTokenmethod inDropboxOAuthManager
- PhotoWatch - View photos from your Dropbox. Supports Apple Watch.
All of our routes and data types are auto-generated using a framework called Stone.
The stone repo contains all of the Swift specific generation logic, and the spec repo contains the language-neutral API endpoint specifications which serve
as input to the language-specific generators.
If you're interested in modifying the SDK codebase, you should take the following steps:
- clone this GitHub repository to your local filesystem
- run
git submodule initand thengit submodule update - navigate to
TestSwifty_[iOS|macOS] - check the CocoaPods version installed (via
pod --version) is same as "locked" inTestSwifty_[iOS|macOS]/Podfile.lock - run
pod install - open
TestSwifty_[iOS|macOS]/TestSwifty_[iOS|macOS].xcworkspacein Xcode - implement your changes to the SDK source code.
To ensure your changes have not broken any existing functionality, you can run a series of integration tests:
- create a new app on https://www.dropbox.com/developers/apps/, with "Full Dropbox" access. Note the App key
- open Info.plist and configure the "URL types > Item 0 (Editor) > URL Schemes > Item 0" key to db-"App key"
- open AppDelegate.swift and replace "FULL_DROPBOX_APP_KEY" with the App key as well
- run the test app on your device and follow the on-screen instructions
Please post any bugs to the issue tracker found on the project's GitHub page.
Please include the following with your issue:
- a description of what is not working right
- sample code to help replicate the issue
Thank you!


