topgrd / blog Goto Github PK
View Code? Open in Web Editor NEWBlog 之前hexo,现在使用 issue
Home Page: http://topgrd.me
Blog 之前hexo,现在使用 issue
Home Page: http://topgrd.me


https://medium.com/@ryardley/react-hooks-not-magic-just-arrays-cd4f1857236e
function Info() {
  const [name, setName] = useState('Topgrd')

  return (
    <div>
      <h2>{name}</h2>
      <input onChange={e => setName(e.target.value)} />
    </div>
  )
}let state = [];
let setters = [];
let firstRun = true;
let cursor = 0;
function createSetter(cursor) {
return function setterWithCursor(newVal) {
state[cursor] = newVal;
};
}
export function useState(initVal) {
if (firstRun) {
state.push(initVal);
setters.push(createSetter(cursor));
firstRun = false;
}
const setter = setters[cursor];
const value = state[cursor];
cursor++;
return [value, setter];
}定义
jack.js
export default () => {
  console.log('fafa');
};
mark.js
export const val = 'sd';

export default () => {
  console.log('jaja');
};
index.js
const name = 'jack';
import('./mark').then(mark => mark());
import('./jack').then(jack => jack());

export default name;
使用 webpack 打包
(function(modules) {
  // webpackBootstrap
  // install a JSONP callback for chunk loading
  function webpackJsonpCallback(data) {}

  // The module cache
  var installedModules = {};

  // 用来存储加载过和加载中的 chunk
  // undefined = chunk not loaded, null = chunk preloaded/prefetched
  // Promise = chunk loading, 0 = chunk loaded
  var installedChunks = {
    main: 0,
  };
  // script path function
  function jsonpScriptSrc(chunkId) {
    return __webpack_require__.p + '' + chunkId + '.bundle.js';
  }
  // The require function
  function __webpack_require__(moduleId) {}
  // This file contains only the entry chunk.
  // The chunk loading function for additional chunks
  __webpack_require__.e = function requireEnsure(chunkId) {};

  // expose the modules object (__webpack_modules__)
  __webpack_require__.m = modules;

  // expose the module cache
  __webpack_require__.c = installedModules;

  // define getter function for harmony exports
  __webpack_require__.d = function(exports, name, getter) {
    if (!__webpack_require__.o(exports, name)) {
      Object.defineProperty(exports, name, { enumerable: true, get: getter });
    }
  };

  // define __esModule on exports
  __webpack_require__.r = function(exports) {
    if (typeof Symbol !== 'undefined' && Symbol.toStringTag) {
      Object.defineProperty(exports, Symbol.toStringTag, { value: 'Module' });
    }
    Object.defineProperty(exports, '__esModule', { value: true });
  };

  __webpack_require__.t = function(value, mode) {};

  // getDefaultExport function for compatibility with non-harmony modules
  __webpack_require__.n = function(module) {};

  // Object.prototype.hasOwnProperty.call
  __webpack_require__.o = function(object, property) {
    return Object.prototype.hasOwnProperty.call(object, property);
  };

  // __webpack_public_path__
  __webpack_require__.p = '';

  // on error function for async loading
  __webpack_require__.oe = function(err) {
    console.error(err);
    throw err;
  };

  var jsonpArray = (window['webpackJsonp'] = window['webpackJsonp'] || []);
  var oldJsonpFunction = jsonpArray.push.bind(jsonpArray);
  jsonpArray.push = webpackJsonpCallback;
  jsonpArray = jsonpArray.slice();
  for (var i = 0; i < jsonpArray.length; i++)
    webpackJsonpCallback(jsonpArray[i]);
  var parentJsonpFunction = oldJsonpFunction;

  // Load entry module and return exports
  return __webpack_require__((__webpack_require__.s = './src/index.js'));
})(
  /************************************************************************/
  {
    /***/ './src/index.js':
      /*!**********************!*\
  !*** ./src/index.js ***!
  \**********************/
      /*! exports provided: default */
      /***/ function(module, __webpack_exports__, __webpack_require__) {
        'use strict';
        eval(
          '__webpack_require__.r(__webpack_exports__);\nconst name = \'jack\';\n__webpack_require__.e(/*! import() */ 0).then(__webpack_require__.bind(null, /*! ./mark */ "./src/mark.js")).then(mark => mark());\n\n/* harmony default export */ __webpack_exports__["default"] = (name);\n\n\n//# sourceURL=webpack:///./src/index.js?',
        );

        /***/
      },
  },
);
jack.js 打包出的内容
(window['webpackJsonp'] = window['webpackJsonp'] || []).push([
  [1],
  {
    /***/ './src/mark.js':
      /*!*********************!*\
  !*** ./src/mark.js ***!
  \*********************/
      /*! exports provided: val, default */
      /***/ function(module, __webpack_exports__, __webpack_require__) {
        'use strict';
        eval(
          '__webpack_require__.r(__webpack_exports__);\n/* harmony export (binding) */ __webpack_require__.d(__webpack_exports__, "val", function() { return val; });\nconst val = \'sd\'\n\n/* harmony default export */ __webpack_exports__["default"] = (() => {\n  console.log(\'jaja\')\n});\n\n\n//# sourceURL=webpack:///./src/mark.js?',
        );

        /***/
      },
  },
]);
取全局的 webpackJsonp 数组,如果没有,定义为空数组,并调用 push 方法,参数一个数组,第一项对应异步模块的 chunkId,第二项就是模块的内容
首先,通过立即执行函数,跳过一系列的方法定义,到下面地方开始运行
// ... some code
var jsonpArray = (window['webpackJsonp'] = window['webpackJsonp'] || []);
var oldJsonpFunction = jsonpArray.push.bind(jsonpArray);
jsonpArray.push = webpackJsonpCallback;
jsonpArray = jsonpArray.slice();
for (var i = 0; i < jsonpArray.length; i++) webpackJsonpCallback(jsonpArray[i]);
var parentJsonpFunction = oldJsonpFunction;
return __webpack_require__((__webpack_require__.s = './src/index.js'));可以看到,jsonpArray 是全局的 webpackJsonp数组,并对这个数组的 push 方法等于 webpackJsonpCallback, 这样根据上面异步 chunk 里的代码,可以看出模块加载了以后,就会执行 webpackJsonpCallback 方法.
加载 index.js. 看下 index.js 对应的 eval 函数内部的内容.
__webpack_require__.r(__webpack_exports__);
const name = 'jack';
__webpack_require__
  .e(/*! import() */ 1)
  .then(__webpack_require__.bind(null, /*! ./mark */ './src/mark.js'))
  .then(mark => mark());
__webpack_require__
  .e(/*! import() */ 0)
  .then(__webpack_require__.bind(null, /*! ./jack */ './src/jack.js'))
  .then(jack => jack());
/* harmony default export */

__webpack_exports__['default'] = name;
可以看到 import().then() 被转换为了 __webpack_require__.e. 这个函数的第一个参数就是按需加载对应 chunk 的 chunkId。
接下来看看 __webpack_require__.e 的具体实现
__webpack_require__.e = function requireEnsure(chunkId) {
  var promises = [];

  // JSONP chunk loading for javascript

  var installedChunkData = installedChunks[chunkId];
  if (installedChunkData !== 0) {
    // 0 表示该chunk已加载过了

    // 如果 installedChunkData 是 promise,即为真,则表示模块正在加载中
    // push installedChunkData[2] 到 promises 数组
    if (installedChunkData) {
      promises.push(installedChunkData[2]);
    } else {
      // installedChunks[chunkId] 赋值为一个数组,前两项是 promise 的 resolve reject
      // installedChunkData = installedChunks[chunkId]
      var promise = new Promise(function(resolve, reject) {
        installedChunkData = installedChunks[chunkId] = [resolve, reject];
      });
      // installedChunkData[2]赋值为上面创建的promise
      promises.push((installedChunkData[2] = promise));

      // 通过创建 script 标签形式下载 chunk script
      var script = document.createElement('script');
      var onScriptComplete;

      script.charset = 'utf-8';
      script.timeout = 120;
      if (__webpack_require__.nc) {
        script.setAttribute('nonce', __webpack_require__.nc);
      }
      // jsonpScriptSrc 拼接 script 地址,webpack public path + chunkId + .bundle.js
      script.src = jsonpScriptSrc(chunkId);

      // create error before stack unwound to get useful stacktrace later
      var error = new Error();
      onScriptComplete = function(event) {
        // avoid mem leaks in IE.
        script.onerror = script.onload = null;
        clearTimeout(timeout);
        var chunk = installedChunks[chunkId];
        // 不为 0 表示下载出错
        if (chunk !== 0) {
          if (chunk) {
            var errorType =
              event && (event.type === 'load' ? 'missing' : event.type);
            var realSrc = event && event.target && event.target.src;
            error.message =
              'Loading chunk ' +
              chunkId +
              ' failed.\n(' +
              errorType +
              ': ' +
              realSrc +
              ')';
            error.name = 'ChunkLoadError';
            error.type = errorType;
            error.request = realSrc;
            chunk[1](error);
          }
          installedChunks[chunkId] = undefined;
        }
      };
      // 超时处理
      var timeout = setTimeout(function() {
        onScriptComplete({ type: 'timeout', target: script });
      }, 120000);
      script.onerror = script.onload = onScriptComplete;
      document.head.appendChild(script);
    }
  }
  // 使用 Promise.all 处理
  return Promise.all(promises);
};
通过创建 script 标签加载对应 chunkId 的 chunk,加载完以后,执行对应 chunk 内的内容.
也就是上面提到的 webpackJsonpCallback
function webpackJsonpCallback(data) {
  var chunkIds = data[0];
  var moreModules = data[1]; // 异步模块内容

  // add "moreModules" to the modules object,
  // then flag all "chunkIds" as loaded and fire callback
  var moduleId,
    chunkId,
    i = 0,
    resolves = [];
  for (; i < chunkIds.length; i++) {
    chunkId = chunkIds[i];
    if (installedChunks[chunkId]) {
      // installedChunks[chunkId][0] 之前是 __webpack_reuqire__.e 里赋值为 promise 的 resolve
      // 放入 resolves
      resolves.push(installedChunks[chunkId][0]);
    }
    // 赋值为 0 表示加载完成
    installedChunks[chunkId] = 0;
  }
  for (moduleId in moreModules) {
    if (Object.prototype.hasOwnProperty.call(moreModules, moduleId)) {
      // 同步到 modules 中
      modules[moduleId] = moreModules[moduleId];
    }
  }
  if (parentJsonpFunction) parentJsonpFunction(data);

  while (resolves.length) {
    resolves.shift()(); // => promise resolve()
  }
}
通过执行 promise 的 resolve(),这样我们的Promise.all(promises); 全部 resolve 之后,就可以执行 .then 后面的方法了.
整理一下
__webpack_require__ 加载入口文件__webpack_require__.e 加载__webpack_require__.e 使用创建 script 标签的方式加载异步模块,并将每个异步的 chunk 创建 promise,并放入 installedChunkwebpackJsonpCallback 方法,改变 nstalledChunk 对应的 chunkId 加载状态为 0,即表示加载过,然后同步到 modules(所有模块存放的缓存)中,执行之前创建的 promise 的 resolve()__webpack_require使用异步模块关于代码风格的圣战,从到底要不要分号,缩进用tab还是space,2个还是4个空格,从未停止过。但是作为现代javascript 开发者,who cares ! 我们使用eslint 就可以轻松的控制团队的代码风格,但是 eslint 在某些方面就无法强制了,下面2份代码
if (a < 1) {
	console.log('haha');
}
if (a < 1)
{
console.log('haha');
}Eslint 都不会报错,还有 trailing commas,Why you should enforce Dangling Commas for Multiline Statements 等等。而prettier + eslint 可以完美的避免这些风格不统一的问题。当你的风格与团队 eslint 配置有不同时,只需要prettier一下,就可以保持一致,不需要在写代码时关心差异,并且 prettier 也是当前最火的一款 format 工具,很多开源项目下面,你会发现都会有一份 .prettierrc
By far the biggest reason for adopting Prettier is to stop all the on-going debates over styles. It is generally accepted that having a common style guide is valuable for a project and team.
到目前为止,采用Prettier的最大原因是停止所有关于风格的争论。人们普遍认为,拥有一个共同的风格指南对于项目和团队来说是有价值的。
Prettier · Opinionated Code Formatter
使用前最好能生成一份 prettier 配置文件Configuration File · Prettier,放在你需要格式化的项目目录下。如果需要,配置一份.prettierignore . 规则和gitignore一样,其中的文件不会被处理。
npm install --save-dev --save-exact prettier
// or globally
npm install --global prettier
格式化自己项目目录下文件时,可以使用
prettier --write 'src/**/*.js'
目录使用的是node-glob语法。
2. 编辑器插件
npm install -D eslint-plugin-prettier eslint-config-prettier.eslintrc进行相关配置{
"parser": "babel-eslint",
"extends": ["eslint-config-hcb", "prettier"],
"plugins": ["prettier"],
"rules": {
"prettier/prettier": "error"
},
"globals": {},
"parserOptions": {
"ecmaFeatures": {
"legacyDecorators": true
}
}
}eslint-plugin-prettier 插件会调用 prettier 对你的代码风格进行检查。也就是他会使用prettier格式化你的代码, 然后比较格式化前后的代码,不一致的地方会像eslint那样报错。
当然你不需要马上手动改,你可以直接用prettier cli 或者编辑器插件进行格式化。
eslint-config-prettier能够关闭不必要或者与prettier冲突的lint 选项,尤其是不希望一个 error 出现2次,但是我们要确保 prettier 在 eslint 配置里extends的最后。
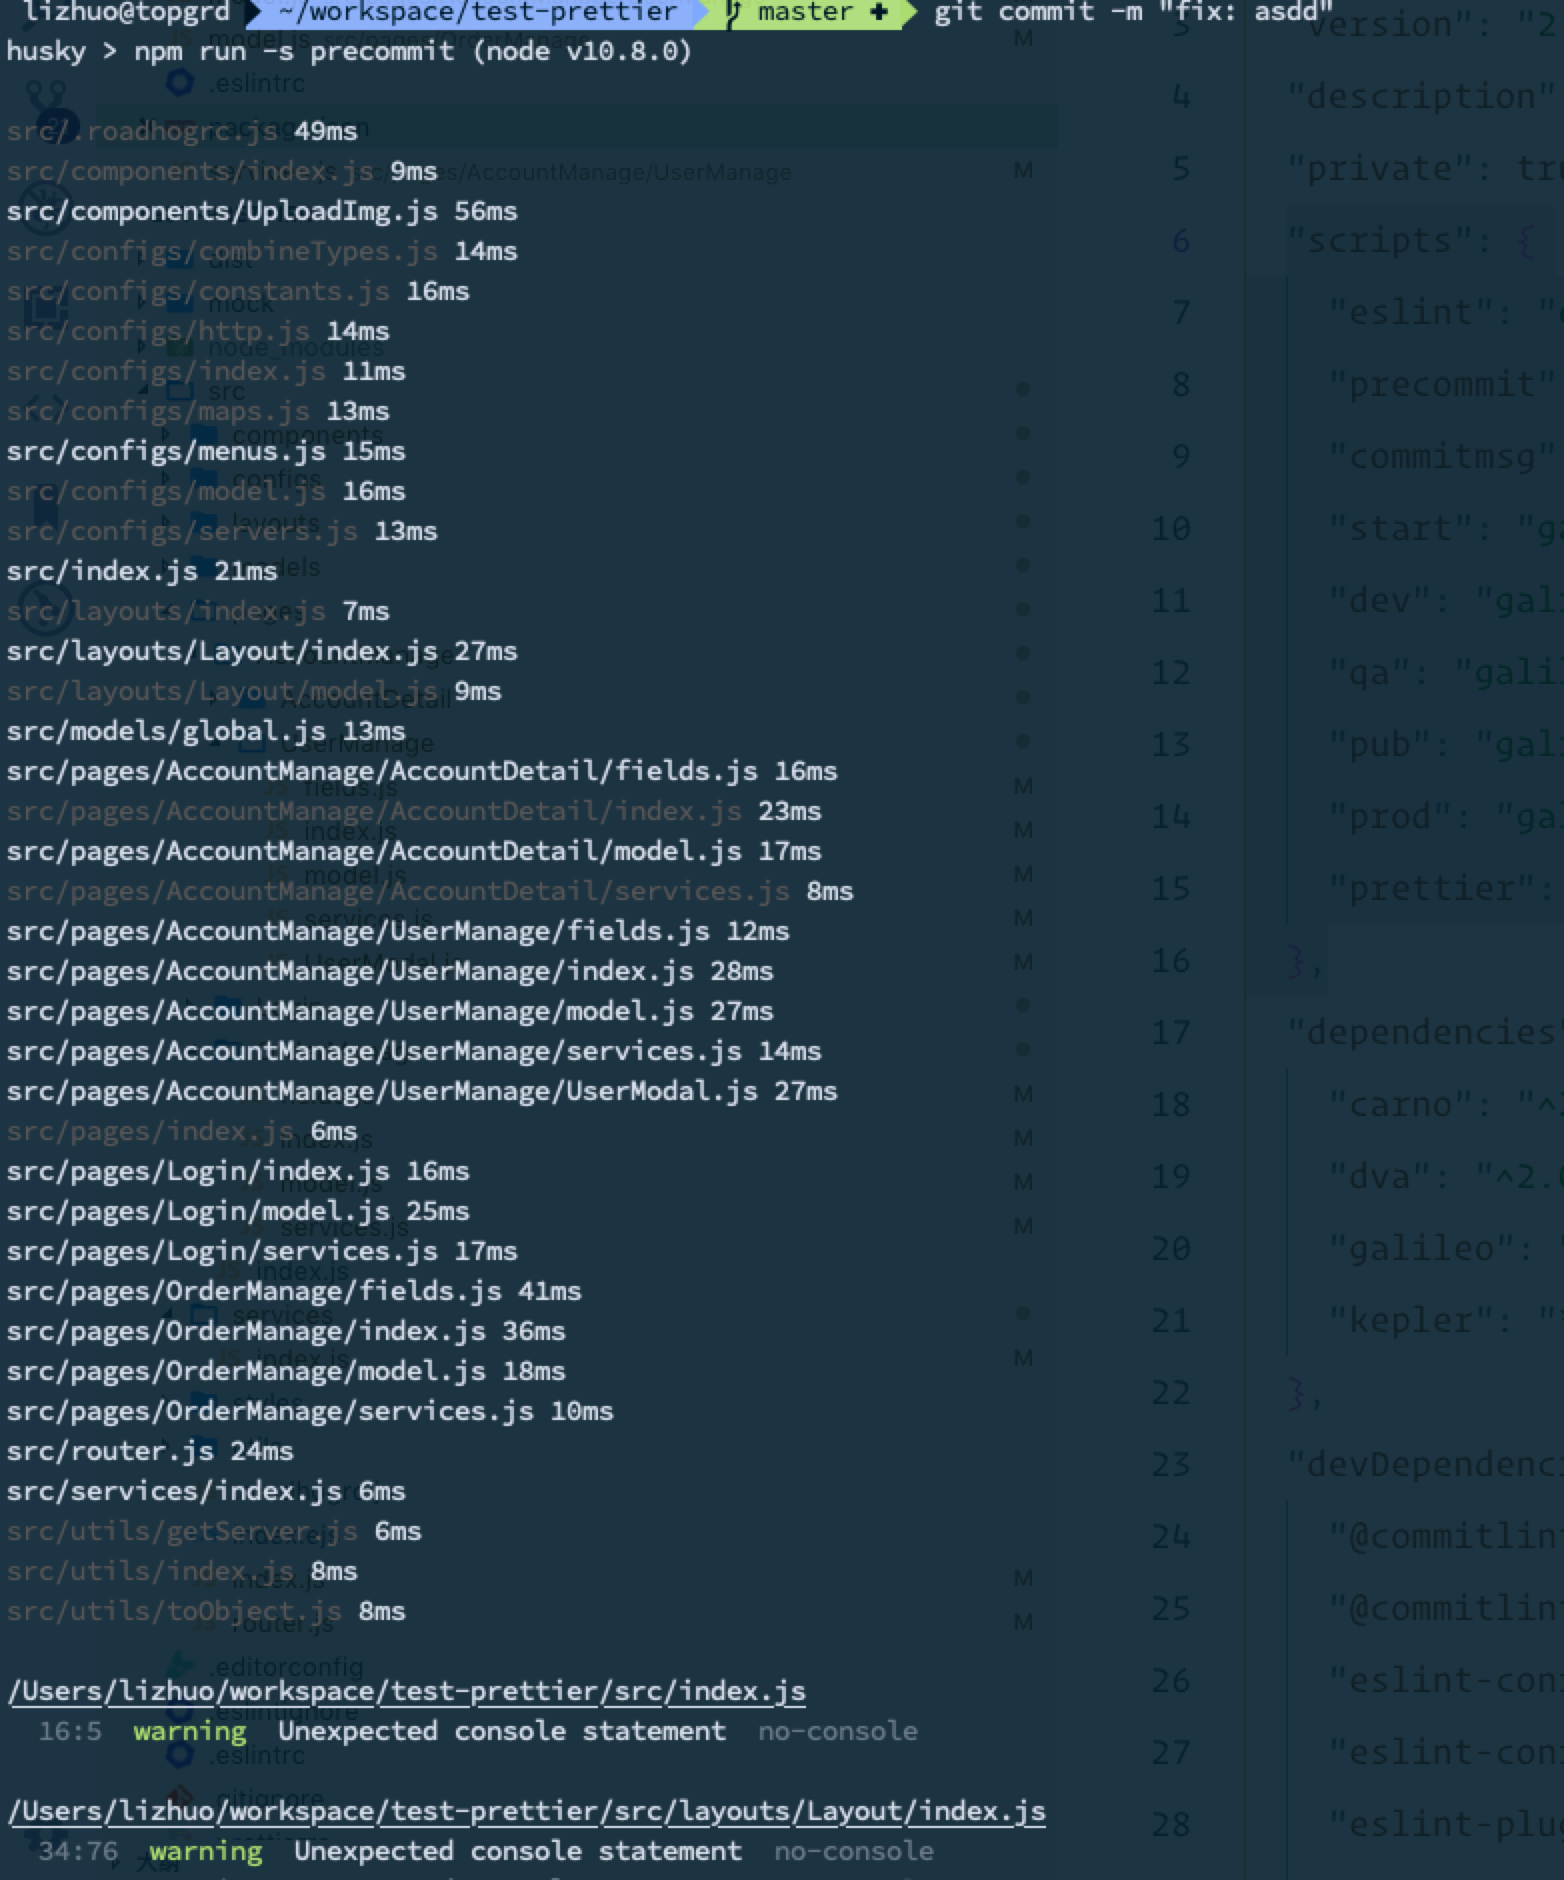
4. 在pre-commit 钩子里使用
Prettier 与 eslint 和 pre-commit 钩子使用可谓是最佳实践,按第三条配好eslint 和 prettier 后,在 项目 package.json 里进行配置
"scripts": {
    "eslint": "eslint src",
    "precommit": "prettier --write 'src/**/*.js' && npm run eslint",
    "commitmsg": "commitlint -E GIT_PARAMS",
    "start": "galileo server -p 8900",
    "dev": "galileo build dev",
    "qa": "galileo build qa",
    "pub": "galileo build prod --static pub",
    "prod": "galileo build prod",
    "prettier": "prettier --write 'src/**/*.js'"
  }
这样每次提交代码时会自动帮你格式化代码并进行 eslint 校验。
链接
⚡️ - James Long - A Prettier Printer (plus bonus clip!) - React Conf 2017 - YouTube
Javascript code formatting - Christopher Chedeau, React London 2017 - YouTube
如果你调试的时候需要看所依赖的npm包的源码,一般包的入口main都指向dist里被babel或rollup编译过的es5代码。
{
  "name": "my-package",
  "version": "0.1.0",
  "main": "dist/index.js"
}
会指示你的打包工具在require 或 import的时候找到正确的入口文件在哪,但是现在有种更推荐的方式是同时发布编译后的 es5 代码和 es2015+ 源码,让用户选择。
将 package.json 的main直接指向es6代码,会产生2个问题。
因此 package.json 中的main指向es5版本代码,要解决这个问题,rollup提出了module字段,现在也被webpack等构建工具所支持。当构建工具遇到我们的模块时,优先使用module字段入口。然后使用main入口。


exclude替换为inclue
{
  test: /\.(js|jsx)$/,
- exclude: /node_modules/,
+ include: [
+		path.resolve('./src'),
+		path.resolve('./node_modules/carno')
+	],
  use: {
    loader: 'babel-loader',
  },
}
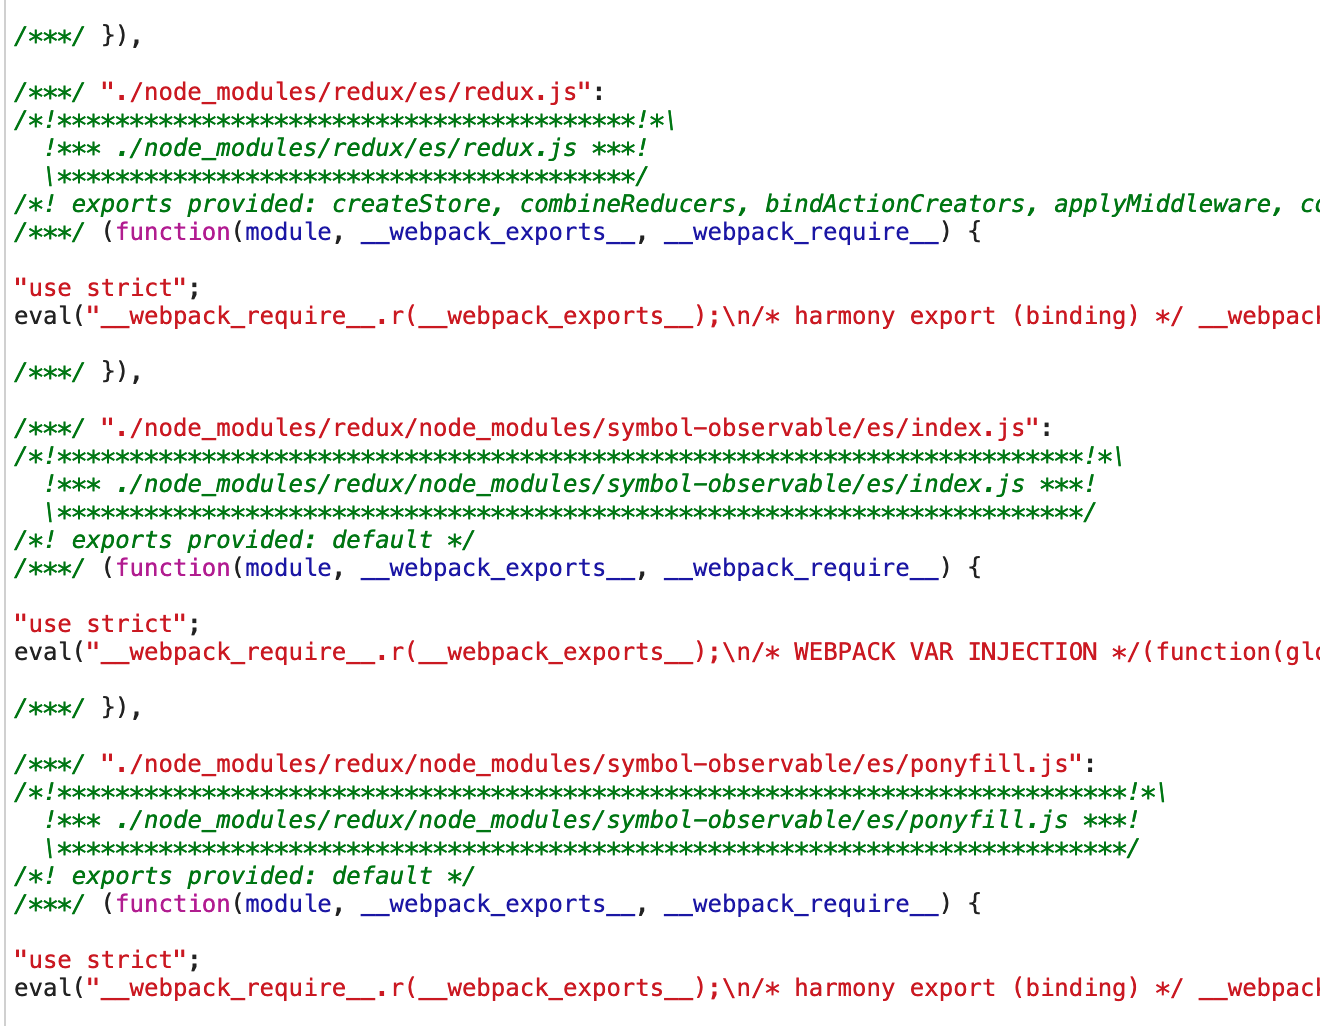
这里取redux模块进行研究
当我们的 mainFields 设置为 ['main'] 时,使用webpack build一下
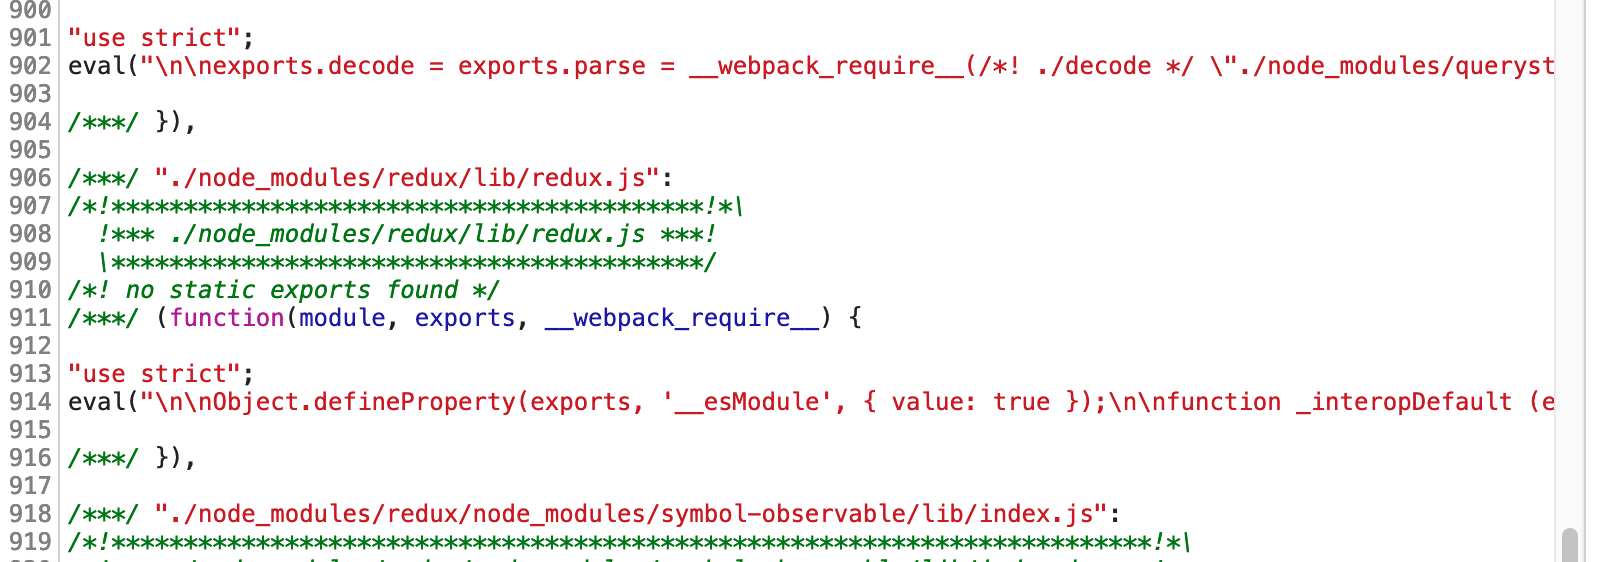
设置为['module', 'main']时 注意 不能只设置 module,因为有的包只提供 main
组件的设计原则
react-component 这里的大多数组件是 ant design 的底层依赖,他们大都很好的遵循了我们的一些设计原则,这里简单概括下:
职责清晰、单一职责

在react中,在组件事件上绑定this通常有三种写法
inline function
<Button onClick={() => this.handleChange></Button>class properties
class A {
  handleChange = () => {
    coneole.log()
  }
}
bind
class B {
  constructor() {
    this.handleChange = this.handleChange.bind(this)
  }

  handleChange() {
    console.log()
  }
}
哪种方法相较而言更适合呢,这个在React的Github Issue里都已经有过多次讨论。facebook/react#9851 根据Dan Abramov的说法,两者基本一致,但在Facebook内部使用的是第二种方法(calss properties)。
虽然两者基本一致,但是肯定有细微的差别,第二种方法因为目前还不是ES的正式语法,所有需要使用babel插件babel-plugin-transform-class-properties进行转义,下面是babel转换A和B的代码
var A = function A() {
  _classCallCheck(this, A);

  this.handleChange = function () {
    coneole.log();
  };
};


var B = function () {
  function B() {
    _classCallCheck(this, B);

    this.handleChange = this.handleChange.bind(this);
  }

  _createClass(B, [{
    key: "handleChange",
    value: function handleChange() {
      console.log();
    }
  }]);

  return B;
}();
我们在这里分别实例化上面代码中的A和B并打印这两个实例,如下图

使用class properties语法的A实例handleChange只存在实例上,使用bind绑定this的在实例和原型上分别存在handleChange方法, 看上去似乎前者的开销比后者小。
性能方面,可以做个测试进行对比,https://jsperf.com/arrow-function-vs-bound-function-with-100-instances。

op/s的测试结果显示bind方式比class properties在性能方面更加优秀,但是没有超过50%,优势不是很大。
但是如果如果在constructor中显式bind this,那么在组件中如果含有大量事件,是会拖慢组件初始化速度,是你的应用程序变慢。
有一种说法是如果你的组件性能受到的影响微乎其微,不要过早的进行优化,因为可能带来副作用,只有在观测到时在进行优化。
第一种内联函数方式是最不被人接受的,因为垃圾回收机制和在使用pureComponent ,在组件中内联的使用一个对象会使Shallow Compare 失效,因为总会产生一个新的对象,是严格不相等的,从而引起重新渲染。
但是有中情况是需要从外部传递参数给事件函数,这种情况下我们不得不使用内联函数,有一种解决方案是讲数据传递到html的表单元素上,通过e.target.value获取。
class C {
    handleClick = (e) => {
        const id = e.target.value
        // do something
    }

    render() {
        const id = {this.state}
        return (<button value={id} onClick={this.handleClick}>提交</button>)
    }
}还有一种解决方案是提取子组件,具体可以看这篇文章https://medium.freecodecamp.org/react-pattern-extract-child-components-to-avoid-binding-e3ad8310725e 但两者都有相应局限性,不是广泛的适用于所有场景。
如果你的组件不是追求极限性能优化或者是拥有超多的子组件,不论采用2和3哪种方式,都是可以的,主要还是看团队规范。
服务性能指标
每秒查询率QPS是对一个特定的查询服务器在规定时间内所处理流量多少的衡量标准,通常用来表达和衡量当前系统的负载
系统同时处理的request/事务数
一般取平均响应时间
QPS = 并发量 / 平均响应时间
一个系统吞吐量通常由QPS(TPS)、并发数两个因素决定,每套系统这两个值都有一个相对极限值,在应用场景访问压力下,只要某一项达 到系统最高值,系统的吞吐量就上不去了,如果压力继续增大,系统的吞吐量反而会下降,原因是系统超负荷工作,上下文切换、内存等等其它消耗导致系统性能下 降!
如果想要提高系统吞吐量,就需要先进行性能测试,测出系统极限,然后再进行性能调优。
Apache JMeter - Download Apache JMeter
下载jmeter,然后解压到任意目录,执行bin文件夹下的 jmeter.sh在出现的UI界面上进行对你的node 服务进行相应测试,具体如何测试可以Google。可以测出程序的吞吐量。
内存泄漏(Memory Leak)指由于疏忽或错误造成程序未能释放已经不再使用的内存的情况。
如果一个程序存在内存泄露,则随着时间的推移,内存占用越来越来,程序也就会越来越卡,导致系统性能下降,吞吐量下降,因此如果发现你的程序越来越慢,那可能存在内存泄露问题。
heapdump或使用 v8-profiler
这两个工具的原理都是一致的:调用v8引擎暴露的接口:
v8::Isolate::GetCurrent()->GetHeapProfiler()->TakeHeapSnapshot(title, control)
然后将获取的c++对象数据转换为js对象。
这里推荐使用v8-profiler因为多一个cpu快照功能
我们为程序添加一个进行快照的路由,在服务一开始运行的时候开始CPU分析并进行第一次堆快照,方便后面对比,服务端接受到这个Get请求时,进行停止分析,并进行堆快照和CPU快照,保存快照文件。
const router = require('koa-router')();
const fs = require('fs');
const profiler = require('v8-profiler');

profiler.startProfiling();
const snapshot1 = profiler.takeSnapshot();

router.get('/profiler', async (ctx) => {
  const perf = profiler.stopProfiling();
  perf
    .export()
    .pipe(fs.createWriteStream('profiler.cpuprofile'))
    .on('finish', () => perf.delete());

  const snapshot2 = profiler.takeSnapshot();

  snapshot1.export((error, result) => {
    if (error) console.log(error);
    fs.writeFileSync('snapshot1.heapsnapshot', result);
    snapshot1.delete();
  });

  snapshot2
    .export()
    .pipe(fs.createWriteStream('snapshot2.heapsnapshot'))
    .on('finish', snapshot2.delete);
  ctx.body = {
    msg: 'success take profile',
  };
});
ok,然后使用Jmeter进行并发测试,在合适的时机请求服务profiler接口,得到3个文件.
snapshot1.heapsnapshot
snapshot2.heapsnapshot
profiler.cpuprofile
分析方式可以使用chrome devtools进行分析,也可以使用alinode进行分析

点开Memory面板,左侧边栏右键load,选择刚才的2个heapsnapshot文件,
选择左上角的Comparsion 即对比2次内存使用情况,下面数据 + 即表示增项的内存,- 表示减少的。

这样就可以轻松的知道什么在增加,增加里多少。找出异常的点开进行分析。
CPU

打开JavaScript Profiler 面板,同样load cpuprofile文件,面板会将最耗时的方法放在上面,剔除program和GC消耗,检查最耗时的function来优化。
登陆alinode,创建新应用,创建好后,打开。
选择上传文件,选择 堆快照,上传刚才的heapsnapshot文件

完成后如下

点击分析,会显示出内存泄露可疑点。👍

点击Array关键字进去查看详细信息,发现内存占用比例87.35%,再点击具体信息就可以知道哪块内存泄露了。

选择上传文件,选择cpu profile,上传刚才的cpu快照。

点击分析

查看火焰图

点击分析(devtool),和chrome面板一样,不过会红色显示可能异常的function

kepler 线上服务大量502,是AG访问kepler server得不到响应,kepler server 部署后,内存消耗严重,拖慢程序运行,导致大量链接响应超过10s。
通过alinode对测试服务器上服务进行监控,并取堆快照。发现node程序92%的内存都来源于一个Array数组,并指向配置文件 app.json,


查看相关代码,发现在代码如下
//
delete require.cache[require.resolve('../configuration/app.json')];
const { duration } = require('../configuration/app.json');
app.json是可配置的,如果使用require会有缓存问题,因此使用了delete require.cache,结果引起了内存泄露。
查看网上相关 require.cache 文章发现此问题有人踩过,具体解释:
node 源码中关于module 的方法,
function Module(id, parent) {
  this.id = id;
  this.exports = {};
  this.parent = parent;
  if (parent && parent.children) {
    parent.children.push(this);
  }

  this.filename = null;
  this.loaded = false;
  this.children = [];
}
node 在 module.js 中自动为模块添加了引用
首先 我们先模拟一个useState
function useState(initVal) {
  let _val = initVal;
  const state = _val;
  function setState(newVal) {
    _val = newVal;
  }

  return [state, setState];
}

const [count, setCount] = useState(0);

console.log(count);

setCount(2);

console.log(count);
但是log 出来的count并不是我们所期望的 0 2,而是 0 0; 为什么呢? 因为在[count, setCount] = useState(0)count 复制的是 initVal, 修改 _val 的值, 而 count 仍然是initVal的值
如何让他恢复正常呢,我们可以使用方法来获取state
function useState(initVal) {
  let _val = initVal;
  const state = () => _val;
  function setState(newVal) {
    _val = newVal;
  }

  return [state, setState];
}

const [count, setCount] = useState(0);

console.log(count());

setCount(2);

console.log(count());
但是如果我们想真正模拟Hooks,就不能这样做。
我们可以用如下代码模拟 React, 主要使用闭包和数组模拟Hook,使用 hook[index] 存放 state 或者 依赖
// module pattern
const React = (function() {
  let hooks = []; // 存放所以使用的 hook
  let idx = 0; // hook 指针,来保证 hook 顺序的正常调用
  function useState(initVal) {
    const state = hooks[idx] || initVal;
    const _idx = idx; // _idx 确保 setState 修改的是同一个state
    function setState(newVal) {
      hooks[_idx] = newVal;
    }

    idx++; // 如果再使用 useState, 指向 hook 数组的下一个

    return [state, setState];
  }

  function useEffect(callback, deps) {
    const oldDeps = hooks[idx];
    let hasChange = true;

    if (oldDeps) {
      hasChange = deps.some((dep, i) => !Object.is(dep, oldDeps[i]));
    }

    if (hasChange) callback();
    hooks[idx] = deps;
    idx++; // 如果再使用 useEffect, 指向 hook 数组的下一个
  }

  function render(Component) {
    const C = Component();
    C.render();
    idx = 0; // 每次 render 重置,确保 hooks 指针顺序
    return C;
  }

  return {
    Component,
    render,
    useState,
    useEffect
  };
})();

const { useState, useEffect, render } = React;

function Component() {
  const [count, setCount] = useState(0);
  const [type, setType] = useState("");

  useEffect(() => {
    console.log("jack");
  }, [count]);

  return {
    render: () => {
      document.body.innerHTML = "";
      const div = document.createElement("div");
      div.innerText = count;
      document.body.appendChild(div);
    },
    click: () => setCount(count + 1),
    type: () => setType("apple"),
    say: () => console.log(count, type)
  };
}

let App = render(Component);

setInterval(() => {
  App.click();
  App = render(Component); // 模拟 rerender
}, 1000);
效果看下面连接
class Parent {
  constructor() {
    this.name = 'tom';
    return { aa: 1 };
  }
}

class Child extends Parent {
  constructor() {
    super();
    this.name = 'sd';
  }
}

const child = new Child();

console.log(child);
看下编译出的代码
var Parent = function Parent() {
  _classCallCheck(this, Parent);

  this.name = 'tom';
  return { aa: 1 };
};

var Child = (function(_Parent) {
  _inherits(Child, _Parent);

  function Child() {
    _classCallCheck(this, Child);

    var _this = _possibleConstructorReturn(
      this,
      (Child.__proto__ || Object.getPrototypeOf(Child)).call(this),
    );

    _this.name = 'jack';
    return _this;
  }

  return Child;
})(Parent);

var child = new Child();
奇怪的是 aa 为什么会跑到 child 上去
关键是 _possibleConstructorReturn 函数
function _possibleConstructorReturn(self, call) {
  if (!self) {
    throw new ReferenceError(
      "this hasn't been initialised - super() hasn't been called",
    );
  }
  return call && (typeof call === 'object' || typeof call === 'function')
    ? call
    : self;
}
Child inherits Parent 继承父类,_possibleConstructorReturn()传入的是参数是 child 的 this,和 Parent.call(this), parent.call(this) 返回的是{ aa: 1 } .所以相当于_possibleConstructorReturn(this, { aa: 1 }),根据这个函数里的内容,这里应该返回第二个参数 call,也就是 { aa: 1 },所以 _this 就是 { aa: 1}
所以得到的结论是如果constructor里调用super(),并且父类的构造函数有返回值,返回值是一个对象的话或者 function,那么子类中的 this 就先被赋予这个值
定义 mark.js
export const val = 'sd';

export default () => {
  console.log('jaja');
};
index.js
import mark from './mark';

const name = 'jack';
mark();
export default name;
下面的代码是 webpack 打包后生成的代码
(function(modules) {
  // webpackBootstrap
  // The module cache
  var installedModules = {};

  // The require function
  function __webpack_require__(moduleId) {
    // Check if module is in cache
    if (installedModules[moduleId]) {
      return installedModules[moduleId].exports;
    }
    // Create a new module (and put it into the cache)
    var module = (installedModules[moduleId] = {
      i: moduleId,
      l: false,
      exports: {},
    });

    // Execute the module function
    modules[moduleId].call(
      module.exports,
      module,
      module.exports,
      __webpack_require__,
    );

    // Flag the module as loaded
    module.l = true;

    // Return the exports of the module
    return module.exports;
  }

  // expose the modules object (__webpack_modules__)
  __webpack_require__.m = modules;

  // expose the module cache
  __webpack_require__.c = installedModules;

  // define getter function for harmony exports
  __webpack_require__.d = function(exports, name, getter) {
    if (!__webpack_require__.o(exports, name)) {
      Object.defineProperty(exports, name, { enumerable: true, get: getter });
    }
  };

  // define __esModule on exports
  __webpack_require__.r = function(exports) {
    if (typeof Symbol !== 'undefined' && Symbol.toStringTag) {
      Object.defineProperty(exports, Symbol.toStringTag, { value: 'Module' });
    }
    Object.defineProperty(exports, '__esModule', { value: true });
  };

  // create a fake namespace object
  // mode & 1: value is a module id, require it
  // mode & 2: merge all properties of value into the ns
  // mode & 4: return value when already ns object
  // mode & 8|1: behave like require
  __webpack_require__.t = function(value, mode) {
    if (mode & 1) value = __webpack_require__(value);
    if (mode & 8) return value;
    if (mode & 4 && typeof value === 'object' && value && value.__esModule)
      return value;
    var ns = Object.create(null);
    __webpack_require__.r(ns);
    Object.defineProperty(ns, 'default', { enumerable: true, value: value });
    if (mode & 2 && typeof value != 'string')
      for (var key in value)
        __webpack_require__.d(
          ns,
          key,
          function(key) {
            return value[key];
          }.bind(null, key),
        );
    return ns;
  };

  // getDefaultExport function for compatibility with non-harmony modules
  __webpack_require__.n = function(module) {
    var getter =
      module && module.__esModule
        ? function getDefault() {
            return module['default'];
          }
        : function getModuleExports() {
            return module;
          };
    __webpack_require__.d(getter, 'a', getter);
    return getter;
  };

  // Object.prototype.hasOwnProperty.call
  __webpack_require__.o = function(object, property) {
    return Object.prototype.hasOwnProperty.call(object, property);
  };

  // __webpack_public_path__
  __webpack_require__.p = '';

  // Load entry module and return exports
  return __webpack_require__((__webpack_require__.s = './src/index.js'));
})(
  /************************************************************************/
  {
    /***/ './src/index.js':
      /*!**********************!*\
      !*** ./src/index.js ***!
      \**********************/
      /*! exports provided: default */
      /***/ function(module, __webpack_exports__, __webpack_require__) {
        'use strict';
        eval(
          '__webpack_require__.r(__webpack_exports__);\n/* harmony import */ var _mark__WEBPACK_IMPORTED_MODULE_0__ = __webpack_require__(/*! ./mark */ "./src/mark.js");\n\n\nconst name = \'jack\';\nObject(_mark__WEBPACK_IMPORTED_MODULE_0__["default"])();\n/* harmony default export */ __webpack_exports__["default"] = (name);\n\n\n//# sourceURL=webpack:///./src/index.js?',
        );

        /***/
      },

    /***/ './src/mark.js':
      /*!*********************!*\
      !*** ./src/mark.js ***!
      \*********************/
      /*! exports provided: default */
      /***/ function(module, __webpack_exports__, __webpack_require__) {
        'use strict';
        eval(
          '__webpack_require__.r(__webpack_exports__);\n/* harmony default export */ __webpack_exports__["default"] = (() => {\n  console.log(\'jaja\')\n});\n\n\n//# sourceURL=webpack:///./src/mark.js?',
        );

        /***/
      },
  },
);
一步一步来看, 整体是个立即执行函数, 精简下如下
(function(modules) {
  // ...
})({
  '.src/index.js': function(module, __webpack_exports__, __webpack_require__) {
    'use strict';
    eval();
    // ...
    //...
  },
});
传入立即执行函数的 modules 对应的就是一个对象,对象的 key 是文件路径,value 是函数,函数参数为 module, webpack_exports, webpack_require. 函数内部是用使用 eval 执行,单独拿出来看下。
eval index
__webpack_require__.r(__webpack_exports__);
/* harmony import */
var _mark__WEBPACK_IMPORTED_MODULE_0__ = __webpack_require__(
  /*! ./mark */ './src/mark.js',
);
const name = 'jack';
Object(_mark__WEBPACK_IMPORTED_MODULE_0__['default'])();
/* harmony default export */
__webpack_exports__['default'] = name;
//# sourceURL=webpack:///./src/index.js?
eval mark
__webpack_require__.r(__webpack_exports__);
/* harmony export (binding) */
__webpack_require__.d(__webpack_exports__, 'val', function() {
  return val;
});
const val = 'sd';
/* harmony default export */
__webpack_exports__['default'] = () => {
  console.log('jaja');
};
//# sourceURL=webpack:///./src/mark.js?
可以看到,是通过__webpack_require__ 去加载模块,并且将我们的变量 name 赋值给 webpack_exports 的 default 属性上。至于 webpack_require.r 我们稍后分析。
接下来 看看 立即执行函数内部做了什么
// 内部定义的 module 缓存, 存放加载过的模块
var installedModules = {};
function __webpack_require__(moduleId) {
  // 如果加载过, 直接返回 installedModules里对应模块的 exports
  if (installedModules[moduleId]) {
    return installedModules[moduleId].exports;
  }
  // 没有加载过,则创建一个 moudle 变量
  var module = (installedModules[moduleId] = {
    i: moduleId, // i 代表 moduleId,也就是 './src/index.js'
    l: false, // l (loaded) 代表是否加载完毕
    exports: {}, // exports 后面导出的内容
  });

  // 执行 modules 里的方法,就是上面提到过的 立即执行函数传入的 ./src/index 对应的 value
  // function (module, __webpack_exports__, __webpack_require__) {...}
  modules[moduleId].call(
    module.exports,
    module,
    module.exports,
    __webpack_require__,
  );

  // 执行完毕,设置模块对应的 l 为 true
  module.l = true;

  // 返回 module.exports
  return module.exports;
}
eval 里主要使用了 webpack_require.r(webpack_exports)
// 在__webpack_exports__上定义 __esModule 为 true
__webpack_require__.r = function(exports) {
  if (typeof Symbol !== 'undefined' && Symbol.toStringTag) {
    Object.defineProperty(exports, Symbol.toStringTag, { value: 'Module' });
  }
  Object.defineProperty(exports, '__esModule', { value: true });
};
这里的 webpack_exports 就是 webpack_require 函数里的 module.exports
webpack_require.d
__webpack_require__.d = function(exports, name, getter) {
  if (!__webpack_require__.o(exports, name)) {
    Object.defineProperty(exports, name, { enumerable: true, get: getter });
  }
};
通过__webpack_require__.d 对 module.exports 对象上赋值
也就是 eval 里的执行完以后,我们的 module.exports.default = name
分别打印 index.js 和 mark.js 对应的 module


至于 bundle.js 中的其他内容,都是些辅助函数,暂不分析了。
梳理下 webpack bundle.js 里的流程
demopark/electron-api-demos-Zh_CN
ELECTRON_MIRROR=https://npm.taobao.org/mirrors/electron/ npm i electron
运行package.json的main脚本的进程被称为 主进程,一个 Electron 应用总是有且只有一个主进程
使用了Chromium 来展示 web 页面,Chromium 的多进程架构也被使用到。每个 Electron 中的 web 页面运行在它自己的渲染进程中。


使用的包包含 C++ 的原生实现。所以在 pack 前需先用 electron-rebuild 做 rebuild。
rebuild 如果很慢,可能是要翻墙,可尝试 cnpmjs.org 提供的镜像,electron-rebuild -d=https://gh-contractor-zcbenz.cnpmjs.org/atom-shell/dist/。
GitHub - electron/electron-rebuild: Package to rebuild native Node.js modules against the currently installed Electron version
使用remote api, 在主进程中导出模块, remote | Electron
// main services
const pty = require('node-pty')
module.exports = { pty }
// main index.js
const services = require('./services')
global.services = services
// renderer services
import { remote } from ‘electron’
const services = remote.getGlobal(‘services’)
export default services
// renderer app.js
import services from './services'
另一种方式是Ipc通信
https://github.com/xtermjs/xterm.jsnode-pty/renderer.js at master
mainWindow.webContents.on('crashed', () => {
    const options = {
      type: 'info',
      title: '进程崩溃',
      message: '这个进程崩溃了',
      buttons: ['重载', '退出'],
    }

    dialog.showMessageBox(options, (index) => {
      if (index === 0) mainWindow.reload()
      else mainWindow.close()
    })
})
使用ipc通信
const mainWin = createWindow()
global.windows = {}
global.windows.home = mainWin
mainWin.webContent.send('custom-evt', data)

// renderer
import { ipcRenderer } from electron
ipcRender.on('custom-evt', data => {
	console.log(data)
})
使用vscode使用attach方式debug
electron index.dev.js —inspect=5858

{
  // 使用 IntelliSense 了解相关属性。
  // 悬停以查看现有属性的描述。
  // 欲了解更多信息,请访问: https://go.microsoft.com/fwlink/?linkid=830387
  "version": "0.2.0",
  "configurations": [
    {
      "type": "node",
      "request": "attach",
      "name": "Attach",
      "port": 5858,
      "address": "localhost"
    }
  ]
}
# electron-npm script
export npm_config_target=1.7.10 # Electron's version. Find with ./node_modules/.bin/electron -v
export npm_config_arch=x64 # The architecture.
export npm_config_runtime=electron # Tell node-pre-gyp we are building for Electron.
export npm_config_build_from_source=true # Tell node-pre-gyp to build module from source code.
npm install $1 # Replace with the first argument passed.
Security, Native Capabilities, and Your Responsibility | Electron
Electron 应用实战 (架构篇) · Issue #13 · sorrycc/blog · GitHub
GitHub - electron-userland/electron-builder: A complete solution to package and build a ready for distribution Electron app with “auto update” support out of the box 基于electron-packager
A declarative, efficient, and flexible JavaScript library for building user interfaces.
🖖 Vue.js is a progressive, incrementally-adoptable JavaScript framework for building UI on the web.
TypeScript is a superset of JavaScript that compiles to clean JavaScript output.
An Open Source Machine Learning Framework for Everyone
The Web framework for perfectionists with deadlines.
A PHP framework for web artisans
Bring data to life with SVG, Canvas and HTML. 📊📈🎉
JavaScript (JS) is a lightweight interpreted programming language with first-class functions.
Some thing interesting about web. New door for the world.
A server is a program made to process requests and deliver data to clients.
Machine learning is a way of modeling and interpreting data that allows a piece of software to respond intelligently.
Some thing interesting about visualization, use data art
Some thing interesting about game, make everyone happy.
We are working to build community through open source technology. NB: members must have two-factor auth.
Open source projects and samples from Microsoft.
Google ❤️ Open Source for everyone.
Alibaba Open Source for everyone
Data-Driven Documents codes.
China tencent open source team.
