trustdec / blog Goto Github PK
View Code? Open in Web Editor NEW笔记
Home Page: http://blog.poetries.top/
笔记
Home Page: http://blog.poetries.top/

查看 webpack 打包后所有组件与组件间的依赖关系,针对多余的包文件过大,
剔除首次影响加载的效率问题进行剔除修改,本次采用的是 ==webpack-bundle-analyzer(可视化视图查看器
介绍1:webpack-bundle-analyzer(可视化)
将捆绑内容表示为方便的交互式可缩放树形图

模块功能:
安装和使用
npm install --save-dev webpack-bundle-analyzer在webpack.config.js中:
let BundleAnalyzerPlugin = require('webpack-bundle-analyzer').BundleAnalyzerPlugin;

module.exports = {
    plugins: [new BundleAnalyzerPlugin()]
}
BundleAnalyzerPlugin== 构造函数可以采用默认的可选配置对象:
new BundleAnalyzerPlugin({
  //  可以是`server`,`static`或`disabled`。
  //  在`server`模式下,分析器将启动HTTP服务器来显示软件包报告。
  //  在“静态”模式下,会生成带有报告的单个HTML文件。
  //  在`disabled`模式下,你可以使用这个插件来将`generateStatsFile`设置为`true`来生成Webpack Stats JSON文件。
  analyzerMode: 'server',
  //  将在“服务器”模式下使用的主机启动HTTP服务器。
  analyzerHost: '127.0.0.1',
  //  将在“服务器”模式下使用的端口启动HTTP服务器。
  analyzerPort: 8888,
  //  路径捆绑,将在`static`模式下生成的报告文件。
  //  相对于捆绑输出目录。
  reportFilename: 'report.html',
  //  模块大小默认显示在报告中。
  //  应该是`stat`,`parsed`或者`gzip`中的一个。
  //  有关更多信息,请参见“定义”一节。
  defaultSizes: 'parsed',
  //  在默认浏览器中自动打开报告
  openAnalyzer: true,
  //  如果为true,则Webpack Stats JSON文件将在bundle输出目录中生成
  generateStatsFile: false,
  //  如果`generateStatsFile`为`true`,将会生成Webpack Stats JSON文件的名字。
  //  相对于捆绑输出目录。
  statsFilename: 'stats.json',
  //  stats.toJson()方法的选项。
  //  例如,您可以使用`source:false`选项排除统计文件中模块的来源。
  //  在这里查看更多选项:https:  //github.com/webpack/webpack/blob/webpack-1/lib/Stats.js#L21
  statsOptions: null,
  logLevel: 'info' 日志级别。可以是'信息','警告','错误'或'沉默'。
})
启动服务:
生产环境查看:npm run build --report 或 正常build 即可启动查看器
开发环境查看:webpack -p --progress 或启动正常devServer服务即可启动查看器!
参考资料:
推荐一个网址:在这里
这里介绍了很多webpack优化的工具。
参考资料:https://www.npmjs.com/package/webpack-bundle-analyzer
== 介绍2:webpack官网提供的工具==
webpack提供的一个官方工具,可查看你的项目版本信息,有多少modules,多少chunks,中间有多少错误信息、有多少警告等等,方便你管理、查看。
效果图如下:

操作步骤:
首先,你需要这么启动webpack,执行以下命令行,将会生成一个 stats.json 文件
webpack --profile --json > stats.json1
之后在 官方分析工具里上传文件即可对你的bundle进行分析
==这里注意==:
这里生成的时候,webpack.config.js 文件中不要有console,打印信息,
否则,他会加入到 stats.json文件中,从而造成 stats.json 文件错误,并不是一个合格的 JSON 文件,所以官网会解析异常!

VS Code 的终端字体,也需要进行配置,打开 VS Code,按
Command + ,键,打开用户配置,
搜索fontFamily,然后将右边的配置增加
"terminal.integrated.fontFamily": "Meslo LG M for Powerline"
成功之后

chsh -s /bin/bash or chsh -s /bin/zsh
cd ./node_modules/react-native scripts/ios-install-third-party.sh cd third-party && cd $(ls | grep 'glog' | awk '{print $1}') ./configure开发react-native时大都有过这个操作,当版本迭代时候要修改app版本号时,一般都这样做
Android:
的要修改build.gradle文件的versionName

ios:
打开xcode修改Info.plist的Bundle versions string, short

这过程特别繁琐。。。无法忍受
接下来,稍微改一下,让每次编译的时候自动从配置文件读取并写入相应的地方
首先,先在package.json配置版本
{
  "name": "you app name",
  "version": "1.0.1"
}
Android:
直接在./android/app/build.gradle进行修改,这样每次编译就会自动读取并写入
//获取配置文件的版本信息
def getAppVersion() {
   def inputFile = new File("../package.json")
   def packageJson = new JsonSlurper().parseText(inputFile.text)
   return packageJson["version"]
}

def appVersion = getAppVersion()

android {
   compileSdkVersion 23
   buildToolsVersion "23.0.1"

   defaultConfig {
       versionName appVersion
   }
}
IOS:
ios并没有像build.gradle这样的文件,所以要想其他法子
打开xcode,TARGETS->Build Phases->添加Run Script
添加shell代码
PACKAGE_VERSION=$(cat ../package.json | grep version | head -1 | awk -F: '{ print $2 }' | sed 's/[\",]//g' | tr -d '[[:space:]]')

/usr/libexec/PlistBuddy -c "Set :CFBundleShortVersionString $PACKAGE_VERSION" "${PROJECT_DIR}/${INFOPLIST_FILE}"
When working with React and Sass, sometimes you want to be able to share variables defined in the stylesheets with your React javascript code. This is actually pretty simple with Webpack.
First make sure webpack is set up to import scss:
// webpack.config.js
module.exports = {
  ...
  module: {
    rules: [{
      test: /\.scss$/,
      use: [{
        loader: "style-loader" // creates style nodes from JS strings
      }, {
        loader: "css-loader" // translates CSS into CommonJS
      }, {
        loader: "sass-loader" // compiles Sass to CSS
      }]
    }]
  }
};
Then define your variables export file:
// variables.scss
$white-color: #fcf5ed;
$dark-color: #402f2b;
$light-color: #e6d5c3;
$medium-color: #977978;
$alert-color: #cb492a;
$light-black-color: #706e72;
$black-color: #414042;

// the :export directive is the magic sauce for webpack
:export {
  whitecolor: $white-color;
  darkcolor: $dark-color;
  lightcolor: $light-color;
  mediumcolor: $medium-color;
  alertcolor: $alert-color;
  lightblackcolor: $light-black-color;
  blackcolor: $black-color;
}
Now you’re ready to import your variables to use with your React components:
import variables from 'variables.scss';

const CSS = {
  backgroudColor: variables.blackcolor
}

export default ({}) => {
  return <div style={CSS}>Content</div>
}Mac 打开当前网页的控制台,按command+shift+p,输入screenshot,选择第一个 即可
在使用git的过程中,因为人为因素造成分支(commit)被删除,可以使用以下步骤进行恢复。
首先用以下步骤创建一个新分支,修改一些文件后删除,以便进行恢复。
1.使用git log -g 找回之前提交的commit
commit 7624238a00dba17b0a4396113bb
Reflog: HEAD@{1} (Trust <email.com>)
Reflog message: checkout: moving from v3-temp to v3
Author: Trust <email.com>
Date:   Thu Dec 13 10:28:52 2018 +0800

    变基此分支为最新版本
2.使用git branch recover_branch[新分支] commit_id命令用这个commit创建一个分支
git branch new_abc 7624238a00dba17b0a4396113bb

git branch -a
* develop
  new_abc
  remotes/origin-dev/develop
可以见到new_abc已创建
3.切换到new_abc分支,检查文件是否存在
git checkout new_abc
问题现象:
1.双击已安装的devices 没有反应
2.可以启动其他的devices,但无法启动上次用的device
原因:
可能长时间无操作之后 VirtualBox 记录状态为:已休眠
解决:
打开VirtualBox可以看到无法启动的device状态显示为:已休眠
右键-启动-正常启动 然后回到Genymotion,双击
Demonstrate all the questions on LeetCode in the form of animation.(用动画的形式呈现解LeetCode题目的思路)
一个带有微软Windows 95操作系统的Electron应用程序,你可以在Linux、Mac、甚至Windows电脑上运行。根据开发人员Felix Rieseberg的说法,无论你目前使用何种操作系统,在安装和运行新的Electron应用程序后,您都将获得完整的Windows 95体验。
用JavaScript实现的算法和数据结构,每个算法和数据结构都有自己独立的自述文件,其中包含相关说明和链接,供进一步阅读(包括YouTube视频)。
一个在终端下录屏并生成gif动画的项目很强大,还可以在生成时添加水印,项目是基于Node.js
打开Telegram > Privacy and Security > Use Proxy

选择socks5代理
添加127.0.0.1 1080
const accountInfo = wx.getAccountInfoSync();
const appId = accountInfo.miniProgram.appId;
开发包最大不能超过 2M ,如果超过了 2M ,就必须要分包了。一般单纯写代码很难超过 2M 大小的,一般都是图片比较占用资源,所以有人就干了这么一件事。把你在小程序中使用的图片上传到 CDN 中,从而减少开发包的体积。
这个开源库就是:wepy-plugin-resources-cdn
报错:
Kernel driver not installed (rc=-1908)
Make sure the kernel module has been loaded successfully.
where: suplibOsInit what:
3 VERR_VM_DRIVER_NOT_INSTALLED (-1908) - The support driver is not installed.
On linux, open returned ENOENT.
解决方案:
1.请下载最新版本
2.安装DMG。运行“ VirtualBox_Uninstall.tool ”。确保没有错误消息。
3.双击“ VirtualBox.pkg ”以重新安装VirtualBox。
按照官方教程创建可引导的 macOS 安装器
比如我M2 Pro下载了Mac OS Ventura 13版本,那么执行此命令:
sudo /Applications/Install\ macOS\ Ventura.app/Contents/Resources/createinstallmedia --volume /Volumes/MyVolume
其中只需要更改命令中的MyVolume:/Volumes/[替换为你的宗卷名称],比如我要将安装器放在我的MacOS Ventura 13这个宗卷下,命令需要更改为:sudo /Applications/Install\ macOS\ Ventura.app/Contents/Resources/createinstallmedia --volume /Volumes/MacOS\ Ventura\ 13
然后等待命令执行完成(如图所示):

一、硬件SSD8G 内存i5不带U 型号以上的处理器
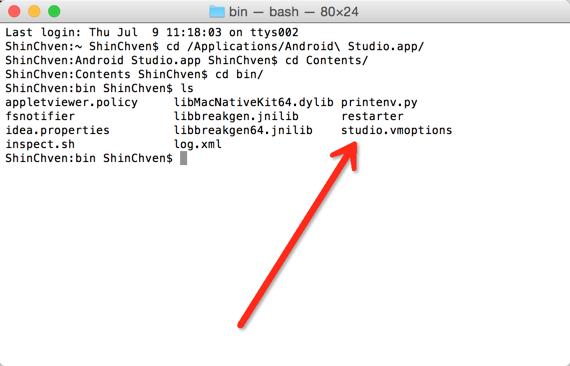
二、优化修改idea.xxx.vmoptions/studio.xxx.vmoptions 文件,它在你的idea/android studio 安装目录下的bin 文件夹中
我的值:
-Xms512m
-Xmx2048m
-XX:MaxPermSize=768m
-XX:ReservedCodeCacheSize=768m
-XX:+UseCompressedOops
运行react-native run-android #339 时构建失败
Gradle DSL method not found: 'compileOnly()'
我修改了node_modules/react-native-linear-gradient/android/build.gradle,解决了它。
dependencies {
    compileOnly "com.facebook.react:react-native:+"
}
更换
dependencies {
    provided "com.facebook.react:react-native:+"
}
提交按钮不与ScrollView同层级,导致关闭键盘没有失去焦点
解决方案
Download flutter_macos_vx.x.x.zip
$ cd path && unzip flutter_macos_vx.x.x.zip
$ vim .bash_profile or vim ~/.zshrc
# flutter
export PATH="$PATH:/Users/name/Development/flutter/bin"
$ flutter doctor
1.可使用国内镜像源地址 具体可看flutter中文网
2.MacOS终端走ss代理
$ vim .bash_profile or vim ~/.zshrc
# proxy list
alias proxy='export all_proxy=socks5://127.0.0.1:1086'
alias unproxy='unset all_proxy'
$ source ~/.zshrc
查看是否代理成功
$ curl cip.cc
~ curl cip.cc
IP	: 45.78.xx.19
地址	: 美国  加利福尼亚

数据二	: 美国 | 加利福尼亚州洛杉矶市 IT7 Networks

URL	: http://www.cip.cc/45.78.xx.19
publick class AiMain {
  publick static void main(String[] args){
    Scanner sc = new Scanner(System.in);
    String str;
    while(true){
      str = sc.next();
      str = str.replace("吗","");
      str = str.replace("?","!");
      str = str.replace("?","!");
      System.out.println(str);
    }
  }
}immutable
Immutable.js是解决这个问题的另一种方法。它通过结构共享提供不可突变的,持久的集合
1.不可突变:一旦创建,集合就不能在另一个时间点改变
2持久性:可以使用原始集合和一个突变来创建新的集合。原始集合在新集合创建后仍然可用
3结构共享:新集合尽可能多的使用原始集合的结构来创建,以便将复制操作降至最少从而提升性能
不可突变数据使得变化跟踪很方便.每个变化都会导致产生一个新的对象,因此只需检查索引对象是否改变。
例如,在这个常见的 JavaScript 代码
const x={foo:'bar' };
const y=x;
y.foo='baz';
x===y;//true
虽然y被编辑了,但是由于它与x索引了相同的对象,这个比较会返回true.
可以使用immutable.js 实现类似效果:
const SomeRecord=Immutable.Record({foo:null });
const x=new SomeRecord({foo:'bar'});
const y=x.set('foo','baz')
X===y;// false
在这个例子中,x突变后返回了一个新的索引,因此我们可以安全的确认x被改变了
还有两个库可以帮助我们使用不可突变数据:seamless-immutable 和immutability-helper.
实现 shouldComponentUpdate 时,不可突变的数据结构帮助我们轻松的追踪对象变化。这通常可以提供一个不错的性能提升
The last version is 0.6.5
Install on Mac
error:
command not found: tsd
reason:
deprecate tsd
Edit: Typings has implemented an upgrade command for TSD users. Upgrading will only convert the format of tsd.json to typings.json, there may be additional tweaks you need to make (such as correcting now stripped references).
commands
$ npm uninstall tsd
$ rm -rf typings
$ npm install typings
$ typings init --upgrade
$ rm tsd.json
$ typings install
利用命令“chflags hidden” 可以隐藏文件或文件夹。先打开Terminal(Applications/Utilities/Terminal),然后执行命令
chflags hidden 文件路径   或

chflags hidden 文件夹路径
既可。也可以先输入chflags hidden,然后直接把要隐藏的文件用鼠标选中拖到输入框中,它自动会转换为文件的路径。
要解除文件的隐藏状态,可以使用命令:
chflags nohidden
chflags 命令修改文件的标志(change file flags),包括隐藏标志,其详细使用方法如下:
SYNOPSIS
chflags [-fhv] [-R [-H | -L | -P]] flags file ...
DESCRIPTION
The chflags utility modifies the file flags of the listed files as specified by the flags operand.
 The options are as follows:

 -f      Do not display a diagnostic message if chflags could not modify the flags for file, nor modify
         the exit status to reflect such failures.

 -H      If the -R option is specified, symbolic links on the command line are followed.  (Symbolic
         links encountered in the tree traversal are not followed.)

 -h      If the file is a symbolic link, change the file flags of the link itself rather than the file
         to which it points.

 -L      If the -R option is specified, all symbolic links are followed.

 -P      If the -R option is specified, no symbolic links are followed.  This is the default.

 -R      Change the file flags for the file hierarchies rooted in the files instead of just the files
         themselves.

 -v      Cause chflags to be verbose, showing filenames as the flags are modified.  If the -v option is
         specified more than once, the old and new flags of the file will also be printed, in octal
         notation.

 The flags are specified as an octal number or a comma separated list of keywords.  The following key-
 words are currently defined:

       arch, archived
               set the archived flag (super-user only)

       opaque  set the opaque flag (owner or super-user only).  [Directory is opaque when viewed through
               a union mount]

       nodump  set the nodump flag (owner or super-user only)

       sappnd, sappend
               set the system append-only flag (super-user only)

       schg, schange, simmutable
               set the system immutable flag (super-user only)

       uappnd, uappend
               set the user append-only flag (owner or super-user only)

       uchg, uchange, uimmutable
               set the user immutable flag (owner or super-user only)

       hidden  set the hidden flag [Hide item from GUI]

 As discussed in chflags(2), the sappnd and schg flags may only be unset when the system is in single-
 user mode.

 Putting the letters ``no'' before or removing the letters ``no'' from a keyword causes the flag to be
 cleared.  For example:

       nouchg  clear the user immutable flag (owner or super-user only)
       dump    clear the nodump flag (owner or super-user only)

 Unless the -H or -L options are given, chflags on a symbolic link always succeeds and has no effect.
 The -H, -L and -P options are ignored unless the -R option is specified.  In addition, these options
 override each other and the command's actions are determined by the last one specified.

 You can use "ls -lO" to see the flags of existing files.
解决方案:
右键点击cloudfunction,手动选当前环境
1.注意点: classifier是必须的一般会遗漏
标准格式:
<dependency>
    <groupId>net.sf.json-lib</groupId>
    <artifactId>json-lib</artifactId>
    <version>2.4</version>
    <classifier>jdk15</classifier>
</dependency>A declarative, efficient, and flexible JavaScript library for building user interfaces.
🖖 Vue.js is a progressive, incrementally-adoptable JavaScript framework for building UI on the web.
TypeScript is a superset of JavaScript that compiles to clean JavaScript output.
An Open Source Machine Learning Framework for Everyone
The Web framework for perfectionists with deadlines.
A PHP framework for web artisans
Bring data to life with SVG, Canvas and HTML. 📊📈🎉
JavaScript (JS) is a lightweight interpreted programming language with first-class functions.
Some thing interesting about web. New door for the world.
A server is a program made to process requests and deliver data to clients.
Machine learning is a way of modeling and interpreting data that allows a piece of software to respond intelligently.
Some thing interesting about visualization, use data art
Some thing interesting about game, make everyone happy.
We are working to build community through open source technology. NB: members must have two-factor auth.
Open source projects and samples from Microsoft.
Google ❤️ Open Source for everyone.
Alibaba Open Source for everyone
Data-Driven Documents codes.
China tencent open source team.