
Note: Looking for Next.js Commerce v1? View the code, demo, and release notes
A Next.js 13 and App Router-ready ecommerce template, built with Shopify, featuring:
- Next.js App Router
- Optimized for SEO using Next.js's Metadata
- React Server Components (RSCs) and Suspense
- Route Handlers for mutations
- Edge runtime
- New fetching and caching paradigms
- Dynamic OG images
- Styling with Tailwind CSS
- Checkout and payments with Shopify
- Automatic light/dark mode based on system settings
You will need to use the environment variables defined in .env.example to run Next.js Commerce. It's recommended you use Vercel Environment Variables for this, but a .env file is all that is necessary.
Note: You should not commit your
.envfile or it will expose secrets that will allow others to control your Shopify store.
- Install Vercel CLI:
npm i -g vercel - Link local instance with Vercel and GitHub accounts (creates
.verceldirectory):vercel link - Download your environment variables:
vercel env pull
pnpm install
pnpm dev
Your app should now be running on localhost:3000.
Next.js Commerce requires a paid Shopify plan. It will not work with a Shopify Starter plan.
Create a SHOPIFY_STORE_DOMAIN environment variable and use your Shopify domain as the the value (ie. SHOPIFY_STORE_SUBDOMAIN.myshopify.com).
Note: Do not include the
https://.
Next.js Commerce utilizes Shopify's Storefront API to create unique customer experiences. The API offers a full range of commerce options making it possible for customers to control products, collections, menus, pages, cart, checkout, and more.
In order to use the Shopify's Storefront API, you need to install the Headless app in your Shopify store.
Once installed, you'll need to create a SHOPIFY_STOREFRONT_ACCESS_TOKEN environment variable and use the public access token as the value
Note: Shopify does offer a Node.js Storefront API SDK. We use the Storefront API via GraphQL directly instead of the Node.js SDK so we have more control over fetching and caching.
Expand to view detailed walkthrough
- Navigate to
https://SHOPIFY_STORE_SUBDOMAIN.myshopify.com/admin/settings/apps. - Click the green
Shopify App Storebutton.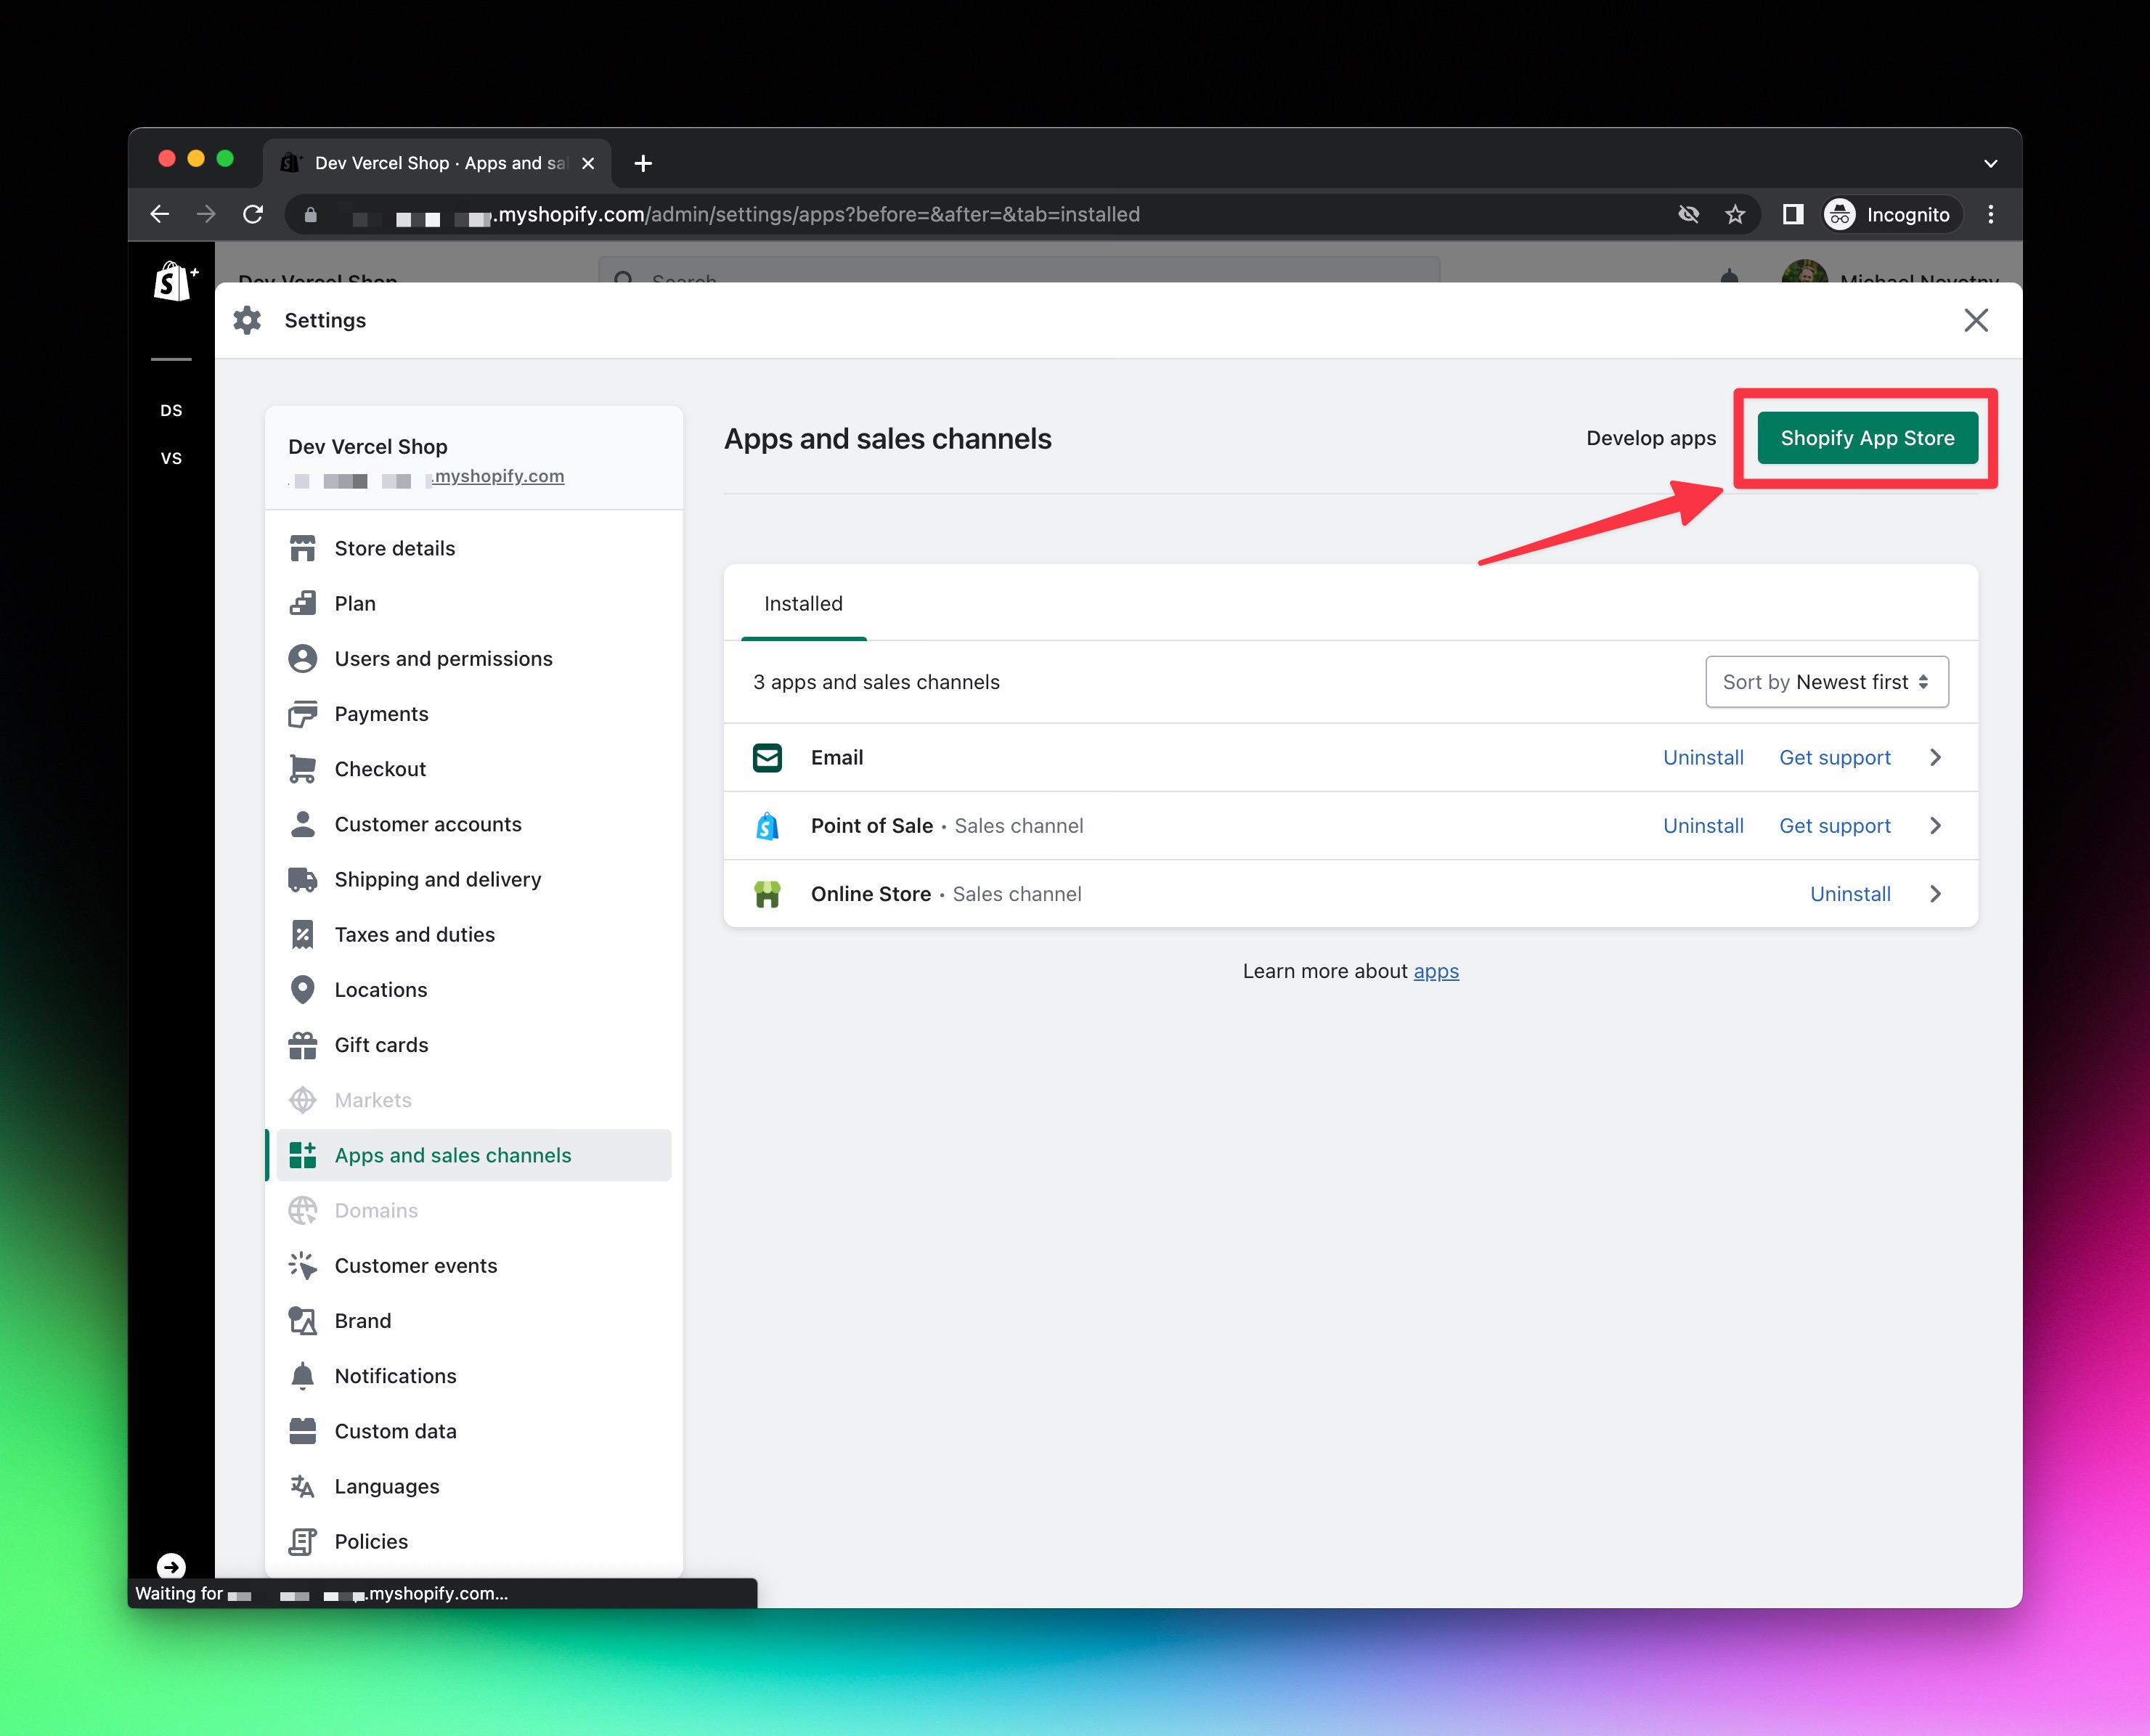
- Search for
Headlessand click on theHeadlessapp.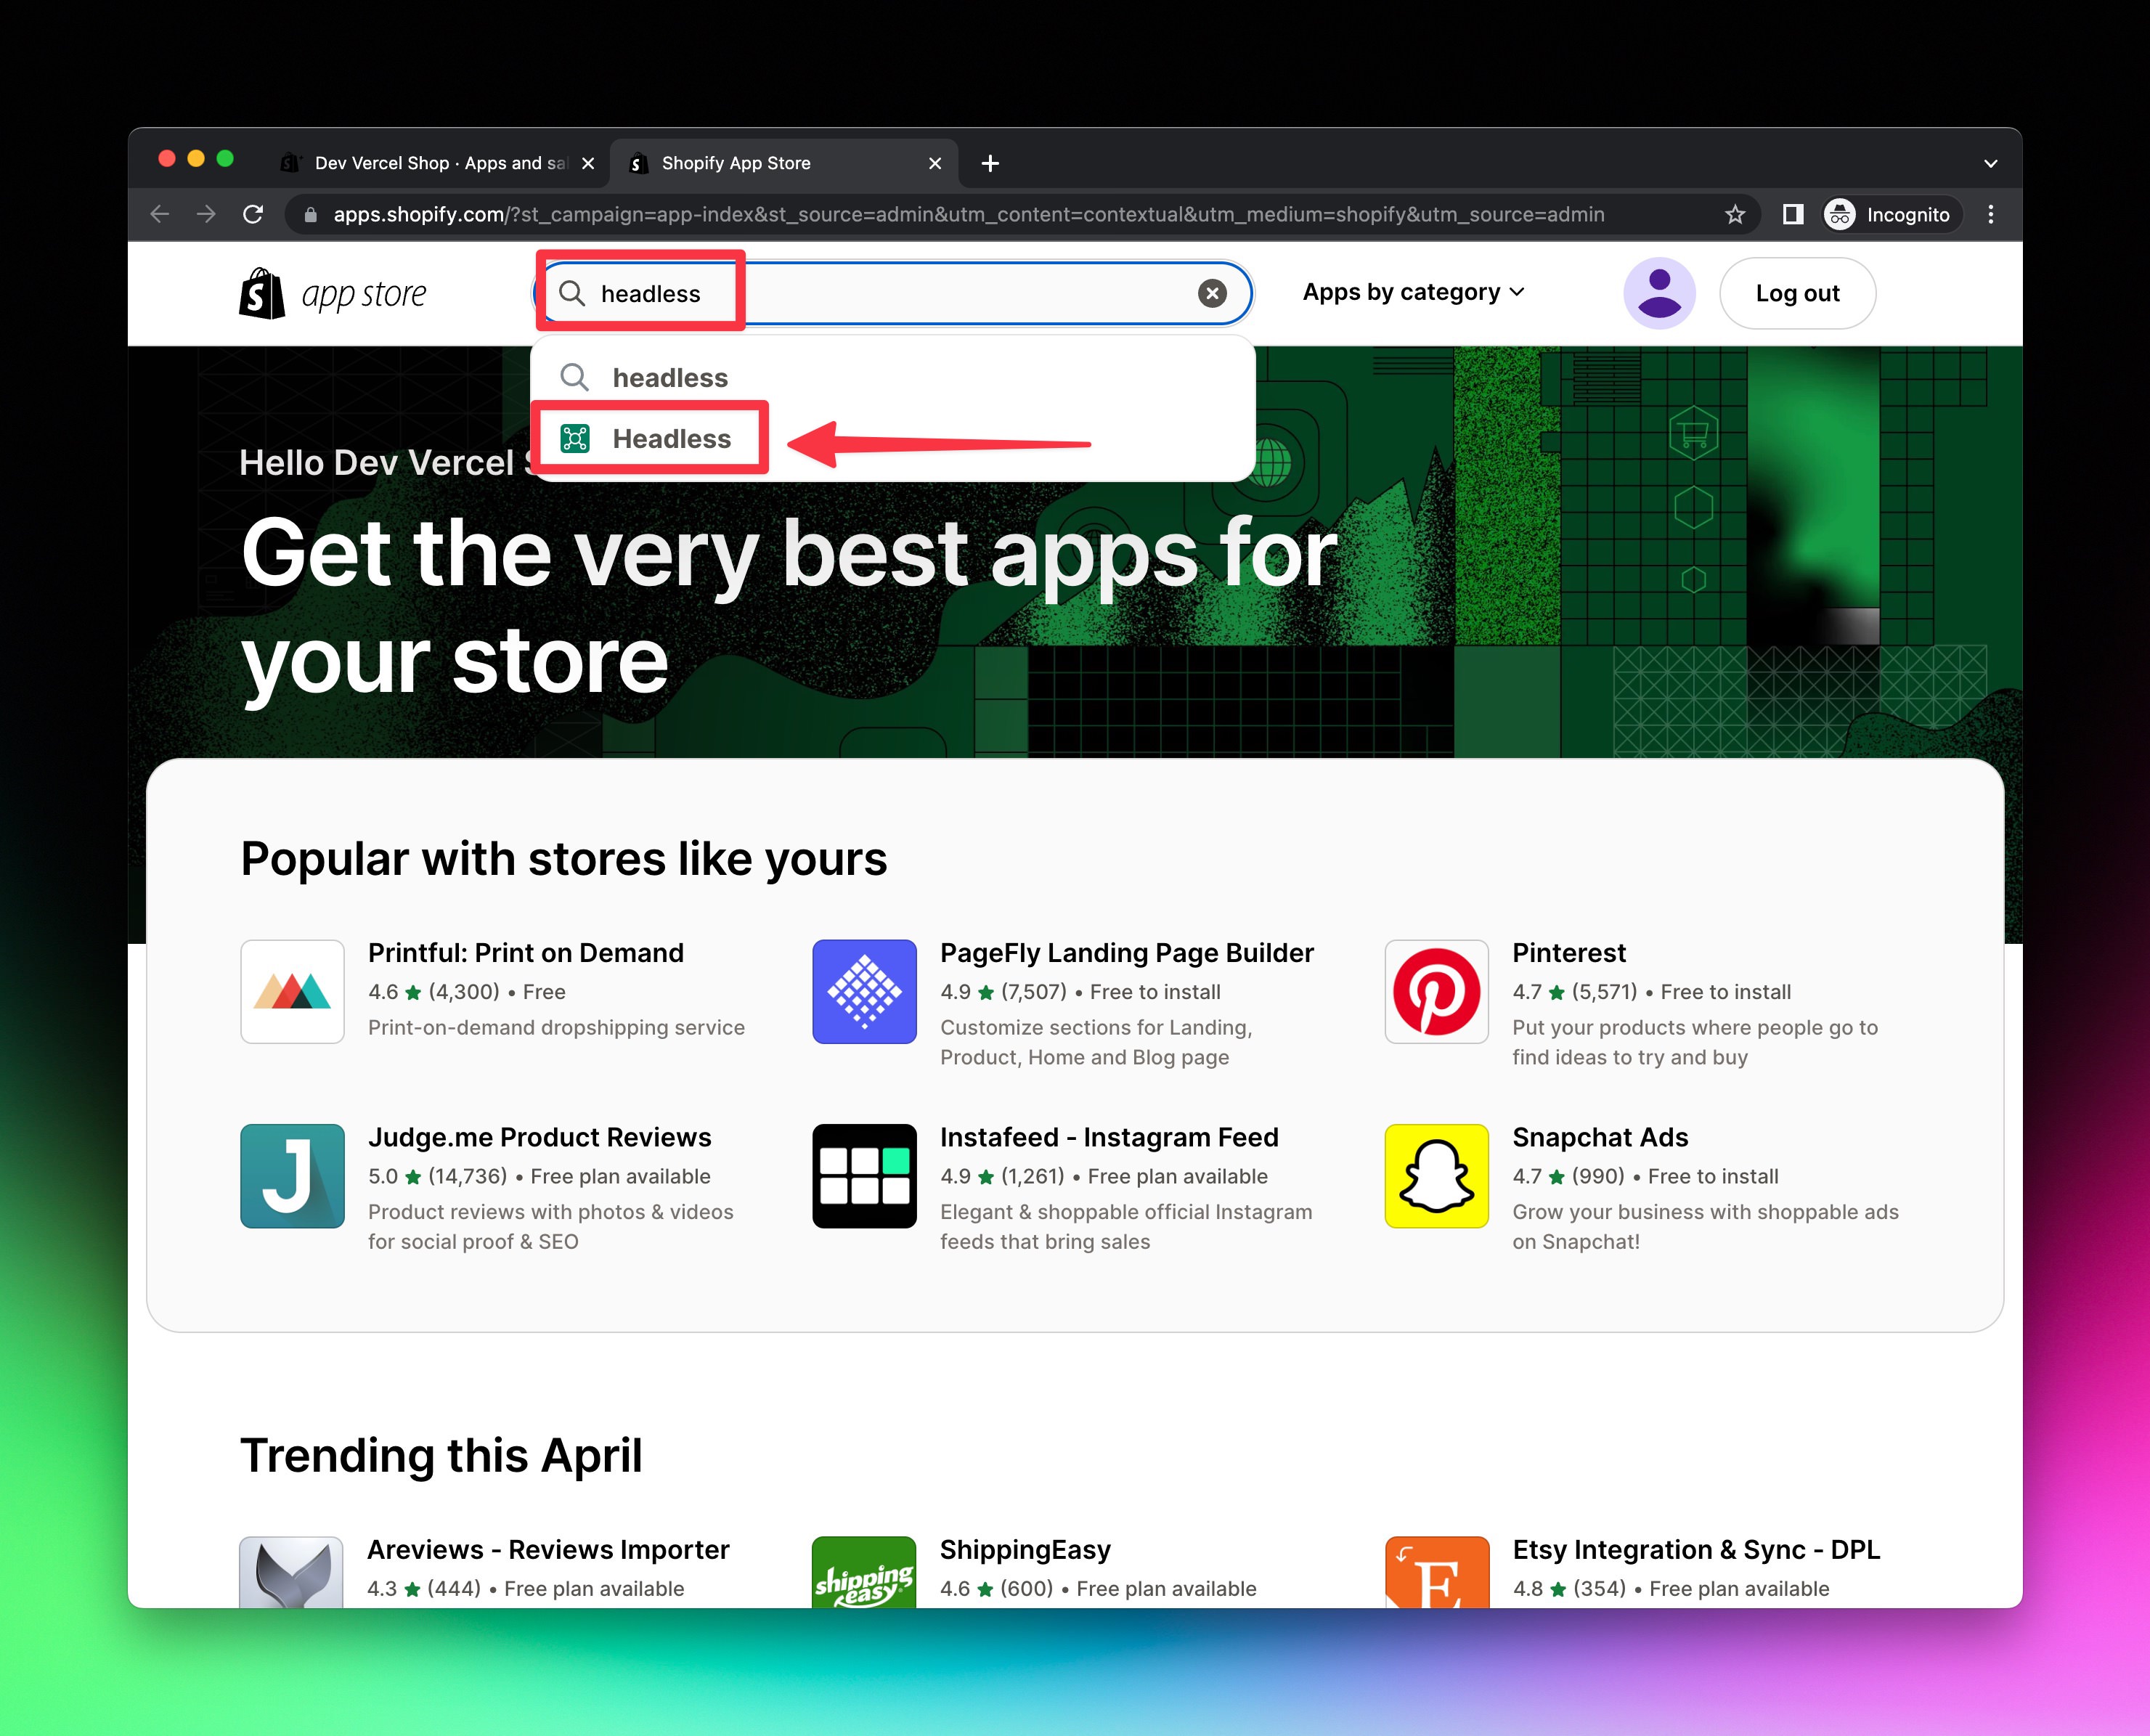
- Click the black
Add appbutton.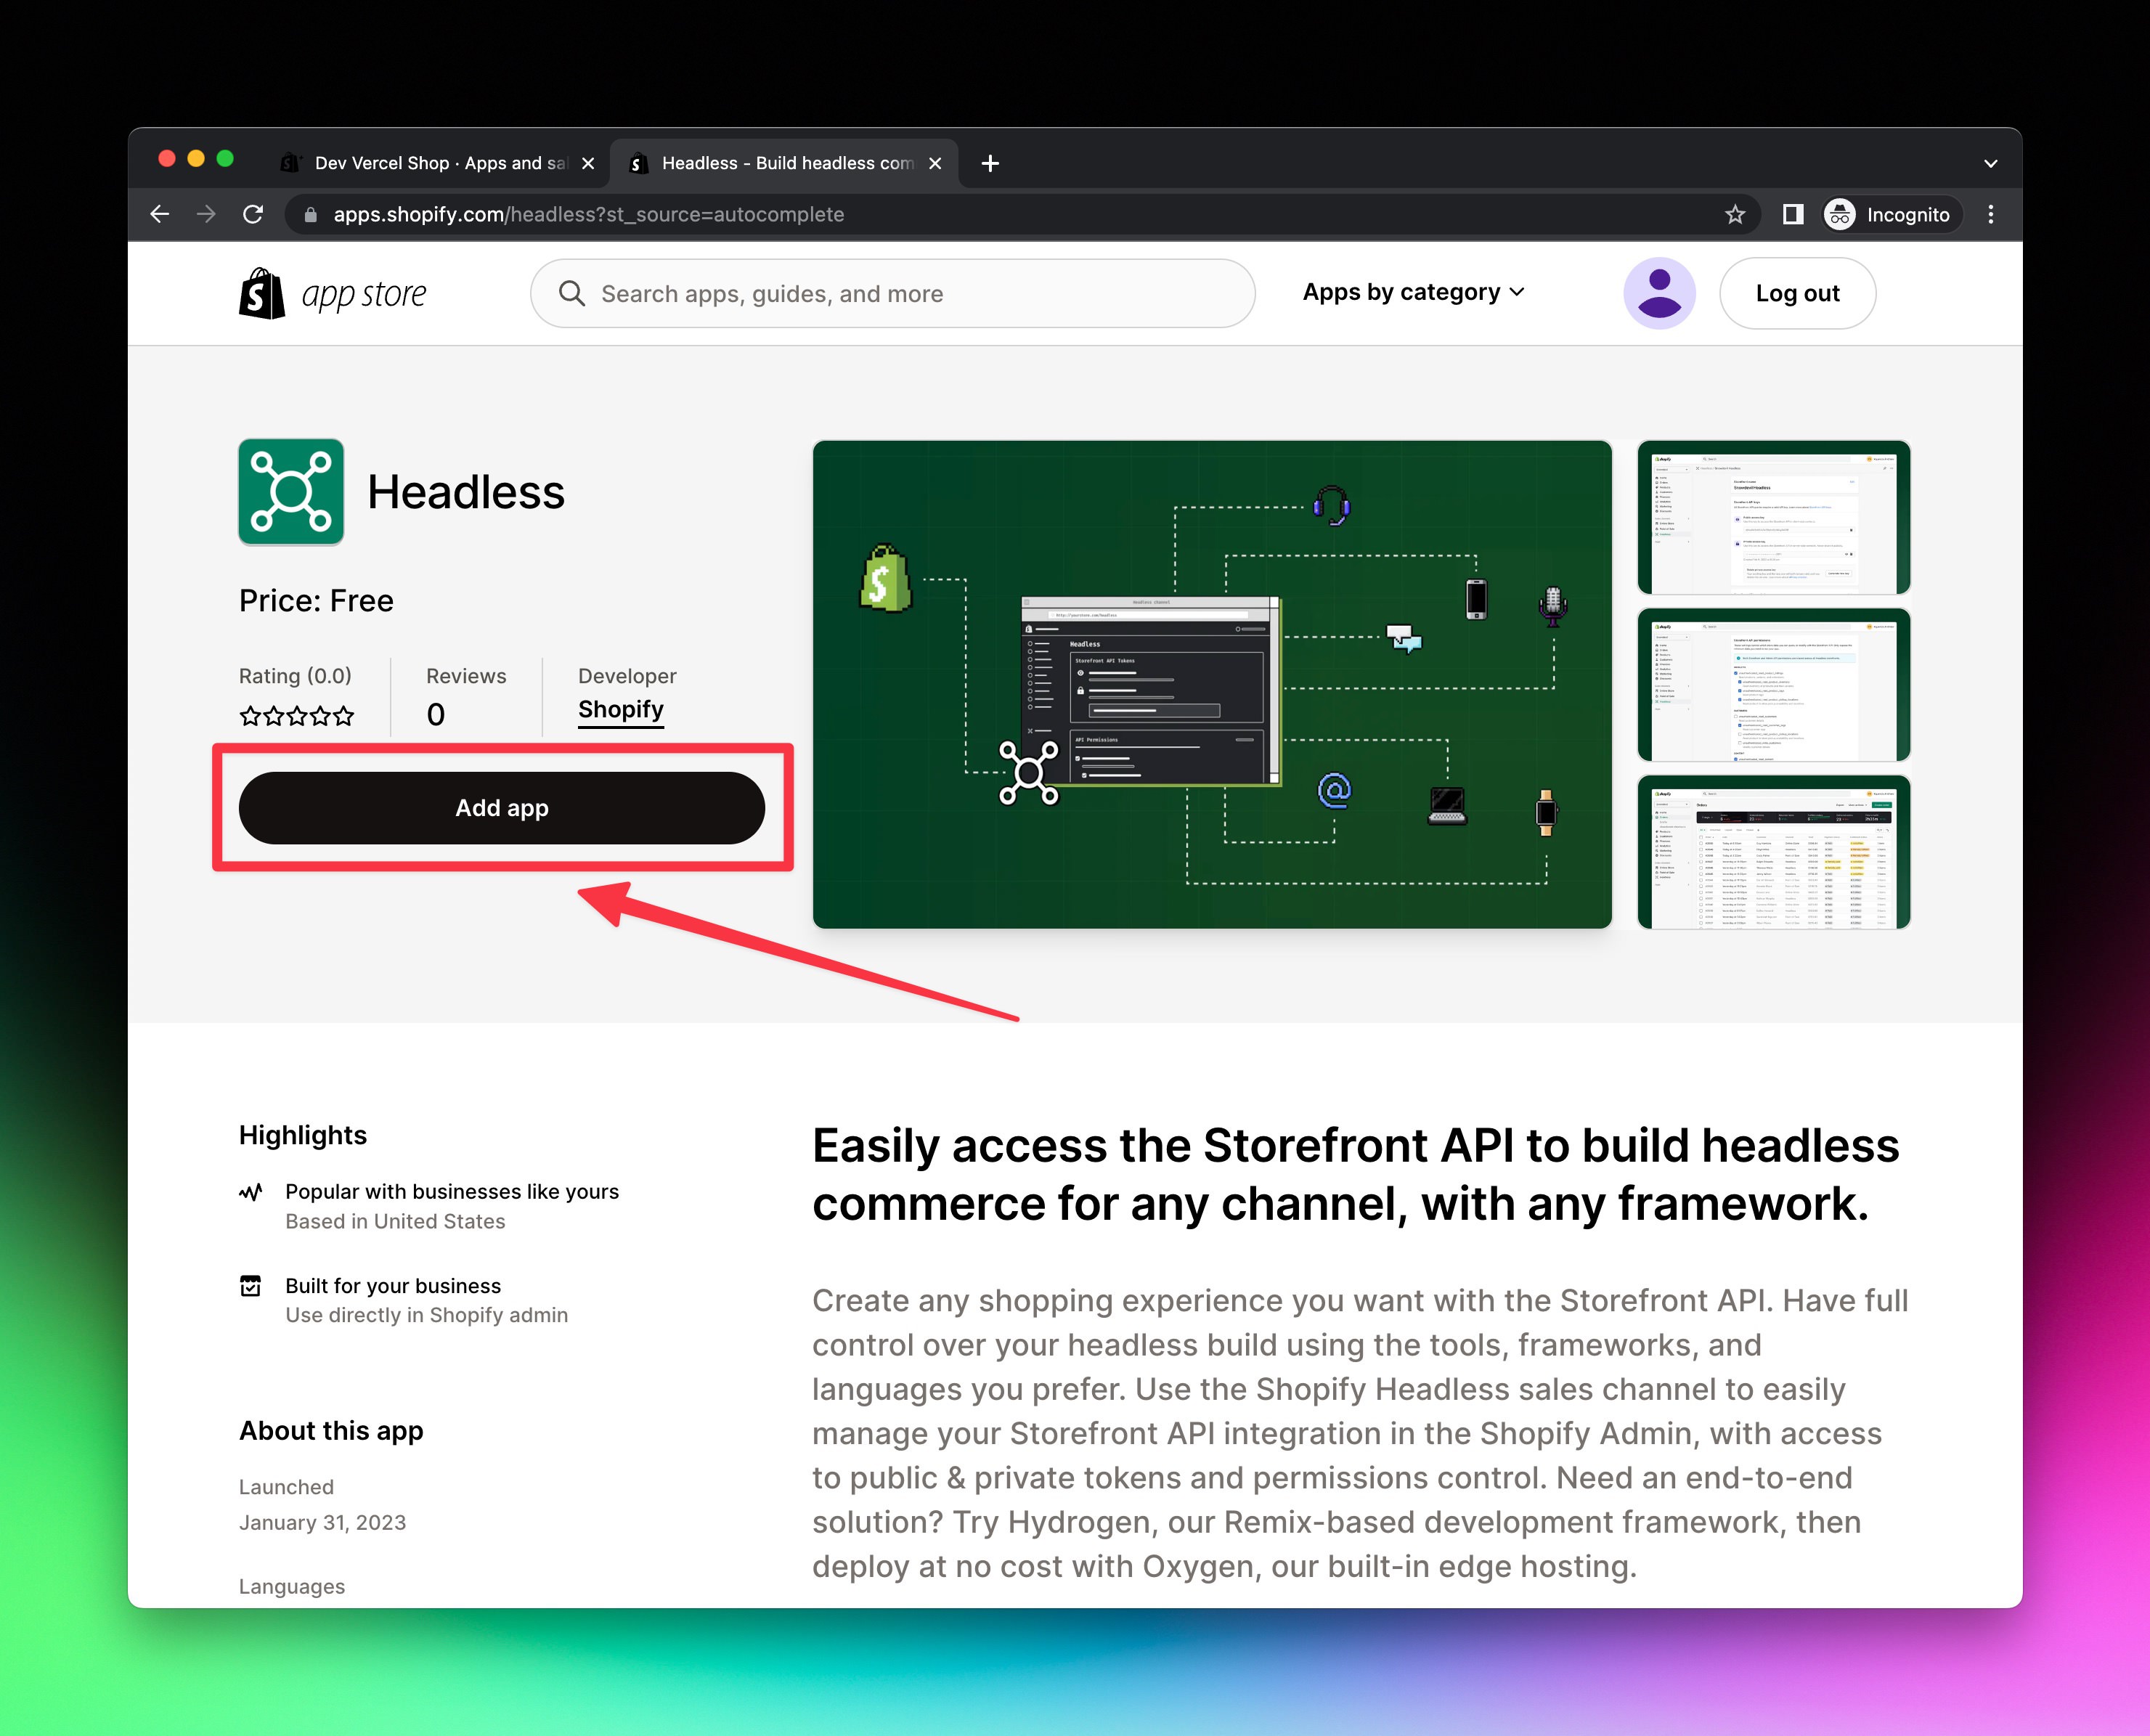
- Click the green
Add sales channelbutton.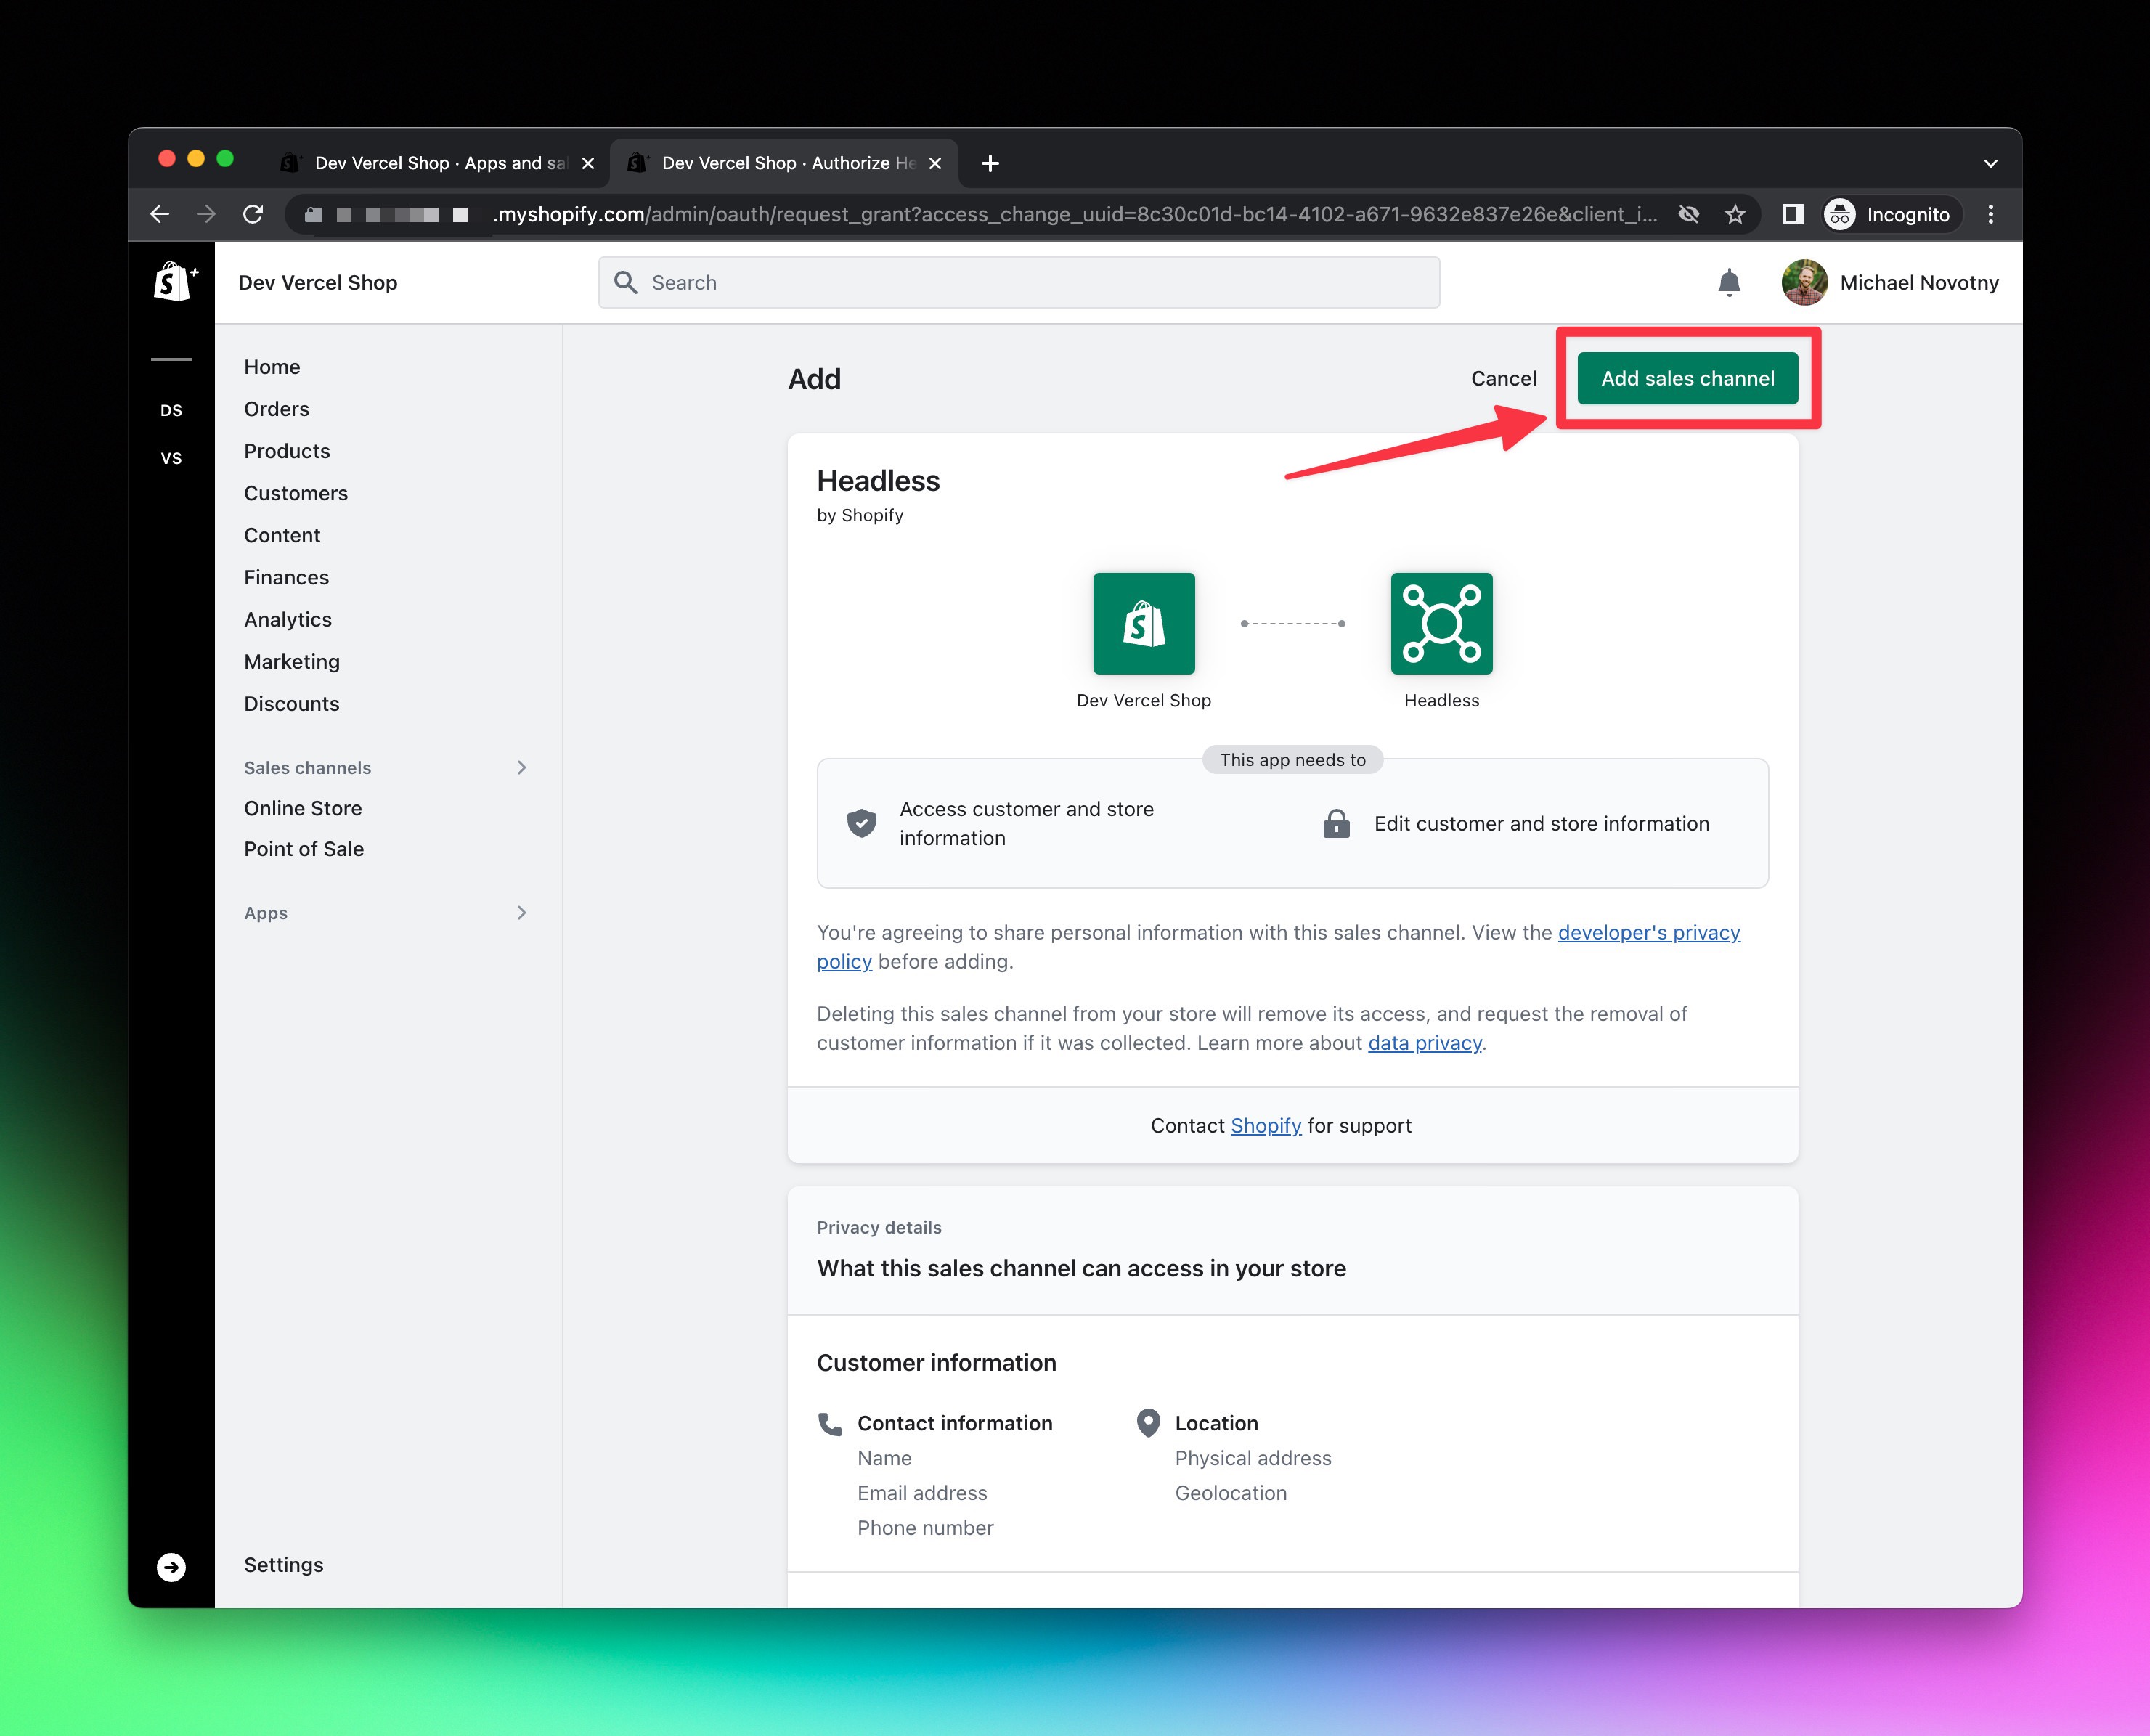
- Click the green
Create storefrontbutton.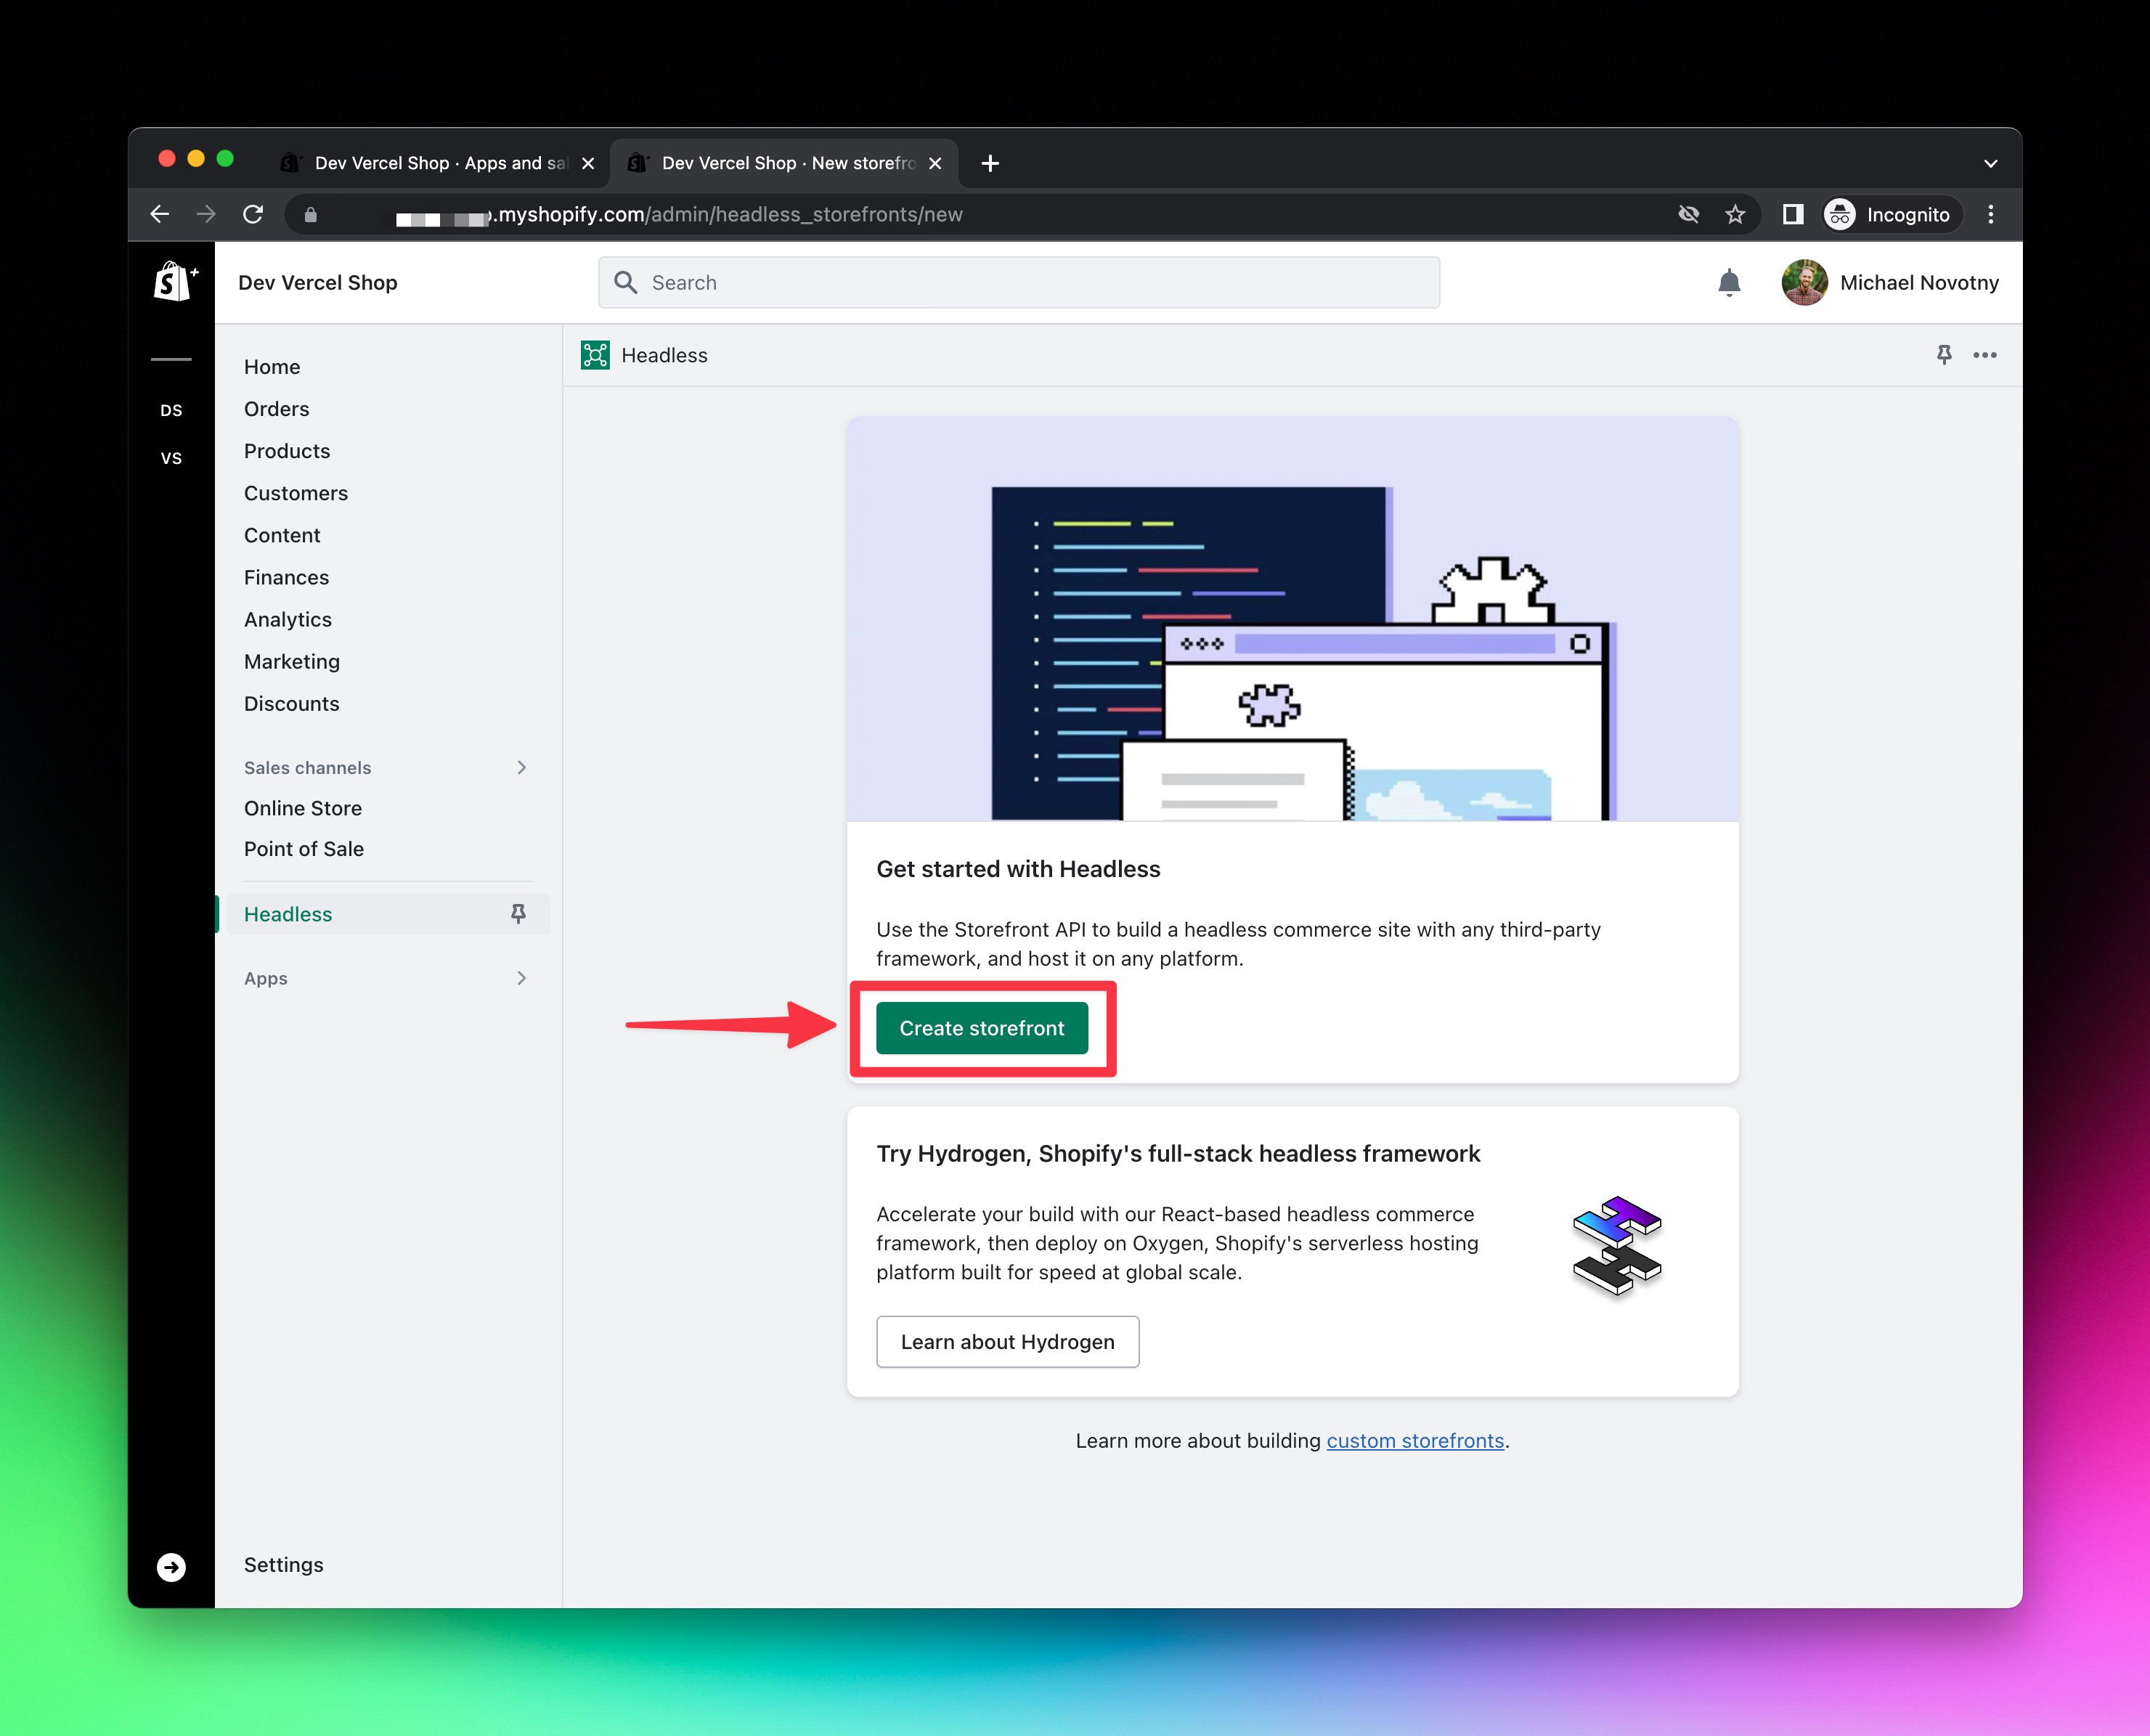
- Copy and paste the public access token and assign it to a
SHOPIFY_STOREFRONT_ACCESS_TOKENenvironment variable.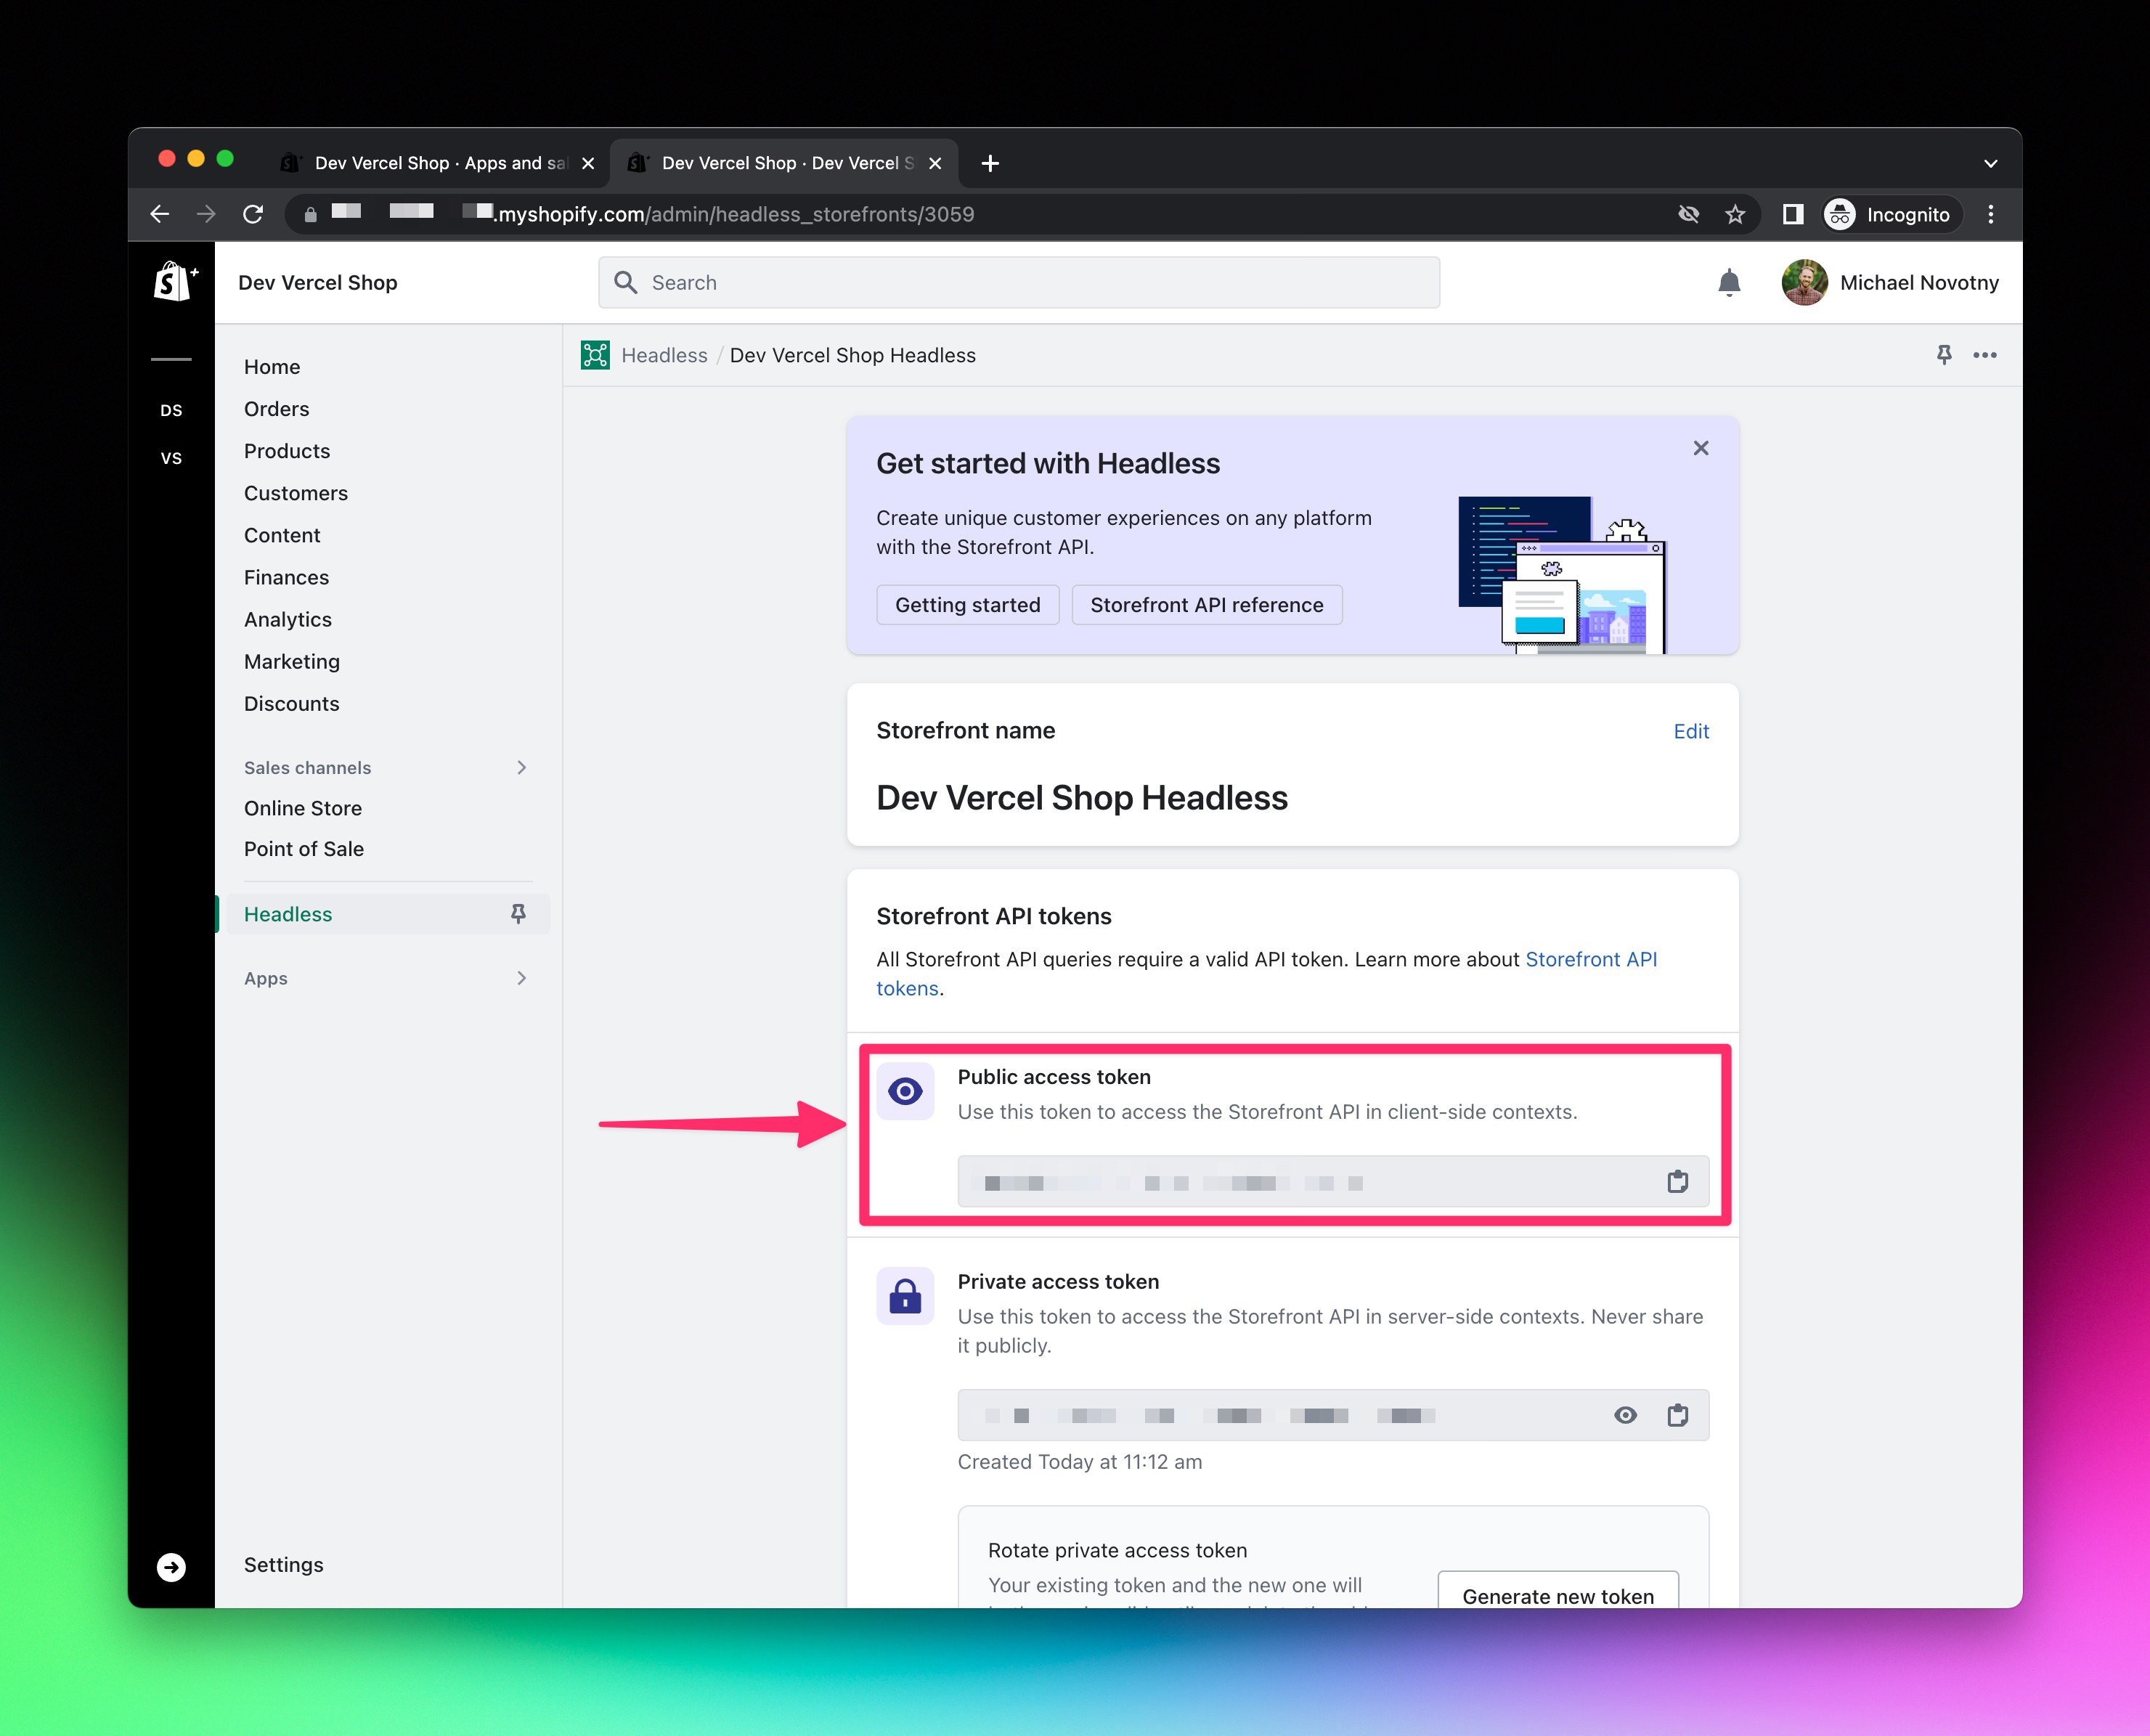
- If you ever need to reference the public access token again, you can navigate to
https://SHOPIFY_STORE_SUBDOMAIN.myshopify.com/admin/headless_storefronts.
When using a headless Shopify setup, you normally don't want customers to access any of the theme pages except for checkout. However, you can't totally disable the theme and a lot of links will still point to the theme (e.g. links in emails, order details, plugins, checkout, etc.).
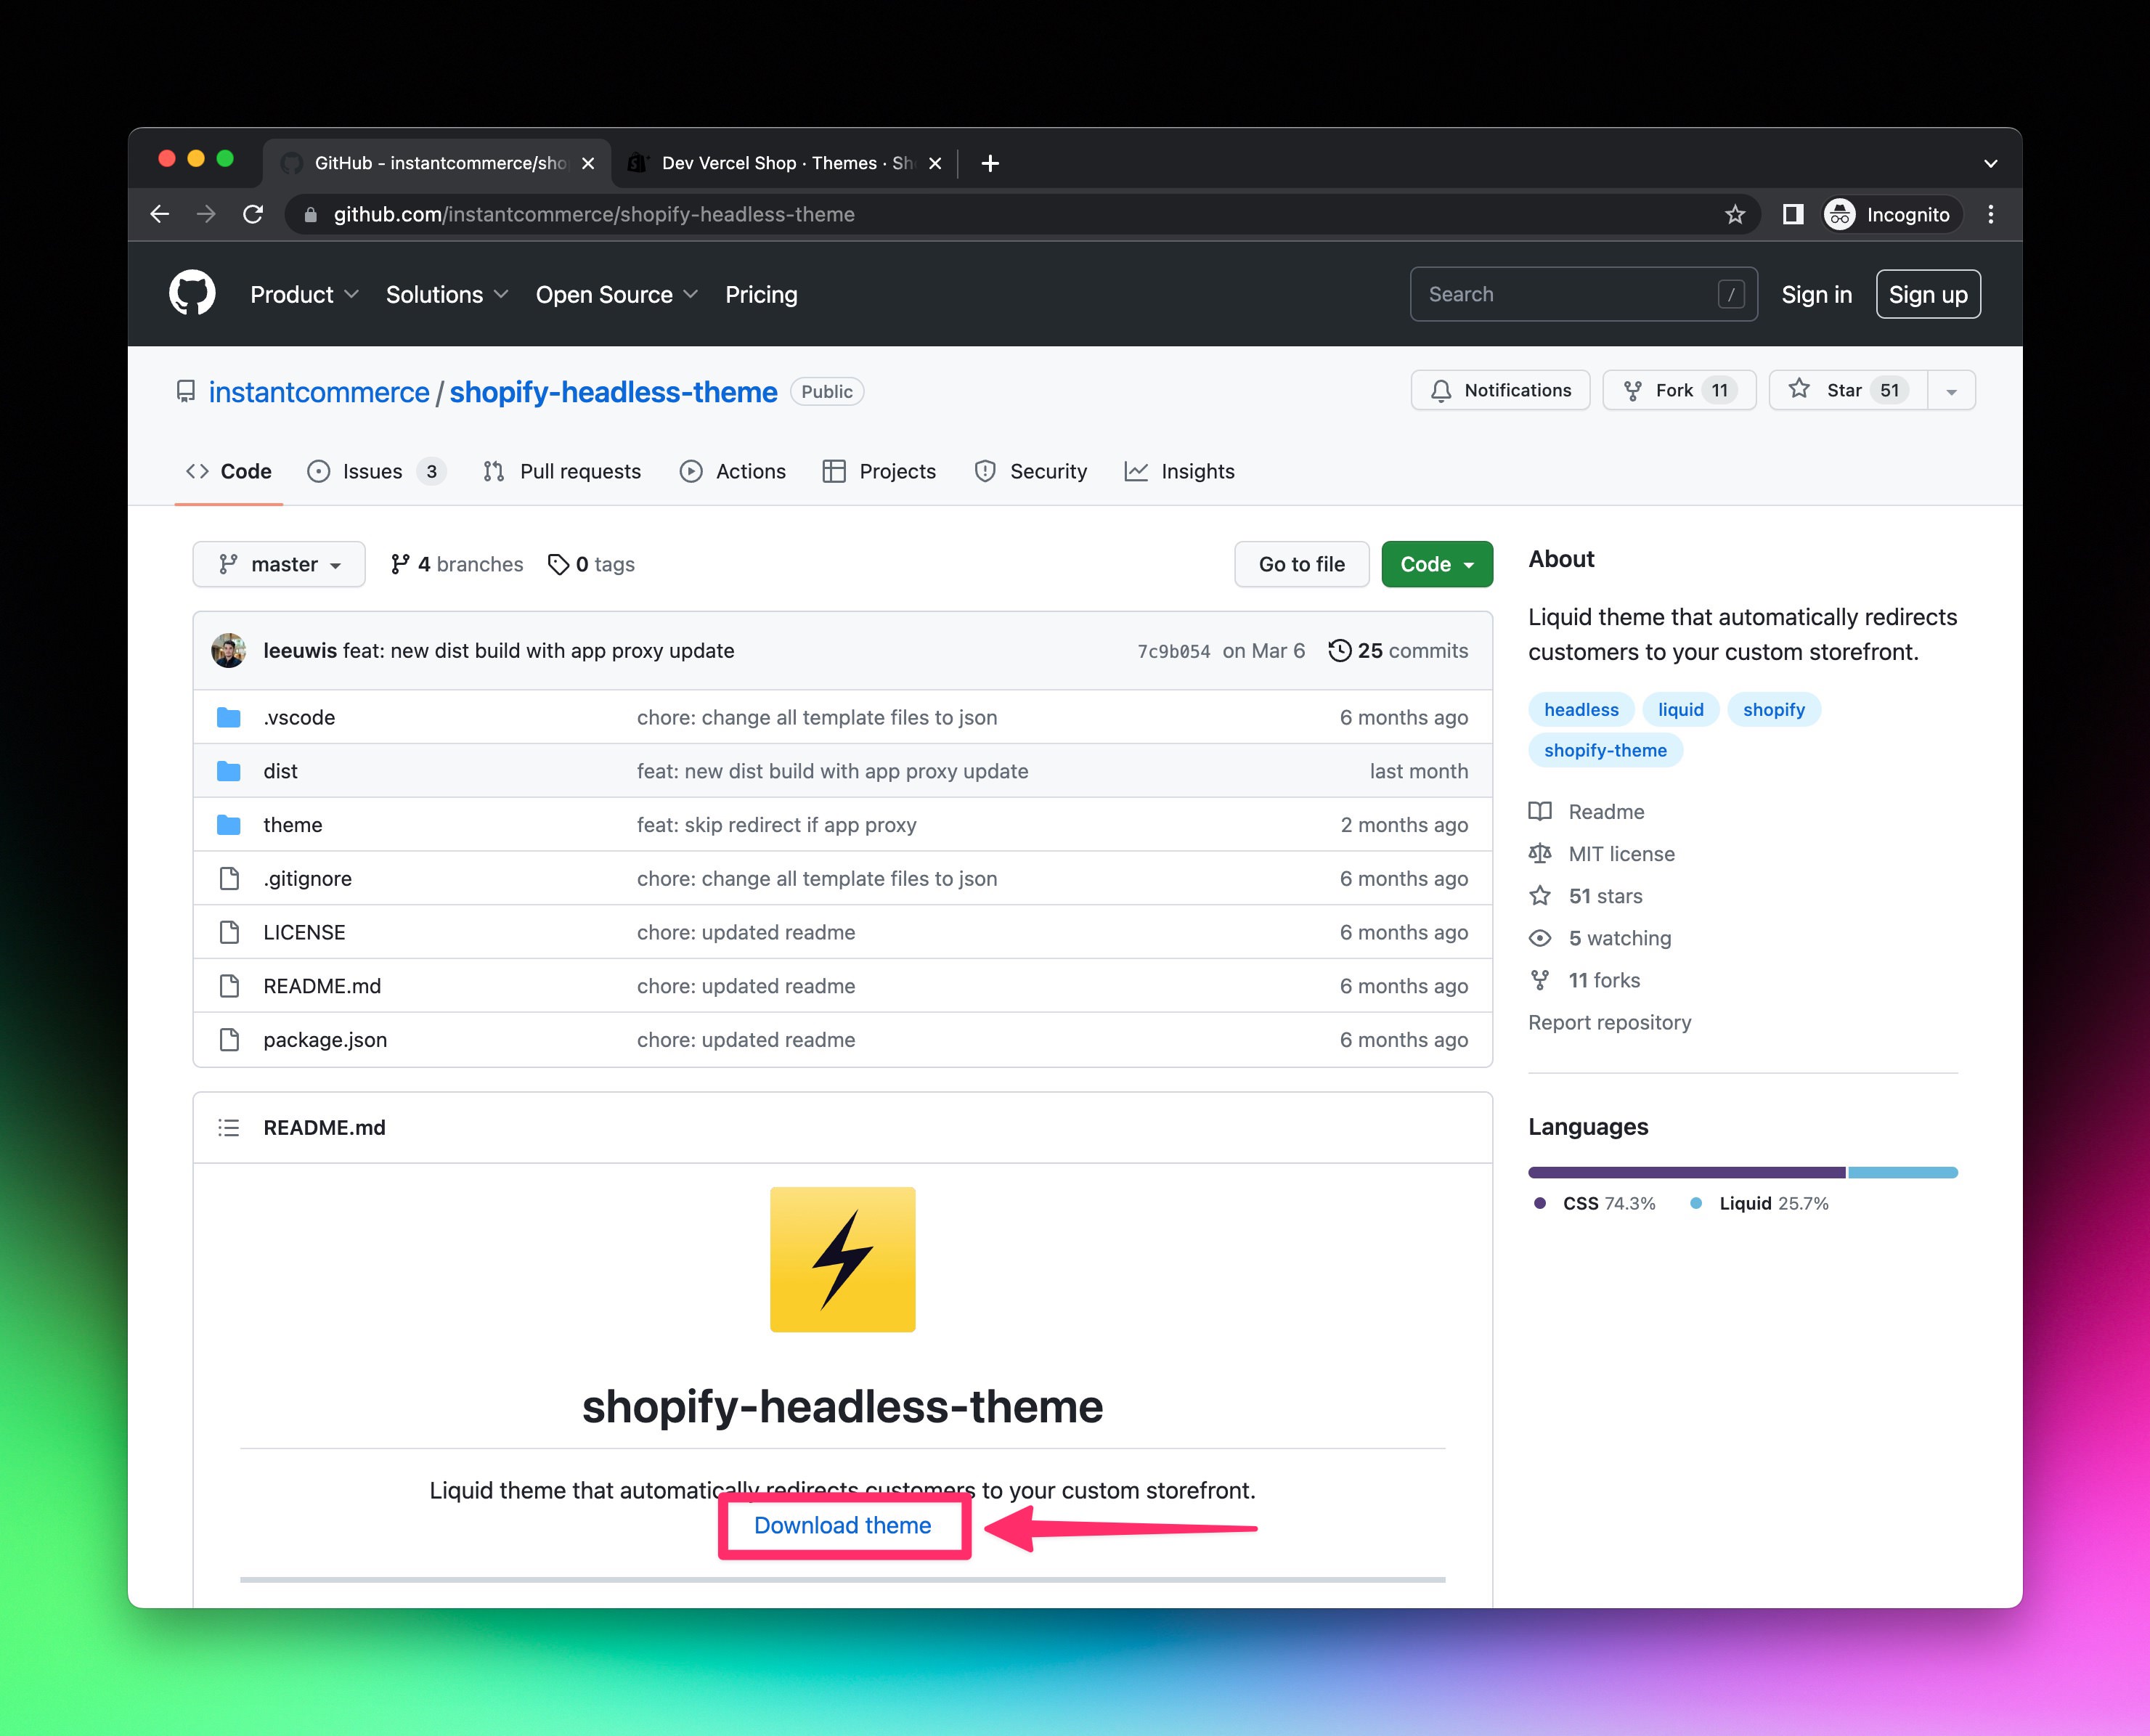
To enable a seamless flow between your headless site and Shopify, you can install the Shopify Headless Theme.
Follow the installation instructions and configure the theme with your headless site's values.
Expand to view detailed walkthrough
- Download Shopify Headless Theme.
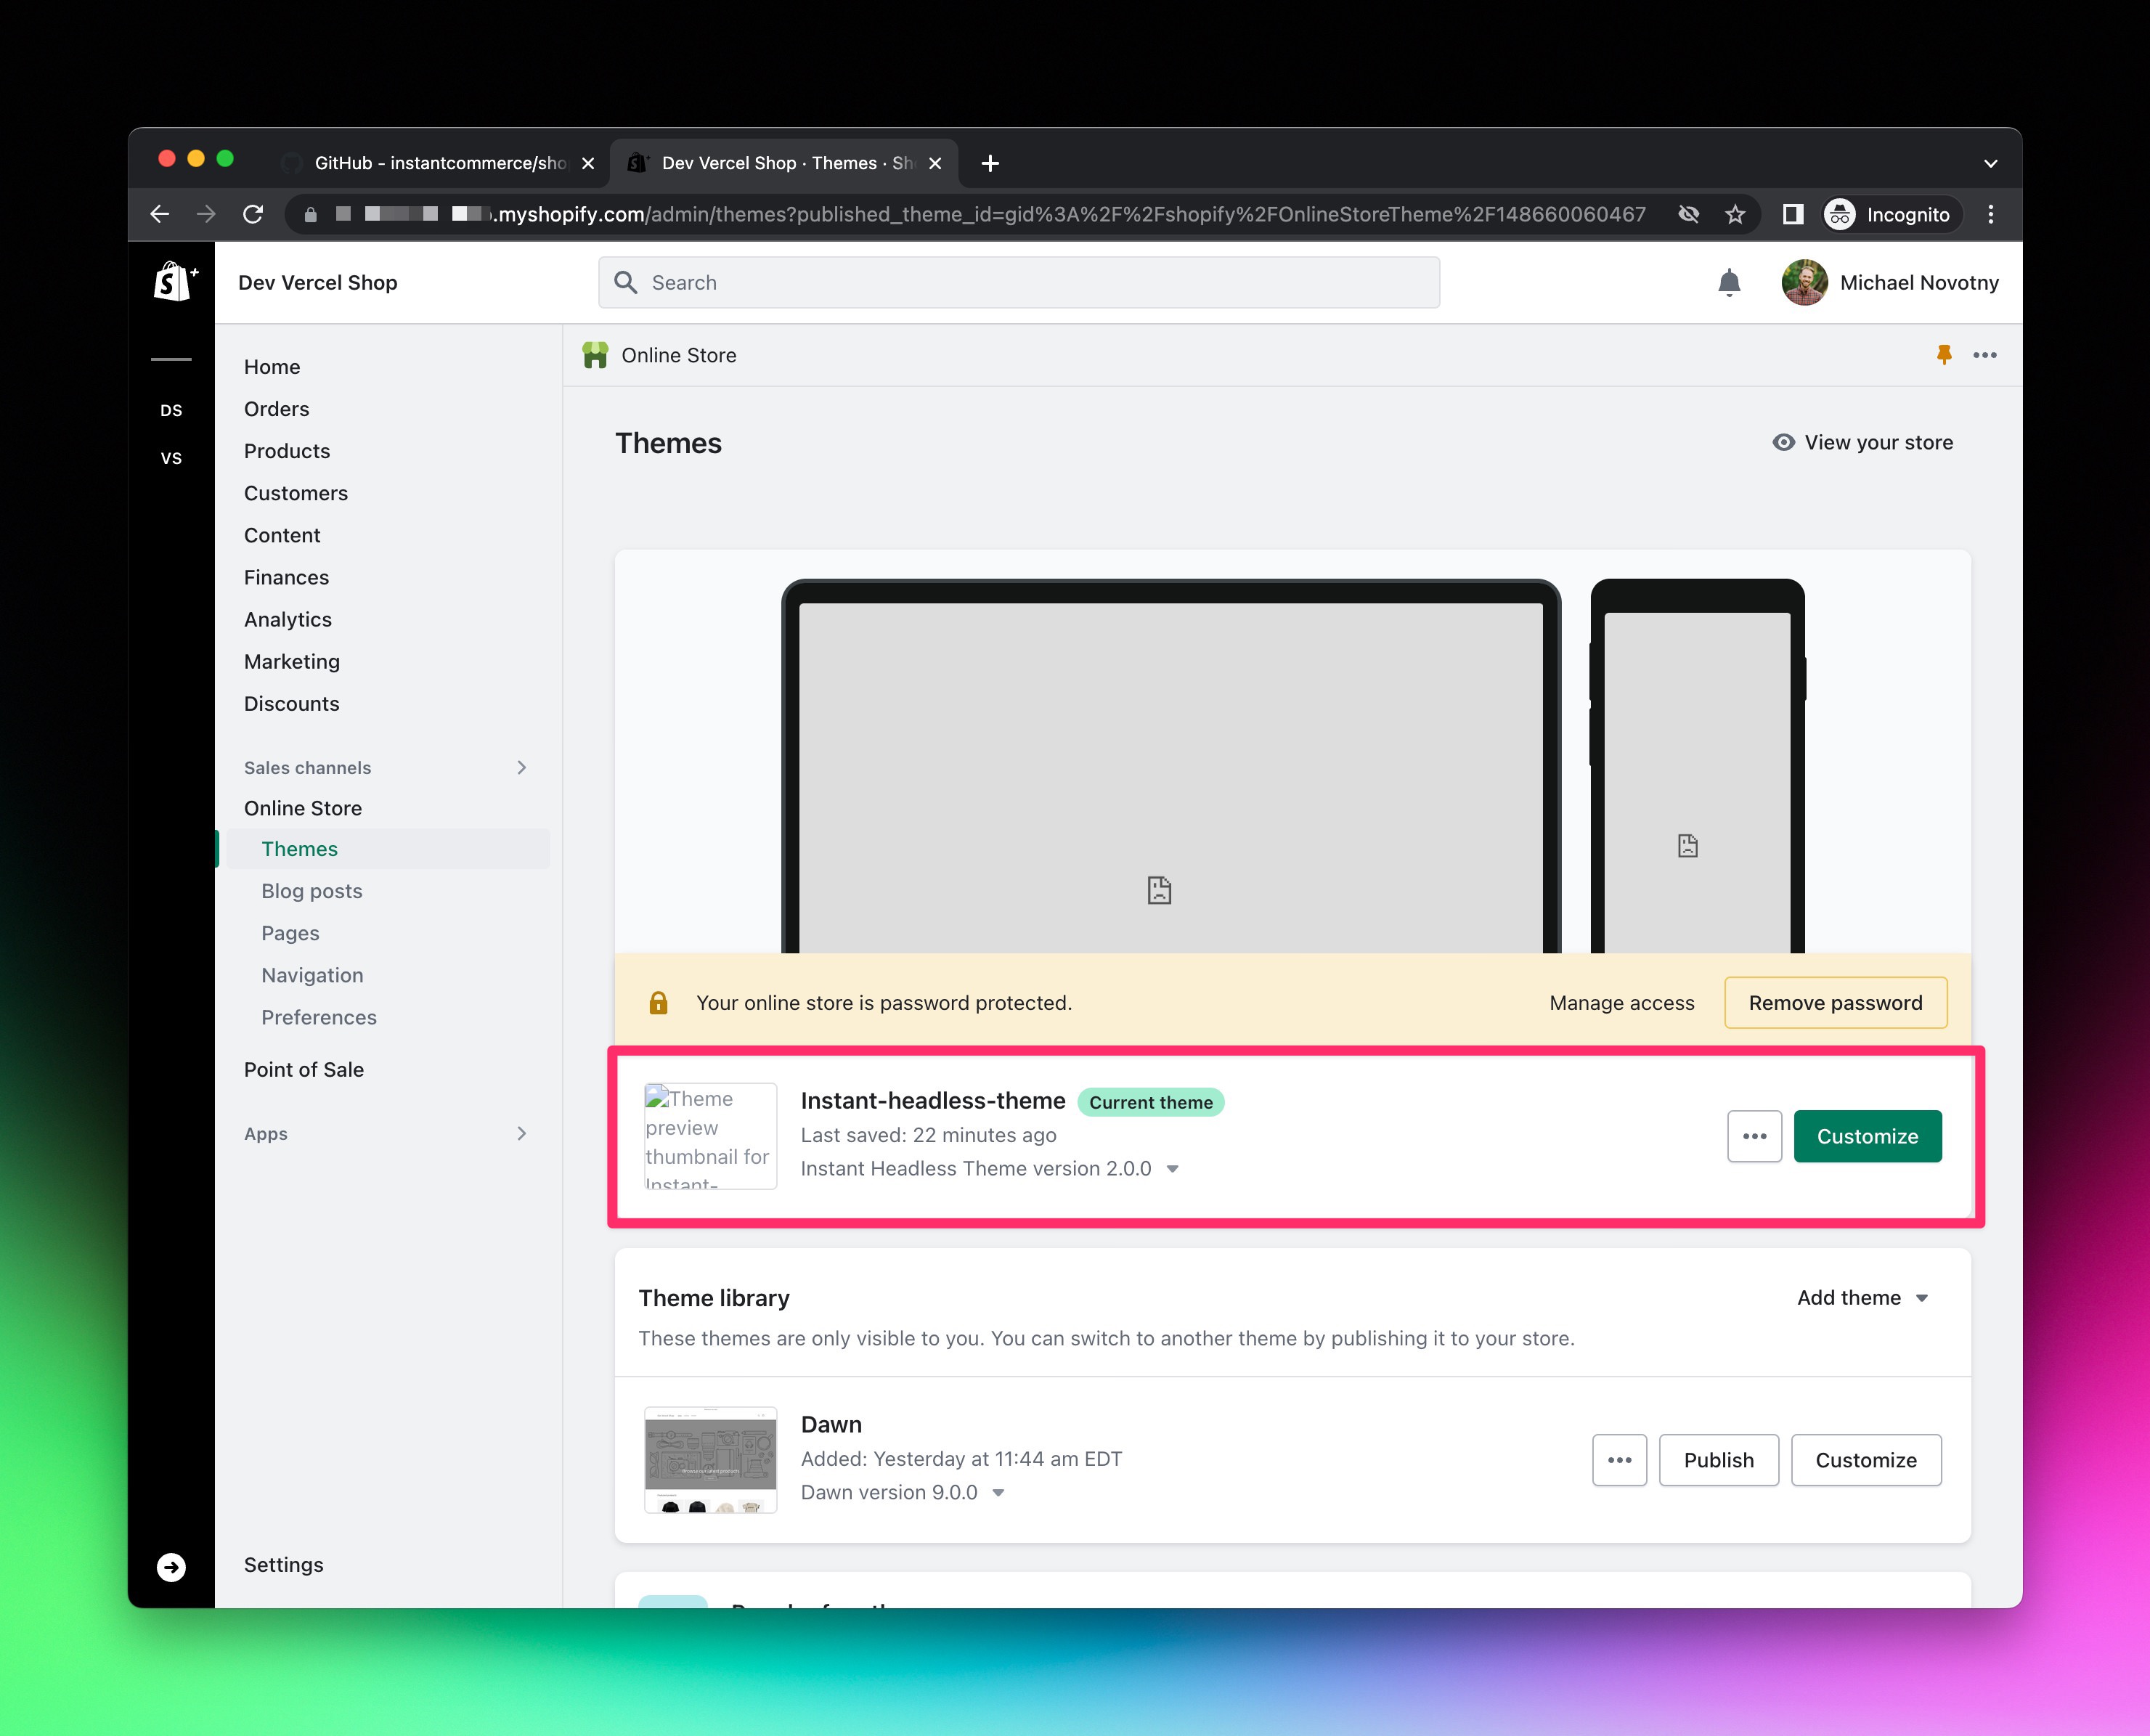
- Navigate to
https://SHOPIFY_STORE_SUBDOMAIN.myshopify.com/admin/themes. - Click
Add theme, thenUpload zip file.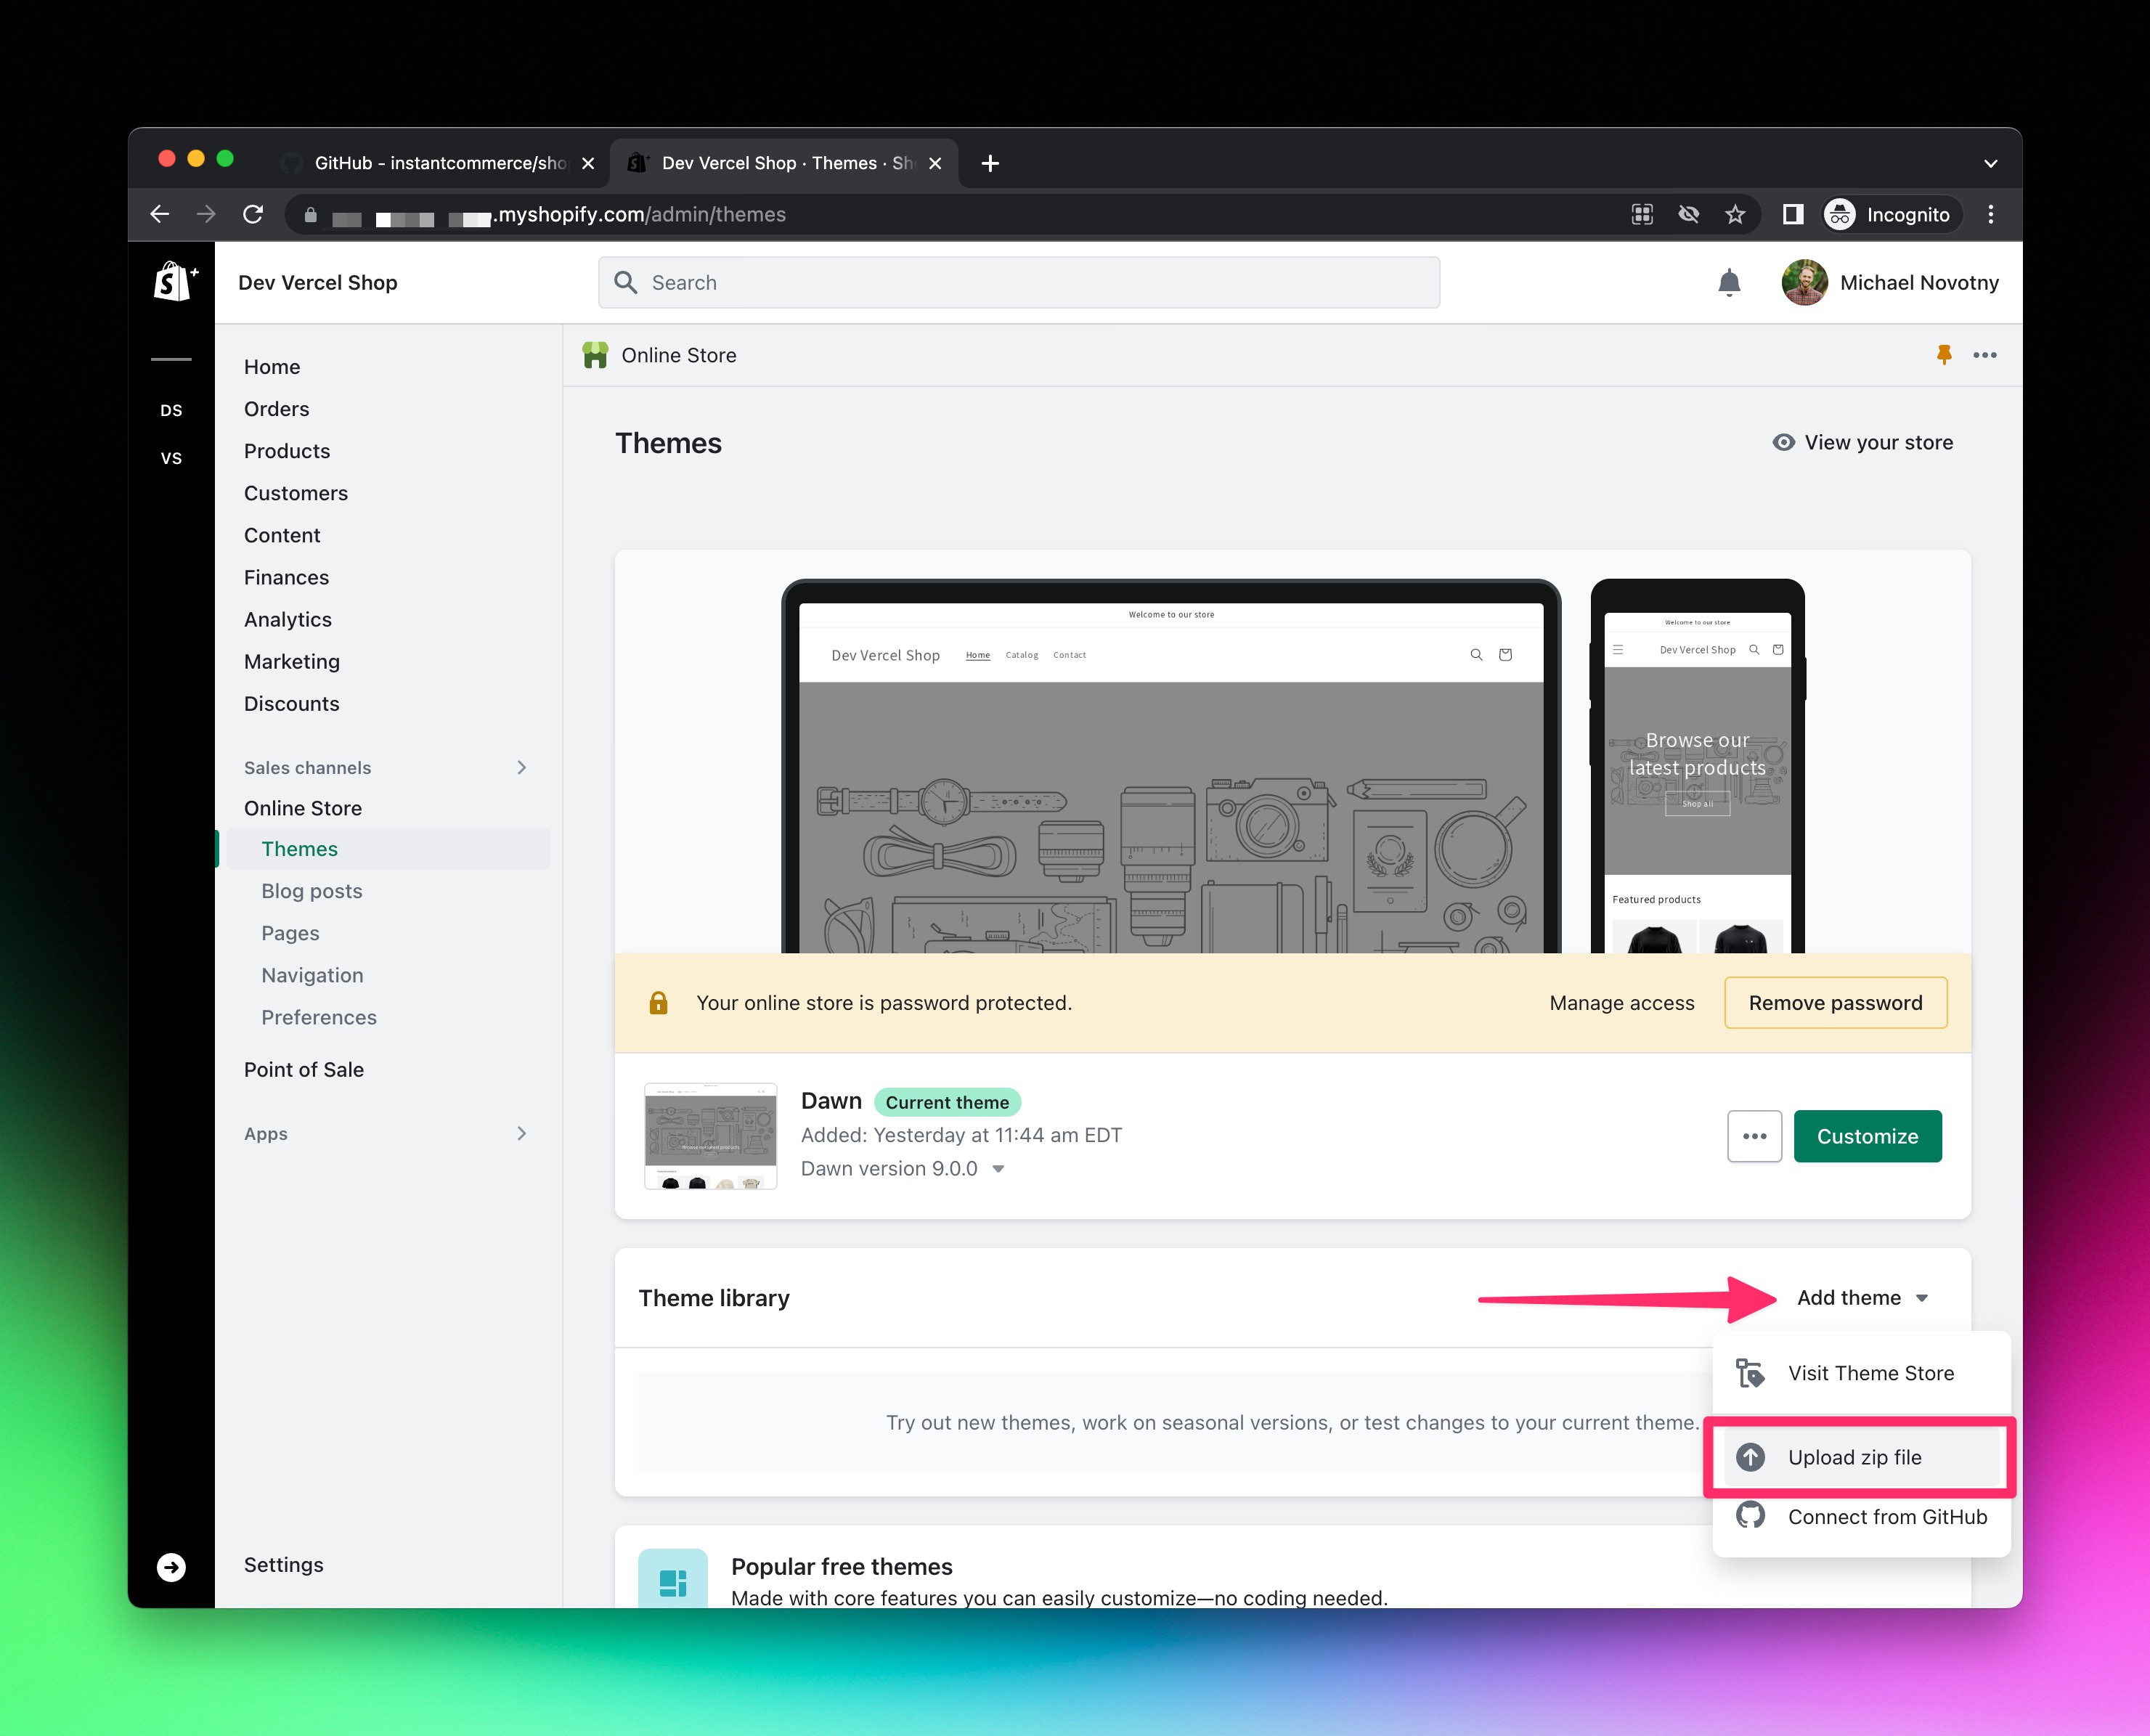
- Select the downloaded zip file from above, and click the green
Upload filebutton.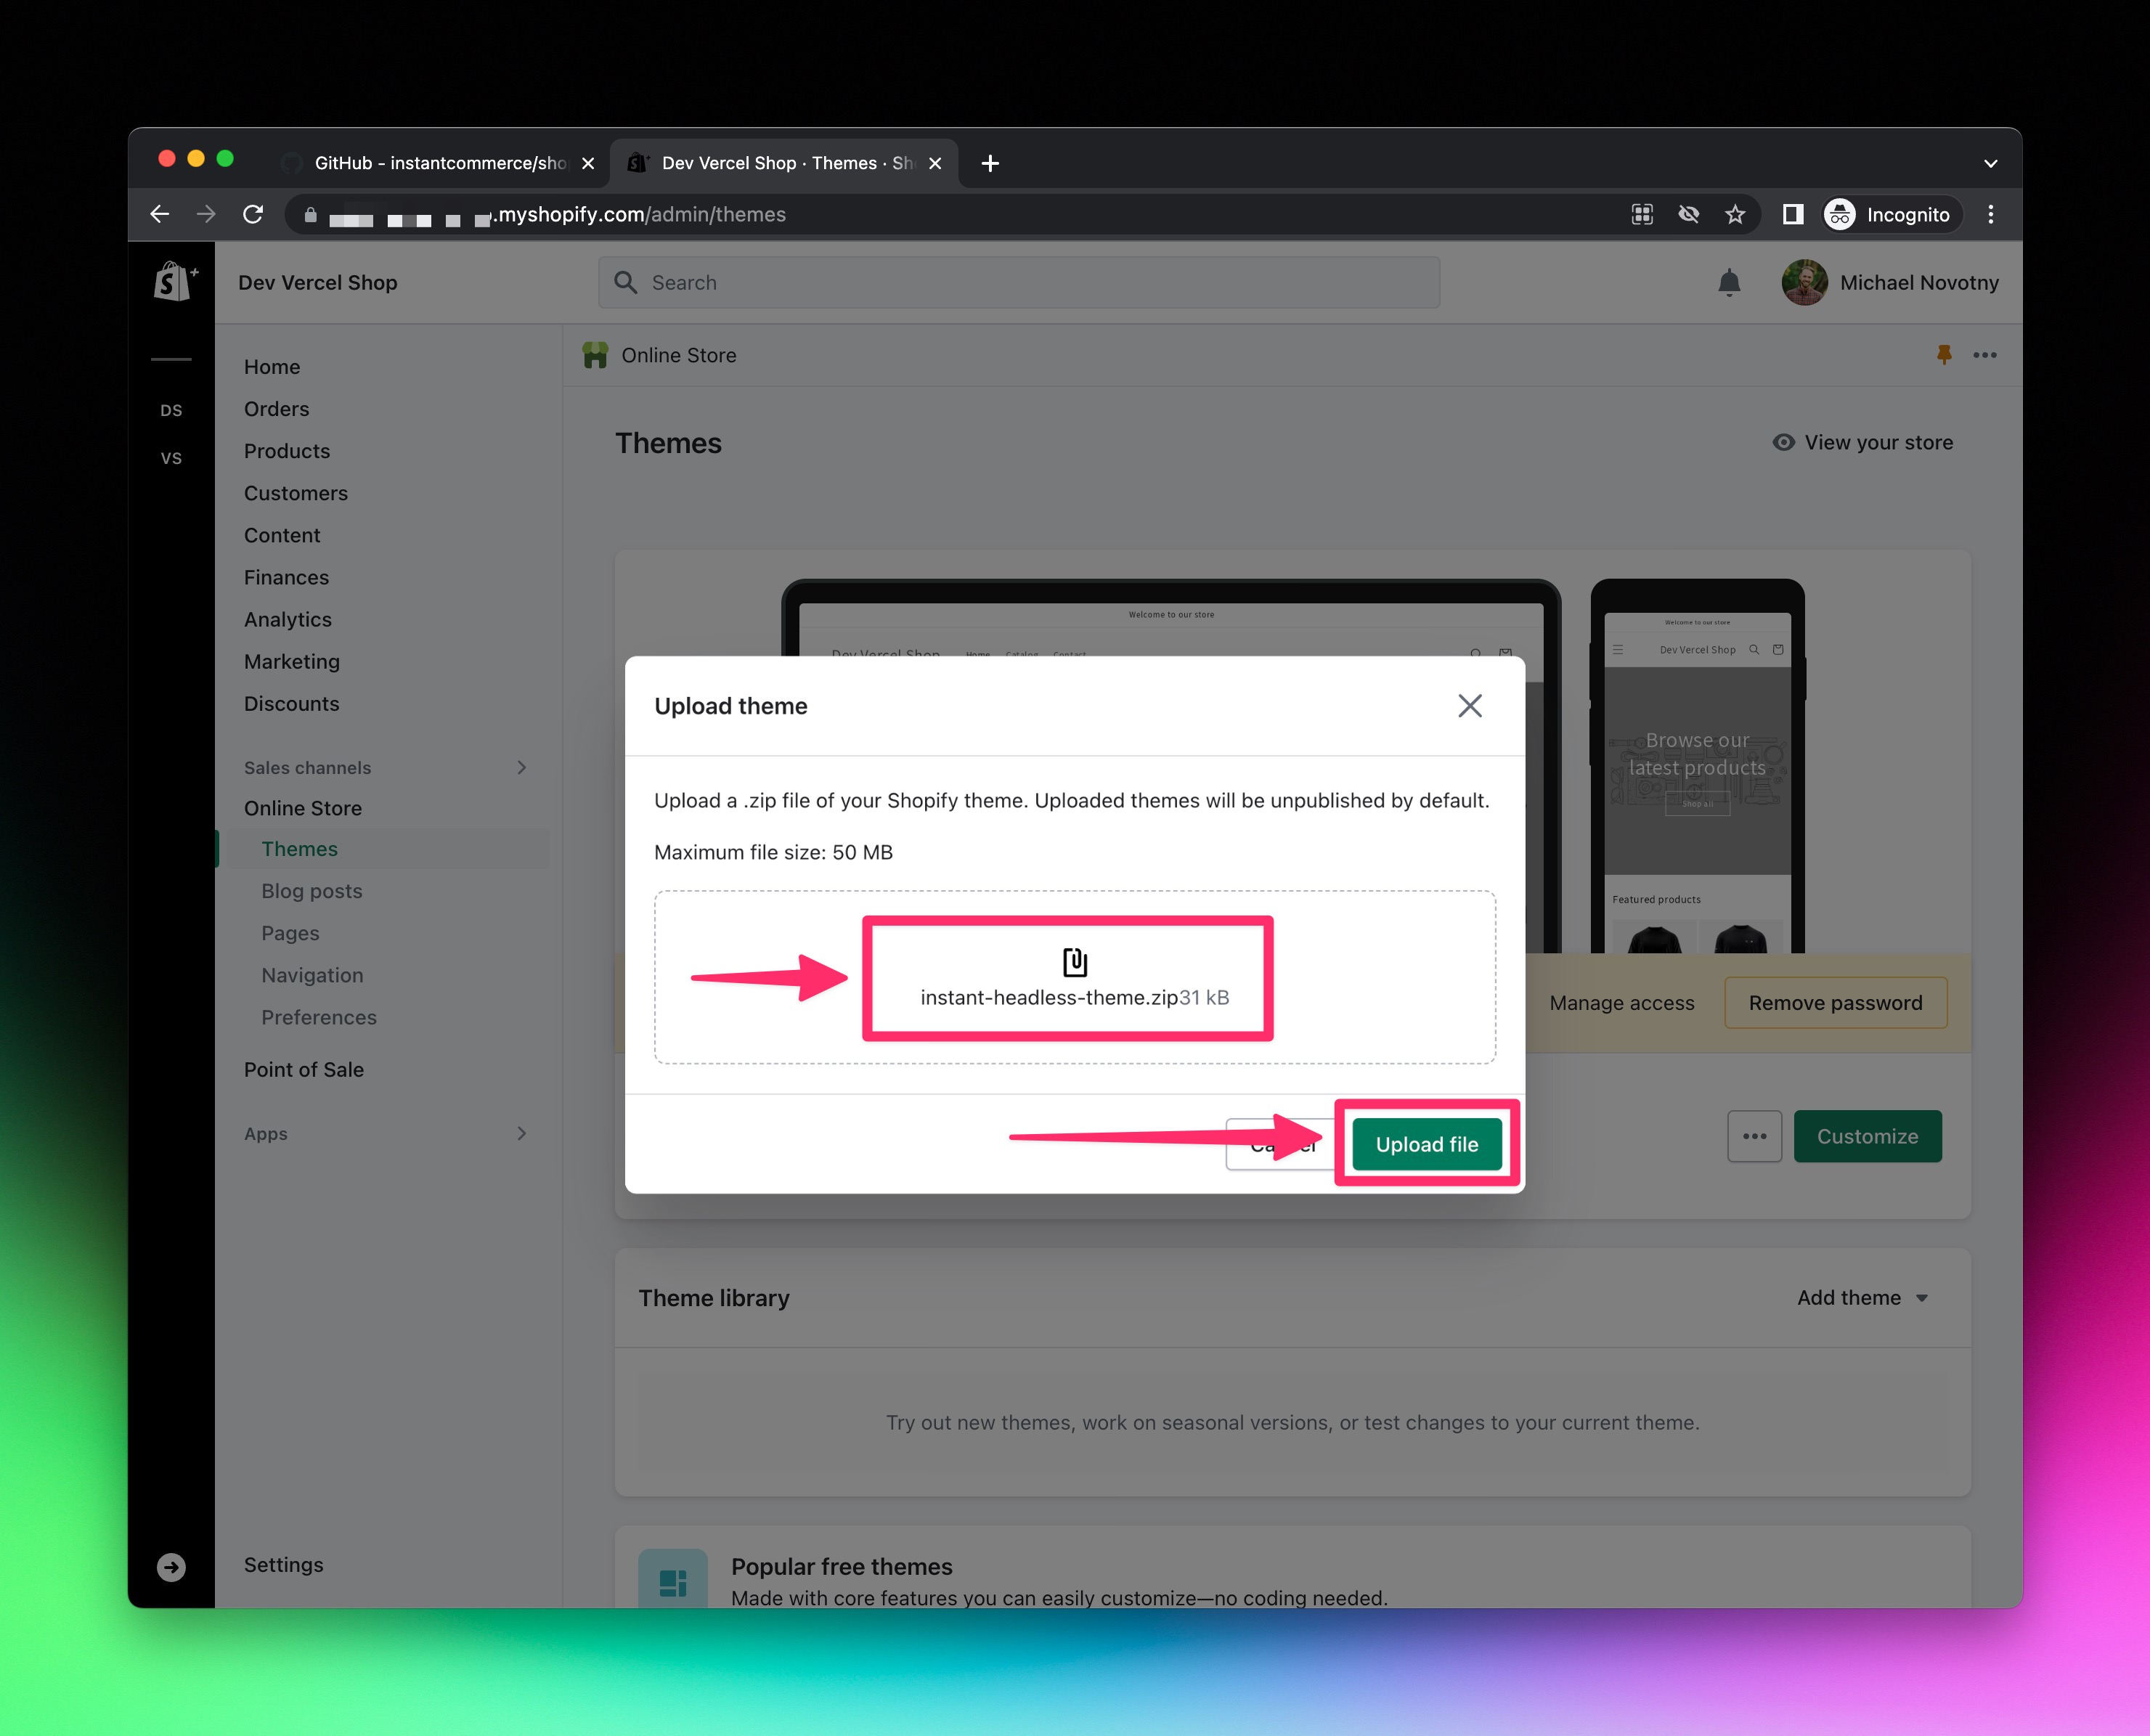
- Click
Customize.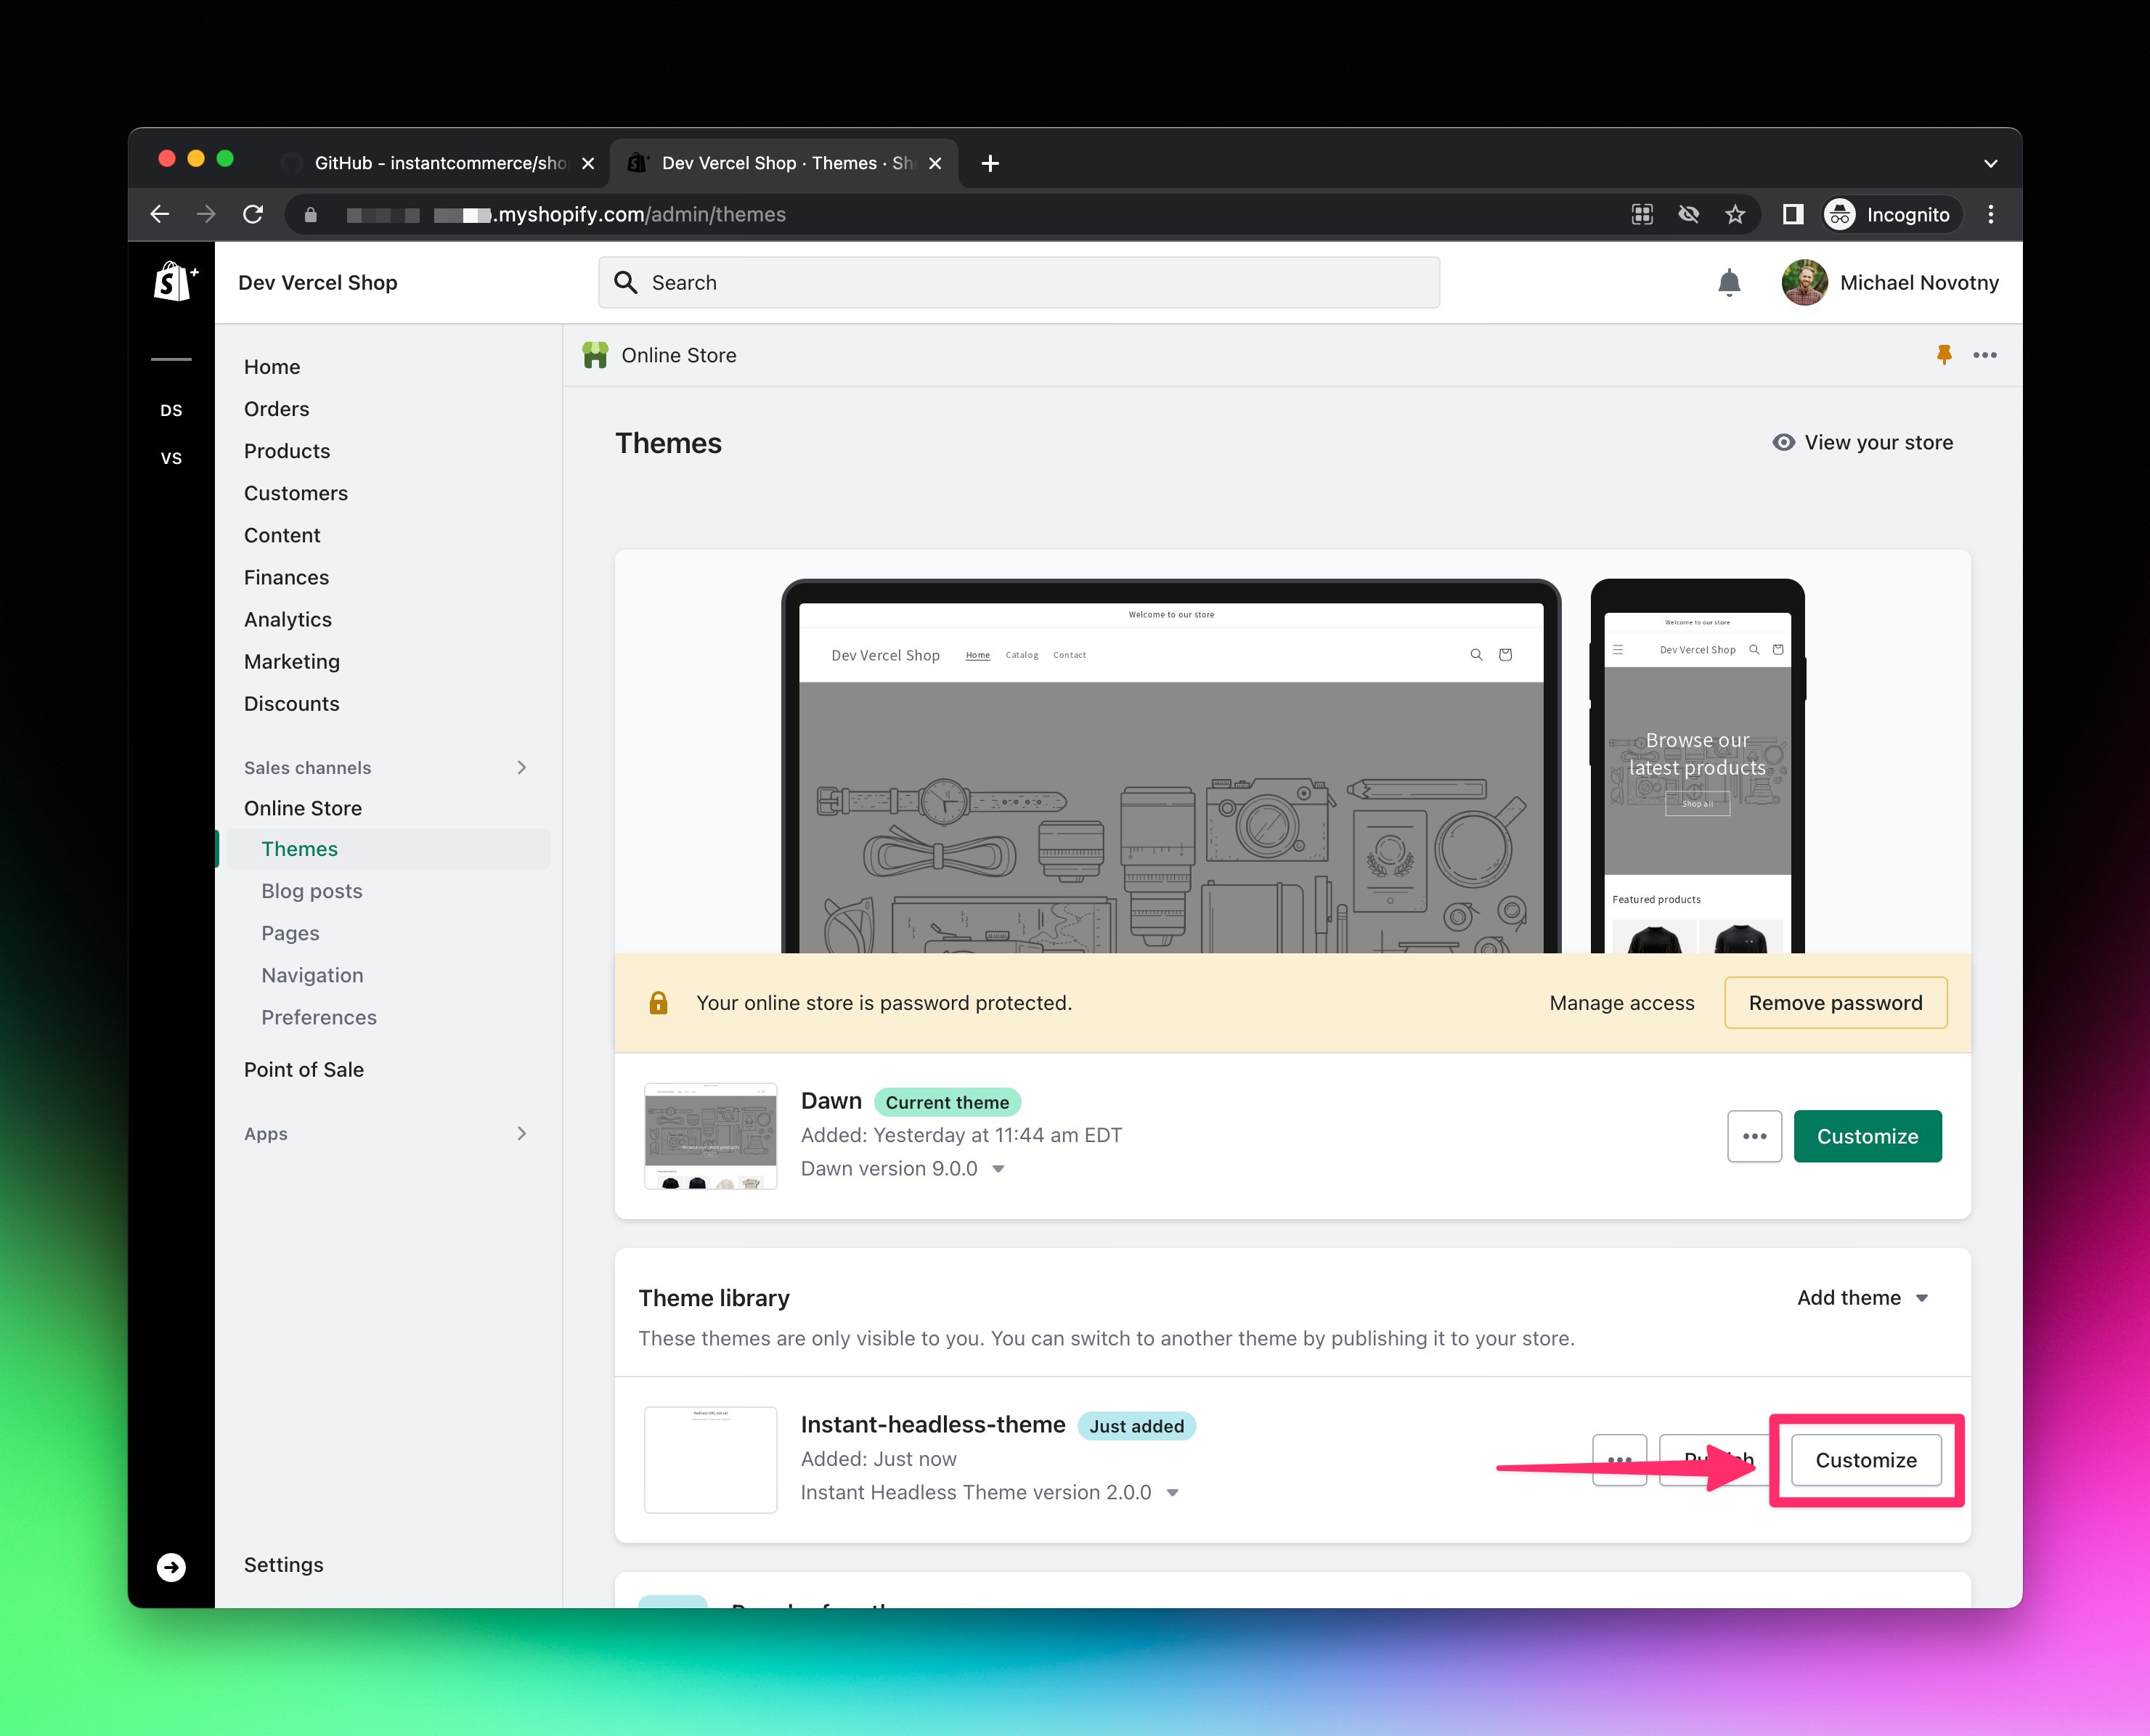
- Click
Theme settings(ie. the paintbrush icon), expand theSTOREFRONTsection, enter your headless store domain, click the grayPublishbutton.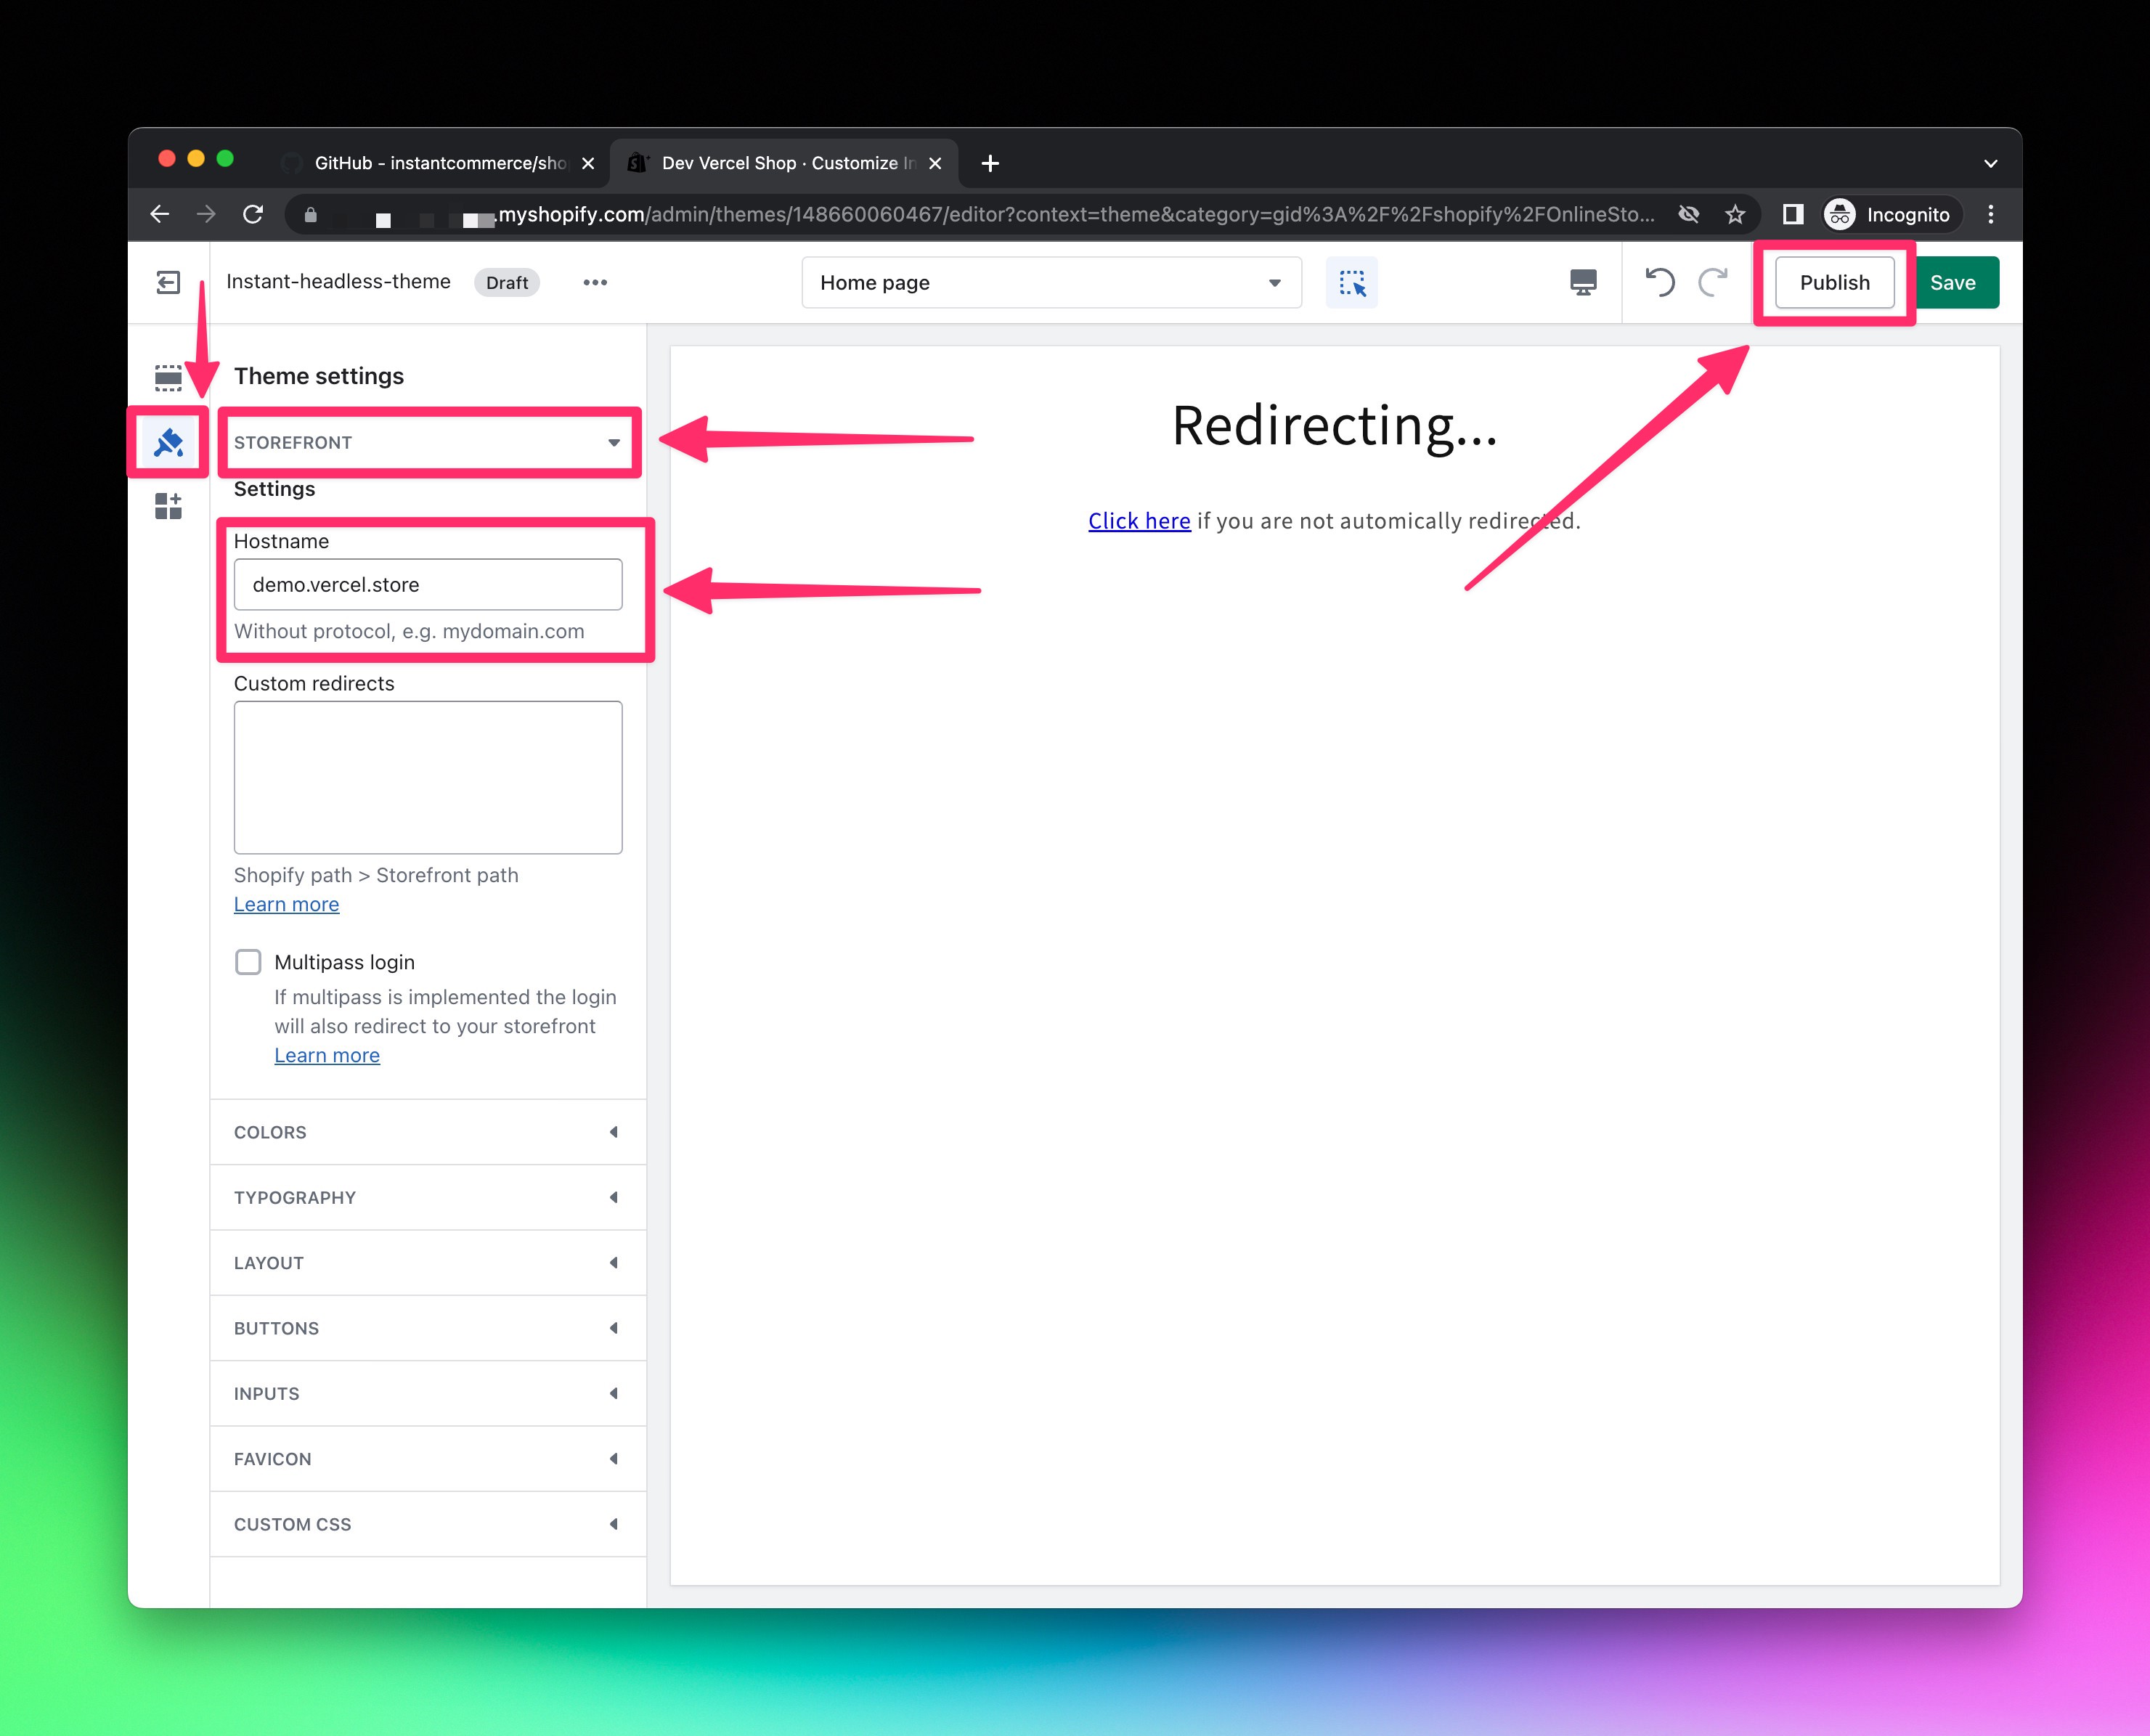
- Confirm the theme change by clicking the green
Save and publishbutton.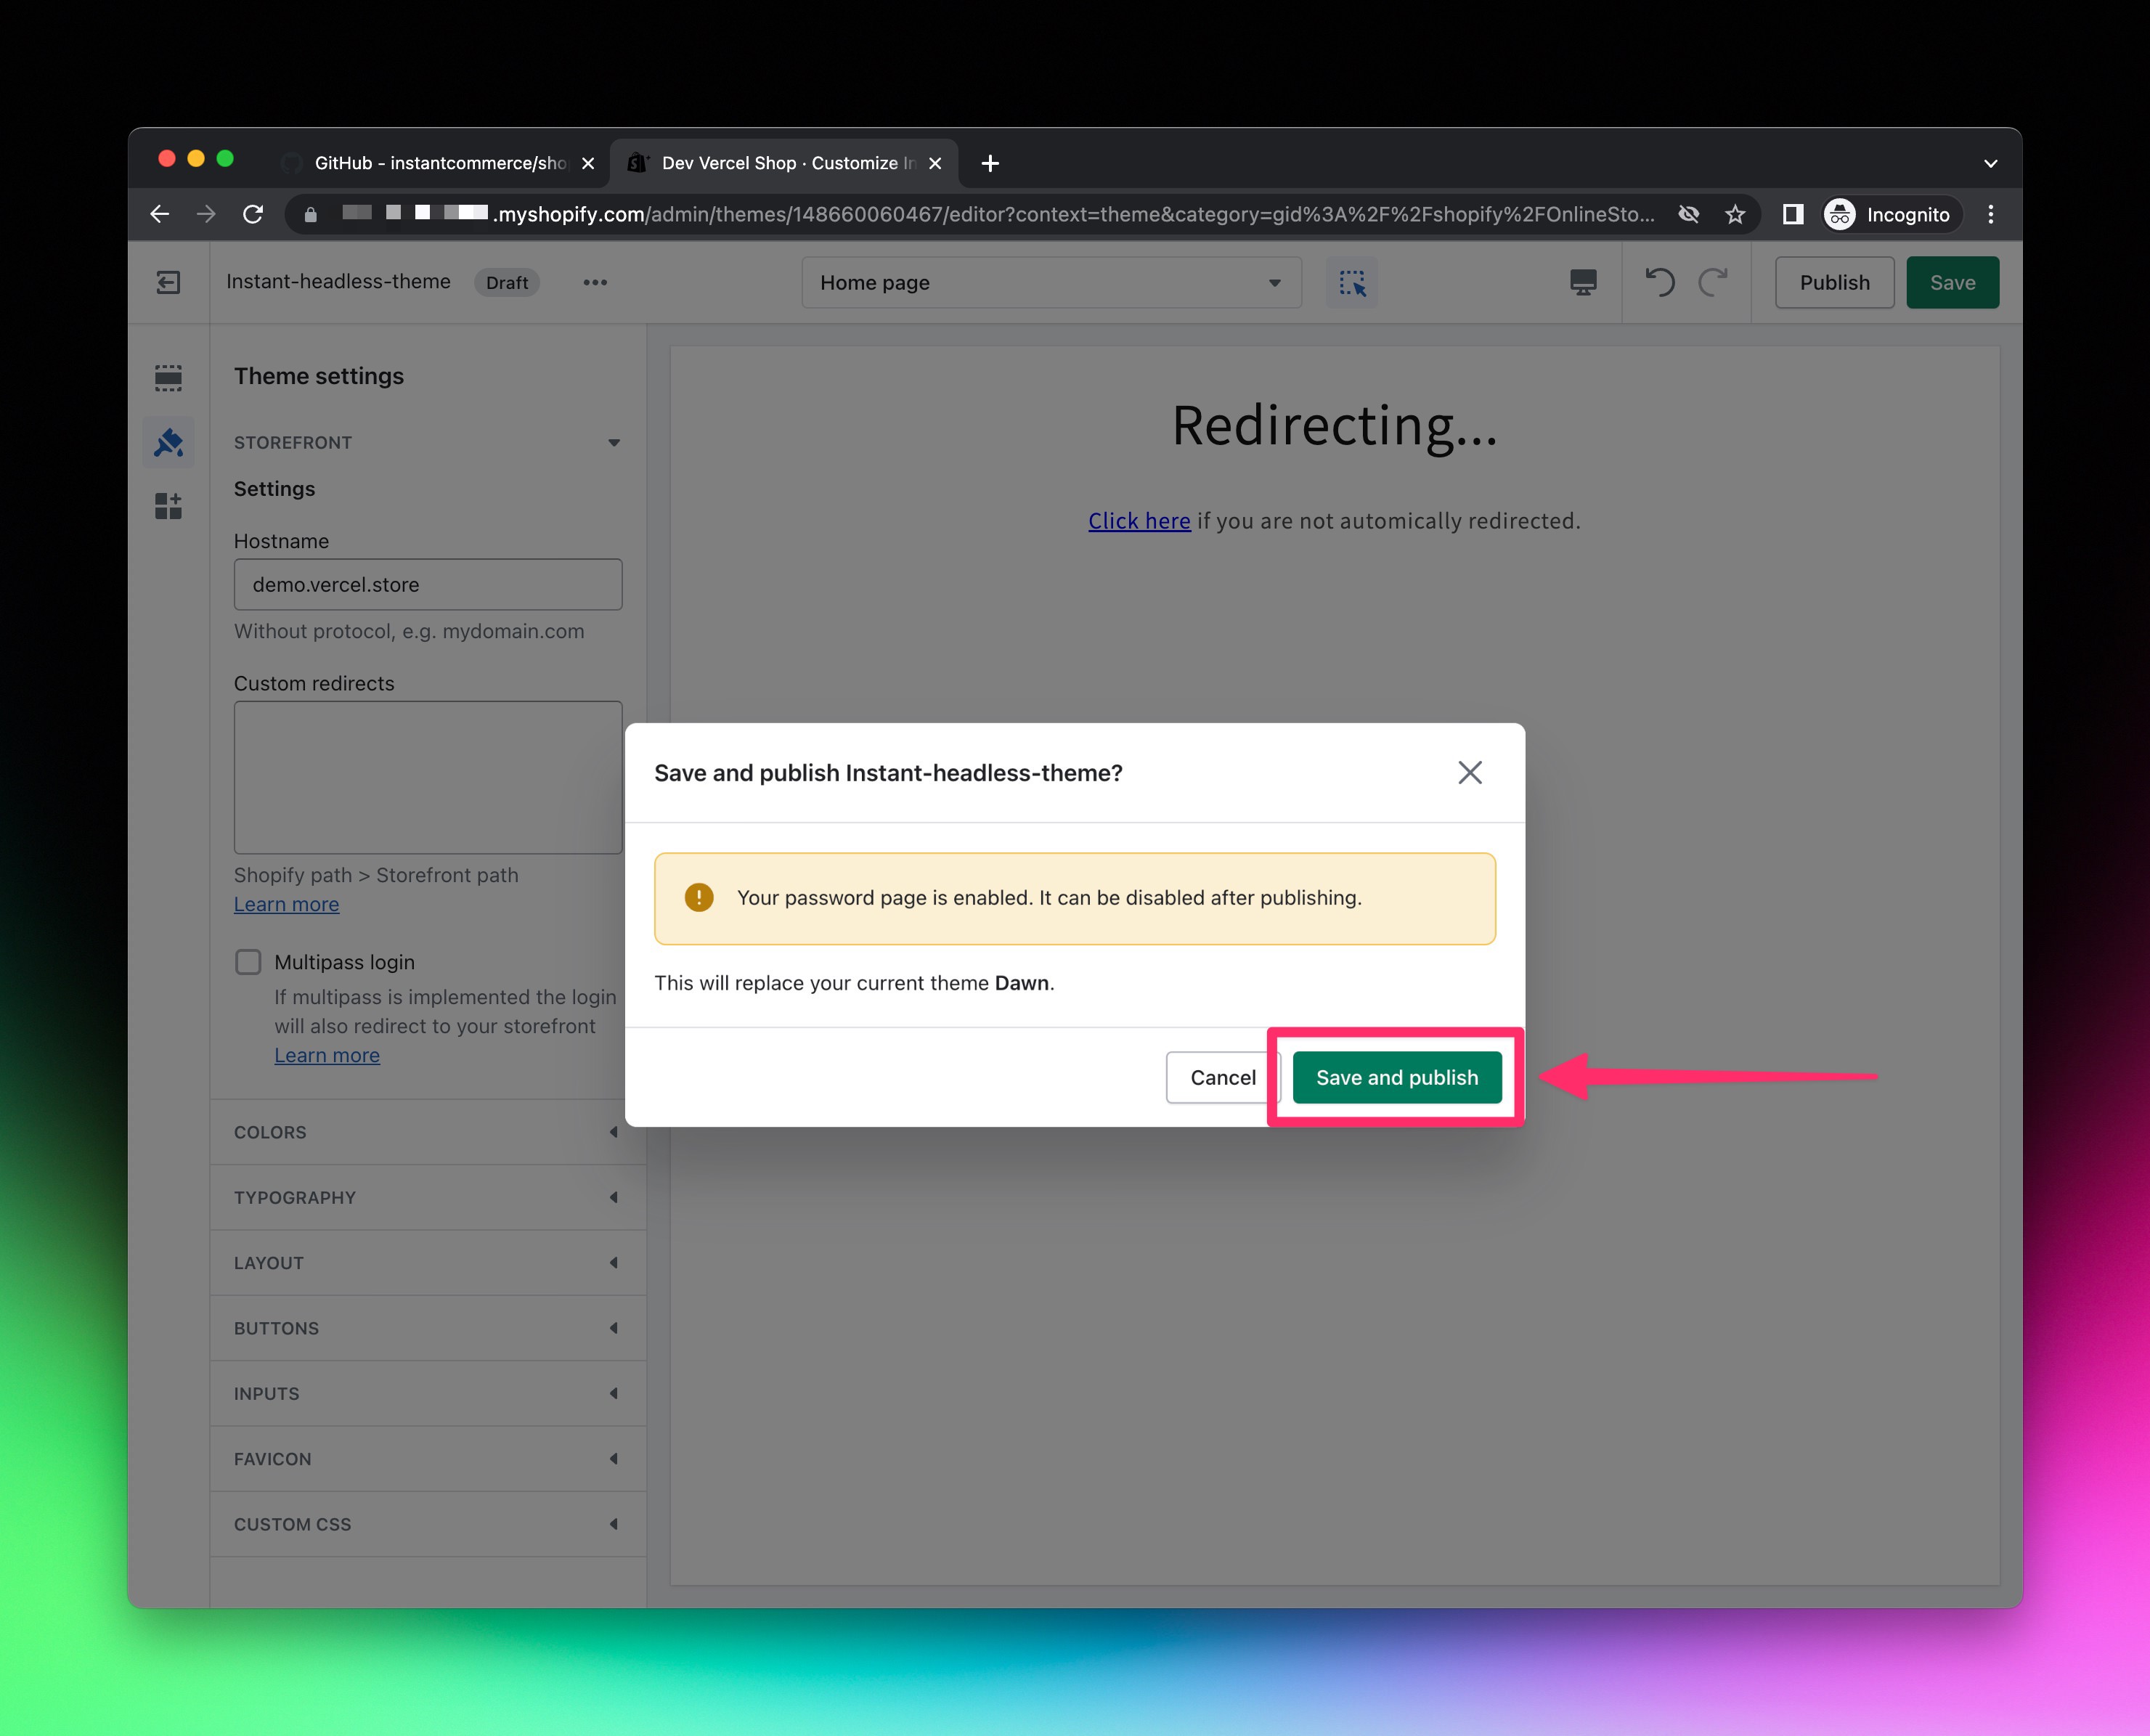
- The headless theme should now be your current active theme.
Since you're creating a headless Shopify store, you'll be in full control of your brand and design. However, there are still a few aspects we're leaving within Shopify's control.
- Checkout
- Emails
- Order status
- Order history
- Favicon (for any Shopify controlled pages)
You can use Shopify's admin to customize these pages to match your brand and design.
Expand to view detailed walkthrough
- Navigate to
https://SHOPIFY_STORE_SUBDOMAIN.myshopify.com/admin/settings/checkout. - Click the green
Customizebutton.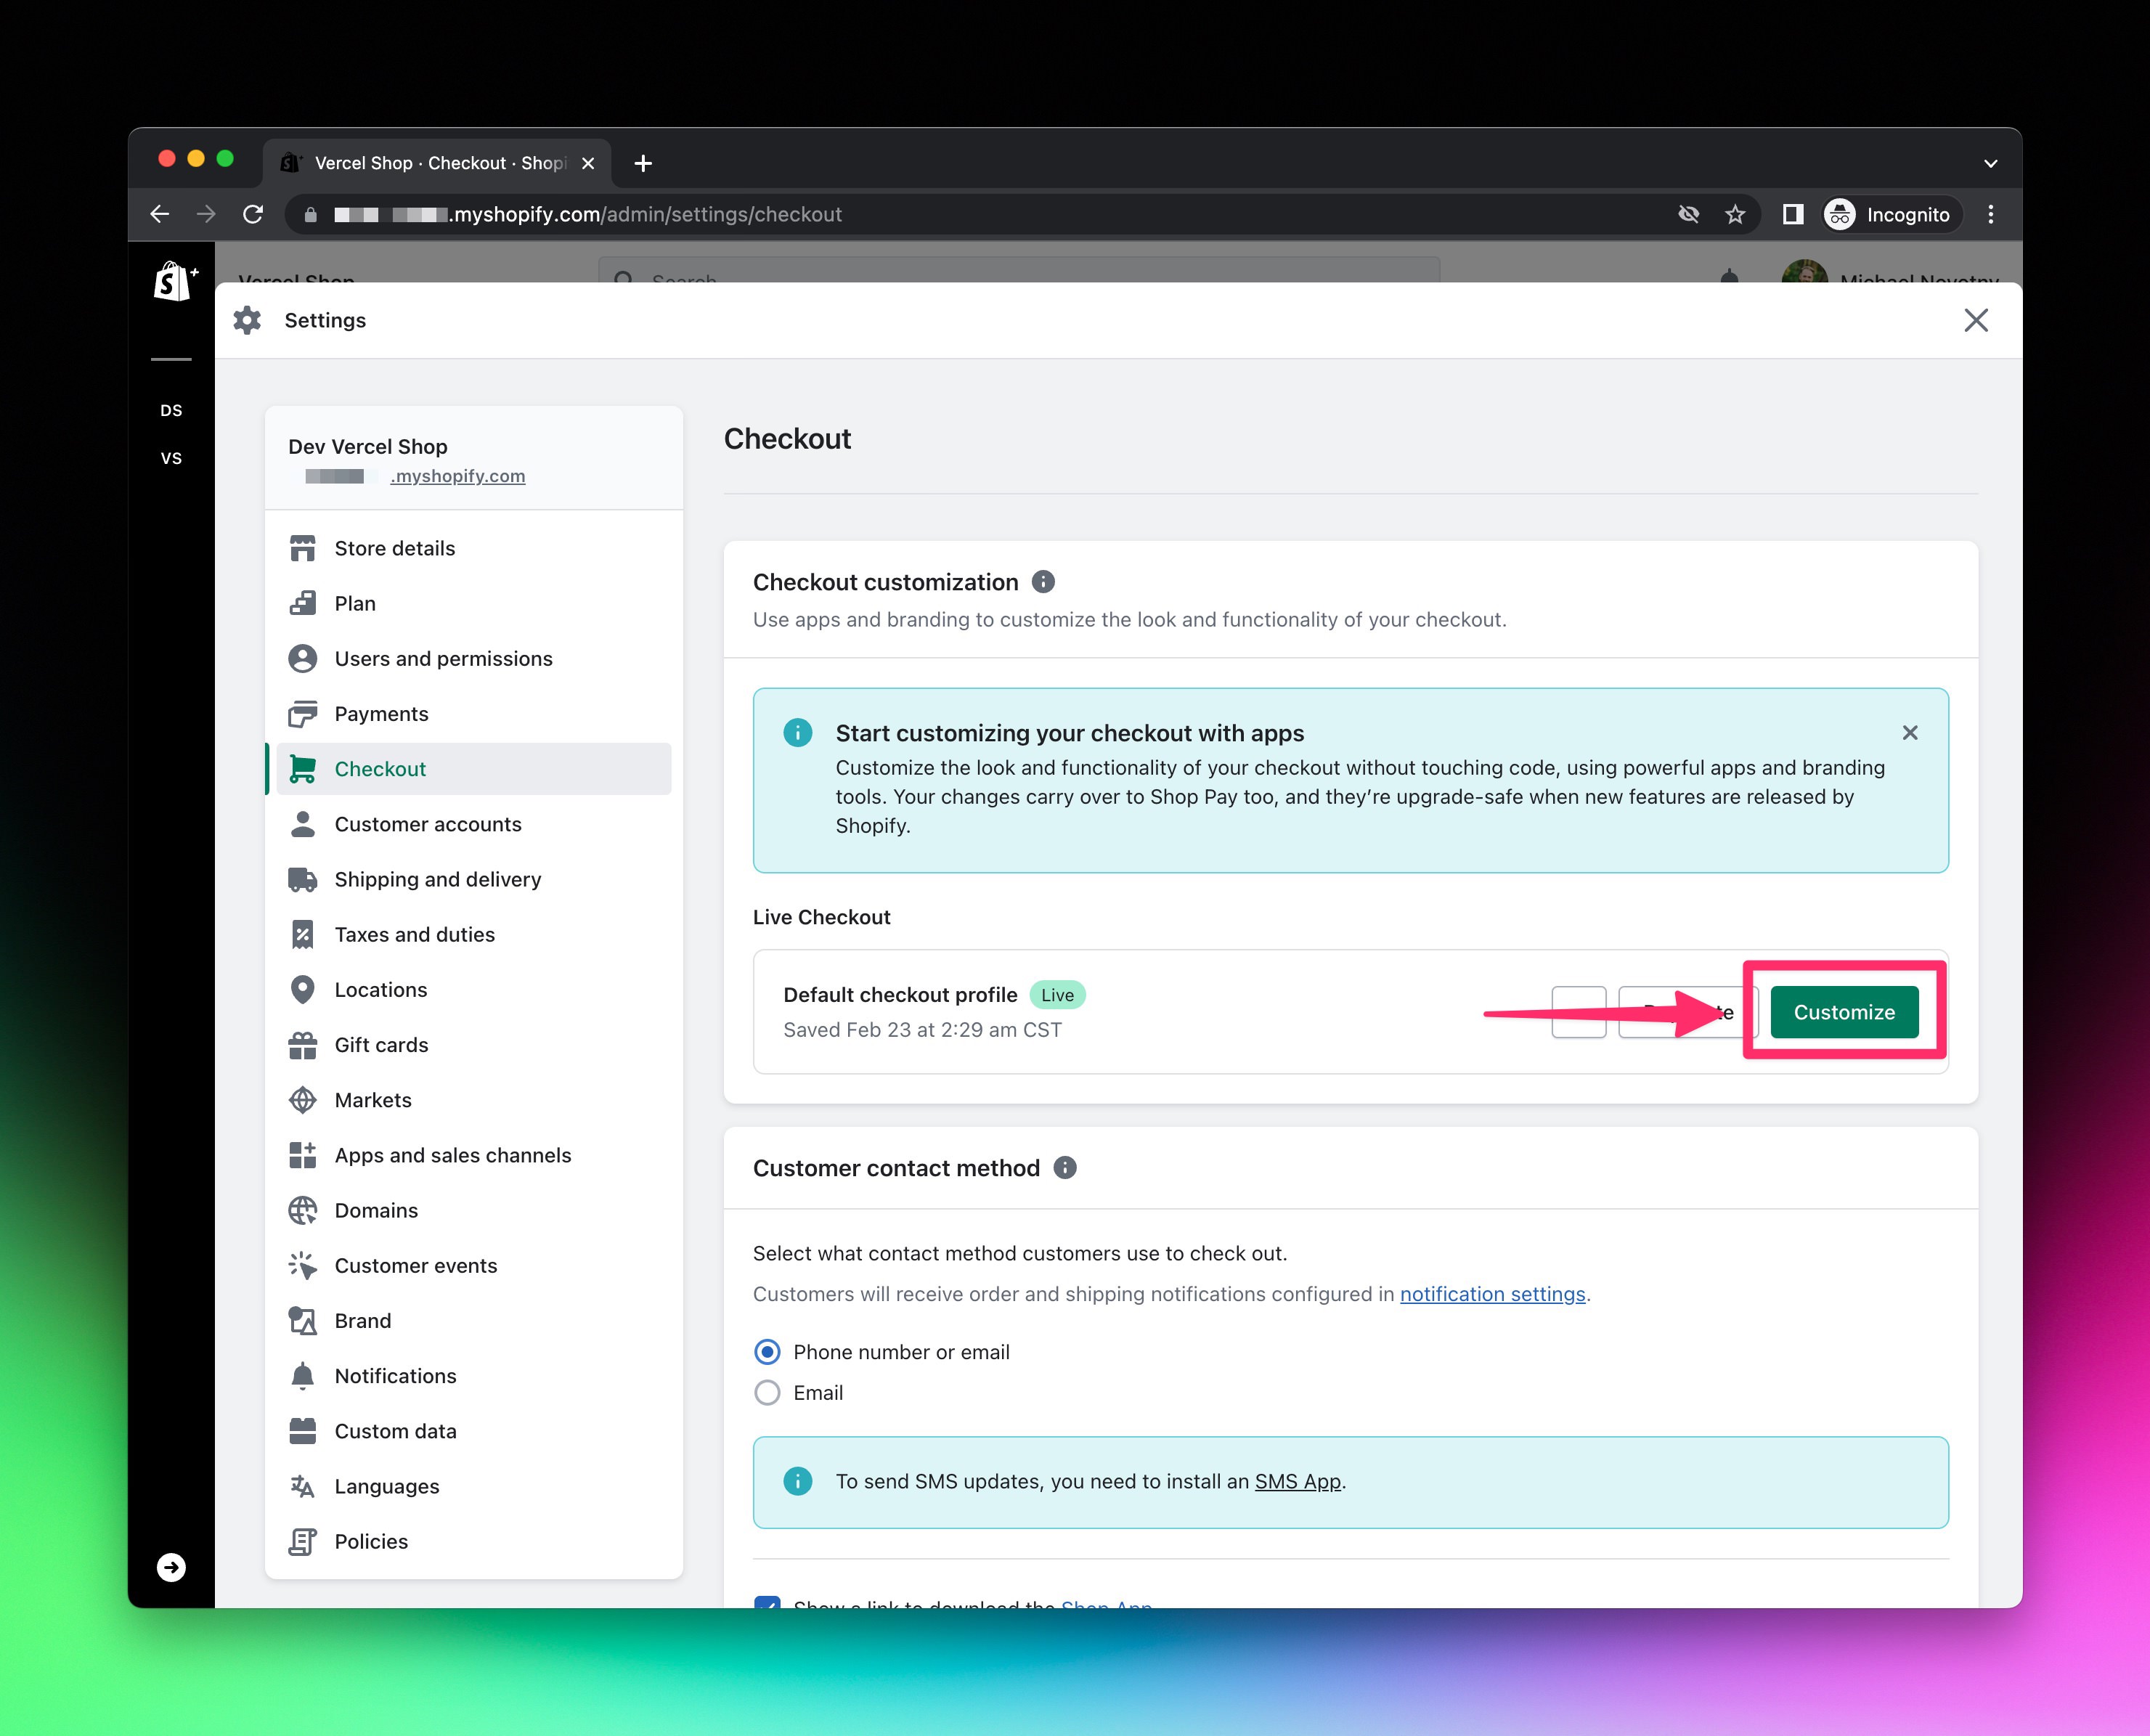
- Click
Branding(ie. the paintbrush icon) and customize your brand. Please note, there are three steps / pages to the checkout flow. Use the dropdown to change pages and adjust branding as needed on each page. ClickSavewhen you are done.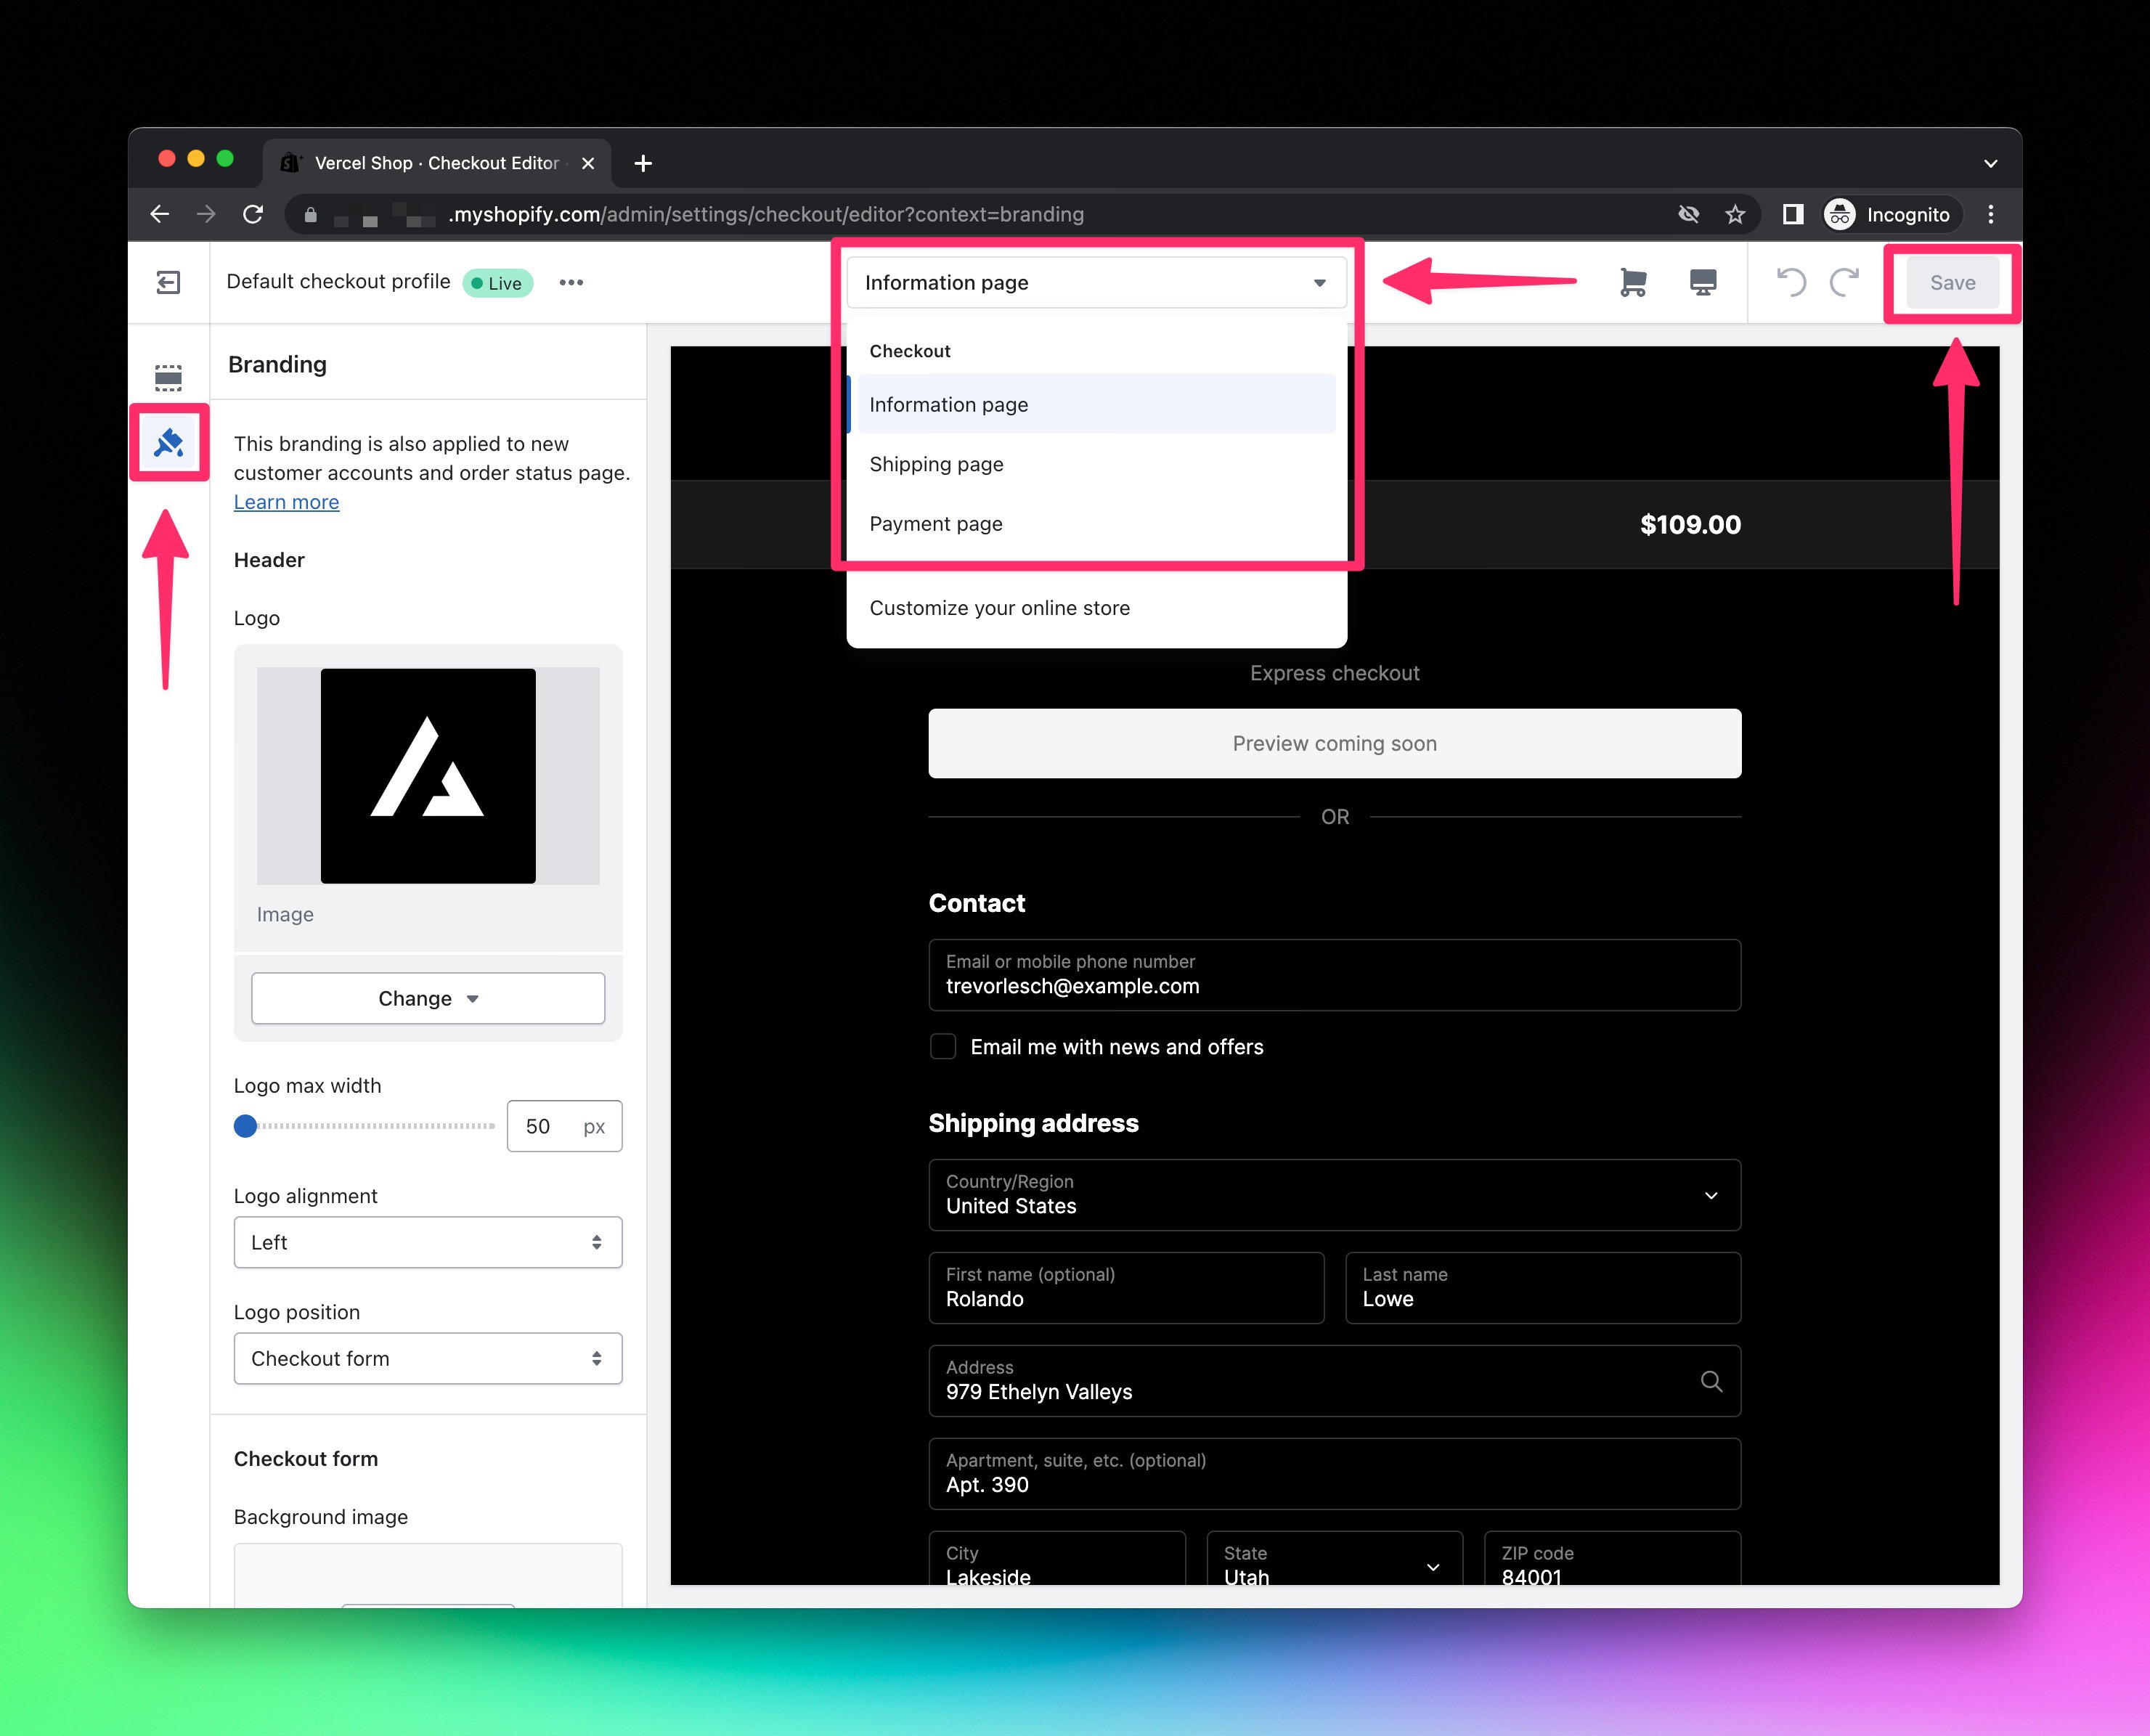
- Navigate to
https://SHOPIFY_STORE_SUBDOMAIN.myshopify.com/admin/settings/branding. - Customize settings to match your brand.

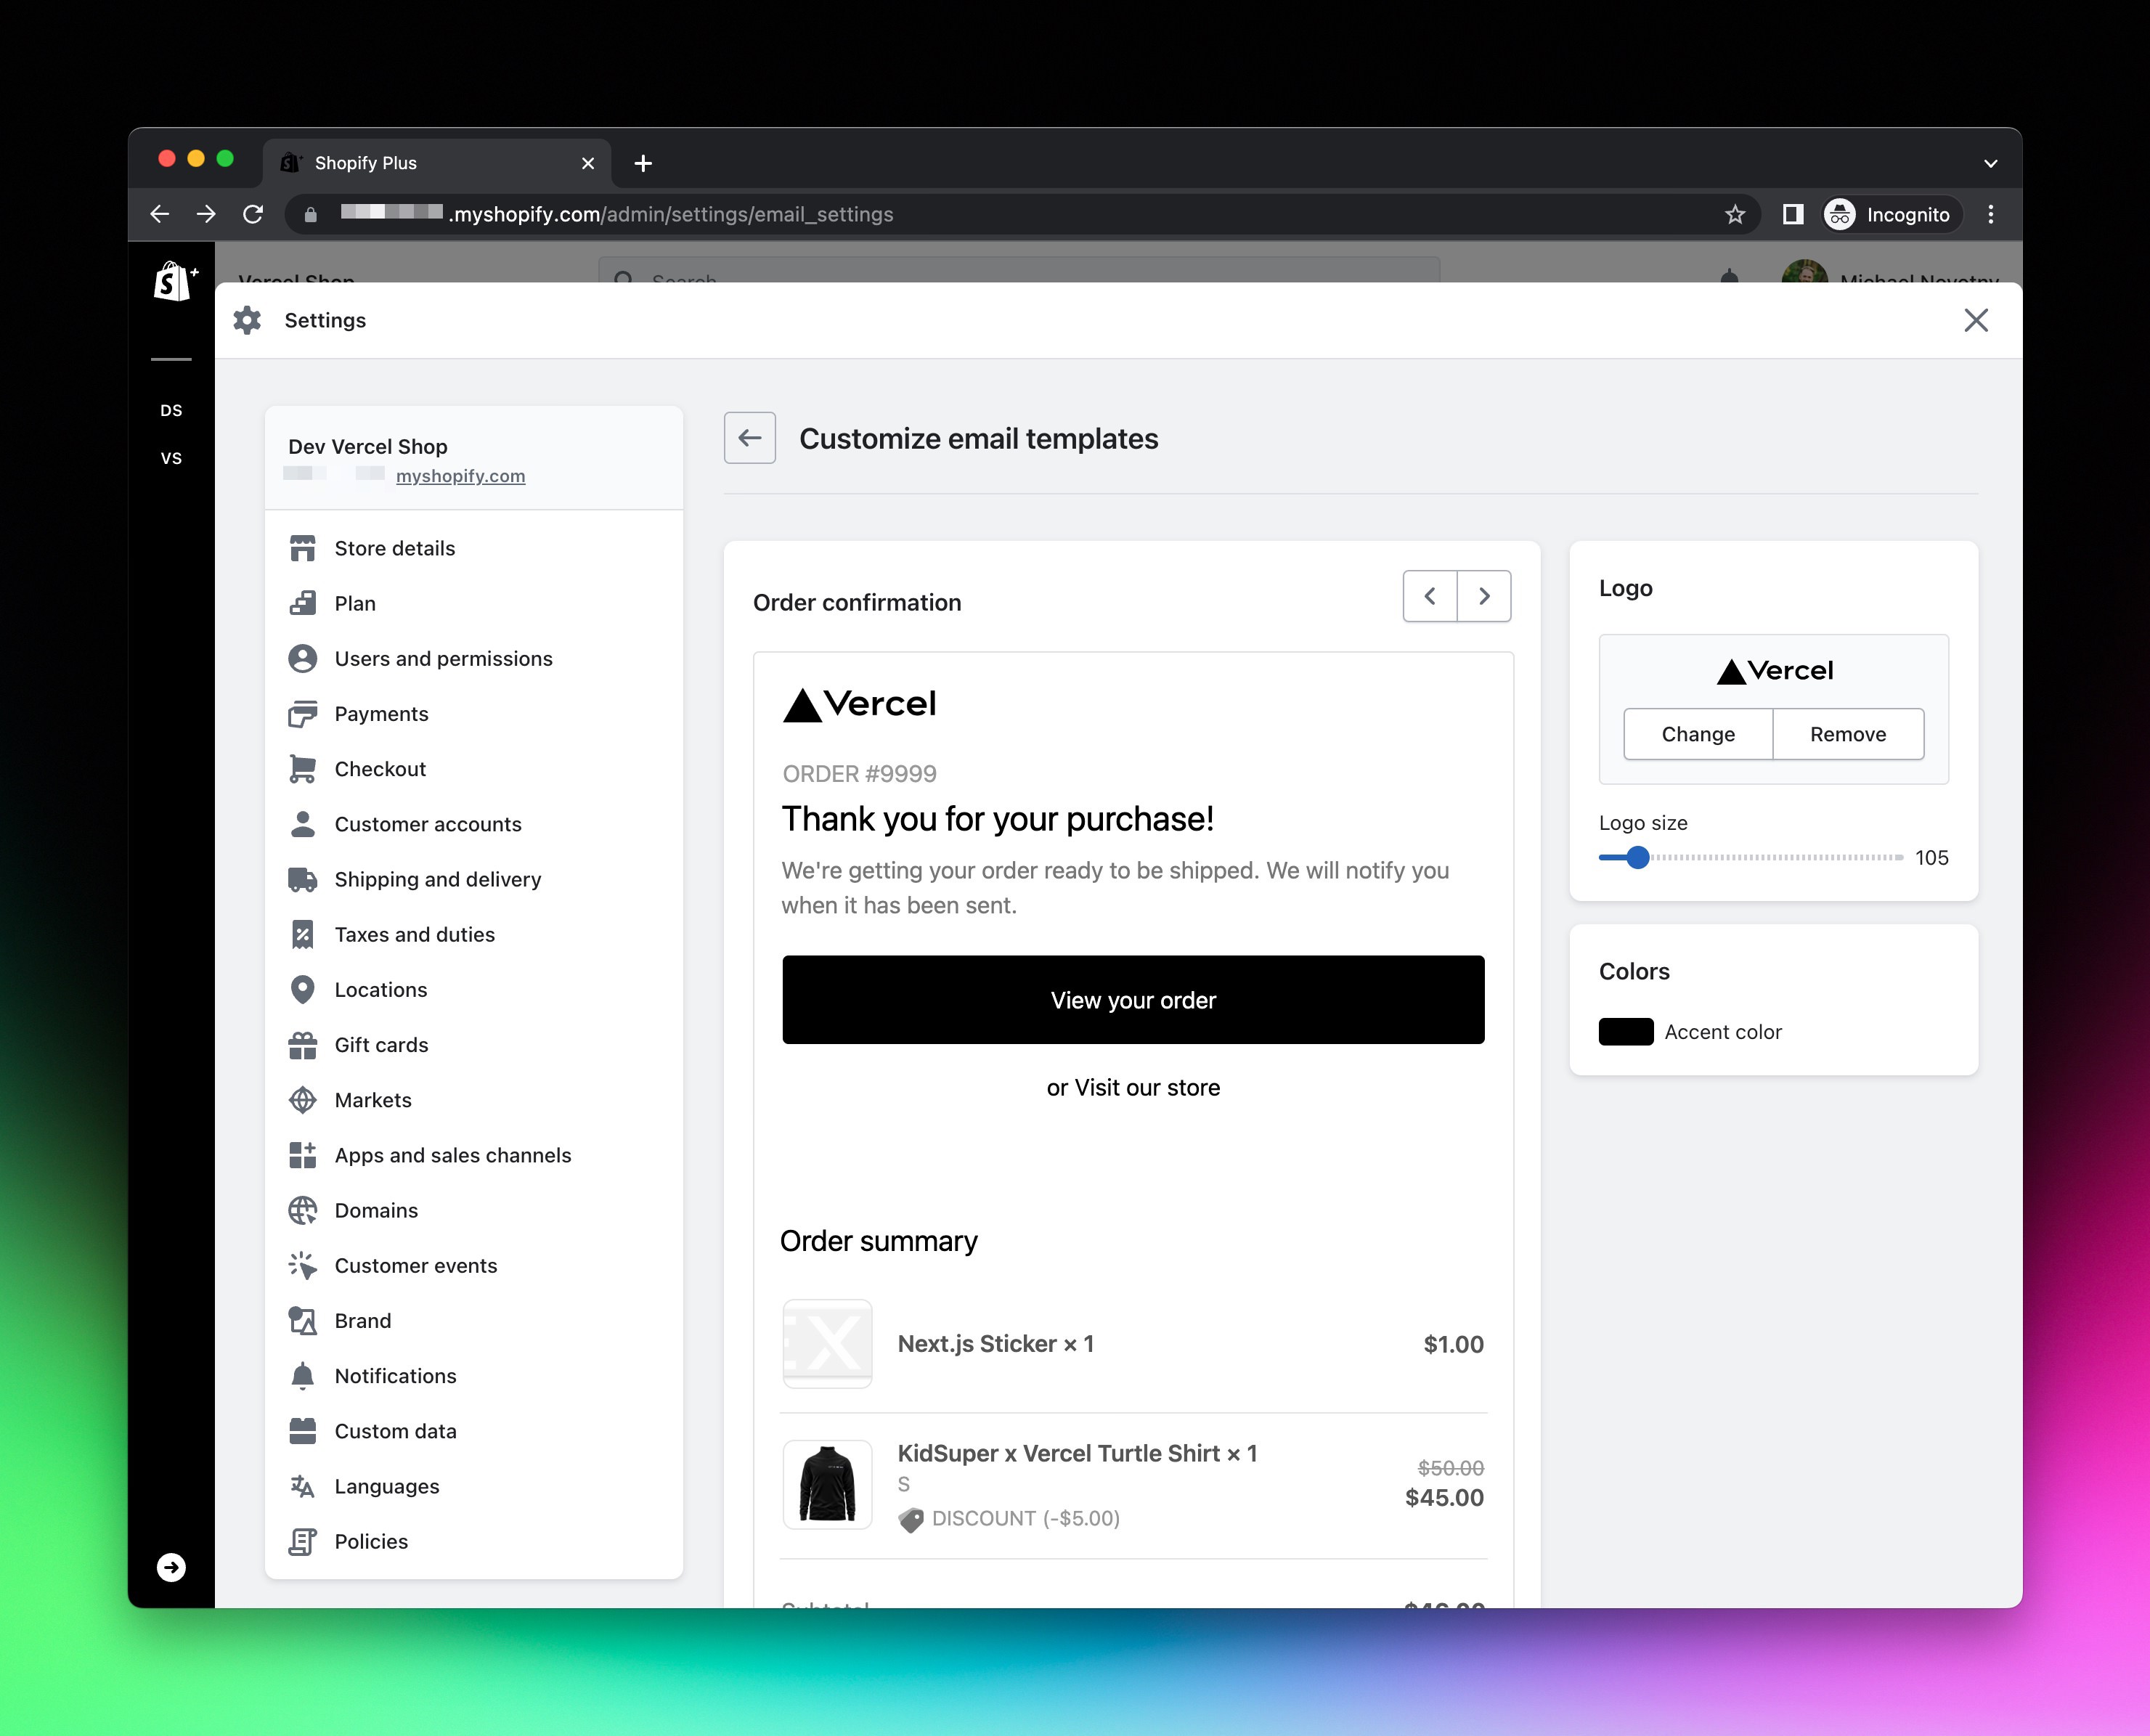
- Navigate to
https://SHOPIFY_STORE_SUBDOMAIN.myshopify.com/admin/settings/email_settings. - Customize settings to match your brand.
- Navigate to
https://SHOPIFY_STORE_SUBDOMAIN.myshopify.com/admin/themes. - Click the green
Customizebutton.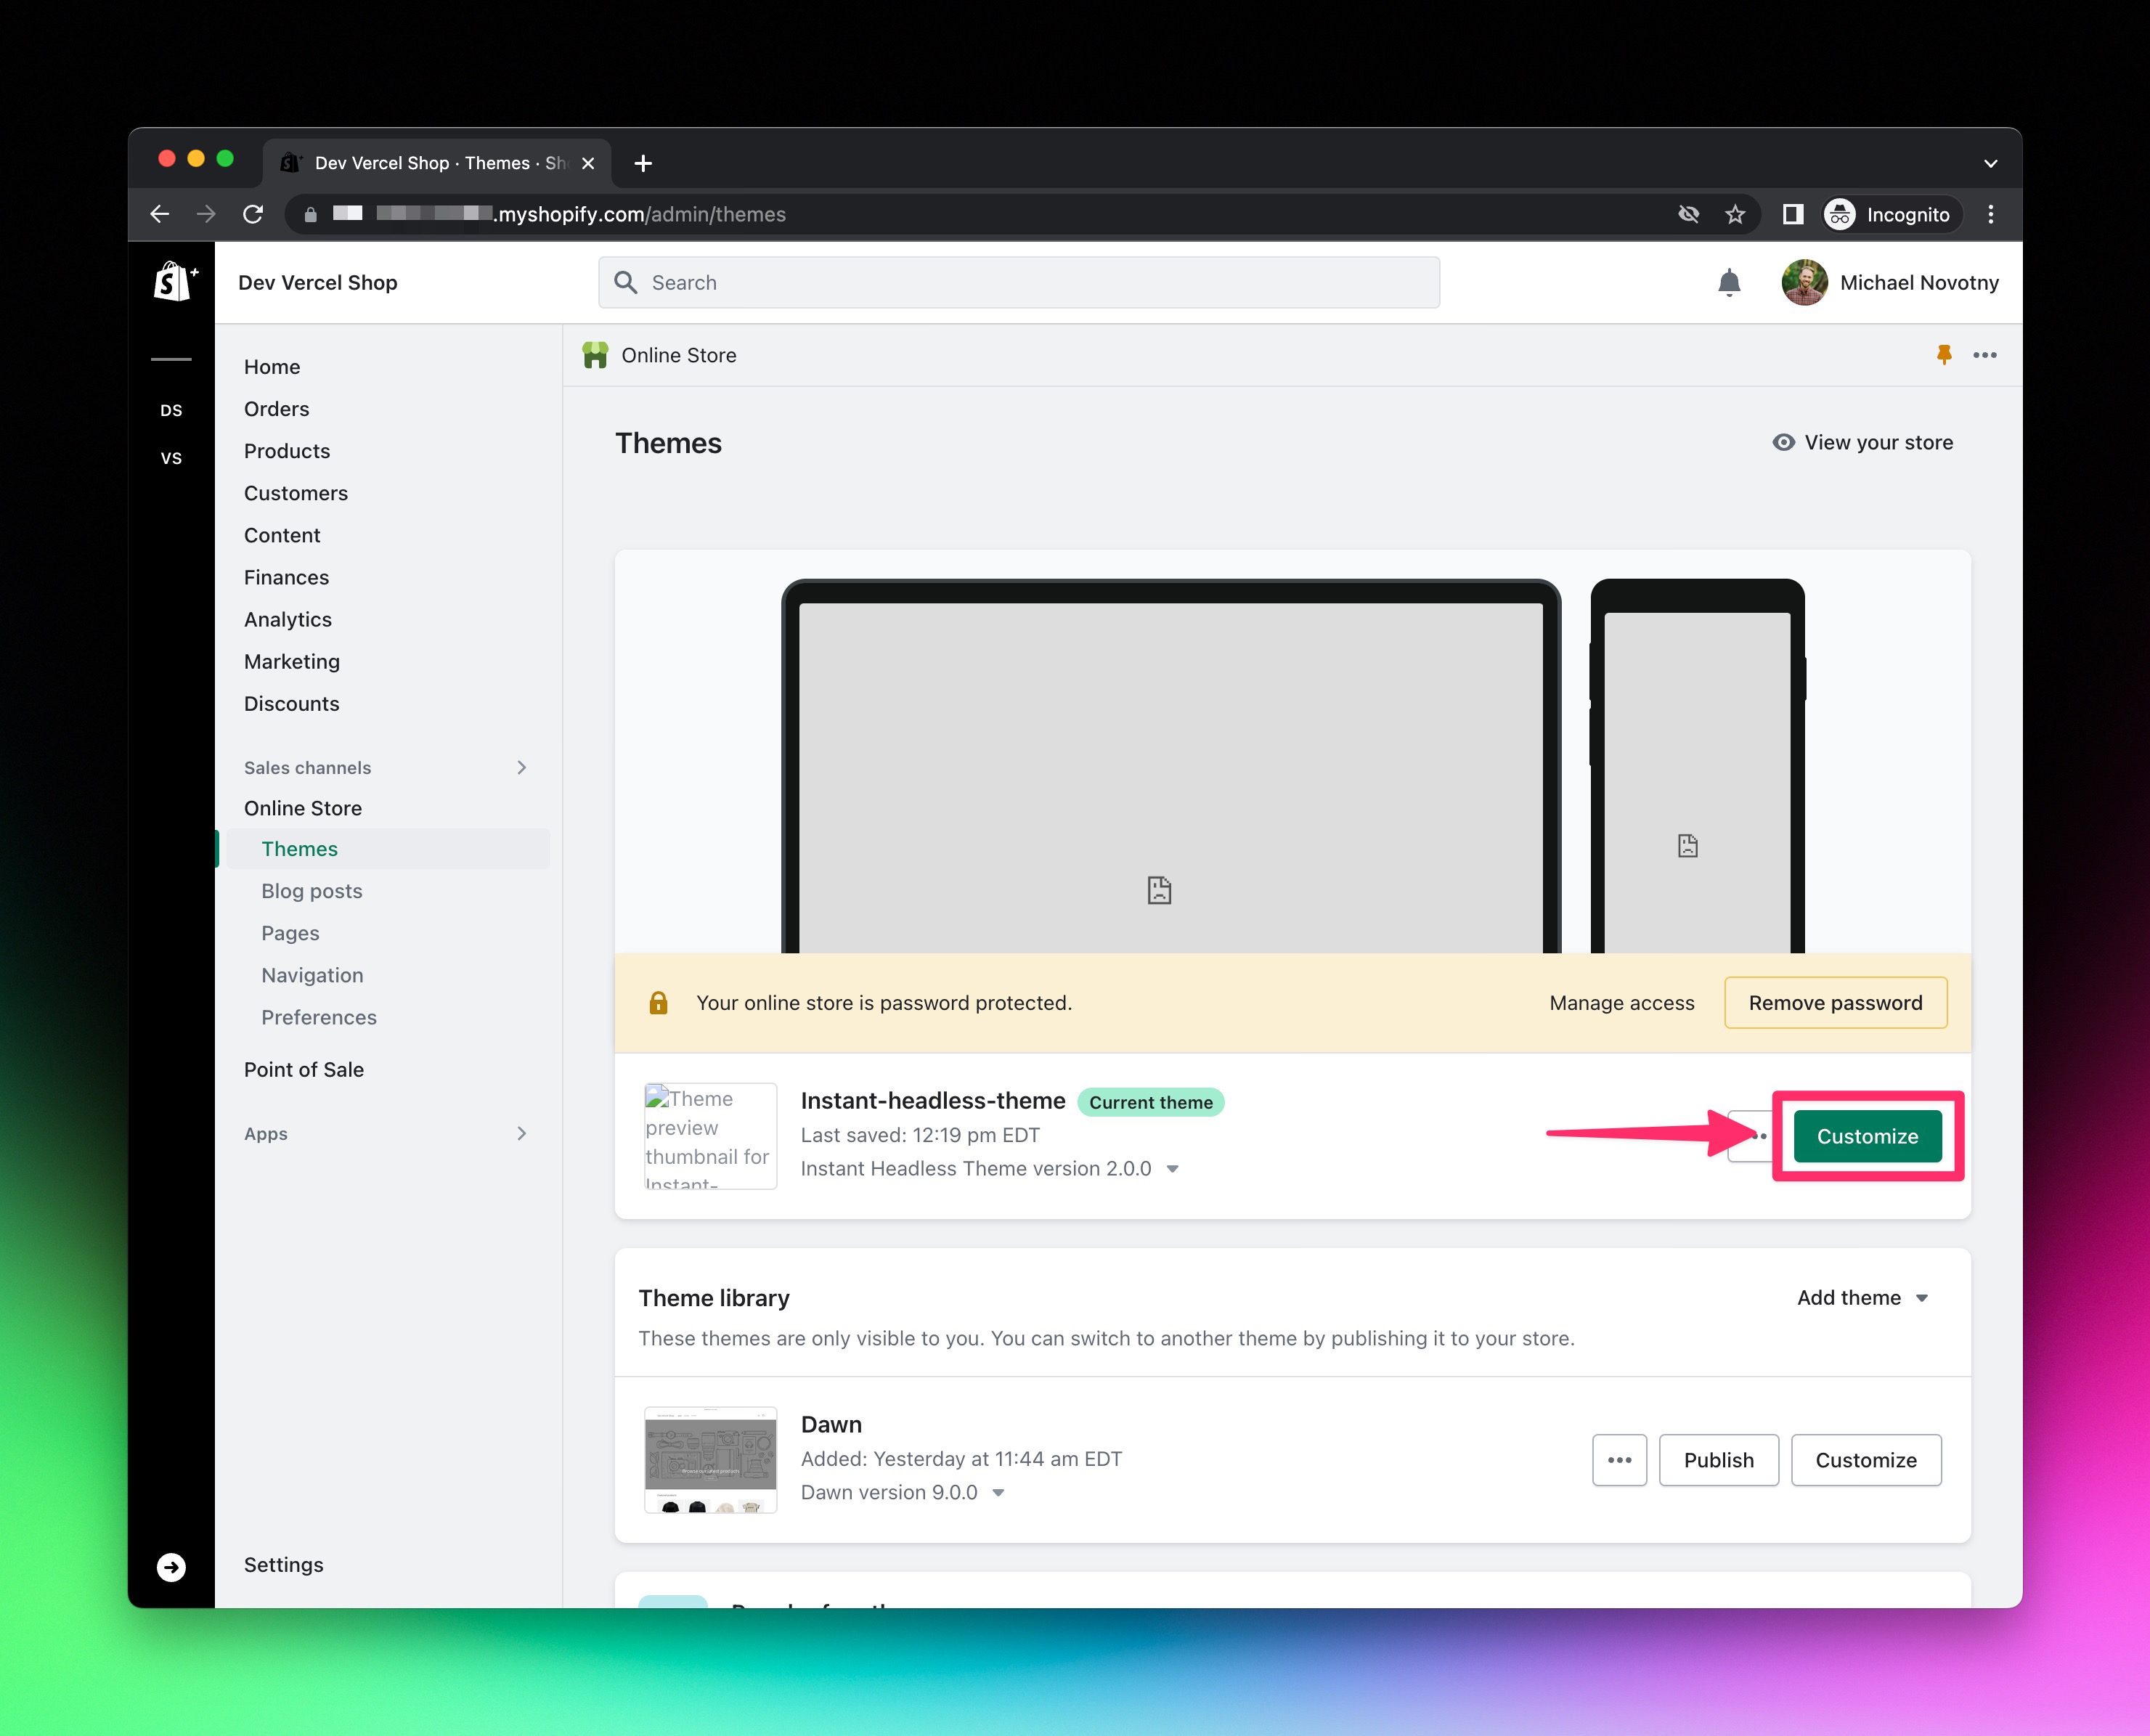
- Click
Theme settings(ie. the paintbrush icon), expand theFAVICONsection, upload favicon, then click theSavebutton.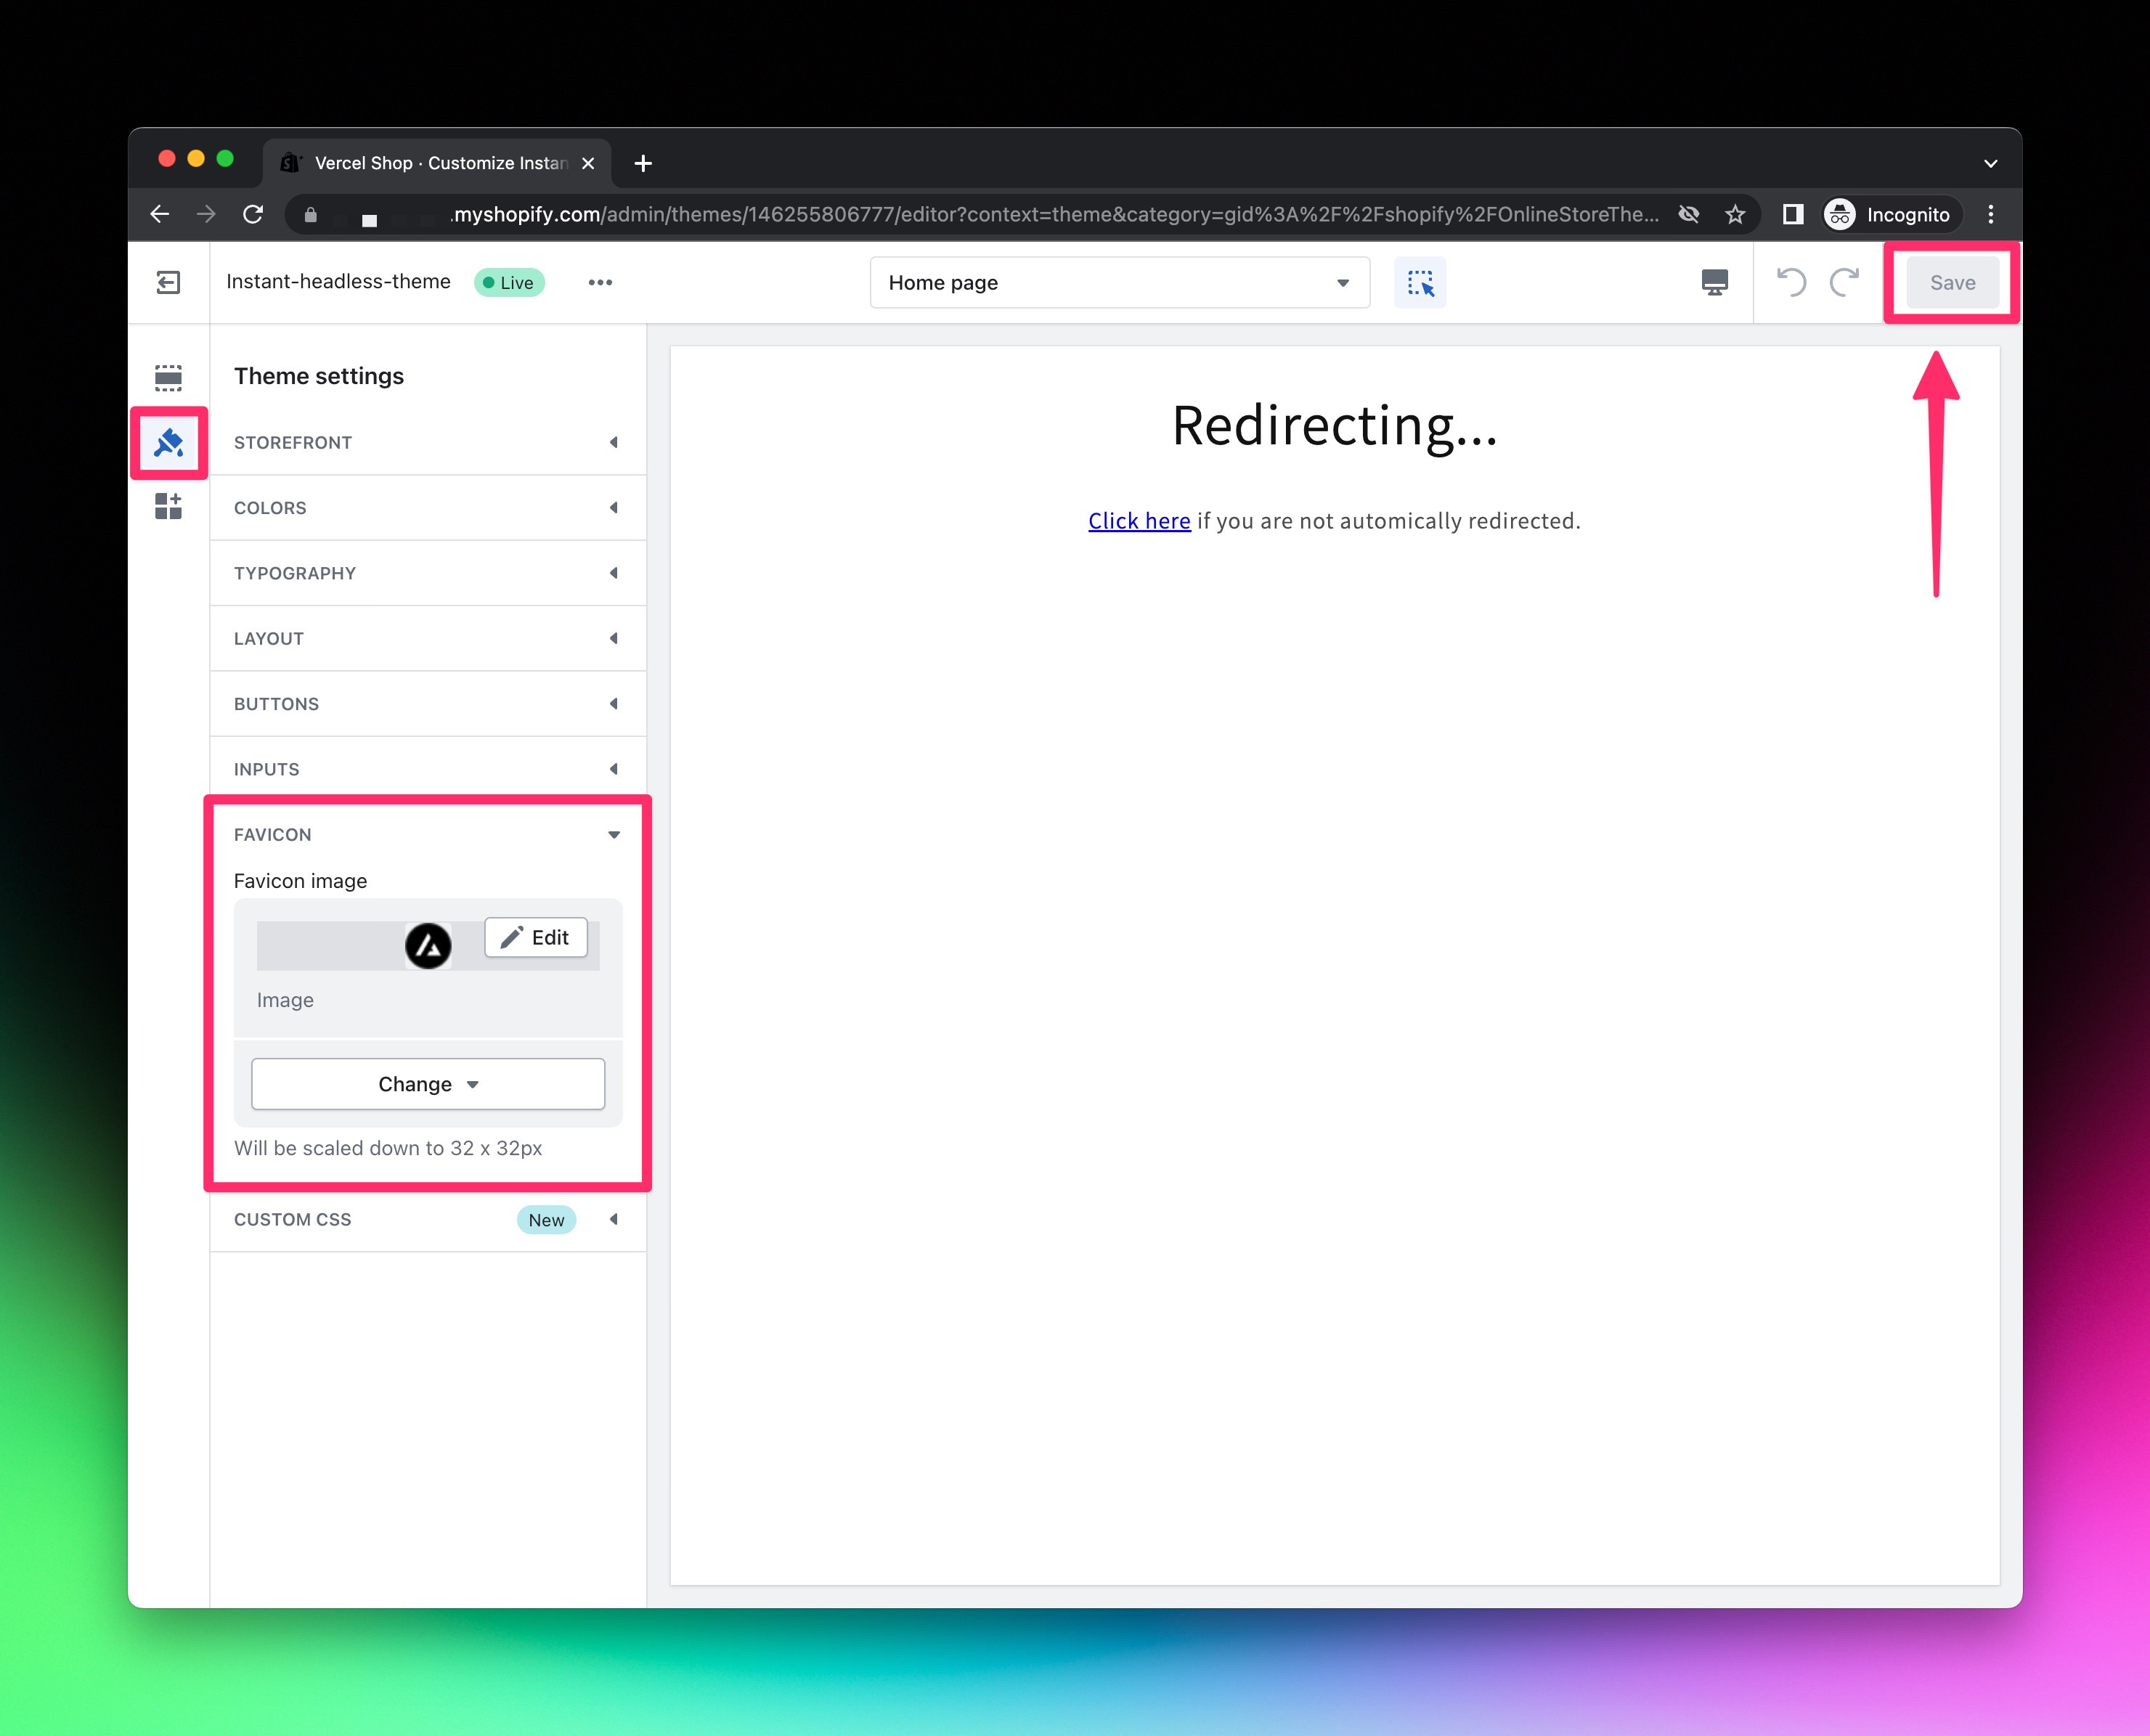
Coming soon.
Next.js Commerce is fully powered by Shopify in a truly headless and data driven way.
https://SHOPIFY_STORE_SUBDOMAIN.myshopify.com/admin/products
Only Active products are shown. Draft products will not be shown until they are marked as Active.
Active products can still be hidden and not seen by navigating the site, by adding a nextjs-frontend-hidden tag on the product. This tag will also tell search engines to not index or crawl the product. The product is still directly accessible via url. This feature is great for "secret" products you only want to people you share the url with.
Product options and option combinations are driven from Shopify options and variants. When selecting options on the product detail page, other option and variant combinations will be visually validated and verified for availability, like Amazon does.
Products that are active and "out of stock" are still shown on the site, but the ability to add the product to the cart is disabled.
https://SHOPIFY_STORE_SUBDOMAIN.myshopify.com/admin/collections
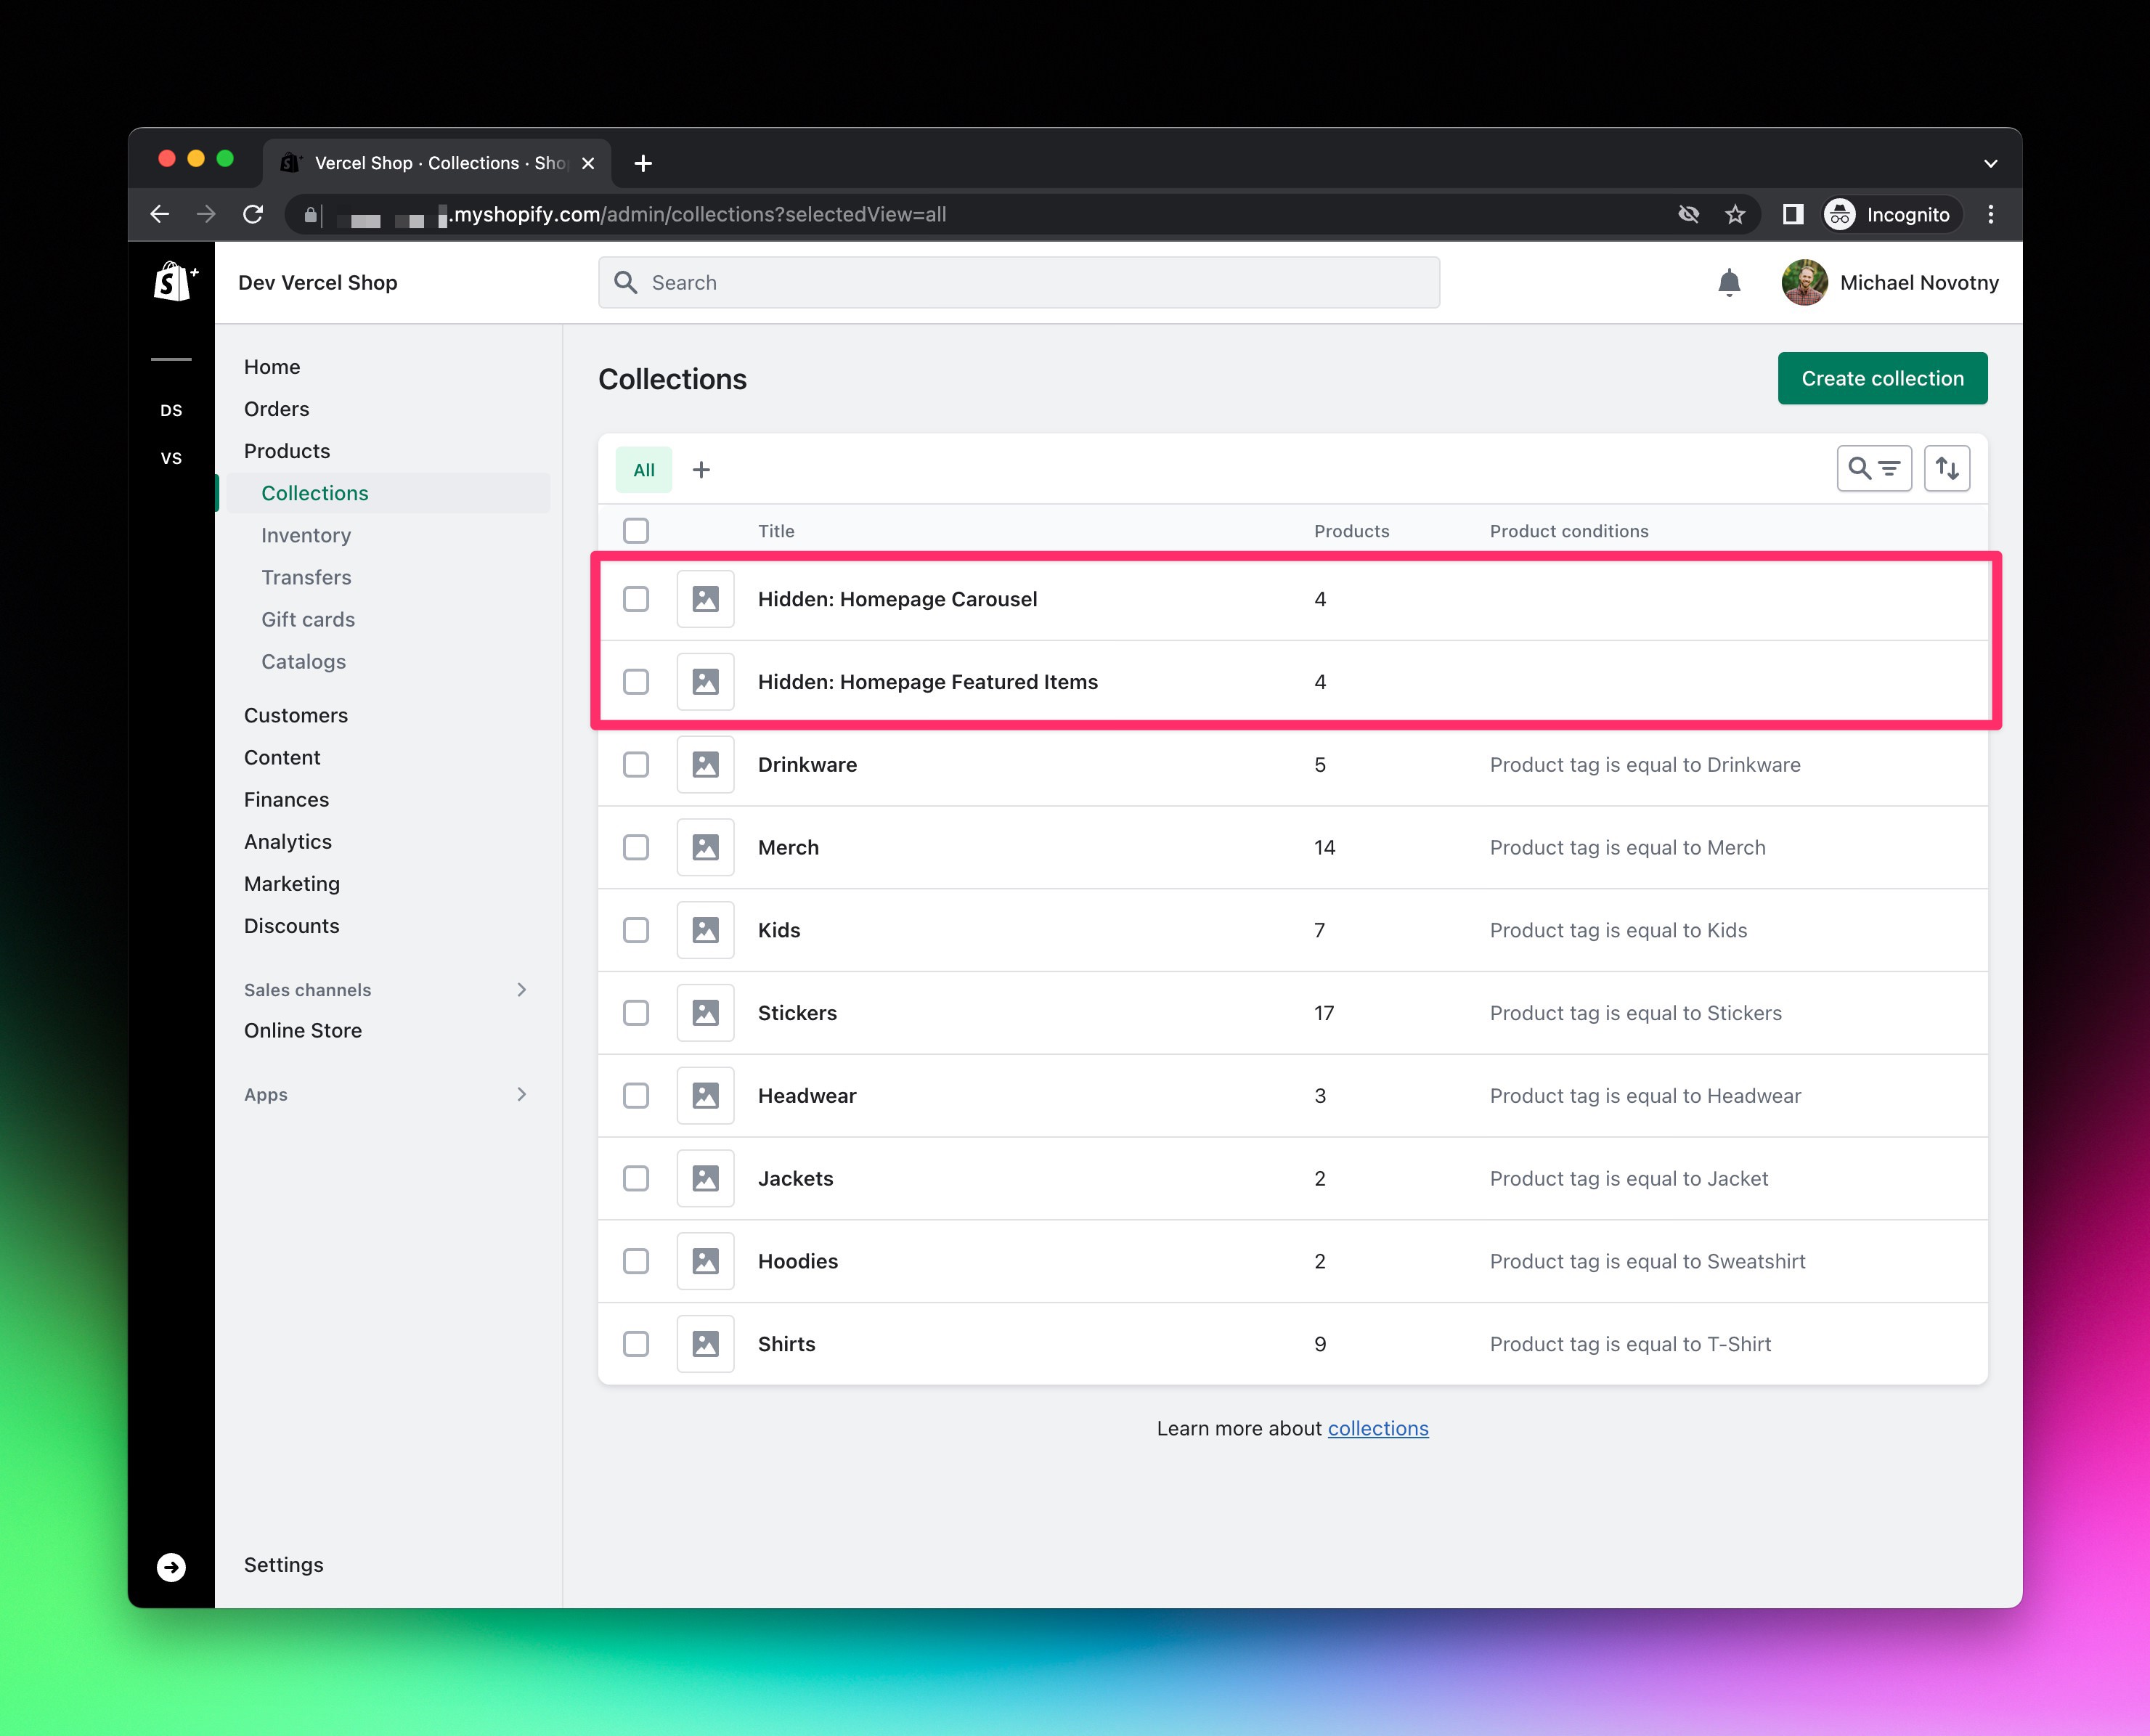
Create whatever collections you want and configure them however you want. All available collections will show on the search page as filters on the left, with one exception...
Any collection names that start with the word "hidden" will not show up on the headless front end. The Next.js Commerce theme comes pre-configured to look for two hidden collections. Collections were chosen for this over tags so that order of products could be controlled (collections allow for manual ordering).
Create the following collections:
Hidden: Homepage Featured Items-- Products in this collection are displayed in the three featured blocks on the homepage.Hidden: Homepage Carousel-- Products in this collection are displayed in the auto-scrolling carousel section on the homepage.

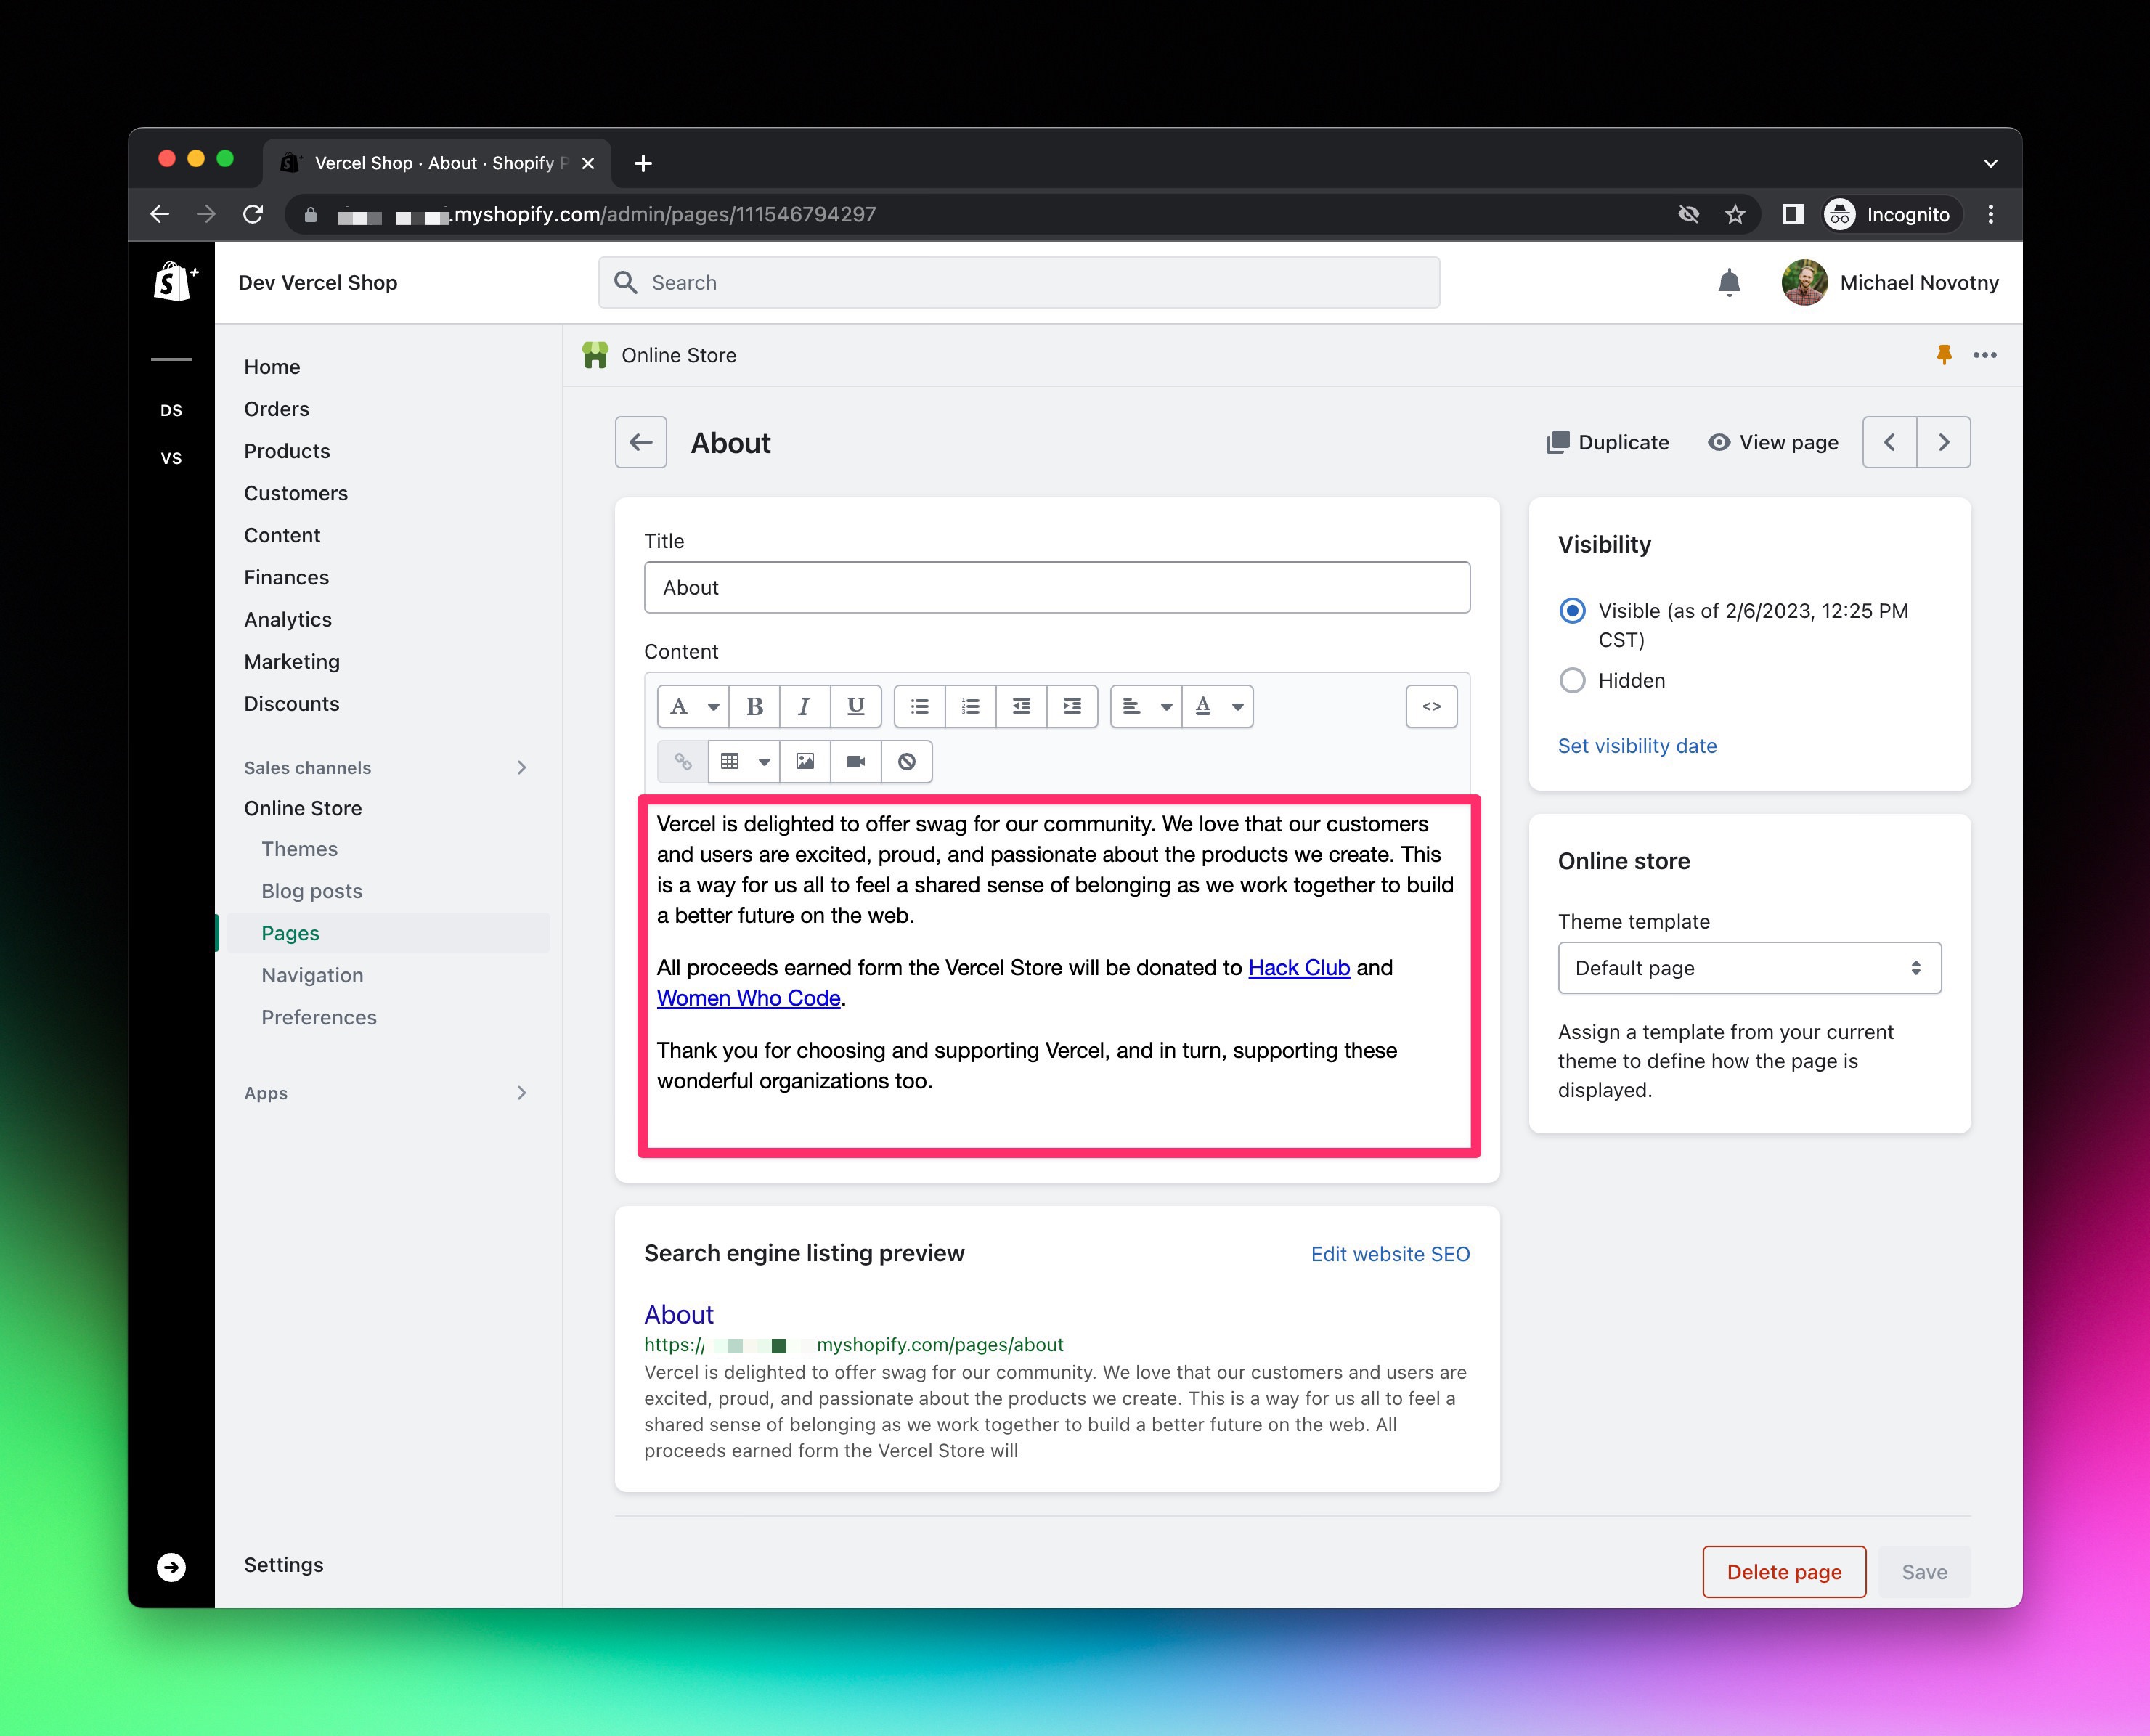
https://SHOPIFY_STORE_SUBDOMAIN.myshopify.com/admin/pages
Next.js Commerce contains a dynamic [page] route. It will use the value to look for a corresponding page in Shopify. If a page is found, it will display its rich content using Tailwind's prose. If a page is not found, a 404 page is displayed.

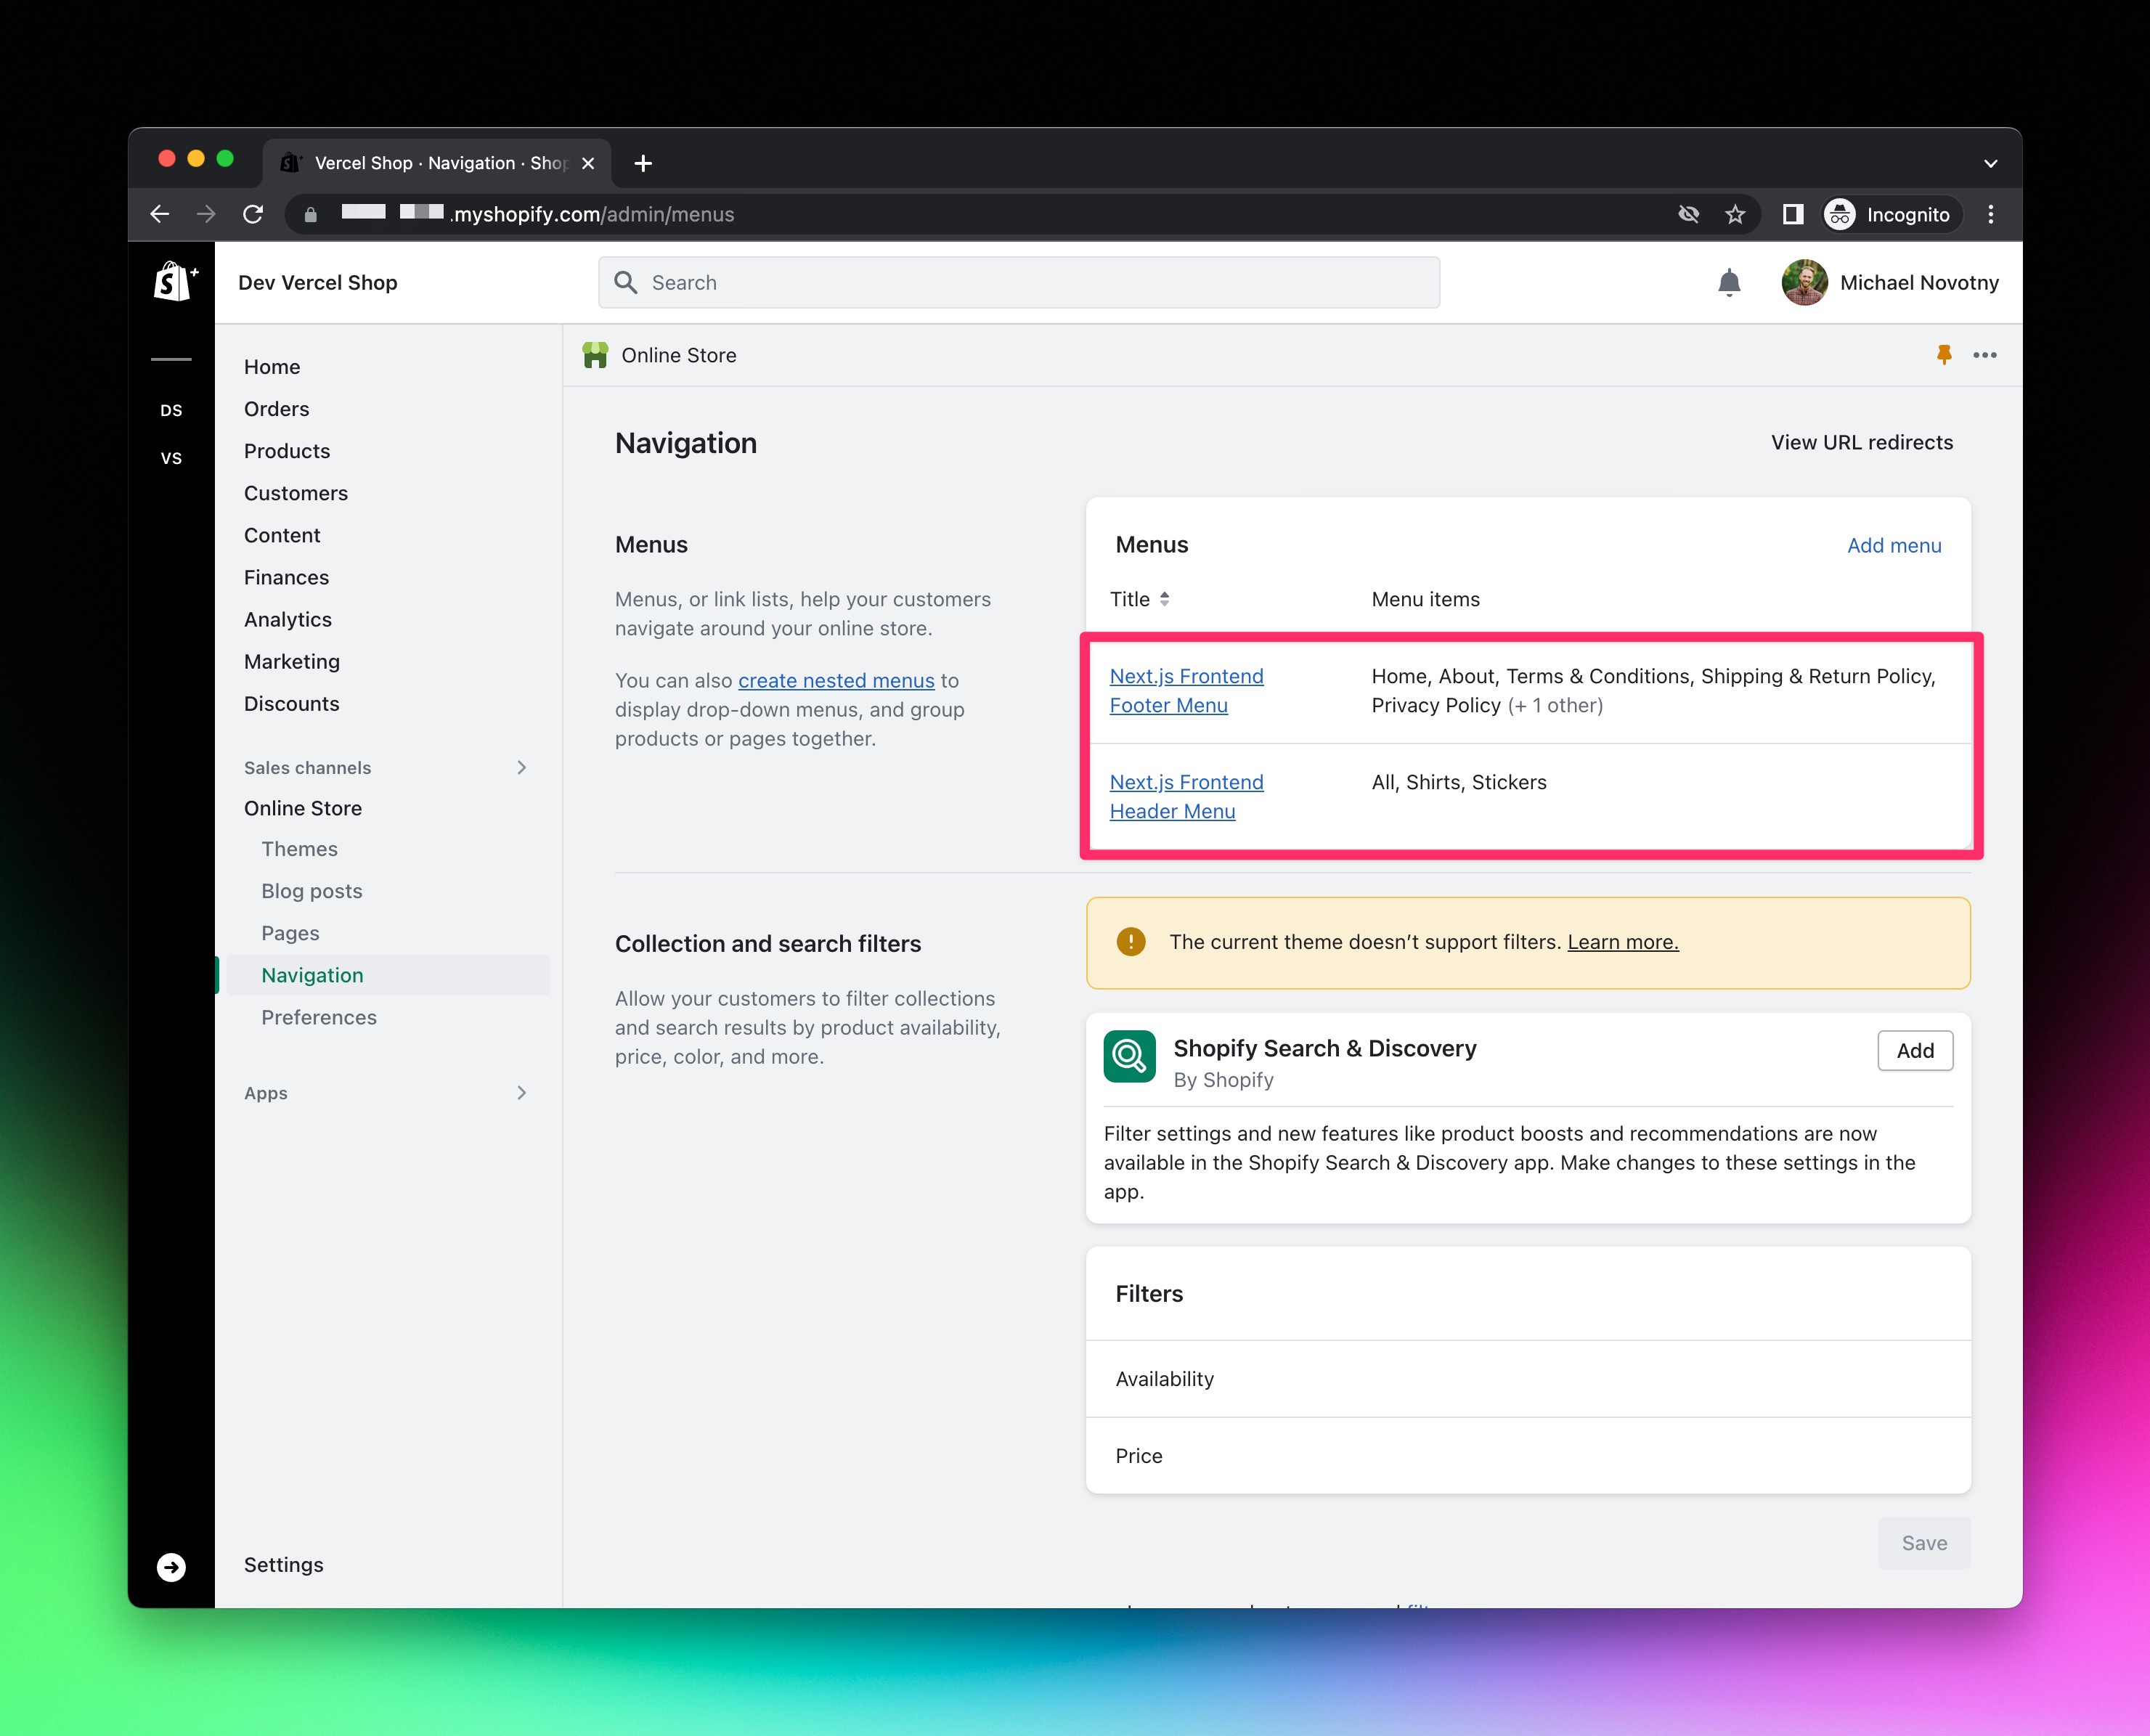
https://SHOPIFY_STORE_SUBDOMAIN.myshopify.com/admin/menus
Next.js Commerce's header and footer navigation is pre-configured to be controlled by Shopify navigation menus. This means you have full control over what links go here. They can be to collections, pages, external links, and more.
Create the following navigation menus:
Next.js Frontend Header Menu-- Menu items to be shown in the headless frontend header.Next.js Frontend Footer Menu-- Menu items to be shown in the headless frontend footer.

Shopify's products, collections, pages, etc. allow you to create custom SEO titles and descriptions. Next.js Commerce is pre-configured to display these custom values, but also comes with sensible default fallbacks if they are not provided.


