GithubHelp home page GithubHelp logo

blog's Introduction

blog's People

Contributors

github-actions[bot] avatar hackmd-deploy avatar xiaotiandada avatar

Stargazers

 avatar  avatar  avatar  avatar  avatar  avatar  avatar

Watchers

 avatar  avatar  avatar

blog's Issues

dfs 深度优先搜索【js】

2019-08-19 12:32:52

资料

题目: https://www.spoj.com/problems/PT07Z/

https://zh.wikipedia.org/wiki/%E6%A0%91_(%E5%9B%BE%E8%AE%BA)

谢谢岛老师的教学

岛娘blog

岛娘Github

岛娘Youtube

code source

Go

下面根据上面资料的wiki图来生成的点和边 看不见可能需要科学上网

点: 1 2 3 4 5 6

边: 14 24 34 45 56

设置顶点

使用 Map https://developer.mozilla.org/zh-CN/docs/Web/JavaScript/Reference/Global_Objects/Map

let vertexLen = 6; // 顶点数
let vertex = new Map(); // 顶点数据集合 map 可以设置键对值 0 1 2 3 4 5 or 1 2 3 4 5 6 or A B C D E F G ... ...

设置顶点和边

/**
 * 设置顶点
 * @param {String || Number} v 顶点
 */
const setVertex = v => vertex.set(v, []);
/**
 * 设置边
 * @param {String || Number} v1 点
 * @param {String || Number} v2 点
 */
const setVertexEdge = (v1, v2) => {
  vertex.get(v1).push(v2);
  vertex.get(v2).push(v1);
};

// 设置点
for (let i = 1; i <= vertexLen; i++) setVertex(i);

// 定义边
let vertexEdge = [[1, 4], [2, 4], [3, 4], [4, 5], [5, 6]];

// 设置边
for (let i = 0; i < vertexEdge.length; i++)
  setVertexEdge(vertexEdge[i][0], vertexEdge[i][1]);

得到的集合

Map {
  1 => [ 4 ],
  2 => [ 4 ],
  3 => [ 4 ],
  4 => [ 1, 2, 3, 5 ],
  5 => [ 4, 6 ],
  6 => [ 5 ] }

dfs

vertex 结构目前是这样点 ⬆️️️️️️️️️️ ⬆️️️️️️️️️️ ⬆️️️️️️️️️️

这个方法主要通过存放一个map保存访问状态

参考地址 https://www.geeksforgeeks.org/implementation-graph-javascript/

/**
 * dfs
 * @param {String || Number} startNode 开始点
 */
const dfs = startNode => {
  let visited = new Map(); // 保持和顶点结构一样
  for (let i = 1; i <= vertexLen; i++) visited.set(i, false); // 设置访问状态

  // dfs 方法
  const dfsFunc = (startNode, visited) => {
    let z = 0; // 长度
    visited.set(startNode, true); // 第一个点设置已访问
    let get_next = vertex.get(startNode); // 获得顶点的所有临接点
    for (let i = 0; i < get_next.length; i++) {
      // 循环临接点
      let get_elem = get_next[i]; // 得到元素
      if (!visited.get(get_elem)) {
        // 是否访问
        z = Math.max(z, dfsFunc(get_elem, visited) + 1); // 增加边数
      }
    }
    return z;
  };
  return dfsFunc(startNode, visited);
};

dfs

下面这个是岛老师👨‍🏫教我方法

主要通过存父节点来判断

/**
 * dfs
 * @param {String || Number} startNode 开始点
 */
const dfs1 = startNode => {
  // 记录开始点和父级节点
  const dfsFunc = (startNode, parentNode = -1) => {
    let z = 0; // 记录长度
    let get_next = vertex.get(startNode); // 得到相邻节点
    for (let i = 0; i < get_next.length; i++) { // 循环点
      let get_elem = get_next[i]; // 得到点
      if (get_elem === parentNode) continue; // 如果是父节点 跳过
      z = Math.max(z, dfsFunc(get_elem, startNode) + 1); // 递归添加长度
    }
    return z;
  };
  return dfsFunc(startNode);
};
查看所有代码
let vertexLen = 6; // 顶点数
let vertex = new Map(); // 顶点数据集合 map 可以设置键对值 0 1 2 3 4 5 or 1 2 3 4 5 6 or A B C D E F G ... ...

/**
 * 设置顶点
 * @param {String || Number} v 顶点
 */
const setVertex = v => vertex.set(v, []);
/**
 * 设置边
 * @param {String || Number} v1 点
 * @param {String || Number} v2 点
 */
const setVertexEdge = (v1, v2) => {
  vertex.get(v1).push(v2);
  vertex.get(v2).push(v1);
};

// 设置点
for (let i = 1; i <= vertexLen; i++) setVertex(i);

// 定义边
let vertexEdge = [[1, 4], [2, 4], [3, 4], [4, 5], [5, 6]];

// 设置边
for (let i = 0; i < vertexEdge.length; i++)
  setVertexEdge(vertexEdge[i][0], vertexEdge[i][1]);

/**
 * dfs
 * @param {String || Number} startNode 开始点
 */
const dfs = startNode => {
  let visited = new Map(); // 保持和顶点结构一样
  for (let i = 1; i <= vertexLen; i++) visited.set(i, false); // 设置访问状态

  // dfs 方法
  const dfsFunc = (startNode, visited) => {
    let z = 0; // 长度
    visited.set(startNode, true); // 第一个点设置已访问
    let get_next = vertex.get(startNode); // 获得顶点的所有临接点
    for (let i = 0; i < get_next.length; i++) {
      // 循环临接点
      let get_elem = get_next[i]; // 得到元素
      if (!visited.get(get_elem)) {
        // 是否访问
        z = Math.max(z, dfsFunc(get_elem, visited) + 1); // 增加边数
      }
    }
    return z;
  };
  return dfsFunc(startNode, visited);
};

/**
 * dfs
 * @param {String || Number} startNode 开始点
 */
const dfs1 = startNode => {
  // 记录开始点和父级节点
  const dfsFunc = (startNode, parentNode = -1) => {
    let z = 0; // 记录长度
    let get_next = vertex.get(startNode); // 得到相邻节点
    for (let i = 0; i < get_next.length; i++) { // 循环点
      let get_elem = get_next[i]; // 得到点
      if (get_elem === parentNode) continue; // 如果是父节点 跳过
      z = Math.max(z, dfsFunc(get_elem, startNode) + 1); // 递归添加长度
    }
    return z;
  };
  return dfsFunc(startNode);
};

let z = dfs(1);
console.log(z);

let z1 = dfs1(1);
console.log(z1);

console.log(vertex);

--- 分割线 ---

很遗憾上面的是有问题的

岛老师的作业批改

  • 数据没有从 IO 读入读出。

  • 第一个 dfs 求出的不是最远的端点。

正确的解法应该是先求最深的一个端点,然后用从这个端点再搜索一次.

  因为 js 在 https://www.spoj.com 跑不过, 在http://codeforces.com 可以跑但是没找到题目,然后就选用了c++

在codeforces js输入输出

http://codeforces.com/blog/entry/10594

http://codeforces.com/blog/entry/64707


// u 开始点 p 父节点
pair<int, int> dfs(int u, int p = -1) {
  // z first 长度 z second 最深点
  // first += 1 second 为 u
  pair<int, int> z = {0, u};
  // for edge u 的 边
  for(auto v: edge[u]) {
    // 如果是父级点 跳过
    if (v == p) continue;
    z = max(z, dfs(v, u));
  }
  // 边+1
  z.first += 1;
  return z;
}
查看所有代码
#include <iostream>
#include <vector>
using namespace std;

const int N = 1e6;
vector<int> edge[N];

// u 开始点 p 父节点
pair<int, int> dfs(int u, int p = -1) {
  // z first 长度 z second 最深点
  // first += 1 second 为 u
  pair<int, int> z = {0, u};
  // for edge u 的 边
  for(auto v: edge[u]) {
    // 如果是父级点 跳过
    if (v == p) continue;
    z = max(z, dfs(v, u));
  }
  // 边+1
  z.first += 1;
  return z;
}


int main() {
  int n;
  // 输入
  cin >> n;
  
  // 输入端点循环下面的边
  for(int i = 0; i < n - 1; i++) {
    int v, u;
    cin >> v >> u;
    edge[v].push_back(u);
    edge[u].push_back(v);
  }
  
  // 得到最深的端点
  pair<int, int> z = dfs(1);
  // 从最深的端点搜索
  z = dfs(z.second);

  // 边-1
  cout << z.first-1 << endl;
}

希望看到的大佬可以多多指点迷津!!! 右边有我的联系方式💗💗

适配iPhonex

2020-06-24 22:30:32

Wap-网页适配iPhoneX.md

[Designing Websites for iPhone X](https://webkit.org/blog/7929/designing-websites-for-iphone-x/?hmsr=funteas.com&utm_medium=funteas.com&utm_source=funteas.com)

这篇文章写得很不错了, 介绍了很多种情况 摘要一些内容(copy)...


前言

iPhoneX 取消了物理按键,改成底部小黑条,这一改动导致网页出现了比较尴尬的屏幕适配问题。对于网页而言,顶部(刘海部位)的适配问题浏览器已经做了处理,所以我们只需要关注底部与小黑条的适配问题即可(即常见的吸底导航、返回顶部等各种相对底部 fixed 定位的元素)。

笔者通过查阅了一些官方文档,以及结合实际项目中的一些处理经验,整理了一套简单的适配方案.

适配之前需要了解的几个新知识

安全区域

安全区域指的是一个可视窗口范围,处于安全区域的内容不受圆角(corners)、齐刘海(sensor housing)、小黑条(Home Indicator)影响,也就是说,我们要做好适配,必须保证页面可视、可操作区域是在安全区域内。

更详细说明,参考文档:Human Interface Guidelines - iPhoneX

viewport-fit

iOS11 新增特性,苹果公司为了适配 iPhoneX 对现有 viewport meta 标签的一个扩展,用于设置网页在可视窗口的布局方式,可设置三个值:

contain: 可视窗口完全包含网页内容
cover:网页内容完全覆盖可视窗口
auto:默认值,跟 contain 表现一致

注意:网页默认不添加扩展的表现是 viewport-fit=contain,需要适配 iPhoneX 必须设置 viewport-fit=cover,这是适配的关键步骤。

更详细说明,参考文档:viewport-fit-descriptor

env() 和 constant()

iOS11 新增特性,Webkit 的一个 CSS 函数,用于设定安全区域与边界的距离,有四个预定义的变量:

safe-area-inset-left:安全区域距离左边边界距离
safe-area-inset-right:安全区域距离右边边界距离
safe-area-inset-top:安全区域距离顶部边界距离
safe-area-inset-bottom:安全区域距离底部边界距离
这里我们只需要关注 safe-area-inset-bottom 这个变量,因为它对应的就是小黑条的高度(横竖屏时值不一样)。

注意:当 viewport-fit=contain 时 env() 是不起作用的,必须要配合 viewport-fit=cover 使用。对于不支持env() 的浏览器,浏览器将会忽略它。

在这之前,笔者使用的是 constant(),后来,官方文档加了这么一段注释(坑):

The env() function shipped in iOS 11 with the name constant(). Beginning with Safari Technology Preview 41 and the iOS 11.2 beta, constant() has been removed and replaced with env(). You can use the CSS fallback mechanism to support both versions, if necessary, but should prefer env() going forward.

这就意味着,之前使用的 constant() 在 iOS11.2 之后就不能使用的,但我们还是需要做向后兼容,像这样:

padding-bottom: constant(safe-area-inset-bottom); /* 兼容 iOS < 11.2 */
padding-bottom: env(safe-area-inset-bottom); /* 兼容 iOS >= 11.2 */
注意:env() 跟 constant() 需要同时存在,而且顺序不能换。

更详细说明,参考文档:Designing Websites for iPhone X

如何适配

了解了以上所说的几个知识点,接下来我们适配的思路就很清晰了。

第一步:设置网页在可视窗口的布局方式

新增 viweport-fit 属性,使得页面内容完全覆盖整个窗口:

<meta name="viewport" content="width=device-width, viewport-fit=cover">

前面也有提到过,只有设置了 viewport-fit=cover,才能使用 env()。

第二步:页面主体内容限定在安全区域内

这一步根据实际页面场景选择,如果不设置这个值,可能存在小黑条遮挡页面最底部内容的情况。

body {
  padding-bottom: constant(safe-area-inset-bottom);
  padding-bottom: env(safe-area-inset-bottom);
}

第三步:fixed 元素的适配

类型一:fixed 完全吸底元素(bottom = 0),比如下图这两种情况:

可以通过加内边距 padding 扩展高度:

{
  padding-bottom: constant(safe-area-inset-bottom);
  padding-bottom: env(safe-area-inset-bottom);
}

或者通过计算函数 calc 覆盖原来高度:

{
  height: calc(60px(假设值) + constant(safe-area-inset-bottom));
  height: calc(60px(假设值) + env(safe-area-inset-bottom));
}

注意,这个方案需要吸底条必须是有背景色的,因为扩展的部分背景是跟随外容器的,否则出现镂空情况。

还有一种方案就是,可以通过新增一个新的元素(空的颜色块,主要用于小黑条高度的占位),然后吸底元素可以不改变高度只需要调整位置,像这样:

{
  margin-bottom: constant(safe-area-inset-bottom);
  margin-bottom: env(safe-area-inset-bottom);
}

空的颜色块:

{
  position: fixed;
  bottom: 0;
  width: 100%;
  height: constant(safe-area-inset-bottom);
  height: env(safe-area-inset-bottom);
  background-color: #fff;
}

类型二:fixed 非完全吸底元素(bottom ≠ 0),比如 “返回顶部”、“侧边广告” 等

像这种只是位置需要对应向上调整,可以仅通过外边距 margin 来处理:

{
  margin-bottom: constant(safe-area-inset-bottom);
  margin-bottom: env(safe-area-inset-bottom);
}

或者,你也可以通过计算函数 calc 覆盖原来 bottom 值:

{
  bottom: calc(50px(假设值) + constant(safe-area-inset-bottom));
  bottom: calc(50px(假设值) + env(safe-area-inset-bottom));
}

你也可以使用 @supports 隔离兼容样式

写到这里,我们常见的两种类型的 fixed 元素适配方案已经了解了吧。如果我们只希望 iPhoneX 才需要新增适配样式,我们可以配合 @supports 来隔离兼容样式,当然这个处理对页面展示实际不会有任何影响:

@supports (bottom: constant(safe-area-inset-bottom)) or (bottom: env(safe-area-inset-bottom)) {
  div {
    margin-bottom: constant(safe-area-inset-bottom);
    margin-bottom: env(safe-area-inset-bottom);
  }
}

ps: 某些css功能不支持的时候可以使用 @supports

效果地址 使用移动端打开任意一篇文章查看 底栏部分!!!

原作者总结得比我好, 拿过来学习学习!!!

卡片翻转动效

2018-06-07 22:34:02

卡片翻转动效

地址

预览地址

资料

资料

视频地址

效果图

截图

截图

# html
<div class="container">
<div class="box">
<div class="positive"></div>
<div class="negative"></div>
</div>
</div>
# css

.box{
    position: relative;
    width: 250px;
    height: 380px;
    margin-left: auto;
    margin-right: auto;
    transform: rotateY(0deg);
    -webkit-transform-style: preserve-3d;
    -moz-transform-style: preserve-3d;
    transform-style: preserve-3d;
    -webkit-transition: transform .8s ease-in-out;
    -moz-transition: transform .8s ease-in-out;
    transition: transform .8s ease-in-out;

    -webkit-perspective: 800px;
    -moz-perspective: 800px;
    perspective: 800px;
}
.positive,
.negative{
    width: 250px;
    height: 380px;
    background-size: cover;
    position: absolute;
    backface-visibility: hidden;
    
}

.positive{
    transform: rotateY(0deg);
    background-image: url(../img/正面.jpg);
}
.negative{
    background-image: url(../img/反面.jpg);
    transform: rotateY(180deg);
}

.box:hover{
    transform: rotateY(180deg);        
}

Electron

本地存储

import storage from 'electron-json-storage';

/**
 * storage Get
 * @returns {Promise<unknown>}
 */
export const storageGet = key => new Promise((resolve, reject) => {
  storage.get(key, (error, data) => {
    if (error) {
      reject(error);
    }

    console.log(data);
    resolve(data);
  });
});

/**
 * storage Set
 * @param data
 * @returns {Promise<unknown>}
 */
export const storageSet = (key, data) => new Promise((resolve, reject) => {
  storage.set(key, data, (error) => {
    if (error) {
      reject(error);
    }
    resolve('success');
  });
});

下载图片

/**
 * download image
 */
export const downloadImage = async ({
  name,
  url,
}) => {
  // path
  const imagePath = await 'path';
  const outputLocationPath = path.join(
    imagePath,
    name,
  );

  console.log('outputLocationPath', outputLocationPath);

  // download
  const response = await axios.get(url, {
    responseType: 'arraybuffer',
  });

  const base64Image = new Buffer.from(
    response.data,
    'binary',
  ).toString('base64');
  await util.promisify(fs.writeFile)(outputLocationPath, base64Image, 'base64');

  return outputLocationPath;
};

设置壁纸

import wallpaper from 'wallpaper';

/**
 * set wallpaper
 */
export const setWallpaper = async ({
  name,
  url,
}) => {
  const imagePath = await downloadImage({ name, url });
  await wallpaper.set(imagePath, { scale: 'auto' });
  console.log('set wallpaper success');
  new remote.Notification({
    title: 'Notification',
    body: 'Set Wallpaper Success',
  }).show();
};

自定义状态栏

因为win自带的状态栏太丑了,所以自己模拟了一个,electron-vue 通过 ipcMain 发送消息

ipcMain - 从主进程到渲染进程的异步通信。

ipcMain模块是EventEmitter类的一个实例。 当在主进程中使用时,它处理从渲染器进程(网页)发送出来的异步和同步信息。 从渲染器进程发送的消息将被发送到该模块。

参考文章

  1. 在 index.js 修改窗口大小.

BrowserWindow - 创建和控制浏览器窗口。

里面的参数自己可以看文档哦~

 mainWindow = new BrowserWindow({
    height: 710,
    width: 1200,
    useContentSize: true,
    frame: false
  })

设置之后,有一个细节需要了解一下.

可拖拽区 - 默认情况下, 无框窗口是 non-draggable 的..... (总之就是,你需要设置一下)

要使整个窗口可拖拽, 您可以添加 -webkit-app-region: drag 作为 body 的样式:

<body style="-webkit-app-region: drag"></body>

请注意, 如果您已使整个窗口draggable, 则必须将按钮标记为 non-draggable, 否则用户将无法单击它们:

button {
  -webkit-app-region: no-drag;
}

如果你设置自定义标题栏为 draggable, 你也需要标题栏中所有的按钮都设为 non-draggable。

  1. 模拟事件

参考文章里面有介绍到,流程大概就是这样。

// 引入
const {ipcRenderer: ipc} = require('electron')

// 自定义事件
winMin () {
    ipc.send('window-min')
},
winEnlargeOrNarrow () {
    ipc.send('win-enlarge-or-narrow')
},
winClose () {
    ipc.send('window-close')
}

/**
 * 模拟 最小 放大 还原 关闭 事件
 * index.js 修改
 */
ipcMain.on('window-min', () => {
  mainWindow.minimize()
})
ipcMain.on('win-enlarge-or-narrow', () => {
  if (mainWindow.isMaximized()) {
    mainWindow.unmaximize()
  } else {
    mainWindow.maximize()
  }
})
ipcMain.on('window-close', () => {
  mainWindow.close()
})

弹幕

播放器提供了相应的接口,只需要获取评论转换相应的数据就可以了。

transformComments (commentsArr) {}

dp.danmaku.draw({
   text: 'DIYgod is amazing',
   color: '#fff',
   type: 'top'
});

https://github.com/xiaotiandada/E-video/blob/master/src/renderer/view/index.vue

import axios from 'axios'

export default () => {
  return axios.create({
    baseURL: 'xxx',
    timeout: 1000
  })
}

-----------------

import Api from './Api'

export default {
  /**
   * 默认30条数据,可以自定义
   * @param limit
   * @returns {*}
   */
  getTopMv (limit = 30, offset = 0) {
    return Api().get(`/top/mv?limit=${limit}&offset=${offset}`)
  },
  getMvId (id) {
    return Api().get(`/mv?mvid=${id}`)
  },
  getMvComments (id) {
    return Api().get(`/comment/mv?id=${id}`)
  }
}

CodeNote

2019-04-14 16:49:16

正则

// 判断字符串是否为数字
reg = /^[0-9]*$/;

// 判断字符串是否为数字 开头为1-9
reg = /^\+?[1-9][0-9]*$/;
reg.test('12323123123213213213')

// 小数点后三位 如果后面需要解除限制修改正则  {0,3}
value.match(/^\d*(\.?\d{0,3})/g)[0] || null;

正则表达式 - 语法
正则表达式在线测试 常用正则表达式

记录一些 CodeNote

CSS3图片旋转木马效果

2018-06-08 23:48:48

CSS3图片旋转木马效果

模仿demo

资料

资料demo


img

# html

<div class="stage_area">
  <div class="container" id="container">
    <img src="http://image.zhangxinxu.com/image/study/s/s128/mm1.jpg" alt="">
    <img src="http://image.zhangxinxu.com/image/study/s/s128/mm1.jpg" alt="">
    <img src="http://image.zhangxinxu.com/image/study/s/s128/mm1.jpg" alt="">
    <img src="http://image.zhangxinxu.com/image/study/s/s128/mm1.jpg" alt="">
    <img src="http://image.zhangxinxu.com/image/study/s/s128/mm1.jpg" alt="">
    <img src="http://image.zhangxinxu.com/image/study/s/s128/mm1.jpg" alt="">
    <img src="http://image.zhangxinxu.com/image/study/s/s128/mm1.jpg" alt="">
    <img src="http://image.zhangxinxu.com/image/study/s/s128/mm1.jpg" alt="">
    <img src="http://image.zhangxinxu.com/image/study/s/s128/mm1.jpg" alt="">
  </div>
</div>

<div class="stage_button">
  <button id="prev">上滑</button>
  <button id="next">下滑</button>
</div>

# css

.stage_area {
  width: 900px;
  margin-left: auto;
  margin-right: auto;
  background: #f0f0f0;
  -webkit-perspective: 800px;
  -moz-perspective: 800px;
  perspective: 800px;
  position: relative;
  padding: 100px 50px;
  min-height: 100px;
}

.container {
  -webkit-transform-style: preserve-3d;
  -moz-transform-style: preserve-3d;
  transform-style: preserve-3d;

  width: 128px;
  height: 100px;
  left: 50%;
  margin-left: -64px;
  position: absolute;

  /* transform: rotateY(40deg); */

  -webkit-transition: transform 1s;
  -moz-transition: transform 1s;
  transition: transform 1s;
}

.container img {
  position: absolute;
}

.container img:nth-child(1) {
  transform: rotateY(0deg) translateZ(195.839px);
}

.container img:nth-child(2) {
  transform: rotateY(40deg) translateZ(195.839px);
}

.container img:nth-child(3) {
  transform: rotateY(80deg) translateZ(195.839px);
}

.container img:nth-child(4) {
  transform: rotateY(120deg) translateZ(195.839px);
}

.container img:nth-child(5) {
  transform: rotateY(160deg) translateZ(195.839px);
}

.container img:nth-child(6) {
  transform: rotateY(200deg) translateZ(195.839px);
}

.container img:nth-child(7) {
  transform: rotateY(240deg) translateZ(195.839px);
}

.container img:nth-child(8) {
  transform: rotateY(280deg) translateZ(195.839px);
}

.container img:nth-child(9) {
  transform: rotateY(320deg) translateZ(195.839px);
}

# js

window.onload = init
function init(){
  var prev = document.querySelector('#prev')
  var next = document.querySelector('#next')
  var container = document.querySelector('#container')
  var len = 0

  var transform = function(element, value, key) {
    key = key || "Transform";
    ["Moz", "O", "Ms", "Webkit", ""].forEach(function(prefix) {
      element.style[prefix + key] = value;	
    });	
    
    return element;
  }

  prev.addEventListener('click', function(){
    var _this = this
    len-=40

    transform(container, 'rotateY('+ len +'deg)');
    
  })

  next.addEventListener('click', function(){
    var _this = this
    len+=40

    transform(container, 'rotateY('+ len +'deg)');
  })
}

js部分用了大佬demo的js方法(就是赞!!

React案列

2018-11-23 17:47:51

React案列

React 做的小案列

记录学习笔记什么的~

仓库地址

博客地址

学习资料-reactjs

学习资料-imooc

React案列一

简易版-todoList

import React, { Component } from "react";
// import logo from "./logo.svg";
import "./App.css";

class App extends Component {

  // 状态
  constructor(props){
    super(props)
    this.state = {
      list: [],  // 列表数据
      inputValue: ''  // 输入框数据
    }
  }
  
  // 添加列表数据
  addList(){
    // es6 语法
    this.setState({
      list: [...this.state.list, this.state.inputValue],
      inputValue: ''
    })
  }

  // 改变inputValue
  changeInput(e) {
    // 目标值
    let value = e.target.value
    this.setState({
      inputValue: value,
    })
  }

  // 删除列表数据
  delList(index) {
    // 拷贝值 删除
    let list = [...this.state.list]
    list.splice(index, 1)
    this.setState({
      list
    })
  }

  render() {
    return (
      <div>
      <div>
        // 数据绑定  改变事件绑定this
        <input value={this.state.inputValue} onChange={this.changeInput.bind(this)} type="text"/>
        // 添加事件 绑定this
        <button onClick={this.addList.bind(this)}>添加</button>
      </div>
        <ul>
        {
          this.state.list.map((item,index) => {
            return (
              // 删除事件 绑定this 传index
              <li key={index} onClick={this.delList.bind(this, index)}>{item}</li>
            )
          })
        }
        </ul>
      </div>
    );
  }
}

export default App;
  1. 事件,需要state里面的值需要绑定this
onClick={this.delList.bind(this, index)}
  1. 改变state 需要用 this.setState
this.setState({})
  1. input 双向绑定数据 不用改变事件 输入框内容不会改变 并且警告报错
// 改变inputValue
changeInput(e) {
  // 目标值
  let value = e.target.value
  this.setState({
    inputValue: value,
  })
}

<input value={this.state.inputValue} onChange={this.changeInput.bind(this)} type="text"/>

刚刚搜了一下

参考文章 react中实现数据双向绑定


todoList 组件与通信

// 父组件
import React, { Component, Fragment } from "react";
import Item from './Item'
class App extends Component {
  constructor(props){
    // ...

    // 绑定this 代码优化
    this.addList = this.addList.bind(this)
    this.changeInput = this.changeInput.bind(this)
    this.delList = this.delList.bind(this)
  }
  
  // ...
  getHead() {
    return (
      <div>
        <input value={this.state.inputValue} onChange={this.changeInput} type="text"/>
        <button onClick={this.addList}>添加</button>
      </div>
    ) 
  }

  getItem() {
    return (
      this.state.list.map((item,index) => {
        return (
          <Item 
            delList={this.delList}    // 子组件调用父组件方法
            key={index}               // 父组件通过属性传递值
            content={item}            // 同
            index={index}             // 同
          />
        )
      })
    )
  }

  render() {
    return (
      <Fragment>                   // 忽略外层包裹的 div 页面不显示
        {this.getHead()}           // 函数返回 head
        <ul>{this.getItem()}</ul>  // 函数返回 Item
      </Fragment>
    );
  }
}

export default App;


// 子组件
import React, { Component } from "react";  // ...

class Item extends Component {

  constructor(props){
    super(props)
    this.delItem = this.delItem.bind(this)  // 同上
  }

  delItem(){
    const {delList, index} = this.props  // 解构赋值
    delList(index)                       // 调用父级方法
  }

  render() {
    const { content } = this.props;     // 解构赋值
    return (
      <li onClick={this.delItem}>{content}</li>  // 调用删除方法
    )
  }
}

export default Item

css 样式

1.内样样式需要

style={{'background': 'red','color': '#fff'}}
  1. 定义类名不能用 class

因为 class 已经用来 定义React组件

className='head-button'

Qq:952822399

Qq群 iD 718639024

大家也可以进来互相交流~

最后就是厚脸皮的一步(觉得不错可以点个star哦~~~) 仓库地址

同时也欢迎Pr!!!

同时也欢迎Pr!!!

同时也欢迎Pr!!!

animation实现登录框

2018-06-25 22:37:45

使用 animate.css 实现一个优雅的登录框

资料地址

预览地址

下面的动画效果 css 样式是从 animate.css里面扣出来的2333

img

<section class="site-container">
    <section class="card">
        <h3>Login</h3>
        <form action="">
            <div class="form__wrapper">
                <input type="email" class="form__input" id="email" name="email">
                <label id="form__label__email" class="form__label" for="email">
                    <span class="form__label__content">Email</span>
                </label>
            </div>

            <div class="form__wrapper">
                <input type="password" class="form__input" id="password" name="password">
                <label id="form__label__password" class="form__label" for="password">
                    <span class="form__label__content">Password</span>
                </label>
            </div>

            <div class="form__wrapper__submit">
                <div class="form__wrapper_submit__content">
                    <button id="btn" type="submit" name="submit" class="btn">Submit</button>
                </div>
            </div>
        </form>
    </section>
</section>
 /* label 文字上移效果 */
.active {
    -webkit-transform: scale(.9) translate(-14px, -14px);
    -moz-transform: scale(.9) translate(-14px, -14px);
    -ms-transform: scale(.9) translate(-14px, -14px);
    -o-transform: scale(.9) translate(-14px, -14px);
    transform: scale(.9) translate(-14px, -14px);
}

/* btn copy animation.css 效果 */
@keyframes bounceIn {
    from,
    25%,
    50%,
    75%,
    to {
        -webkit-animation-timing-function: cubic-bezier(0.215, 0.61, 0.355, 1);
        animation-timing-function: cubic-bezier(0.215, 0.61, 0.355, 1);
    }

    0% {
        -webkit-transform: scale3d(1, 1, 1);
        transform: scale3d(1, 1, 1);
    }

    25% {
        -webkit-transform: scale3d(1.01, 1.01, 1.01);
        transform: scale3d(1.01, 1.01, 1.01);
    }

    50% {
        -webkit-transform: scale3d(1.02, 1.02, 1.02);
        transform: scale3d(1.02, 1.02, 1.02);
    }

    75% {
        -webkit-transform: scale3d(1.01, 1.01, 1.01);
        transform: scale3d(1.01, 1.01, 1.01);
    }

    to {
        -webkit-transform: scale3d(1, 1, 1);
        transform: scale3d(1, 1, 1);
    }
}

.bounceIn {
    -webkit-animation-duration: 0.75s;
    animation-duration: 0.75s;
    -webkit-animation-name: bounceIn;
    animation-name: bounceIn;
    animation-iteration-count: infinite;
}

详情查看[github地址](

css 弹跳小球

2019-10-27 22:08:23

资料

  <div class="circle"></div>
  <div class="line"></div>
    body {
      -webkit-box-reflect: below 0px -webkit-linear-gradient(transparent,transparent 50%, rgba(255,255,255,.6));
    }
    .circle {
      width: 100px;
      height: 100px;
      /* background: red; */
      background: radial-gradient(circle at 40% 0, red 60%, #104b63);
      border-radius: 50%;
      margin-top: 300px;
      margin-left: 300px;
      transform: translate(0, -200px);
      animation: circle 1.8s cubic-bezier(0.18, 0.89, 0.32, 1.28) infinite;
    }

    @keyframes circle {
      0% {
        transform: translate(0, -200px);
      }
      10% {
        transform: translate(0, -160px);
      }
      20% {
        transform: translate(0, -120px);
      }
      30% {
        transform: translate(0, -80px);
      }
      40% {
        transform: translate(0, -40px);
      }
      50% {
        transform: translate(0, 0);
      }
      60% {
        transform: translate(0, -40px) scale(1.13, 0.87);
      }
      70% {
        transform: translate(0, -80px) scale(0.87, 1.13);
      }
      80% {
        transform: translate(0, -120px) scale(1.05, 0.95);
      }
      90% {
        transform: translate(0, -160px) scale(0.98, 1.02);
      }
      100% {
        transform: translate(0, -200px);
      }
    }

    .line {
      height: 1px;
      width: 100%;
      background-color: #000;
    }

See the Pen 弹跳小球 by xiaotiandada (@xiaotiandada) on CodePen.

<script async src="https://static.codepen.io/assets/embed/ei.js"></script>

twitter 点赞简易动画

2019-09-08 16:06:47

资料

https://zhuanlan.zhihu.com/p/20486738

GO

  • 首先去twitter打开控制台下载png的素材
  • 放入一个div
  • 设置css 完事

Js

export default class Render {
  append(parent, dom){
    parent.append(dom)
  }
}


let render =  new Render()

let likeButton = document.createElement('div')
likeButton.classList.add('like-button')


render.append(document.querySelector('body'), likeButton)

Css

.like-button {
  width: 50px;
  height: 50px;
  background-position: left;
  background-image: url(https://abs.twimg.com/a/1446542199/img/t1/web_heart_animation.png);
  background-repeat:no-repeat;
  background-size:2900%;
  cursor: pointer;
  &:hover {
    background-position: right;
  }
}

.is-animating {
  animation: heart-burst .8s steps(28) 1 forwards;
}

@keyframes heart-burst { // 从左到右
  0%{
    background-position: left;
  }
  100%{
    background-position: right;
  }
}

鼠标经过png从 background-position: left;background-position: right; 变色处理

通过单击添加 class 达到目的

animation: heart-burst .8s steps(28) 1 forwards; 分为steps 28 执行动画

js

likeButton.onclick = function() {
  let hasClass = likeButton.classList.contains('is-animating')
  if (!hasClass) likeButton.classList.add('is-animating')
}

likeButton.addEventListener('animationend', function() {
  let hasClass = likeButton.classList.contains('is-animating')
  if (hasClass) likeButton.classList.remove('is-animating')
}) // 根据情况处理

-- end ---

vue自定义滚动指令

2019-10-21 10:48:56

教程

教程写的很好, 我按照教程跑了一部分

真实的示例:为级联动画使用一个自定义滚动指令

这部分没有跑, 看了看directive里面的代码, 通过v-scroll里面的参数来进行判断的, 然后把toPath里面的参数传入进来,

我根据教程学习, 然后顺便添加了一个lodash throttle 来'节流'

创建一个vue demo

... ... 省略

新建一个directive.js

import Vue from 'vue'
import throttle from "lodash/throttle";
Vue.directive('scroll', {
  inserted: (el, binding) => {
    let f = evt => {
      if (binding.value(evt, el)) {
        // eslint-disable-next-line no-console
        // console.log(8, binding.value(evt, el))
        // remove event
        window.removeEventListener('scroll', f)
      }
    }
    // listen event
    // use lodash/throttle call methods
    window.addEventListener('scroll', throttle(f, 300))
    // eslint-disable-next-line no-console
    console.log(el, binding)
  }
})

import "./directive"; // main.js 里面 import

在组件里面

<HelloWorld v-scroll="handleScroll" class="box" msg="Welcome to Your Vue.js App"/>

可以是任何元素 使用 v-scroll="xxx"

// ....
    handleScroll (evt, el) {
      // eslint-disable-next-line no-console
      console.log(19, evt, el, window.scrollY)
      // judeg window.scroll, execution TweenMax function
      if (window.scrollY > 50) {
        TweenMax.to(el, .3, {
          y: -10,
          opacity: 1,
          // eslint-disable-next-line no-undef
          ease: Sine.easeOut
        })
      }
      // to meet the conditions return true else return false
      return window.scrollY > 100
    }
// ...
.box {
  opacity: 0;
  transition: 1.5s all cubic-bezier(0.39, 0.575, 0.565, 1);
  /* transform: translate3d(0, 10px, 0); */
}

模仿san的hover动画

2018-05-19 01:10:14

在百度前端技术学院学习 设计师学院 绿(大佬)的课程 (第一课QAQ) 传送门

然后模仿san官网的动画效果 san

这是我模仿的效果 传送们 pc端食用更佳!

大佬的实现已经很棒了 个人只让部分动画变得平滑 比如说鼠标移出的时候增加了

transition: transform .3s;

这样可以让鼠标移出Div的时候更加平滑

分界线~~~


首先贴出资料和大佬的教程

大概就是这么写 大家可以去Google搜教程 官方案例很不错

首先布局 结构和样式都可以借鉴san官网 利用控制台(so easy~)

<div class="resource-block">
  <a href="" class="resource-item">
    <div class="resource-item-top resource-item-top-two">
        <div
        id="bm"
        class="bodymovin"
        data-movpath="js/compass.json">
      </div>
    </div>

    <div class="resource-item-bottom">
      <h5>教程</h5>
      <p>教程是入门的捷径,请从这里开始了解San</p>
    </div>
  </a>
</div>

这是结构 具体样式可以查看我的github文件 传送门

然后就是js 控制动画效果了

引入jquery (方便~)

  • 在github上的build/player获取最新版本的lottie.js文件 或者 从AE的插件导出
  • 在HTML引入文件
<script src="js/lottie.js"></script>
  • 调用lottie.loadAnimation()启动一个动画。将一个对象作为参数
var animData = {
  container: bodymovinLayer,
  renderer: 'svg',
  prerender: true,
  loop: false,
  autoplay: false,
  path: bodymovinLayer.getAttribute('data-movpath')
}

# animData 导出的动画数据的Object
# container 渲染动画的dom元素
# renderer 'svg'/'canvas'/'html'来设置渲染器
# prerender 这个根据英文应该是预渲染
# loop 是否循环播放
# autoplay 是否自动播放
# path 路径

  • while循环绑定事件 将上面封装进一个方法
setBodymovin = function (cards, len) {
  while (len--) {
    var bodymovinLayer = cards[len].getElementsByClassName('bodymovin')[0]

    var animData = {
      container: bodymovinLayer,
      renderer: 'svg',
      prerender: true,
      loop: false,
      autoplay: false,
      path: bodymovinLayer.getAttribute('data-movpath')
    }

    anim = lottie.loadAnimation(animData);

    (function (anim) {
      var card = cards[len]

      $(card).on('mouseenter', function () {
        anim.play()
      })

      $(card).on('mouseleave', function (e) {
        anim.stop()
      })
    })(anim)

  }

}
  • 最后获取元素调用
var resourceCards = document.querySelectorAll('.resource-block')
var facilityCards = document.querySelectorAll('.facility-block')
var len = resourceCards.length

setBodymovin(resourceCards, len)
setBodymovin(facilityCards, len)

最后贴 gulp 任务

const gulp = require('gulp')
const connect = require('gulp-connect')

gulp.task('connect', function(){
  connect.server({
    root: 'app',
    port: 8000,
    livereload: true
  })
})

gulp.task('html', function(){
  gulp.src('./app/*.html')
    .pipe(connect.reload())
})

gulp.task('css', function(){
  gulp.src('./app/css/*.css')
    .pipe(connect.reload())
})

gulp.task('watch', function () {
  gulp.watch(['./app/*.html'], ['html'])
  gulp.watch(['./app/css/*.css'], ['css'])
})

gulp.task('default', ['connect','watch'])

具体代码见github源码

大佬多给给意见哦~~~

Qq: 952822399

css布局

2018-06-20 16:50:52

更多信息可以查看我的github仓库

MDN 定位

https://developer.mozilla.org/zh-CN/docs/Learn/CSS/CSS_layout/%E5%AE%9A%E4%BD%8D

MDN 定位实战

https://developer.mozilla.org/zh-CN/docs/Learn/CSS/CSS_layout/Practical_positioning_examples

MDN Flexbox

https://developer.mozilla.org/zh-CN/docs/Learn/CSS/CSS_layout/Flexbox

布局

这个基础需要恶补

圣杯布局

# css
body {
    margin: 0;
    padding: 0;
}

.header,
.footer {
    background: red;
    padding: 20px 0;
}

.container {
    padding-left: 200px;
    padding-right: 200px;
    /* min-width: 600px; */
}

.content,
.left,
.right {
    height: 200px;
    float: left;
    position: relative;
}


.content {
    width: 100%;
    background: gold;
}

.left {
    width: 200px;
    height: 200px;
    background: #333;
    margin-left: -100%;
    right: 200px;
}

.right {
    width: 200px;
    height: 200px;
    background: #eee;
    margin-right: -200px;
}

.footer {
    clear: both;
}

* html .left {
    left: 200px;
}
# html
<div class="header">
    header
</div>

<div class="container">
    <div class="content">Lorem ipsum dolor sit amet consectetur adipisicing elit. Obcaecati iusto cumque quibusdam quis qui sit quisquam iure repellat perferendis. Tempora accusantium dignissimos, magnam est placeat enim dicta dolores nam distinctio!</div>
    <div class="left"></div>
    <div class="right"></div>
</div>

<div class="footer">
    footer
</div>

双飞翼布局

#css 

.left,
.main,
.right {
    float: left;
    min-height: 200px;
}
.left {
    background: gray;
    width: 200px;
    margin-left: -100%;
}
.main {
    background: rgb(252, 102, 102);
    width: 100%;
}
.right {
    background: #333;
    width: 200px;
    margin-left: -200px;
}
.content {
    margin: 0 200px;
    overflow: hidden;
}

#html 
<div class="container">

    <div class="main">
        <div class="content">Lorem ipsum dolor sit amet consectetur adipisicing elit. Culpa quos labore, ad officiis animi libero ipsam dolorum explicabo placeat facere fuga ex suscipit porro nesciunt quod mollitia corrupti voluptatem a?</div>
    </div>
    <div class="left">left</div>
    <div class="right">right</div>
</div>

圣杯布局和双飞翼布局的作用和区别

http://www.cnblogs.com/woodk/p/5147085.html

http://www.cnblogs.com/imwtr/p/4441741.html

flex 布局

#css
.container {
    -webkit-display:flex;
    display: flex;
    min-height: 200px;
}
.left {
    order: -1;
    background: red;
    flex-basis: 200px;
}
.main {
    background: forestgreen;
    flex-grow: 1;
}
.right{
    background: gold;
    flex-basis: 300px;
}
#html
<div class="container">

    <div class="main">Lorem ipsum dolor sit amet consectetur adipisicing elit. Eaque quae, veritatis dignissimos laborum debitis id accusantium dolore inventore odit sed! Sunt officiis temporibus esse eum ab fuga ad sequi officia?</div>
    <div class="left">left</div>
    <div class="right">right</div>
</div>

绝对定位布局

# css 

.container {
    position: relative;
}

.main,
.right,
.left {
    top: 0;
    height: 130px;
}

.main {
    background: gray;
    margin: 0 300px 0 200px;
}

.right {
    position: absolute;
    width: 300px;
    right: 0;
    background: red;
}

.left {
    width: 200px;
    position: absolute;
    left: 0;
    background: green;
}

#html
<div class="container">
    <div class="main">man</div>
    <div class="left">left</div>
    <div class="right">right</div>
</div>

实现布局还原

#css 
body{
    margin: 0;
    padding: 0;
}

* {
    box-sizing: border-box;
}
.fl{
    float: left;
}
.ri {
    float: right;
}

.header{
    width: 100%;
    min-width: 960px;
    height: 100px;
    background: #333;
}

.header-content{
    width: 960px;
    height: 100%;
    margin: 0 auto;
}
.header-content .logo{
    width: 100px;
    height: 100%;
}
.header-content .logo h1 {
    margin: 0;
    padding: 0;
    font-size: 40px;
    color: #fff;
    line-height: 100px;
    text-align: center;
}
.header-content .about a{
    display: inline-block;
    padding: 0 4px;
    color: #fff;
    font-size: 16px;
    line-height: 100px;
}


.banner{
    width: 100%;
    height: 400px;
    background: rgb(77, 206, 77);
    position: relative;
}

.list{
    position: absolute;
    bottom: 10px;
    right: 10%;
    -webkit-display: flex;
    display: flex;
}

.list span {
    display: block;
    width: 30px;
    height: 40px;
    line-height: 40px;
    background: rgba(238, 238, 238, 0.7);
    border: 1px solid #333;
    float: left;
    text-align: center;
    align-self: flex-end;
    margin: 0 2px;

}
/* .list span:hover{
    height: 50px;
    line-height: 60px;    
} */
.list span.active{
    height: 50px;
    line-height: 60px;    
}

.nav{
    width: 100%;
    height: 80px;
    background: #fff;
    border-bottom: 1px solid #eee;
}

.nav-content {
    width: 960px;
    height: 100%;
    margin: 0 auto;
}

.nav-content a{
    display: block;
    float: left;
    width: 140px;
    height: 50px;
    line-height: 50PX;
    text-align: center;
    text-decoration: none;
    color: #000;
    border-left: 1px solid #c5c5c5;
    border-top: 1px solid #c5c5c5;
    border-right: 1px solid #c5c5c5;
    border-bottom: 1px solid #c5c5c5;
    background: #eee;
    border-radius: 20px 20px 0 0;
    margin-top: 30px;
}
.nav-content a.active{
    background: #fff;
    border-bottom: 1px solid #fff;
}


.main{
    width: 960px;
    overflow: hidden;
    margin: 10px auto 0;
}

.main .row{
    -webkit-display: flex;
    display: flex;
}

.main .row .row-content {
    flex: 1;
    height: 200px;
    text-align: center;
    border: 1px solid #bfbfbf;
    /* padding: 80px; */
    margin: 4px;
    align-items: center;
    justify-content: center;
    -webkit-display: flex;
    display: flex;
}


.footer{
    width: 100%;
    height: 100px;
    background: #404040;
    text-align: center;
    line-height: 100px;
    font-size: 16px;
    color: #fff;
}

# html

<div class="header">
    <div class="header-content">
        <div class="logo fl">
            <h1>logo</h1>
        </div>
        <div class="about ri">
            <a href="#">Github</a>
            <a href="#">Register</a>
            <a href="#">Login</a>
        </div>
    </div>
</div>

<div class="banner">
    <div class="list">
        <span>1</span>
        <span class="active">2</span>
        <span>3</span>
        <span>4</span>
    </div>
</div>

<div class="nav">
    <div class="nav-content">
        <a href="#" class="active">HOME</a>
        <a href="#">PROFLE</a>
        <a href="#">ABOUT</a>
    </div>
</div>

<div class="main">
    <div class="row">
        <div class="row-content">content</div>
        <div class="row-content">content</div>
        <div class="row-content">content</div>
    </div>
    <div class="row">
        <div class="row-content">content</div>
        <div class="row-content">content</div>
        <div class="row-content">content</div>
        <div class="row-content">content</div>
    </div>
    <div class="row">
        <div class="row-content">content</div>
        <div class="row-content">content</div>
        <div class="row-content">content</div>
    </div>
</div>

<div class="footer">
    <p>&copy; 2018 ife.baidu.com</p>
</div>

[预览地址](

node爬虫 简易版【站酷】

2019-08-29 13:35:12

node爬虫 简易版【站酷】

简单的学习一下node爬虫, 抓取站酷(本来想抓花瓣的,但是因为花瓣是接口调用的 而我想抓dom所以选择了站酷 :)

Result

资料

https://github.com/liuxing/mm-spider

站酷: https://www.zcool.com.cn

const superagent = require('superagent');
const cheerio = require('cheerio')
const fs = require('fs-extra')

https://www.npmjs.com/ 搜索

Go

获取HTML

const getUrlHtml = async () => {
  try {
    // 外层定义的id
    const res = await superagent.get(`https://www.zcool.com.cn/?p=${id}`);
    return res.text
  } catch (err) {
    console.error(err);
    return false
  }
}

使用 superagent 获取html

文档: https://www.npmjs.com/package/superagent

拆Dom

const getDom = (html) => {
  if (!html) return // 没html返回
  const $ = cheerio.load(html)
  let arr = [] // 储存需要下载的数据
  // 获取dom 循环写入数据
  $('.all-work-list .work-list-box .card-box').each((i, el) => {
    let img = $(el).find('.card-img a img').attr('src')
    let title = $(el).find('.card-info .card-info-title a').text()
    arr.push({
      title: title.replace(/\//g, ''), // 去掉 / 因为 / 会认为是路径, 根据实际情况来操作
      url: img.replace('@260w_195h_1c_1e_1o_100sh.jpg', '') // 去掉后缀 不使用缩略图 根据实际情况来操作
    })
  })
  return arr
}

使用 cheerio 操作html

文档: https://www.npmjs.com/package/cheerio

下载图片

// 睡眠
const sleep = async time => new Promise(resolve => setTimeout(resolve, time))
const downloadImg = async arr => {
  // 先删除文件夹 可以不用这步 因为开始写的时候会重复创建 我又懒得删
  try {
    await fs.remove(path.join(__dirname, `/page${id}`))
  } catch (error) {
    console.log('删除文件夹失败')
  }
  // 创建文件夹 根据id命名
  try {
    await fs.mkdir(path.join(__dirname, `/page${id}` ))
  } catch (error) {
    return console.log('创建文件夹失败')
  }
  // 下载图片
  const download = async item => {
    await sleep(100) // 睡眠 降低爬虫的速度
    try {
      // 通过 superagent 保存图片
      const req =  superagent.get(item.url)
      // 使用了stream(流)
      req.pipe(fs.createWriteStream(`./page${id}/${item.title}.png`))
      console.log(`下载${item.title}done`)
    } catch (error) {
      return console.log(`下载图片失败${item.title}`, error)
    }
  }

  // 循环arr数据下载图片
  for (const item of arr) await download(item)
}

使用fs下载图片

文档:

https://www.npmjs.com/package/fs-extra

https://nodejs.org/api/fs.html

遇到的问题:

下载图片不能使用async await 好像会提前结束 导致下载图片无法使用(具体可以大佬实验的时候打印Error)(可能是我打开方式不对 请大佬赐教)

文件名不能带有 / 会认为是路径

All Code

查看所有代码
const superagent = require('superagent');
const cheerio = require('cheerio')
const fs = require('fs-extra')
const path = require('path')

let id = 1
let maxPage = 10

const sleep = async time => new Promise(resolve => setTimeout(resolve, time))

const getUrlHtml = async () => {
  try {
    // 外层定义的id
    const res = await superagent.get(`https://www.zcool.com.cn/?p=${id}`);
    return res.text
  } catch (err) {
    console.error(err);
    return false
  }
}

const getDom = (html) => {
  if (!html) return // 没html返回
  const $ = cheerio.load(html)
  let arr = [] // 储存需要下载的数据
  // 获取dom 循环写入数据
  $('.all-work-list .work-list-box .card-box').each((i, el) => {
    let img = $(el).find('.card-img a img').attr('src')
    let title = $(el).find('.card-info .card-info-title a').text()
    arr.push({
      title: title.replace(/\//g, ''), // 去掉 / 因为 / 会认为是路径, 根据实际情况来操作
      url: img.replace('@260w_195h_1c_1e_1o_100sh.jpg', '') // 去掉后缀 不使用缩略图 根据实际情况来操作
    })
  })
  return arr
}

const downloadImg = async arr => {
  // 先删除文件夹 可以不用这步 因为开始写的时候会重复创建 我又懒得删
  try {
    await fs.remove(path.join(__dirname, `/page${id}`))
  } catch (error) {
    console.log('删除文件夹失败')
  }
  // 创建文件夹 根据id命名
  try {
    await fs.mkdir(path.join(__dirname, `/page${id}` ))
  } catch (error) {
    return console.log('创建文件夹失败')
  }
  // 下载图片
  const download = async item => {
    await sleep(100) // 睡眠 降低爬虫的速度
    try {
      // 通过 superagent 保存图片
      const req =  superagent.get(item.url)
      // 使用了stream(流)
      req.pipe(fs.createWriteStream(`./page${id}/${item.title}.png`))
      console.log(`下载${item.title}done`)
    } catch (error) {
      return console.log(`下载图片失败${item.title}`, error)
    }
  }

  // 循环arr数据下载图片
  for (const item of arr) await download(item)
}

const init = async () => {
  for (let i = 0; i < maxPage; i++) {
    let urlHtml = await getUrlHtml()
    let getDate = await getDom(urlHtml)
    await downloadImg(getDate)
    id = i + 1
  }
}

init()

源码地址: https://github.com/xiaotiandada/interest-page/tree/master/crawler

修改1

--- 分割线 ---

感谢大佬的指点 ----> QQ 923398776

资料

https://andyliwr.github.io/2017/12/05/nodejs_spider_ip/

使用async控制并发数

  try {
    // async map limit 控制并发数
    async.mapLimit(arr, 20, async item => download(item, id), (err, results) => {
      if (err) throw err
      console.log(results)
    })
  } catch (error) {
    console.log(`async.mapLimit${error}`)
  }

文档: https://www.npmjs.com/package/async

动态设置UA

    // userAgent
    const userAgents = [ 'Mozilla/5.0 ..'];

    try {
      let userAgent = userAgents[parseInt(Math.random() * userAgents.length)]
      // 通过 superagent 保存图片
      const req =  superagent.get(item.url)
      .set({ 'User-Agent': userAgent })
      // 使用了stream(流)
      req.pipe(fs.createWriteStream(`./page${id}/${item.title}.png`))
      return `下载${item.title}done`
    } catch (error) {
      return console.log(`下载图片失败${item.title}`, error)
    }
  }

All Code

查看所有代码
const superagent = require('superagent');
const cheerio = require('cheerio')
const fs = require('fs-extra')
const path = require('path')
const async = require("async");

let id = 1
let maxPage = 10

// userAgent
const userAgents = [
  'Mozilla/5.0 (X11; U; Linux i686; en-US; rv:1.8.0.12) Gecko/20070731 Ubuntu/dapper-security Firefox/1.5.0.12',
  'Mozilla/4.0 (compatible; MSIE 7.0; Windows NT 6.0; Acoo Browser; SLCC1; .NET CLR 2.0.50727; Media Center PC 5.0; .NET CLR 3.0.04506)',
  'Mozilla/5.0 (Windows NT 6.1; WOW64) AppleWebKit/535.11 (KHTML, like Gecko) Chrome/17.0.963.56 Safari/535.11',
  'Mozilla/5.0 (Macintosh; Intel Mac OS X 10_7_3) AppleWebKit/535.20 (KHTML, like Gecko) Chrome/19.0.1036.7 Safari/535.20',
  'Mozilla/5.0 (X11; U; Linux i686; en-US; rv:1.9.0.8) Gecko Fedora/1.9.0.8-1.fc10 Kazehakase/0.5.6',
  'Mozilla/5.0 (Windows NT 6.1; WOW64) AppleWebKit/537.1 (KHTML, like Gecko) Chrome/21.0.1180.71 Safari/537.1 LBBROWSER',
  'Mozilla/5.0 (compatible; MSIE 9.0; Windows NT 6.1; Win64; x64; Trident/5.0; .NET CLR 3.5.30729; .NET CLR 3.0.30729; .NET CLR 2.0.50727; Media Center PC 6.0) ,Lynx/2.8.5rel.1 libwww-FM/2.14 SSL-MM/1.4.1 GNUTLS/1.2.9',
  'Mozilla/4.0 (compatible; MSIE 6.0; Windows NT 5.1; SV1; .NET CLR 1.1.4322; .NET CLR 2.0.50727)',
  'Mozilla/5.0 (compatible; MSIE 9.0; Windows NT 6.1; WOW64; Trident/5.0; SLCC2; .NET CLR 2.0.50727; .NET CLR 3.5.30729; .NET CLR 3.0.30729; Media Center PC 6.0; .NET4.0C; .NET4.0E; QQBrowser/7.0.3698.400)',
  'Mozilla/4.0 (compatible; MSIE 6.0; Windows NT 5.1; SV1; QQDownload 732; .NET4.0C; .NET4.0E)',
  'Mozilla/5.0 (Windows NT 6.1; Win64; x64; rv:2.0b13pre) Gecko/20110307 Firefox/4.0b13pre',
  'Opera/9.80 (Macintosh; Intel Mac OS X 10.6.8; U; fr) Presto/2.9.168 Version/11.52',
  'Mozilla/5.0 (X11; U; Linux i686; en-US; rv:1.8.0.12) Gecko/20070731 Ubuntu/dapper-security Firefox/1.5.0.12',
  'Mozilla/5.0 (compatible; MSIE 9.0; Windows NT 6.1; WOW64; Trident/5.0; SLCC2; .NET CLR 2.0.50727; .NET CLR 3.5.30729; .NET CLR 3.0.30729; Media Center PC 6.0; .NET4.0C; .NET4.0E; LBBROWSER)',
  'Mozilla/5.0 (X11; U; Linux i686; en-US; rv:1.9.0.8) Gecko Fedora/1.9.0.8-1.fc10 Kazehakase/0.5.6',
  'Mozilla/5.0 (X11; U; Linux; en-US) AppleWebKit/527+ (KHTML, like Gecko, Safari/419.3) Arora/0.6',
  'Mozilla/5.0 (compatible; MSIE 9.0; Windows NT 6.1; WOW64; Trident/5.0; SLCC2; .NET CLR 2.0.50727; .NET CLR 3.5.30729; .NET CLR 3.0.30729; Media Center PC 6.0; .NET4.0C; .NET4.0E; QQBrowser/7.0.3698.400)',
  'Opera/9.25 (Windows NT 5.1; U; en), Lynx/2.8.5rel.1 libwww-FM/2.14 SSL-MM/1.4.1 GNUTLS/1.2.9',
  'Mozilla/5.0 (Windows NT 10.0; WOW64) AppleWebKit/537.36 (KHTML, like Gecko) Chrome/61.0.3163.100 Safari/537.36'
]

const getUrlHtml = async () => {
  try {
    // 外层定义的id
    const res = await superagent.get(`https://www.zcool.com.cn/?p=${id}`);
    return res.text
  } catch (err) {
    console.error(err);
    return false
  }
}

const getDom = (html) => {
  if (!html) return // 没html返回
  const $ = cheerio.load(html)
  let arr = [] // 储存需要下载的数据
  // 获取dom 循环写入数据
  $('.all-work-list .work-list-box .card-box').each((i, el) => {
    let img = $(el).find('.card-img a img').attr('src')
    let title = $(el).find('.card-info .card-info-title a').text()
    arr.push({
      title: title.replace(/\//g, ''), // 去掉 / 因为 / 会认为是路径, 根据实际情况来操作
      url: img.replace('@260w_195h_1c_1e_1o_100sh.jpg', '') // 去掉后缀 不使用缩略图 根据实际情况来操作
    })
  })
  return arr
}

const downloadImg = async (arr, id) => {
  // 先删除文件夹 可以不用这步 因为开始写的时候会重复创建 我又懒得删
  try {
    await fs.remove(path.join(__dirname, `/page${id}`))
  } catch (error) {
    console.log('删除文件夹失败')
  }
  // 创建文件夹 根据id命名
  try {
    await fs.mkdir(path.join(__dirname, `/page${id}` ))
  } catch (error) {
    return console.log('创建文件夹失败')
  }
  // 下载图片
  const download = (item, id) => {
    try {
      let userAgent = userAgents[parseInt(Math.random() * userAgents.length)]
      // 通过 superagent 保存图片
      const req =  superagent.get(item.url)
      .set({ 'User-Agent': userAgent })
      // 使用了stream(流)
      req.pipe(fs.createWriteStream(`./page${id}/${item.title}.png`))
      return `下载${item.title}done`
    } catch (error) {
      return console.log(`下载图片失败${item.title}`, error)
    }
  }

  try {
    // async map limit 控制并发数
    async.mapLimit(arr, 20, async item => download(item, id), (err, results) => {
      if (err) throw err
      console.log(results)
    })
  } catch (error) {
    console.log(`async.mapLimit${error}`)
  }

}

const init = async () => {
  for (let i = 0; i <= maxPage; i++) {
    let urlHtml = await getUrlHtml()
    let getDate = await getDom(urlHtml)
    await downloadImg(getDate, id)
    id = i + 1
  }
}

init()

不足, 没有动态设置Ip等等, 希望大佬多多指点

toString(36)

2020-05-29 23:02:07

在某个开源项目里面发现一个随机生成 ID 的方法, 于是好奇的搜了搜, 发现一篇写的不错的文章!!!

文章地址

方法源码

Math.random().toString(36).substr(2, 9);

这个方法会返回一串随机的 ID adp1r8xh7 类似于这样的

HackMD

在 HackMD 里面(一款很好用的在线编辑工具) 在上传的时候会有个占位 Tag

![Uploading file..._unv0ukdwd]()

_unv0ukdwd 这个 ID 就是随机生成的!!!

Ant Design

分享给群友的时候, 群友提到 antd 里面也用到了了

Select选择器

const children = [];
for (let i = 10; i < 36; i++) {
  children.push(<Option key={i.toString(36) + i}>{i.toString(36) + i}</Option>);
}

因为是从 10 开始循环的 所以结果是从 A-Z

测试

for (let i = 0; i < 36; i++) {
  console.log(i, i.toString(36))
}

0 "0"
1 "1"
2 "2"
3 "3"
4 "4"
5 "5"
6 "6"
7 "7"
8 "8"
9 "9"
10 "a"
11 "b"
12 "c"
13 "d"
14 "e"
15 "f"
16 "g"
17 "h"
18 "i"
19 "j"
20 "k"
21 "l"
22 "m"
23 "n"
24 "o"
25 "p"
26 "q"
27 "r"
28 "s"
29 "t"
30 "u"
31 "v"
32 "w"
33 "x"
34 "y"
35 "z"
undefined

上面是测试结果

0-9 输出了 0-9

10-35 输出了 a-z

36 为 undefined

如果转换的基数大于10,则会**使用字母**来表示大于9的数字,比如基数为16的情况,则使用a到f的字母来表示10到15。 复制文章的文字

End

在一些简单的随机数生成或者demo展示的时候这个方法应该还是挺好用的

svg动画用复杂交互动画改善用户体验-练习

2019-07-07 23:53:32

书籍Demo
源码

https://codei.netlify.com/gist/b4c50cbd51edb77d431fe4d5929128ab

HTML

随意写的,主要用svg画一些线条和圆,具体的大家可以参考svg文档把

  ...
  <svg class="magnifier" vieBox="0 0 300 46">
    <!-- 圆 -->
    <circle class="magnifier-c" cx="20" cy="20" r="16" fill="none" stroke="#fff"></circle>
    <!-- 线 -->
    <line class="magnifier-l-c" x1="10" y1="10" x2="20" y2="20" fill="none" stroke="#fff" />
  </svg>
  ...

CSS

css部分写得比较乱(我真垃圾!!!)

主要通过Element添加class来切换(能用css的就不用js)

随便贴一点意思意思emmm

.magnifier-l-c,
 .line-line,
 .main input {
  /* 避免引起回流 */
  visibility: hidden;
  opacity: 0;
}

.magnifier.open .magnifier-l-c, 
.main.open .line-line,
.main.open input {
  /* 避免引起回流 */
  visibility: visible;
  opacity: 1;
}

JS

// 获取Element
let magnifier = document.querySelector('.magnifier')
let main = document.querySelector('.main')
let line = document.querySelector('.line')
// set click
magnifier.onclick = function() {
  // 判断是否有class
  let hasOpen = magnifier.classList.contains('open')
  console.log(hasOpen)
  // 设置 class
  if (hasOpen) {
    magnifier.classList.remove('open')
    main.classList.remove('open')
    line.classList.remove('open')
  } else {
    magnifier.classList.add('open')
    main.classList.add('open')
    line.classList.add('open')
  }
}

okk了, 大概就这么多,然后具体的可以看源码和书籍Demo

书籍Demo
[源码](

vue-lottie动画效果

2018-06-06 18:45:38

vue-lottie动画效果

仓库地址

模仿demo

blog

掘金

用lottie的好处有很多(.......此处省略n字) 简单来说就是简单高效的还原设计的动画效果

然后在个人项目使用vue-lottie 分享一些小小经验吧

废话不多说~~~ (正经分割线)


分析官方demo

先来一个简单的尝尝鲜

vue-lottie仓库

vue-lottie demo

打开仓库可以看见很多很棒的效果(nice

Installation

npm install --save vue-lottie

Usage

<template>
    <div id="app">
        <lottie :options="defaultOptions" :height="400" :width="400" v-on:animCreated="handleAnimation"/>
        <div>
            <p>Speed: x{{animationSpeed}}</p>
            <input type="range" value="1" min="0" max="3" step="0.5"
                   v-on:change="onSpeedChange" v-model="animationSpeed">
        </div>
        <button v-on:click="stop">stop</button>
        <button v-on:click="pause">pause</button>
        <button v-on:click="play">play</button>
    </div>
</template>

<script>
  import Lottie from './lottie.vue';
  import * as animationData from './assets/pinjump.json';

  export default {
    name: 'app',
    components: {
      'lottie': Lottie
    },
    data() {
      return {
        defaultOptions: {animationData: animationData},
        animationSpeed: 1
      }
    },
    methods: {
      handleAnimation: function (anim) {
        this.anim = anim;
      },

      stop: function () {
        this.anim.stop();
      },

      play: function () {
        this.anim.play();
      },

      pause: function () {
        this.anim.pause();
      },

      onSpeedChange: function () {
        this.anim.setSpeed(this.animationSpeed);
      }
    }
  }
</script>

这是之前官方给的demo代码 基本上和平时使用没啥不一样(所以只需要复制粘贴就ok了)

# json 动画效果AE转json后的文件
import * as animationData from './assets/pinjump.json';

引入的json需要改!!!

# 这里引入了 lottie组件
import Lottie from './lottie.vue';
# lottie.vue
<template>
    <div :style="style" ref="lavContainer"></div>
</template>

<script>
  import lottie from 'lottie-web'
export default {
    props: {
      options: {
        type: Object,
        required: true
      },
      height: Number,
      width: Number
    },
    data() {
      return {
        style: {
          width: this.width ? `${this.width}px` : '100%',
          height: this.height ? `${this.height}px` : '100%',
          overflow: 'hidden',
          margin: '0 auto'
        }
      }
    },
    mounted() {
      this.anim = lottie.loadAnimation({
        container: this.$refs.lavContainer,
        renderer: 'svg',
        loop: this.options.loop !== false,
        autoplay: this.options.autoplay !== false,
        animationData: this.options.animationData,
        rendererSettings: this.options.rendererSettings
      }
      )
      this.$emit('animCreated', this.anim)
    }
  }
</script>

然后会发现还是有错误(缺少组件!) 其实很简单啦,打开仓库进入src然后打开lottle组件然后复制过去就ok啦hhh(简单)

效果图

这是效果图(是不是很简单233

使用别的json文件

官方给给了一个很好的效果网站 地址

下载json文件 然后更换引入的json

# json 动画效果AE转json后的文件
import * as animationData from './assets/blood_transfusion_kawaii.json.json';

效果图

是不是也很简单!!!

使用vue-lottie模仿san官网的动画效果

先来效果图~~~

效果图

因为有多个需要用到lottie动画,想了半天不知道怎么解决调用方法的问题 最后想了一个简单的方法

直接将每一个动画抽到一个组件 组件内依然用之前的方法(稍微改造一下就行

然后利用父子组件传数据的形式传递json文件 子组件props接收

# html
<template>
  <div class="card-panel" @mouseenter="lottiePlay" @mouseleave="lottieStop">
    <div class="card-panel-icon-wrapper icon-shoppingCard">
      <lottie :options="defaultOptions" :height="80" :width="80" v-on:animCreated="handleAnimation" />
    </div>
    <div class="card-panel-description">
      <div class="card-panel-text">今日活跃</div>
      <div class="card-panel-num">2600</div>
    </div>
  </div>
</template>
# props
props: {
    animationDataPath: {
      type: Object,
      default: null
    }
  },
  data() {
  return {
    defaultOptions: {
      // animationData: animationDataPath,
      animationData: this.animationDataPath,
      autoplay: false,  # 不自动播放
      loop: false     # 不循环
    }
  }
}
# 事件调用
@mouseenter="lottiePlay" @mouseleave="lottieStop"

lottiePlay: function() {
  this.anim.play()
},
lottieStop: function() {
  this.anim.stop()
}

然后就到了父组件传数据

# 父组件
<panel-lottie :animationDataPath="animationDataPathOne"></panel-lottie>

animationDataPathOne: require('../../../public/json/compass.json')

自己用到了require引入json 然后打包出来 一样可以正常运行 如果大家有很好的方法可以教我!我好学习学习


emmmmm 大概就是这么多吧~

如果实在需要这个的源码可以打开我的github仓库 由于项目还是一个半成品 所以地址就放在最后面了

vue-lottie源码

项目地址

如果大家觉得不错的话 可以点star哦(厚脸皮233

css旋转立方体

2018-06-24 23:30:56

纯 CSS 制作绕中轴旋转的立方体

预览地址

<div id="wrapper">
    <div class="viewport">
        <div class="cube">
            <div class="side">
                <div class="cube-image">1</div>
            </div>
            <div class="side">
                <div class="cube-image">2</div>
            </div>
            <div class="side">
                <div class="cube-image">3</div>
            </div>
            <div class="side">
                <div class="cube-image">4</div>
            </div>
            <div class="side">
                <div class="cube-image">5</div>
            </div>
            <div class="side">
                <div class="cube-image active">6</div>
            </div>
        </div>
    </div>
</div>
*,
*::before,
*::after {
    -moz-box-sizing: border-box;
    -webkit-box-sizing: border-box;
    box-sizing: border-box;
}

body {
    background: #1b1b1b;
    font-family: 'HelveticaNeue-Light', 'Helvetica Neue Light', 'Helvetica Neue', Helvetica, Arial, 'Lucida Grande', sans-serif;
    font-weight: 300;
}


#wrapper {
    padding-top: 20%;
}

.viewport {
    -webkit-perspective: 800px;
    -moz-perspective: 800px;
    -ms-perspective: 800px;
    -o-perspective: 800px;
    perspective: 800px;


    -webkit-perspective-origin: 50% 50%;
    -moz-perspective-origin: 50% 50%;
    -ms-perspective-origin: 50% 50%;
    -o-perspective-origin: 50% 50%;
    perspective-origin: 50% 50%;

    -webkit-transform: scale(0.8, 0.8);
    -moz-transform: scale(0.8, 0.8);
    -ms-transform: scale(0.8, 0.8);
    -o-transform: scale(0.8, 0.8);
    transform: scale(0.8, 0.8);

        -webkit-transition: .28s;
    -moz-transition: .28s;
    -ms-transition: .28s;
    -o-transition: .28s;
    transition: .28s;

}

.cube {
    position: relative;
    margin: 0 auto;
    height: 200px;
    width: 200px;

    -webkit-transform-style: preserve-3d;
    -moz-transform-style: preserve-3d;
    -ms-transform-style: preserve-3d;
    -o-transform-style: preserve-3d;
    transform-style: preserve-3d;

    -webkit-transform: rotate(180deg) rotateY(0deg);
    -moz-transform: rotate(180deg) rotateY(0deg);
    -ms-transform: rotate(180deg) rotateY(0deg);
    -o-transform: rotate(180deg) rotateY(0deg);
    transform: rotate(180deg) rotateY(0deg);


    -webkit-transition: 5s;
    -moz-transition: 5s;
    -ms-transition: 5s;
    -o-transition: 5s;
    transition: 5s;
}

.cube>div {
    overflow: hidden;
    position: absolute;
    opacity: .5;
    height: 200px;
    width: 200px;
    background: rgba(0, 191, 255, 0.07);
    border: 2px solid rgb(0, 170, 255);

    -webkit-touch-callout: none;
    -moz-touch-callout: none;
    -ms-touch-callout: none;
    -o-touch-callout: none;
    touch-callout: none;

    -webkit-user-select: none;
    -moz-user-select: none;
    -ms-user-select: none;
    -o-user-select: none;
    user-select: none;
}

.cube>div>div.cube-image {
    height: 200px;
    width: 200px;

    -webkit-transform: rotate(180deg);
    -moz-transform: rotate(180deg);
    -ms-transform: rotate(180deg);
    -o-transform: rotate(180deg);
    transform: rotate(180deg);

    line-height: 200px;
    font-size: 80px;
    text-align: center;
    color: #1b9bd8;

    -webkit-transition: color 600ms;
    -moz-transition: color 600ms;
    -ms-transition: color 600ms;
    -o-transition: color 600ms;
    transition: color 600ms;
}


.cube>div:hover {
    cursor: pointer;
}

.cube>div:active {
    cursor: pointer;
}

.cube:hover {
    -webkit-transform: rotate(180deg) rotateY(360deg);
    -moz-transform: rotate(180deg) rotateY(360deg);
    -ms-transform: rotate(180deg) rotateY(360deg);
    -o-transform: rotate(180deg) rotateY(360deg);
    transform: rotate(180deg) rotateY(360deg);
}

.cube>div:first-child {
    -webkit-transform: rotateX(90deg) translateZ(100px);
    -moz-transform: rotateX(90deg) translateZ(100px);
    -ms-transform: rotateX(90deg) translateZ(100px);
    -o-transform: rotateX(90deg) translateZ(100px);
    transform: rotateX(90deg) translateZ(100px);
    outline: 1px solid transparent;
}

.cube>div:nth-child(2) {
    -webkit-transform: translateZ(100px);
    -moz-transform: translateZ(100px);
    -ms-transform: translateZ(100px);
    -o-transform: translateZ(100px);
    transform: translateZ(100px);
    outline: 1px solid transparent;
}

.cube>div:nth-child(3) {
    -webkit-transform: rotateY(90deg) translateZ(100px);
    -moz-transform: rotateY(90deg) translateZ(100px);
    -ms-transform: rotateY(90deg) translateZ(100px);
    -o-transform: rotateY(90deg) translateZ(100px);
    transform: rotateY(90deg) translateZ(100px);
    outline: 1px solid transparent;
}

.cube>div:nth-child(4) {
    -webkit-transform: rotateY(180deg) translateZ(100px);
    -moz-transform: rotateY(180deg) translateZ(100px);
    -ms-transform: rotateY(180deg) translateZ(100px);
    -o-transform: rotateY(180deg) translateZ(100px);
    transform: rotateY(180deg) translateZ(100px);
    outline: 1px solid transparent;
}

.cube>div:nth-child(5) {
    -webkit-transform: rotateY(-90deg) translateZ(100px);
    -moz-transform: rotateY(-90deg) translateZ(100px);
    -ms-transform: rotateY(-90deg) translateZ(100px);
    -o-transform: rotateY(-90deg) translateZ(100px);
    transform: rotateY(-90deg) translateZ(100px);
    outline: 1px solid transparent;
}

.cube>div:nth-child(6) {
    -webkit-transform: rotateX(-90deg) rotate(180deg) translateZ(100px);
    -moz-transform: rotateX(-90deg) rotate(180deg) translateZ(100px);
    -ms-transform: rotateX(-90deg) rotate(180deg) translateZ(100px);
    -o-transform: rotateX(-90deg) rotate(180deg) translateZ(100px);
    transform: rotateX(-90deg) rotate(180deg) translateZ(100px);
    outline: 1px solid transparent;
}


@media (max-width: 640px) {
    .viewport {
        -webkit-transform: scale(0.6, 0.6);
        -moz-transform: scale(0.6, 0.6);
        -ms-transform: scale(0.6, 0.6);
        -o-transform: scale(0.6, 0.6);
        transform: scale(0.6, 0.6);
    }
}

React showGithub

技术栈

// ...
"@antv/data-set": "^0.10.1",
"antd": "^3.11.6",
"axios": "^0.18.0",
"bizcharts": "^3.4.3",
"react": "^16.7.0",
"react-dom": "^16.7.0",
"react-redux": "^6.0.0",
"react-router-dom": "^4.3.1",
"react-scripts": "2.1.2",
"redux": "^4.0.1",
"redux-devtools-extension": "^2.13.7",
"redux-logger": "^3.0.6",
"redux-persist": "^5.10.0"
// ...

路由

<Router>
  <Switch>
    <Route path="/" exact component={IndexDom} />
    <Route path="/list" exact component={ListDom} />
    <Route path="/about/" exact component={DetailDom} />
    <Redirect from="*" to="/" />
  </Switch>
</Router>

Redux

// redux
import { connect } from "react-redux";
import action from "../../store/action/index";

// ...
const { xxx } = this.props;
// ...
const mapStateToProps = state => ({
  ...state
});
export default connect(
  mapStateToProps,
  action
)(IndexDom);

如果没有数据 变会自动跳转到首页。

export const isEmptyArray = arr => Array.isArray(arr) && arr.length === 0;

if (isEmptyArray(userList)) this.props.history.push("/");

Safari等浏览器 border-eadius失效...

2019-08-02 11:34:33

今天产品反馈了一个Bug说是鼠标经过,图片会 圆角=》无圆角=》圆角 的过程来变化

懒得贴图, 搜到这个文章肯定就会发生了hhh

增加解决方案,方便更快搜到问题

解决方案

给他的父级添加 transform

transform: rotate(0deg);
/* 懒得加 -webkit */

结论

我还不知道为什么会这样(可能是浏览器的解析不同???)

脑洞

猜测影响失效的原因

  • transition 去掉这个可以解决!!!但是没有动画只会很难看 不可取
  • transform 猜测
  • xxxxx

Building Components Custom Elements 自定义元素

2019-09-15 01:42:32

首先来写一个示例吧

Web Components 标准非常重要的一个特性是,它使开发者能够将HTML页面的功能封装为 custom elements(自定义标签),而往常,开发者不得不写一大堆冗长、深层嵌套的标签来实现同样的页面功能。这篇文章将会介绍如何使用HTML的custom elements。 - MDN

https://developer.mozilla.org/zh-CN/docs/Web/Web_Components/Using_custom_elements

具体看MDN文档,(复制完应该就差不多了 然后去这里玩)

https://developers.google.com/web/fundamentals/web-components/

查看demo

<style for-run for-show>
.popup-info {
  width: 100px;
  height: 100px;
  position: relative;
  top: 100px;
  left: 300px;
}
.popup-info1 {
  width: 100px;
  height: 100px;
  position: relative;
  top: 160px;
  left: 600px;
}
.popup-info img {
  width: 100%;
  height: 100%;
  object-fit: cover;
  cursor: pointer;
}
.popup-info .info {
  font-size: 20px;
  width: 200px;
  display: inline-block;
  border: 1px solid black;
  padding: 10px;
  background: white;
  border-radius: 4px;
  opacity: 0;
  transition: 0.6s all;
  position: absolute;
  bottom: 110px;
  left: 0px;
  z-index: 3;
}
.popup-info:hover .info{
  opacity: 1;
}
</style>

<template for-run for-show>

<popup-info role="popup" img="https://ss2.bdstatic.com/70cFvnSh_Q1YnxGkpoWK1HF6hhy/it/u=4038933139,466219061&fm=26&gp=0.jpg" data-text="I Learn Js 💗"></popup-info>
<button id="remove">remove</button>
<button id="move">move</button>
<button id="toggle">toggle attribute</button>


<popup-info1 role="popup" img="https://ss2.bdstatic.com/70cFvnSh_Q1YnxGkpoWK1HF6hhy/it/u=4038933139,466219061&fm=26&gp=0.jpg" data-text="I Learn Js 💗"></popup-info1>

<button is="popup-button">popup-button!</button>

</template>

<script for-run for-show>
class popupInfo extends HTMLElement {
  constructor() {
    super()

  }
  static get observedAttributes() {
    return ['role']
  }
  // 生命周期钩子
  connectedCallback() {
    // 创建 div
    let div = document.createElement('div')
    div.setAttribute('role', 'popup-info')

    // 创建 img
    let img = document.createElement('img')
    let src = this.getAttribute('img')

    // 创建info信息
    let info = document.createElement('span')
    let text = this.getAttribute('data-text')

    // 设置img内容
    img.src = src
    img.alt = text

    // 设置info内容
    info.classList.add('info')
    info.innerText = text

    // 添加class
    div.classList.add('popup-info')

    // 添加内容 img info
    div.appendChild(img)
    div.appendChild(info)

    this.appendChild(div)
  }
  disconnectedCallback() {
    console.log('我没有了呀')
  }
  attributeChangedCallback(attrName, oldVal, newVal) {
    console.log('当前的属性:', attrName)
    console.log('当前的属性 old:', oldVal)
    console.log('当前的属性 new:', newVal)
  }
  adoptedCallback() {
    console.log('adoptedCallback 自定义元素被移入新的 document')
  }
}

customElements.define('popup-info', popupInfo)


// 测试 自定义元素被移入新的 document
const testAdoptedCallback = ()=> {
  // 创建 iframe
  const createWindow = () => {
    let iframe = document.createElement('iframe')
    document.body.appendChild(iframe)
    return iframe.contentWindow
  }
  let cw = createWindow()
  // 创建 自定义元素
  let cw1 = document.querySelector('popup-info')

  // 创建的元素插入到 新创建的iframe
  cw.document.body.appendChild(cw1)
}

const move = () => {
  let move = document.querySelector('#move')
  move.onclick = function() {
    testAdoptedCallback()
  }
}
move()

// 测试移除 popup-info
const remove = () => {
  let remove = document.querySelector('#remove')
  remove.onclick = function() {
    document.querySelector('popup-info').remove()
  }
}
remove()

// 测试属性被修改 toggle
const toggle = () => {
  let i = 0
  let toggle = document.querySelector('#toggle')
  toggle.onclick = function() {
    i++
    document.querySelector('popup-info').setAttribute('role', `popup-info-change, ${i}`)
  }
}
toggle()


class popupInfo1 extends popupInfo {
  constructor() {
    super()
  }
  connectedCallback() {
    this.innerText = 'extends popupInfo'
  }
}

customElements.define('popup-info1', popupInfo1)


class popupButton extends HTMLButtonElement {
  constructor() {
    super()
  }
  connectedCallback() {
    this.innerText += ' extends'
  }
}

customElements.define('popup-button', popupButton, {extends: 'button'})

</script>

定义新元素

class popupInfo extends HTMLElement {
  constructor() {
    super()
  }
  static get observedAttributes() {
    return ['role']
  }
  // 生命周期钩子
  connectedCallback() {
    // 创建 div
    let div = document.createElement('div')
    div.setAttribute('role', 'popup-info')

    // 创建 img
    let img = document.createElement('img')
    let src = this.getAttribute('img')

    // 创建info信息
    let info = document.createElement('span')
    let text = this.getAttribute('data-text')

    // 设置img内容
    img.src = src
    img.alt = text

    // 设置info内容
    info.classList.add('info')
    info.innerText = text

    // 添加class
    div.classList.add('popup-info')

    // 添加内容 img info
    div.appendChild(img)
    div.appendChild(info)

    this.appendChild(div)
  }
  disconnectedCallback() {
    console.log('我没有了呀')
  }
  attributeChangedCallback(attrName, oldVal, newVal) {
    console.log('当前的属性:', attrName)
    console.log('当前的属性 old:', oldVal)
    console.log('当前的属性 new:', newVal)
  }
  adoptedCallback() {
    console.log('adoptedCallback 自定义元素被移入新的 document')
  }
}

customElements.define('popup-info', popupInfo)
<popup-info role="popup" img="https://miro.medium.com/max/1440/1*LjR0UrFB2a__5h1DWqzstA.png" data-text="I Learn Js 💗"></popup-info>

定义一个自定义的元素 然后使用

扩展元素

扩展自定义元素

customElements 全局性用于定义自定义元素

customElements.define(),并使用 JavaScript class 扩展基础 HTMLElement

class popupInfo1 extends popupInfo {
  constructor() {
    super()
  }
  connectedCallback() {
    this.innerText = 'extends popupInfo'
  }
}

customElements.define('popup-info1', popupInfo1)

继承自定义元素好像效果有点不对(我还没找到为啥 希望大佬教教我)

有关创建自定义元素的规则

  • 自定义元素的名称必须包含短横线 (-)。因此,、 和 等均为有效名称,而 和 <foo_bar> 则为无效名称....
  • 您不能多次注册同一标记...
  • 自定义元素不能自我封闭标签

教程里面更详细

和上面很相识, 扩展了自定义的元素

扩展原生 HTML 元素

class popupButton extends HTMLButtonElement {
  constructor() {
    super()
  }
  connectedCallback() {
    this.innerText += ' extends'
  }
}

customElements.define('popup-button', popupButton, {extends: 'button'})

要扩展元素,您需要创建继承自正确 DOM 接口的类定义

扩展原生元素时,对 define() 的调用会稍有不同。所需的第三个参数告知浏览器要扩展的标记。

这很有必要,因为许多 HTML 标记均使用同一 DOM 接口

例如 section address 和 em(以及其他)都使用 HTMLElement;q 和 blockquote 则使用 HTMLQuoteElement;等等。

指定 {extends: 'blockquote'} 可让浏览器知道您创建的是 blockquote 而不是 q。有关 HTML DOM 接口的完整列表,请参阅 HTML 规范。

class popupButton extends HTMLButtonElement {}

customElements.define('popup-button', popupButton)

自定义元素响应

自定义元素可以定义特殊生命周期钩子

名称 描述
constructor 创建或升级元素的一个实例。用于初始化状态、设置事件侦听器或创建 Shadow DOM...
connectedCallback 元素每次插入到 DOM 时都会调用...
disconnectedCallback() 元素每次从 DOM 中移除时都会调用...
attributeChangedCallback(attrName, oldVal, newVal) 属性添加、移除、更新或替换...
adoptedCallback(attrName, oldVal, newVal) 自定义元素被移入新的 document...

https://developers.google.com/web/fundamentals/web-components/customelements#extendhtml

https://developer.mozilla.org/zh-CN/docs/Web/Web_Components/Using_custom_elements#%E4%BD%BF%E7%94%A8%E7%94%9F%E5%91%BD%E5%91%A8%E6%9C%9F%E5%9B%9E%E8%B0%83%E5%87%BD%E6%95%B0

上面写得很清晰 比我这个容易理解

  // 生命周期钩子
  connectedCallback() {
    // 创建 div
    let div = document.createElement('div')
    div.setAttribute('role', 'popup-info')

    // 创建 img
    let img = document.createElement('img')
    let src = this.getAttribute('img')

    // 创建info信息
    let info = document.createElement('span')
    let text = this.getAttribute('data-text')

    // 设置img内容
    img.src = src
    img.alt = text

    // 设置info内容
    info.classList.add('info')
    info.innerText = text

    // 添加class
    div.classList.add('popup-info')

    // 添加内容 img info
    div.appendChild(img)
    div.appendChild(info)

    this.appendChild(div)
  }

dom创建时候 创建内容

...
  disconnectedCallback() {
    console.log('我没有了呀')
  }
  ...

  // 测试移除 popup-info
const remove = () => {
  let remove = document.querySelector('#remove')
  remove.onclick = function() {
    document.querySelector('popup-info').remove()
  }
}
remove()

dom 移除执行的方法 可以移除事件什么的

...
  attributeChangedCallback(attrName, oldVal, newVal) {
    console.log('当前的属性:', attrName)
    console.log('当前的属性 old:', oldVal)
    console.log('当前的属性 new:', newVal)
  }
...
  // 测试属性被修改 toggle
const toggle = () => {
  let i = 0
  let toggle = document.querySelector('#toggle')
  toggle.onclick = function() {
    i++
    document.querySelector('popup-info').setAttribute('role', `popup-info-change, ${i}`)
  }
}
toggle()

需要注意的是,如果需要在元素属性变化后,触发 attributeChangedCallback()回调函数,你必须监听这个属性。这可以通过定义observedAttributes() get函数来实现,observedAttributes()函数体内包含一个 return语句,返回一个数组,包含了需要监听的属性名称:

  static get observedAttributes() {
    return ['role']
  }

监听属性变化 调用的方法 比如 role="popup" 什么的

...
  adoptedCallback() {
    console.log('adoptedCallback 自定义元素被移入新的 document')
  }
...

  // 测试 自定义元素被移入新的 document
const testAdoptedCallback = ()=> {
  // 创建 iframe
  const createWindow = () => {
    let iframe = document.createElement('iframe')
    document.body.appendChild(iframe)
    return iframe.contentWindow
  }
  let cw = createWindow()
  // 创建 自定义元素
  let cw1 = document.querySelector('popup-info')

  // 创建的元素插入到 新创建的iframe
  cw.document.body.appendChild(cw1)
}

const move = () => {
  let move = document.querySelector('#move')
  move.onclick = function() {
    testAdoptedCallback()
  }
}
move()

自定义元素被移入新的 document

元素定义的内容

class popupInfo extends HTMLElement {
  constructor() {
    super()

  }
  connectedCallback() {
     this.innerHTML = "xxxxxx";
  }
}

以新内容覆盖元素的子项并非一种好的做法,因为这样做会不符合设想。
添加元素定义内容的更好做法是使用 shadow DOM,下一篇文章会写

class popupInfoShadow extends HTMLElement {
  constructor() {
    super()

    let shadowRoot = this.attachShadow({mode: 'open'})
    shadowRoot.innerHTML = "<span>hello</span>"
  }

}

customElements.define('popup-info-shadow', popupInfoShadow)

通过 template 创建元素

<info-template></info-template>

<template id="info-template">
  <style>
    p {
      color: red;
    }
  </style>
  <p>hello template</p>

</template>


<script>
class infoTemplate extends HTMLElement {
  constructor(){
    super()

    let shadowRoot = this.attachShadow({mode: 'open'})
    const t = document.querySelector('#info-template')
    const instance = t.content.cloneNode(true)
    shadowRoot.appendChild(instance)
  }
}

customElements.define('info-template', infoTemplate)

  • 我们在 HTML 中定义新的元素:info-template
  • 元素的 Shadow DOM 使用 template 创建
  • 由于是 Shadow DOM,元素的 DOM 局限于元素本地
  • 由于是 Shadow DOM,元素的内部 CSS 作用域限于元素内

设置自定义元素样式

<style>
p {
  ...
}
</style>

:defined CSS 伪类 表示任何已定义的元素。这包括任何浏览器内置的标准元素以及已成功定义的自定义元素 (例如通过 CustomElementRegistry.define() 方法)。

https://developer.mozilla.org/zh-CN/docs/Web/CSS/:defined

app-drawer:not(:defined) {}
<style>
info-template {
  color:red;
  opacity: 0;
}
aa-bb:not(:defined) {
  color:red;
  opacity: 0;
}
</style>

<info-template></info-template>
<info-template>123</info-template>

<aa-bb>123</aa-bb>

定义之前会隐藏起来哦

其他详情

未知元素与未定义的自定义元素

HTML 使用起来非常宽松和灵活。例如,在页面上声明 randomtagthatdoesntexist,浏览器将非常乐意接受它。为什么非标准标记可以生效?答案在于 HTML 规范允许这样。规范没有定义的元素作为 HTMLUnknownElement 进行解析。

自定义元素则并非如此。如果在创建时使用有效的名称(包含“-”),则潜在的自定义元素将解析为 HTMLElement。 您可以在支持自定义元素的浏览器中核实这一点。打开控制台:Ctrl+Shift+J(或者在 Mac 上,Cmd+Opt+J)并粘贴下列代码行:

// "tabs" is not a valid custom element name
document.createElement('tabs') instanceof HTMLUnknownElement === true

// "x-tabs" is a valid custom element name
document.createElement('x-tabs') instanceof HTMLElement === true

API 参考

全局性 customElements 定义了处理自定义元素的方法。

define(tagName, constructor, options)

在浏览器中定义新的自定义元素。

customElements.define('my-app', class extends HTMLElement { ... });
customElements.define(
  'fancy-button', class extends HTMLButtonElement { ... }, {extends: 'button'});

抽离出来可以更利于阅读

get(tagName)

let Drawer = customElements.get('app-drawer');
console.log(Drawer)
if (Drawer) {
  let drawer = new Drawer();
}


let PopupInfo = customElements.get('popup-info');
console.log(PopupInfo)
if (PopupInfo) {
  let popupInfo = new PopupInfo();
}

在给定有效自定义元素标记名称的情况下,返回元素的构造函数。

如果没有注册元素定义,则返回 undefined。

whenDefined(tagName)

customElements.whenDefined('popup-info').then(() => {
  console.log('popup-info ready!');
});

customElements.whenDefined('app-drawer').then(() => {
  console.log('app-drawer ready!');
}).catch(err => {
  console.log('err', err)
})

如果定义了自定义元素,则返回可解析的 Promise。如果元素已定义,则立即得到解析。

如果标记名称并非有效自定义元素名称,则拒绝(好像也不会走catch)

历史记录和浏览器支持

如果您最近几年持续关注网络组件,您应知道 Chrome 36+ 实施的自定义元素 API 版本使用了 document.registerElement() 而不是 customElements.define()。

但前者是标准的弃用版本,称为 v0。customElements.define() 成为现行标准并逐步获得各大浏览器厂商的支持。这称为自定义元素 v1。

https://developers.google.com/web/fundamentals/web-components/customelements

浏览器支持

要检测自定义元素功能,检测是否存在 window.customElements:

const supportsCustomElementsV1 = 'customElements' in window;

Polyfill

https://www.npmjs.com/package/@webcomponents/custom-elements

注:无法对 :defined CSS 伪类执行 polyfill。 (没测试过)

const supportsCustomElementsV1 = 'customElements' in window;
function loadScript(src) {
  return new Promise((resolve, reject) => {
    const script = document.createElement('script')
    script.src = src
    script.onload = resolve
    script.onerror = reject
    document.head.appendChild(script)
  })
}

if (!supportsCustomElementsV1) {
  loadScript('https://unpkg.com/@webcomponents/custom-elements')
  console.log('use polyfill')
} else {
  // Native support.Good to go.
  console.log('native')
}

总结:

自定义元素提供了一种新工具,可让我们在浏览器中定义新 HTML 标记并创建可重用的组件。
它们与 Shadow DOM 和 template 等新平台原语结合使用,我们可开始实现更多的可能

  • 创建和扩展可重复使用组件的跨浏览器(网络标准)
  • 无需库或框架即可使用。原生 JS/HTML 威武!
  • 提供熟悉的编程模型。仅需使用 DOM/CSS/HTML。
  • 与其他网络平台功能良好匹配(Shadow DOM、template、CSS 自定义属性等)
  • 与浏览器的 DevTools 紧密集成。
  • 利用现有的无障碍功能。
  • (我也是复制的 2333)

https://developers.google.com/web/fundamentals/web-components/customelements

https://developer.mozilla.org/zh-CN/docs/Web/Web_Components/Using_custom_elements

把AE动画转换成Web原生动画

2018-06-26 12:00:07

把AE动画转换成Web原生动画

先贴效果图

预览地址 pc 端食用更佳

模仿san官网效果文章地址

博客地址

img

img

右边这个动画会一直动 在firefox可以直接打开 其他浏览器需要服务环境

正经分割线


大家其实看第一个就知道怎么弄了 这个我之前写过一个vue-lottie 的时候说过类似的实现方法

文章地址


页面布局

<div class="home-banner">
    <div class="home-banner-left">
        <h1>
            <b>ECharts</b>数据可视化实验室</h1>
        <p>由百度 ECharts 团队创建,联合公司内外众多数据可视化从业人组成的技术研究虚拟组织,致力于数据可视化的相关研究、教育普及、产品研发及生态建设。</p>
    </div>
    <div class="home-banner-right">
        <div id="bm"></div>
    </div>
</div>

页面样式

*,
*::after,
*::before {
    box-sizing: border-box;
}

body {
    padding: 0;
    margin: 0;

    background-color: #102131;

    min-height: 100%;
}

.home-banner {
    max-width: 1130px;
    margin: 0 auto;
    position: relative;

    padding-top: 8%;

}


.home-banner-left {
    width: 54%;
    vertical-align: top;
    display: inline-block;
    position: relative;

}

.home-banner-left h1 {
    font-size: 48px;
    line-height: 62px;
    color: #fff;
    font-weight: 800;
    margin: 0;
    margin-bottom: 30px;
}

.home-banner-left h1 b {
    font-size: 53px;
    margin-right: 5px;
}

.home-banner-left p {
    color: rgba(255, 255, 255, .7);
    font-size: 15px;
    padding-right: 47px;
    padding-left: 5px;
    font-weight: 200;
    line-height: 30px;
    letter-spacing: 2px;
}

.home-banner-right {
    width: 62%;
    margin-left: -8%;
    margin-right: -300px;
    vertical-align: top;
    display: inline-block;
    position: relative;
}

#bm {
    max-width: 700px;
    display: block;
}
@media screen and (max-width: 768px) {
    .home-banner {
        padding-top: 2%;
    }

    .home-banner-left {
        text-align: center;
        display: block;
        width: 100%;
        box-sizing: border-box;
        padding: 0 20px;
    }

        .home-banner-right {
        display: block;
        width: 100%;
        margin: 0;
    }
}

功能实现

<script src="./lottie.min.js"></script>
<script>
    var animation = lottie.loadAnimation({
        container: document.getElementById('bm'), // the dom element that will contain the animation
        renderer: 'svg',
        loop: true,
        autoplay: true,
        path: 'test.json' // the path to the animation json
    });
</script>

其实这里复制粘贴就好了2333

预览地址 pc 端食用更佳

ife No.8下面还有一个模仿san官网效果的 结果发现之前已经模仿了2333机缘啊哈哈哈

[模仿san官网效果文章地址](

node mysql 增删改查【简易版】

2019-09-02 14:35:40

学习 node mysql, 然后做了一些简单的增删改查, 小小总结总结 Go!!!

资料: https://www.oschina.net/translate/using-node-mysql-javascript-client

init

使用 express 初始化

const express = require('express')
const app = express()

app.use('/', (req, res) => {
  res.send(`hello world`)
})

app.listen(3000, () => console.log('port in 3000'))

懒得截图, 运行localhost:3000 就能看到hello world (擅长输出hello world 233)

然后添加了nodemon 自动重启

yarn add nodemon -D

// package

"dev": "nodemon index.js"

yarn dev

方便

mysql

npm mysql

文档: https://www.npmjs.com/package/mysql

var mysql      = require('mysql');
var connection = mysql.createConnection({
  host     : 'localhost',
  user     : 'me',
  password : 'secret',
  database : 'my_db'
});
connection.connect();

connection.query('SELECT 1 + 1 AS solution', function (error, results, fields) {
  if (error) throw error;
  console.log('The solution is: ', results[0].solution);
});

connection.end();

上面需要根据实际情况修改, 比如说账号密码数据库

数据库我是用 Tool 创建的(不会终端命令 我真垃圾)

  • navicat premium 有免费试用时间

然后mysql我是用 brew 下载的 (方便)

brew install mysql

这里遇到一个问题

Error: ER_NOT_SUPPORTED_AUTH_MODE: Client does not support authentication protocol requested by server; consider upgrading MySQL client

解决方案:
https://stackoverflow.com/questions/50093144/mysql-8-0-client-does-not-support-authentication-protocol-requested-by-server

数据新建了一个image, 设置主键ID key 自增

// 插入数据 id自增
const sqlAdd = () => {
  // posts 表名
  let sqlAdd = 'INSERT INTO image SET ?';
  let sqlAddJson = {
    url: Math.floor(Math.random()*100) + '我是url',
    title: Math.floor(Math.random()*100) + '我是标题'
  }
  connection.query(sqlAdd, sqlAddJson, (err,res) => {
    if(err) return console.log('INSERT INFO ERROR:',err.message);
    console.log('INSERT INFO', res.insertId);
  });
}
// sqlAdd()

// 删除数据 id
const sqlDelete = id => {
  // 通过id查询
  let sql = `DELETE FROM image WHERE id = ?`;
  connection.query(sql, [id] , (err,res) => {
    if(err) console.log('[DELETE ERROR]:',err.message);
    console.log('DELETE', res.affectedRows);
  });
}
// sqlDelete(2)

// 更新数据 id
const sqlUpdate = id => {
  let sqlAddJson = {
    url: Math.floor(Math.random()*100) + '我是url',
    title: Math.floor(Math.random()*100) + '我是标题'
  }
  // 需要改的数据和查询id
  let sqlAdd = `UPDATE image SET url = ?, title = ? WHERE id = ?`;
  connection.query(sqlAdd, [sqlAddJson.url, sqlAddJson.title, id], (err,res) => {
    if(err) return console.log('UPDATE ERROR:',err.message);
    console.log('UPDATE', res.changedRows);
  });
}
// sqlUpdate(2)

// 查询数据
const sqlSelect = () => {
  // 查询那个表
  let sql = 'SELECT * FROM image';
  connection.query(sql,  (err,result) => {
    if(err) console.log('[SELECT ERROR]:',err.message);
    console.log('result', JSON.stringify(result));  //数据库查询结果返回到result中
  });
}
// sqlSelect()

end

很简易的增删改查 嘿嘿

mpvue外卖小程序

2018-09-09 00:37:52

前言

首先说说为什么自己会想着写一个小程序emmmmmm 感觉没有为什么 就是想写了 我就干了~~~hhhhh

我就粗略看了一下小程序的官方文档和mpvue的文档 然后就开撸了。

项目仓库 欢迎start和pr哦~~

为了节省大家的宝贵时间,不废话 直接进入正题;


技术栈

mpvue

mpvue 是一个使用 Vue.js 开发小程序的前端框架。框架基于 Vue.js......(可以看官网介绍~).

iview weapp

iview weapp 一套高质量的
微信小程序 UI 组件库.

界面展示

mpvue
mpvue
mpvue
mpvue
mpvue

大概的界面就是这样(界面是模仿得饿了么 我也只会模仿点页面了hhhhh)

完成进度

  • 小程序的基本界面展示
  • 简单的购买流程
  • 使用全局状态保存部分数据
  • 使用Fly请求数据
  • 使用Easy-mock模拟数据
  • ......
  • 没有数据库保存真实数据
  • 没有根据多个数据渲染店和商品
  • 没有做添加地址的数据校验等
  • 订单页面还需要优化 折叠显示等
  • 商家端还未开发
  • ......

其实还有很多功能没写,因为这是刚开始上班没事做的时候撸的(所以兴趣才是最好的老师),然后现在事情比较忙就可能先放下了 如果有大佬或者有时间的大佬可以帮忙完善或者pr emmm 你直接拿走再写也是可以的~

技术实现

技术实现过程和一些踩过的坑

界面

界面主要使用 iview weapp 组件库 然后 有一些组件库没有的自己原生写法来撸,这里还好没啥坑 但是在布局上面似乎有一个1px的问题 我好像没处理 不知道哪位大佬能发现 并且教我怎么解决~~ 单位主要使用小程序的rpx(很好用) 只需要根据iPhone6的尺寸来使用就可以了,详情可以看官方文档.

iview weapp input 似乎不能使用双向数据绑定,需要自己重新撸.

底部的tabBar我是用的json来配置的 省得自己写 方便

tabBar: {
      color: '#6f6f6f',
      selectedColor: '#18a3ff',
      backgroundColor: '#ffffff',
      borderStyle: 'black',
      list: [
        {
          pagePath: 'pages/index/main',
          iconPath: 'static/img/wm.png',
          selectedIconPath: 'static/img/wms.png',
          text: '外卖'
        },
        {
          pagePath: 'pages/order/main',
          iconPath: 'static/img/dd.png',
          selectedIconPath: 'static/img/dds.png',
          text: '订单'
        },
        {
          pagePath: 'pages/shopp/main',
          iconPath: 'static/img/tj1.png',
          selectedIconPath: 'static/img/tj1s.png',
          text: '推荐'
        },
        {
          pagePath: 'pages/user/main',
          iconPath: 'static/img/user.png',
          selectedIconPath: 'static/img/users.png',
          text: '我的'
        }
      ]
    }

这块的话可能需要大家查看小程序的文档来配置,其实也简单 跟玩一样就配置的非常好看

可能最麻烦的也是很简单的一个坑 如何引入 其实iview weapp 官方文档写的很清楚了 但是只是大家不知道这么配置而已 我来扣个代码演示一下.

到 GitHub 下载 iView Weapp 的代码,将 dist 目录拷贝到自己的项目中。然后按照如下的方式使用组件,以 Button 为例,其它组件在对应的文档页查看:

1. 添加需要的组件 在页面的 json 中配置(路径根据自己项目位置配置)
// 添加 config json
export default {
  config: {
    // 这儿添加要用的小程序组件
    usingComponents: {
      'i-button': '../../dist/button/index'
    }
  }
}
2. 在 wxml 中使用组件
<i-button type="primary" bind:click="handleClick">这是一个按钮</i-button>

是不是很简单!!! 没看明白的也可以看我的github仓库哦~

界面这块大概就是这么多 也可能我写掉了 后续想起来我会更一下的hhhh(懒)

mpvue

mpvue 新建页面需要重新 npm run dev 这个官方文档已经明确说明过了,由于一个页面只用重启一次 问题不大。

小程序的请求似乎不能用axios 所以使用了Fly 来代替,至于为什么 可以看github里面的issues

mpvue 支持小程序和vuejs的事件 详情可以查看文档

然后可能最坑的就是页面转跳了吧... 其实官方文档有写 目前页面路径最多只能十层。 比如说我再添加地址的时候 使用了wx.navigateTo(OBJECT) 然后返回到地址的列表页面然后继续重复添加地址 到达一定的数量之后 就不会再跳转,而且返回的也是之前重复的页面 用户体验很不好 所以需要一个解决的办法。文字太多可能看不懂 我来画个图。

mpvue

关于登录一块的话 我没有做什么处理 直接用新的用户信息接口就可以了

小程序与小游戏获取用户信息接口调整

<open-data type="groupName" open-gid="xxxxxx"></open-data>
<open-data type="userAvatarUrl"></open-data>
<open-data type="userGender" lang="zh_CN"></open-data>

i18n

Next

vue-i18n 为什么切换语言部分的数据会不变?

2019-09-26 15:48:12

vue-i18n国际化在data中切换不起作用

https://www.bbsmax.com/A/qVdep96p5P/

配置会写在另一篇文章里面!!

将this.$t() 写到了data属性里,切换语言不起作用

data是一次性生产的,你这么写只能是在 data 初始化的时候拿到这些被国际化的值,并不能响应变化。

官方的解决办法是,建议我们将表达式写到computed属性里,不要写到data里

copy⬆️

因为在 js 中的this.options只会在初始化的时候执行一次,它的数据并不会随着你本地 lang的变化而变化,所以需要你在lang变化的时候手动重设this.options。 -- copy

https://panjiachen.github.io/vue-element-admin-site/zh/guide/advanced/i18n.html

有些数据又不想写在computed里面怎么办???

解决方案

  1. 刷新页面 (体验不太好
  2. 写入computed
  3. 通过监听locale重新赋值
  watch: {
    '$i18n.locale'() {
      console.log(this.$i18n.locale)
      this.setContent() // 重新设置一下值
    }
  },

Building-Components shadow Dom

2019-09-25 00:41:02

https://developers.google.com/web/fundamentals/web-components/shadowdom#slots

<!-- custom dom -->
<custom-tabs>
    <!-- 定义slot -->
    <button slot="tab">button</button>
    <button slot="tab">button</button>
    <button slot="tab">button</button>
    <!-- 默认slot -->
    <section>section1</section>
    <section>section2</section>
    <section>section3</section>
  </custom-tabs>

  <script>
  let selected_ = null
  class customTab extends HTMLElement {
    constructor() {
      super()

      let shadowRoot = this.attachShadow({mode: 'open'})
      // 样式 内容
      shadowRoot.innerHTML = `
        <style>
          :host {
            border: 1px solid #ececec;
            display: inline-block;
          }

          #tabs ::slotted(*) {
            border: none;
            outline: none;
            padding: 20px 40px;
            background: #f1f1f1;
          }

          #tabs ::slotted([aria-selected="true"]) {
            background: #fff;
          }

          #panels {
            padding: 20px;
            font-size: 18px;
          }

          #panels ::slotted([aria-hidden="true"]) {
            display: none;
          }

        </style>

        <div id="tabs">
          <slot id="tabSlot" name="tab"></slot>
        </div>
        <div id="panels">
          <slot id="panelsSlot"></slot>
        </div>
      `
    }

    // get set
    get selected() {
      return selected_
    }

    set selected(idx) {
      selected_ = idx
      this._selected(idx)
    }

    connectedCallback() {

      // set role
      this.setAttribute('role', 'tab-list')

      // get Element
      let tabsSlot = this.shadowRoot.querySelector('#tabSlot')
      let panelsSlot = this.shadowRoot.querySelector('#panelsSlot')

      // filter Element
      this.tabs = tabsSlot.assignedNodes({flatten: true})
      this.panels = panelsSlot.assignedNodes({flatten: true}).filter(el => el.nodeType === Node.ELEMENT_NODE)


      // set role
      for (const [i, panel] of this.panels.entries()) {
        panel.setAttribute('role', 'tab-panel')
      }

      // set click keydown event
      this._boundOnTitleClick = this._onTitleClick.bind(this)
      this._boundOnKeydown = this._onKeydown.bind(this)

      tabsSlot.addEventListener('click', this._boundOnTitleClick)
      tabsSlot.addEventListener('keydown', this._boundOnKeydown)

      // set default selected, by tab html selected attribute
      this.selected = this._findFirstSelectedTab() || 0
    }

    // tab click event
    _onTitleClick(e) {
      if (e.target.slot === 'tab') {
        // now click Element index
        this.selected = this.tabs.indexOf(e.target)
      }
    }

    // tab keydown event
    _onKeydown(e) {
      switch(e.code) {
        // up left
        case 'ArrowUp':
        case 'ArrowLeft':
          e.preventDefault()
          // --, if it's 0 idx = length - 1 else idx
        var idx = this.selected - 1
        idx = idx < 0 ? this.tabs.length - 1 : idx
        // click event
        this.tabs[idx].click()
          break;
          // down right
        case 'ArrowDown':
        case 'ArrowRight':
          e.preventDefault()
          // ++ by & tab click event
        var idx = this.selected + 1
        this.tabs[idx % this.tabs.length].click()
          break;
        default:
          break;
      }
    }

    // find tab html attribute selected set now Tab
    _findFirstSelectedTab() {
      let selectedIdx
      // for
      for (const [i, tab] of this.tabs.entries()) {
        // set role
        tab.setAttribute('role', 'tab')
        // if tab has selected, nowTab is i
        if (tab.hasAttribute('selected')) {
          selectedIdx = i
        }
      }
      return selectedIdx
    }

    // set tab toggle function
    _selected(idx = null) {
      // for
      for(let i = 0, tab; tab = this.tabs[i]; ++i) {
        // if idx === i equal true
        let selected = idx === i
        // set attribute
        tab.setAttribute('aria-selected', selected)
        this.panels[i].setAttribute('aria-hidden', !selected)
      }
    }
  }


  if (customElements) customElements.define('custom-tabs', customTab)
  else console.log('不支持 custom')
  </script>

compose javascript

2020-02-26 22:54:15

在阅读某段代码的时候,了解到了compose 但是似乎不止redux 很多工具库都用到了这个function

code

/**
 * Composes single-argument functions from right to left. The rightmost
 * function can take multiple arguments as it provides the signature for
 * the resulting composite function.
 *
 * @param {...Function} funcs The functions to compose.
 * @returns {Function} A function obtained by composing the argument functions
 * from right to left. For example, compose(f, g, h) is identical to doing
 * (...args) => f(g(h(...args))).
 */

export default function compose(...funcs) {
  if (funcs.length === 0) {
    return arg => arg
  }

  if (funcs.length === 1) {
    return funcs[0]
  }

  return funcs.reduce((a, b) => (...args) => a(b(...args)))
}

以前的写法:

fn1(fn2(fn3(fn4(fnN(...)))))

现在的写法:

compose(fn1, fn2, fn3, fn4, fnN)(...)

相关链接:

redux

Use function composition in JavaScript

redux之compose

redux compose 详解

设计模式

2020-02-26 23:57:00

第一次学习设计模式 repo 所有的代码都在这儿啦!

工厂模式

相关资料:

JavaScript设计模式总结

js设计模式-工厂模式

创建三个角色然后随机决斗⚔️

console.log('工厂模式');

// 攻击力1-100
const attackPower = () => Math.floor(Math.random() * 100 + 1)

// 战士
class Warrior {
  constructor() {
    this.occupation = '战士'
    this.skill = '单一狂砍'
    this.blood = 100
    this.hit = attackPower()
    // other
  }
}

// 法师
class Mage {
  constructor() {
    this.occupation = '法师'
    this.skill = '集体冰冻'
    this.blood = 100
    this.hit = attackPower()
  }
}

// 射手
class Archer {
  constructor() {
    this.occupation = '射手'
    this.skill = '全局轰炸'
    this.blood = 100
    this.hit = attackPower()
  }
}

// 工厂对象
// class、function、object
class RoleFactory {
  constructor() {}
  createRole(role) {
    let roles = {
      Warrior: Warrior,
      Mage: Mage,
      Archer: Archer
    }

    const Character = roles[role]
    return role ? new Character() : new Warrior()

  }
}

// 创建角色
let roleFactory = new RoleFactory
let warrior = roleFactory.createRole('Warrior')
let mage = roleFactory.createRole('Mage')
let archer = roleFactory.createRole('Archer')

console.log('warrior:', warrior);
console.log('mage:', mage);
console.log('archer:', archer);

console.log('----------')

// 随机角色
const randomRole = (data, number) => {
  if (!data || !data.length || !number) return

  let randomRole = []

  for (let i = 0; i < data.length; i++) {
    let sub = Math.floor(Math.random() * data.length )
    randomRole.push(...data.splice(sub, 1))
  }
  return randomRole
}

// 战斗
const duel = roles => {
  // 最强角色
  let maxRole = null
  // 最高攻击力
  let maxHit = -1
  roles.map(item => {
    console.log(item)
    // 如果攻击力大于最大攻击力
    if (item.hit > maxHit) {
      // 设置当前角色
      maxRole = item
      // 攻击力也替换
      maxHit = item.hit
    } else if (item.hit === maxHit) {
      // 清空
      maxRole = null
      maxHit = -1
    }

  })

  return maxRole
}

const compose = (...fn) => fn.reduce((a, b) => (...args) => a(b(...args)))

let winner = compose(duel, randomRole)([warrior, mage, archer], 2)

if (winner) {
  console.log(`胜利者是: ${winner.occupation}, 他的技能是: ${winner.skill}, 攻击力: ${winner.hit}`)
} else {
  console.log(`这是平局`)
}

输出

工厂模式
warrior: Warrior { occupation: '战士', skill: '单一狂砍', blood: 100, hit: 1 }
mage: Mage { occupation: '法师', skill: '集体冰冻', blood: 100, hit: 39 }
archer: Archer { occupation: '射手', skill: '全局轰炸', blood: 100, hit: 33 }
----------
Warrior { occupation: '战士', skill: '单一狂砍', blood: 100, hit: 1 }
Mage { occupation: '法师', skill: '集体冰冻', blood: 100, hit: 39 }
胜利者是: 法师, 他的技能是: 集体冰冻, 攻击力: 39

因为第一次学习 还不太知道具体的优点和好处 也没办法口喷 所以暂时留个坑给自己 下次更加了解之后回来填坑 🍑

单例模式

https://juejin.im/post/5c984610e51d45656702a785

https://fanerge.github.io/2017/js%E8%AE%BE%E8%AE%A1%E6%A8%A1%E5%BC%8F-%E5%8D%95%E4%BE%8B%E6%A8%A1%E5%BC%8F.html

定义:单例就是保证一个类只有一个实例,实现的方法一般是先判断实例存在与否,如果存在直接返回,如果不存在就创建了再返回,这就确保了一个类只有一个实例对象。 -- 复制的

我的理解为一个类仅有一个实例, 并且全局访问都是相同的实例

建议先看完上面文章的单例模块, 我觉得他们总结得比我要好

// 登录框
/**
* 我这里单击按钮🔘显示登录框, 并且自身设置关闭事件 只是隐藏
* 在下一次显示登录框的时候不会创建 而是直接展示 因为单例模式
* 登录框已经创建了 所以直接返回了对象 然后展示
*/
const loginBox = (function(){
  let div
  return function() {
    if (!div) {
      div = document.createElement('div')
      div.onclick = function() {
        div.style.display = 'none'
      }
      div.innerHTML = '登录 hhhh (单击我隐藏)'
      document.body.appendChild(div)
    }
    return div
  }
})()

document.querySelector('#btn').onclick = function() {
  let loginbox = loginBox()
  loginbox.style.display = 'block'
}

这只是一个简单的示范... 🍑

装饰器模式

https://juejin.im/post/5c984610e51d45656702a785

在不改变对象自身的基础上,动态的给某个对象添加新的功能,同时又不改变其接口

https://fanerge.github.io/2017/js%E8%AE%BE%E8%AE%A1%E6%A8%A1%E5%BC%8F-%E8%A3%85%E9%A5%B0%E8%80%85%E6%A8%A1%E5%BC%8F.html

定义:装饰者(decorator)模式能够在不改变对象自身的基础上,在程序运行期间给对象动态的添加职责。

这样给对象动态的增加职责的方式就没有改变对象自身,一个对象放入另一个对象就形成了一条装饰链(一个聚合对象), 而上面的shot和track也就是装饰者、装饰函数 ,当函数执行时,会把请求转给链中的下一个对象。

{
  class Plane {
    fire() {
      console.log('发射普通子弹')
    }
  }

  class Missile {
    plane: any
    constructor(plane) {
      this.plane = plane
    }

    fire () {
      this.plane.fire()
      console.log('发射导弹')
    }
  }

  let plane = new Plane()
  plane = new Missile(plane)
  console.log(plane.fire())
}
// 利用AOP给函数动态添加功能,即Function的after或者before
{
  let func = function() {
    console.log('2')
  }

  Function.prototype.before = function(fn) {
    const _this = this
    return function() {
      fn.apply(this, arguments)
      return _this.apply(this, arguments)
    }
  }
  Function.prototype.after = function(fn) {
    const _this = this
    return function() {
      const ret = _this.apply(this, arguments)
      fn.apply(this, arguments)
      return ret
    }
  }
  
  func = func.before(function() {
    console.log(1)
  }).after(() => {
    console.log(3)
  });
  
  func()
}
{
  // 利用装饰器
  function func1() {
    console.log(1)
  }
  function func2() {
    console.log(2)
  }
  class Func {
    @func2
    @func1
    init() {
      console.log(3)
    }
  }

  let func = new Func()
  func.init()

}
{
  // 封装成函数
  const before = function (fn, before) {
    return function() {
      before.apply(this, arguments)
      return fn.apply(this, arguments)
    }
  }

  const after = function(fn, after) {
    return function() {
      const ret = fn.apply(this, arguments)
      after.apply(this, arguments)
      return ret
    }
  }

  function func(x) {
    console.log(x)
  }

  function func1(2) {
    console.log(1)
  }


  function func2() {
    console.log(2)
  }


  before(func1, func2)()
  after(func1, func2)()
}

核心就在after before

{
 // ...
 function handwashing() {
   console.log('洗手')
 }

 function drink() {
   console.log('喝水')
 }

 function eat() {
   console.log('吃饭')
 }


 before(eat, handwashing)()
 after(eat, drink)()
 
 // 吃饭前洗手
 // 吃饭后喝水
}

比较基础的演示了 :)

代理模式

为一个对象提供一个代用品或占位符,以便控制对它的访问。

https://fanerge.github.io/2017/js%E8%AE%BE%E8%AE%A1%E6%A8%A1%E5%BC%8F-%E4%BB%A3%E7%90%86%E6%A8%A1%E5%BC%8F.html

// 缓存代理
const mult = function() {
  let a = 1

  for (let i = 0; i < arguments.length; i++) {
    a *= arguments[i]
  }

  return a
}


const plus = function() {
  let a = 0

  for (let i = 0; i < arguments.length; i++) {
    a += arguments[i]
  }

  return a
}


const createProxyFactory = function(fn) {
  let cache = {} // 保存计算结果
  return function() {
    let args = Array.from(arguments).join(',')
    if (args in cache) {
      return cache[args]
    } else {
      return cache[args] = fn.apply(this, arguments)
    }
  }
}


let proxyMult = createProxyFactory(mult)
let proxyPlus = createProxyFactory(plus)

console.log(proxyMult(1,2,3,4))
console.log(proxyPlus(1,2,3,4))

这里每次进行同类的计算时(乘法和加法两类),先判断缓存对象cache中是否存在该参数连接成的字符串作为key的属性。
如果有,则直接从cache中读取,否则就进行计算并保存其结果。

// 虚拟代理

const sleep = time => new Promise(resolve => setTimeout(resolve, time))

const imgFunc = (function() {
  let imgNode = document.createElement('img')
  document.body.appendChild(imgNode)

  return {
    setSrc(src) {
      imgNode.src = src
    }
  }
})()


const proxyImage = (function() {
  const img = new Image()
  img.onload = function() {
    imgFunc.setSrc(this.src)
  }

  return {
    setSrc(src) {
      imgFunc.setSrc('https://ss1.bdstatic.com/70cFuXSh_Q1YnxGkpoWK1HF6hhy/it/u=766379944,3048822499&fm=26&gp=0.jpg')
      // 模拟加载时间
      setTimeout(() => {
        img.src = src
      }, 2000)
    }
  }
})()

proxyImage.setSrc('http://t8.baidu.com/it/u=1484500186,1503043093&fm=79&app=86&f=JPEG?w=1280&h=853')

图片懒加载的方式:先通过一张loading图占位,然后通过异步的方式加载图片,等图片加载好了再把完成的图片加载到img标签里面。

策略模式

https://fanerge.github.io/2017/js%E8%AE%BE%E8%AE%A1%E6%A8%A1%E5%BC%8F-%E7%AD%96%E7%95%A5%E6%A8%A1%E5%BC%8F.html

定义:定义一系列的算法,把它们一个个封装起来,并且使它们可以相互替换。

const strategy = {
  a(salary) {
     return salary * 4
  },
  b(salary) {
    return salary * 3
  },
  c(salary) {
    return salary * 2
  }
}


Object.freeze(strategy)


const returnMoney = (type, salary) => {
  return strategy[type](salary)
}

console.log(returnMoney('a', 1000))
console.log(returnMoney('b', 3000))
console.log(returnMoney('c', 4000))

简单的使用

ps: 策略模式指的是定义一系列的算法,把它们一个个封装起来,将不变的部分和变化的部分隔开,
实际就是将算法的使用和实现分离出来;

表单验证

我在原有的code上加了一个方法(错误展示, 比较基础所以很多地方没有考虑到)

<iframe height="265" style="width: 100%;" scrolling="no" title="策略模式" src="https://codepen.io/xiaotiandada/embed/xxZOBvG?height=265&theme-id=dark&default-tab=js,result" frameborder="no" allowtransparency="true" allowfullscreen="true"> See the Pen 策略模式 by xiaotiandada (@xiaotiandada) on CodePen. </iframe>
<!-- ... -->
<style>
  .error-msg {
    color: red;
    font-size: 14px;
  }
</style>

<form id="registerForm">
  <div>
    <label for="">用户名</label>
    <input type="text" name="username">
  </div>
  <div>
    <label for="">密码</label>
    <input type="password" name="password">
  </div>
  <div>
    <label for="">手机号码</label>
    <input type="text" name="phoneNumber">
  </div>
  <button>submit</button>
</form>
<!-- ... -->
// 这里我们实现一组策略类封装具体的验证规则
const strategyForm = {
	// 是否为空
	isNotEmpty (value, errorMsg){
		if (value === '') {
			return errorMsg;
		}
	},
	// 最小长度
	minLength (value, length, errorMsg){
		if (value.length < length) {
			return errorMsg;
		}
	},
	// 手机号码格式
	mobileFormat (value,errorMsg){
		if(!/(^1[3|5|8][0-9]{9}$)/.test(value)) {
			return errorMsg;
		}
	}
};
Object.freeze(strategyForm);


const Validator = function() {
  this.cache = []
}

Validator.prototype.add = function(dom, rules) {
	let slef = this
	// 添加错误信息提示
	const addErrorMsg = (msg, dom, errorMsg) => {
		// 如果有错误信息
		if (msg) {
			// 如果已经有了错误提示
			let errorMsgDom = dom.parentNode.querySelector('.error-msg')
			if (errorMsgDom) {
				errorMsgDom.innerHTML = errorMsg
			} else {
				// 没有提示创建
				let errorHtml = document.createElement('span')
				errorHtml.className = 'error-msg'
				errorHtml.innerHTML = errorMsg
				dom.parentNode.appendChild(errorHtml)
			}
		} else {
			// 没有错误提示
			// 如果有错误提示但是tag还存在则清除
			let errorMsgDom = dom.parentNode.querySelector('.error-msg')
			if (errorMsgDom) {
				errorMsgDom.remove()
			}
		}
	}
	for(let i = 0, rule; rule = rules[i++]; ) {
		(function(rule) {
			let strategyArr = rule.strategy.split(':')
			let errorMsg = rule.errorMsg

			slef.cache.push(function() {
				let strategy = strategyArr.shift() // 取第一个 策略名
				strategyArr.unshift(dom.value)
				strategyArr.push(errorMsg)
				let msg = strategyForm[strategy].apply(dom, strategyArr)
				addErrorMsg(msg, dom, errorMsg)
				return msg
			})

		})(rule)
	}
}

Validator.prototype.start = function() {
	for (let i = 0, validatorFunc; validatorFunc = this.cache[i++];) {
		let msg = validatorFunc()
		if (msg) return msg
	}
}

let registerForm = document.getElementById('registerForm')

let validateFunc = function() {
	let validator = new Validator()
	validator.add(registerForm.username, [
		{ strategy: 'isNotEmpty', errorMsg: '用户名不能为空' },
		{ strategy: 'minLength:6', errorMsg: '用户名长度不能小于6位' }
	])
	validator.add(registerForm.password,[
		{strategy: 'minLength:6',errorMsg:'密码长度不能小于6位'},
	]);
	validator.add(registerForm.phoneNumber,[
		{strategy: 'mobileFormat',errorMsg:'手机号格式不正确'},
	]);
	let errorMsg = validator.start()
	return errorMsg
}

registerForm.onsubmit = function() {
	let errorMsg = validateFunc()
	if (errorMsg) {
		console.log(errorMsg)
	} else {
		console.log('done')
	}
	return false
}

中介者模式

https://fanerge.github.io/2017/js%E8%AE%BE%E8%AE%A1%E6%A8%A1%E5%BC%8F-%E4%B8%AD%E4%BB%8B%E8%80%85%E6%A8%A1%E5%BC%8F.html

定义:中介者模式的作用就是解除对象与对象之间的紧耦合关系

// MVC 模式
let M = {}
let V = {}
let C = {}

M.data = 'Hello World'
V.render = (M) => {
    // alert(M.data)
    document.body.append(document.createElement('p').innerHTML = M.data)
}
C.handleOnload = () => {
    V.render(M)
}


window.onload = C.handleOnload
<iframe height="265" style="width: 100%;" scrolling="no" title="中介者模式" src="https://codepen.io/xiaotiandada/embed/abdBOvp?height=265&theme-id=dark&default-tab=js,result" frameborder="no" allowtransparency="true" allowfullscreen="true"> See the Pen 中介者模式 by xiaotiandada (@xiaotiandada) on CodePen. </iframe>
<form action="#" id="selectPhone">
  <div>
    <label for="">选择手机颜色</label>
    <select name="" id="colorSelect">
      <option value="">请选择</option>
      <option value="red">红色</option>
      <option value="blue">蓝色</option>
    </select>
  </div>
  <div>
    <label for="">选择内存</label>
    <select name="" id="memorySelect">
      <option value="">请选择</option>
      <option value="16G">16G</option>
      <option value="32G">32G</option>
    </select>
  </div>
  <div>
    <label for="">输入购买数量</label>
    <input type="number" min="0" id="numberInput">
  </div>
  <div>
    您选择了颜色: <div id="colorInfo"></div><br/>
    您选择了内存: <div id="memoryInfo"></div><br/>
    您输入了数量: <div id="numberInfo"></div><br/>
    <button id="nextBtn" disabled="true">请选择手机颜色和购买数量</button>
  </div>
</form>
let goods = {
   "red|32G": 3,
	"red|16G": 0,
	"blue|32G": 1,
	"blue|16G": 6
}

// 获得所有节点的引用,以便对其进行操作(中介者必许获得对其他对象的引用)
let colorSelect = document.getElementById( 'colorSelect' )
let memorySelect = document.getElementById( 'memorySelect' )
let numberInput = document.getElementById( 'numberInput' )

let colorInfo = document.getElementById( 'colorInfo' )
let memoryInfo = document.getElementById( 'memoryInfo' )
let numberInfo = document.getElementById( 'numberInfo' )
let nextBtn = document.getElementById( 'nextBtn' )

let mediator = (function() {
    return {
        changed(obj) {
            var color = colorSelect.value // 颜色
            let memory = memorySelect.value// 内存
            let number = numberInput.value // 数量

            if (obj === colorSelect) {
                colorInfo.innerHTML = color
            } else if (obj === memorySelect) {
                memoryInfo.innerHTML = memory
            } else if (obj === numberInput) {
                numberInfo.innerHTML = number
            } else {
                console.log(obj)
            }

            if (!color) {
                nextBtn.disabled = true
                nextBtn.innerHTML = '请选择手机颜色'
                return
            }

            if (!memory) {
                nextBtn.disabled = true
                nextBtn.innerHTML = '请选择内存大小'
                return
            }

            if (((number - 0) | 0 !== number - 0)) {
                nextBtn.disabled = true
                nextBtn.innerHTML = '请输入正确的购买数量'
                return
            }

            nextBtn.disabled = false;
			nextBtn.innerHTML = '放入购物车';

        }
    }
})()


// 与中介者联系起来,事件函数
colorSelect.onchange = function(){
	mediator.changed( this );
};
memorySelect.onchange = function(){
	mediator.changed( this );
};
numberInput.onchange = function(){
	mediator.changed( this );
};

发布订阅模式

// https://fanerge.github.io/2017/js%E8%AE%BE%E8%AE%A1%E6%A8%A1%E5%BC%8F-%E5%8F%91%E5%B8%83%E8%AE%A2%E9%98%85%E6%A8%A1%E5%BC%8F.html

// 对象间的一种一对多的关系,让多个观察者对象同时监听某一个主题对象,当一个对象发生改变时,所有依赖于它的对象都将得到通知。

const Event = (function() {
  // 缓存列表
  let list = {}

  // 监听函数
  const listen = function(key, fn) {
    if (!list[key]) {
      list[key] = []
    }
    list[key].push(fn)
  }

  // 触发监听
  const trigger = function() {
    let key = Array.prototype.shift.call(arguments)
    let fns = list[key]

    if (!fns || fns.length === 0) {
      return false
    }

    for (let i = 0, fn; fn = fns[i++];) {
      fn.apply(this, arguments)
    }
  }
  // 移除监听函数
  const remove = function(key, fn) {
    let fns = list[key]

    if (!fns) {
      return false
    }

    if (!fn) {
      fns && (fns.length = 0)
    } else {
      for (let i = fns.length - 1; i >= 0; i--) {
        let _fn = fns[i]
        if (_fn === fn) {
          fns.splice(i, 1)
        }
      }
    }
  }

  return {
    listen,
    trigger,
    remove
  }
})()


function d1() {
  console.log('d11111')
}

function d2() {
  console.log('d22222')
}

function d3() {
  console.log('d33333')
}

Event.listen('color', d1)
Event.listen('color', d2)
Event.listen('color', d3)


Event.listen('size', d1)
Event.listen('size', d2)
Event.remove('size', d1)
Event.listen('size', d3)

Event.trigger('color')
console.log('----')
Event.trigger('size')
console.log('----')
Event.trigger('color')


// d11111
// d22222
// d33333
// ----
// d22222
// d33333
// ----
// d11111
// d22222
// d33333

迭代器模式

// https://fanerge.github.io/2017/js%E8%AE%BE%E8%AE%A1%E6%A8%A1%E5%BC%8F-%E8%BF%AD%E4%BB%A3%E5%99%A8%E6%A8%A1%E5%BC%8F.html
// 定义:迭代器模式是指提供一种方法顺序访问一个聚合对象中的各个元素,而又不需要暴露该对象的内部表示。

// 内部迭代器

const each = (array, callback) => {
  for (let i = 0, len = array.length; i < len; i++) {
    if (callback.call(array[i], array[i], i) === false) {
      break
    }
  }
}

each([1,2,3,4,5], (val, i) => {
  console.log(val + ' - ' + i)
})
console.log('-----')
each([1,2,3,4,5], (val, i) => {
  if (i === 3) {
    return false
  }
  console.log(val + ' - ' + i)
})

// 外部迭代器

const Iterator = obj => {
  let current = 0;

  const next = () => {
    if (current > obj.length) {
      return false
    }
    current += 1;
  }

  const isDone = () => {
    return current >= obj.length
  }

  const getCurrentItem = () => {
    return obj[current]
  }

  return {
    next,
    isDone,
    getCurrentItem
  }
}

console.log('-----')

let iterator = Iterator([1,2,3,4,5])
console.log(iterator.getCurrentItem())

iterator.next()

console.log(iterator.getCurrentItem())
console.log(iterator.isDone())

iterator.next()
console.log(iterator.getCurrentItem())
iterator.next()
console.log(iterator.getCurrentItem())
iterator.next()
console.log(iterator.getCurrentItem())
iterator.next()
console.log(iterator.getCurrentItem())
iterator.next()

console.log(iterator.isDone())


// 1 - 0
// 2 - 1
// 3 - 2
// 4 - 3
// 5 - 4
// -----
// 1 - 0
// 2 - 1
// 3 - 2
// -----
// 1
// 1
// 2
// false
// 3
// 4
// 5
// undefined
// true

桥接模式

https://fanerge.github.io/2017/js%E8%AE%BE%E8%AE%A1%E6%A8%A1%E5%BC%8F-%E6%A1%A5%E6%8E%A5%E6%A8%A1%E5%BC%8F.html

定义:桥接模式(Bridge)将抽象部分与它的实现部分分离,使它们都可以独立地变化。

外观模式

<button id="button">外观模式</button>
<div id="foo"></div>
<div id="foo1"></div>
<div id="foo2"></div>
// https://fanerge.github.io/2017/js%E8%AE%BE%E8%AE%A1%E6%A8%A1%E5%BC%8F-%E5%A4%96%E8%A7%82%E6%A8%A1%E5%BC%8F.html
// https://natee.gitbooks.io/javascript-design-patterns/facade-pattern.html
// 定义:外观模式(Facade)为子系统中的一组接口提供了一个一致的界面,此模块定义了一个高层接口,这个接口使得这一子系统更加容易使用。


const addEvent = function(el, ev, fn) {
  if (el.addEventListener) {
    el.addEventListener(ev, fn, false)
  } else if (el.attachEvent) {
    el.attachEvent(`on${ev}`, fn)
  } else {
    el[`on${ev}`] = fn
  }
}

// 没测试
let N = window.N || {}
N.tools = {
  stopPropagation(e) {
    if (e.stopPropagation) {
      e.stopPropagation()
    } else {
      e.cancelBubble = true
    }
  },
  preventDefault(e) {
    if (e.preventDefault) {
      e.preventDefault()
    } else {
      e.returnValue = false
    }
  },
  stopEvent(e) {
    this.stopPropagation(e)
    this.preventDefault(e)
  }
}


addEvent(document.getElementById('button'), 'click', function() {
  console.log('button')
})


function setStyles(elements, styles) {
  for (let i = 0, len = elements.length; i < len; i++) {
    let element = document.getElementById(elements[i])
    if (element) {
      for (let property in styles) {
        element.style[property] = styles[property]
      }
    }
  }
}

setStyles(['foo', 'foo1', 'foo2'], {
  backgroundColor: 'red',
  width: '150px',
  height: '200px'
});

访问者模式

// https://fanerge.github.io/2017/js%E8%AE%BE%E8%AE%A1%E6%A8%A1%E5%BC%8F-%E8%AE%BF%E9%97%AE%E8%80%85%E6%A8%A1%E5%BC%8F.html
// 没太理解...

function Visitor () {
  this.visit  = function(ConceteElement) {
    ConceteElement.doSomething()
  }
}

function ConceteElement() {
  this.doSomething = function() {
    console.log('this is a element')
  }

  this.accept = function(visitor) {
    visitor.visit(this)
  }
}


let visitor = new Visitor()
let conceteElement = new ConceteElement()

conceteElement.accept(visitor)

模版方法模式

定义:模板方法模式由二部分组成,第一部分是抽象父类,第二部分是具体实现的子类,一般的情况下是抽象父类封装了子类的算法框架,包括实现一些公共方法及封装子类中所有方法的执行顺序,子类可以继承这个父类,并且可以在子类中重写父类的方法,从而实现自己的业务逻辑。

// https://fanerge.github.io/2017/js%E8%AE%BE%E8%AE%A1%E6%A8%A1%E5%BC%8F-%E6%A8%A1%E7%89%88%E6%96%B9%E6%B3%95%E6%A8%A1%E5%BC%8F.html


const ITInterview = function() {}

ITInterview.prototype.writeTest = function() {
  console.log('this is a write test')
}

ITInterview.prototype.technicalInterView = function() {
  console.log('this is a technical interview')
}

ITInterview.prototype.leader = function() {
  console.log('this is a leader interview')
}

ITInterview.prototype.waitNotice = function() {
  console.log('wait notice')
}

ITInterview.prototype.init = function() {
  this.writeTest()
  this.technicalInterView()
  this.leader()
  this.waitNotice()
}

const itInterview = new ITInterview()
itInterview.init()


// baidu
const BaiDuITInterview = function() {}
BaiDuITInterview.prototype = new ITInterview()

BaiDuITInterview.prototype.writeTest = function() {
  console.log('this is a baidu write test')
}

BaiDuITInterview.prototype.technicalInterView = function() {
  console.log('this is a baidu technical interview')
}


const baiduItInterview = new BaiDuITInterview()
baiduItInterview.init()

组合模式

定义:组合模式(Composite)将对象组合成树形结构以表示“部分-整体”的层次结构,组合模式使得用户对单个对象和组合对象的使用具有一致性。

// https://fanerge.github.io/2017/js%E8%AE%BE%E8%AE%A1%E6%A8%A1%E5%BC%8F-%E7%BB%84%E5%90%88%E6%A8%A1%E5%BC%8F.html
// 定义:组合模式(Composite)将对象组合成树形结构以表示“部分-整体”的层次结构,组合模式使得用户对单个对象和组合对象的使用具有一致性。


// 定义组合对象(文件夹)
let Folder = function(name) {
  this.name = name
  this.files = []
}

Folder.prototype.add = function(file) {
  this.files.push(file)
}

Folder.prototype.scan = function() {
  console.log('开始文件扫描:' + this.name)
	for( let i = 0, file, files = this.files; file = files[i++]; ){
		file.scan();
	}
} 

//定义叶子对象(文件)
let File = function(name) {
  this.name = name
}

File.prototype.add = function() {
  throw new Error('文件下面不能再添加文件')
}
File.prototype.scan = function() {
  console.log('开始扫瞄:' + this.name)
}


let folder = new Folder('前端学习');
let folder1 = new Folder('JS学习');
let folder2 = new Folder('JQ学习');

let file1 = new File('JS设计模式');
let file2 = new File('JQ实战');
let file3 = new File('前端性能');

folder1.add(file1);
folder2.add(file2);

folder.add(folder1);
folder.add(folder2);
folder.add(file3);
folder.scan();

// 开始文件扫描:前端学习
// 开始文件扫描:JS学习
// 开始扫瞄:JS设计模式
// 开始文件扫描:JQ学习
// 开始扫瞄:JQ实战
// 开始扫瞄:前端性能

备忘录模式

定义:在不破坏封装性的前提下,捕获一个对象的内部状态,并在该对象之外保存这个状态。这样就可以将该对象恢复到原先保存的状态

// https://fanerge.github.io/2017/js%E8%AE%BE%E8%AE%A1%E6%A8%A1%E5%BC%8F-%E5%A4%87%E5%BF%98%E5%BD%95%E6%A8%A1%E5%BC%8F.html
// 定义:在不破坏封装性的前提下,捕获一个对象的内部状态,并在该对象之外保存这个状态。这样就可以将该对象恢复到原先保存的状态

const render = data => {
  console.log(data)
}

const page = function () {
  let cache = {}

  return (page) => {
    console.log('page', page)
    console.log('cache', JSON.stringify(cache))

    if (cache[page]) {
      render(cache[page])
    } else {
      let data = [
        {
          title: "hi"
        }
      ]

      cache[page] = data
      render(data)
    }
  }
}()


page(1)
page(1)
page(1)
page(1)

page(1)
page(2)
page(3)
page(4)

page(2)

职责链模式

// https://fanerge.github.io/2017/js%E8%AE%BE%E8%AE%A1%E6%A8%A1%E5%BC%8F-%E8%81%8C%E8%B4%A3%E9%93%BE%E6%A8%A1%E5%BC%8F.html

// 定义:职责链模式(Chain of responsibility)是使多个对象都有机会处理请求,从而避免请求的发送者和接受者之间的耦合关系。将这个对象连成一条链,并沿着这条链传递该请求,直到有一个对象处理他为止。职责链模式的名字非常形象,一系列可能会处理请求的对象被该连接成一条链,请求在这些对象之间依次传递,直到遇到一个可以处理它的对象,我们把这些对象成为链中的节点。

// 500 元客户订单
var order500 = function (orderType, pay, stock) {
  if (orderType === 1 && pay) {
    console.log('500 rmb deposit, get 100 coupon ')
  } else {
    return 'nextSuccessor' // unknow the next node but always pass to next.
  }
};
// 200 元客户订单
var order200 = function (orderType, pay, stock) {
  if (orderType === 2 && pay) {
    console.log('200 rmb deposit , get 50 coupon')
  } else {
    return 'nextSuccessor';
  }
};
// 无预约客户订单
var orderNormal = function (orderType, pay, stock) {
  if (stock > 0) {
    console.log('normal buy no coupon')
  } else {
    console.log('the stock lack')
  }
};

let Chain = function (fn) {
  this.fn = fn
  this.successor = null
}

Chain.prototype.setNextSuccessor = function (successor) {
  return this.successor = successor
}

Chain.prototype.passRequest = function () {
  let ret = this.fn.apply(this, arguments)
  if (ret === 'nextSuccessor') {
    return this.successor && this.successor.passRequest.apply(this.successor, arguments)
  }
  return ret
}


// 现在我们把3个订单函数分别包装成职责链的节点
var chainOrder500 = new Chain(order500);
var chainOrder200 = new Chain(order200);
var chainOrderNormal = new Chain(orderNormal);

// 这里我们把上面封装的节点连成一条线,依次判断执行
chainOrder500.setNextSuccessor(chainOrder200)
chainOrder200.setNextSuccessor(chainOrderNormal)
// 测试代码
chainOrder500.passRequest(1,true,6); // 500 rmb deposit, get 100 coupon
chainOrder500.passRequest(2,true,4); // 200 rmb deposit , get 50 coupon

chainOrderNormal.passRequest(2,true,0); // 200 rmb deposit , get 50 coupon

状态模式

// https://fanerge.github.io/2017/js%E8%AE%BE%E8%AE%A1%E6%A8%A1%E5%BC%8F-%E7%8A%B6%E6%80%81%E6%A8%A1%E5%BC%8F.html
// 定义:状态模式(State)定义一个对象,这个对象可以通过管理其状态从而使得应用程序作出相应的变化。

var trafficLight = (function () {
	var currentLight = null;
	return {
		change: function (light) {
			currentLight = light;
			currentLight.go();
		}
	}
})();


// 红灯
function RedLight() { }
RedLight.prototype.go = function () {
	console.log("this is red light");
}
// 绿灯
function GreenLight() { }
GreenLight.prototype.go = function () {
	console.log("this is green light");
}
// 黄灯
function YellowLight() { }
YellowLight.prototype.go = function () {
	console.log("this is yellow light");
}

trafficLight.change(new RedLight()); // this is red light
trafficLight.change(new YellowLight()); // this is yellow light


function Menu() { }
Menu.prototype.toggle = function (state) {
	state();
}

var menuStates = {
	"show": function () {
		console.log("the menu is showing");
	},
	"hide": function () {
		console.log("the menu is hiding");
	}
};

var menu = new Menu();
menu.toggle(menuStates.show);
menu.toggle(menuStates.hide);

享元模式

// https://fanerge.github.io/2017/js%E8%AE%BE%E8%AE%A1%E6%A8%A1%E5%BC%8F-%E4%BA%AB%E5%85%83%E6%A8%A1%E5%BC%8F.html

// 定义:享元模式是一种用于性能优化的模式,如果系统中因为创建了大量类似的对象而导致内存不足或占用过高这种模式就非常有用了。

// 定义塑料模特的构造函数
var Model = function (sex) {
	this.sex = sex;
}
// 为模特拍照
Model.prototype.takePhoto = function () {
	console.log('sex=' + this.sex + 'underwear=' + this.underwear )
}
// 实例化一个男模特 和 一个女模特
var maleModel = new Model('male');
let female    = new Model('female');    
for (var i = 1; i <=50; i++){
	// 分别为模特换上 50 件内衣 以及 照相
	maleModel.underwear = 'underwear' + i;
	maleModel.takePhoto();
}
for (var i = 1; i <=50; i++){
	// 分别为模特换上 50 件内衣 以及 照相
	female.underwear = 'underwear' + i;
	female.takePhoto();
}


let toolTipFactory = (function() {
  let tooplTipPool = []
  return {
    create: function() {
      if (tooplTipPool.length === 0) {
        console.log(1)
        let div = document.createElement('div')
        document.body.appendChild(div)
        return div
      } else {
        console.log(2)
        return tooplTipPool.shift()
      }
    },
    recover: function(tooltipDOm) {
      tooplTipPool.push(tooltipDOm)
    }
  }
})()

// 2
let arr = []
for (let i = 0, str; str = ['a', 'b'][i++];) {
  let toolTip = toolTipFactory.create()
  toolTip.innerHTML = str
  arr.push(toolTip)
}


for (let i = 0, toolTip; toolTip = arr[i++];) {
  toolTipFactory.recover(toolTip)
}

// 11
// 22
// 1111
for (let i = 0, str; str = ['a', 'b', 'c', 'd', 'e', 'f'][i++];) {
  let toolTip = toolTipFactory.create()
  toolTip.innerHTML = str
}

算法数据结构

栈的定义及实现- Crystal_Guang - 博客园

数据结构之栈和队列- 归斯君- 博客园

class Stack {
  constructor() {
    // 存储栈的数据
    this.data = []; // {}
    // 记录栈的数据个数(相当于数组的 length)
    this.count = 0;
  }

  // push() 出栈方法
  push(item) {
    // 1. 数组方法 push 添加
    // this.data.push(item);
    // 2. 利用数组长度
    // this.data[this.data.length] = item;
    // 3. 计数方式
    this.data[this.count] = item;
    // 入栈后 count 自增
    this.count++;
  }

  // pop() 出栈方法
  pop() {
    // 出栈的前提是栈中存在元素,应先行检测
    if (this.isEmpty()) {
      console.log("栈为空");
      return;
    }
    // 移除栈顶数据
    // 1. 数组方法 pop 移除
    // this.data.pop();
    // 2. 计数方式
    const temp = this.data[this.count - 1];
    delete this.data[--this.count];
    return temp;
  }

  // isEmpty() 检测栈是否为空
  isEmpty() {
    return this.count === 0;
  }

  // top() 用于获取栈顶值
  top() {
    if (this.isEmpty()) {
      console.log("栈为空");
      return;
    }
    return this.data[this.count - 1];
  }

  // size() 获取元素个数
  size() {
    return this.count;
  }

  // clear() 清空栈
  clear() {
    this.data = [];
    this.count = 0;
  }
}

const s = new Stack();
s.push("x");
s.push("y");
s.push("z");

// console.log(s.pop());

console.log(s.top());
console.log(s.size());

// s.clear();

console.log(s);

剑指 Offer 30. 包含min函数的栈

解题思路:

  1. 在存储数据的栈外,再新建一个栈,用于存储最小值
  2. 入栈的时候正常存储值到 stackA 栈,如果存储值小于等于 stackB 栈顶值,stackB 也入栈
  3. 出栈的时候判断 stackA 栈顶值,如果 stackA 栈顶值全等 stackB 栈顶值,stackA stackB 一起出栈,否则仅 stackA 出栈

阶段一

stackA: [2]

stackB: [2]

阶段二

stackA: [2, 1]

stackB: [2, 1]

阶段二

stackA: [2, 1, 4, 5, 6]

stackB: [2, 1]

阶段三

stackA: [2, 1, 4, 5, 6, 1]

stackB: [2, 1, 1]

阶段性存储最小值到 stackB 栈,在出现新的小于等于最小值之前为一个阶段

解题思路:

GIF 2021-8-6 18-17-13.gif

GIF 2021-8-6 18-23-10.gif

// 在存储数据的栈外,再新建一个栈,用于存储最小值
class MinStack {
  constructor() {
    // stackA 用于存储数据
    this.stackA = [];
    this.countA = 0;

    // stackB 用于将数据降序存储(栈顶值为最小值)
    this.stackB = [];
    this.countB = 0;
  }

  // 入栈
  push(item) {
    // stackA 正常入栈
    this.stackA[this.countA++] = item;

    // stackB 如果没有数据 直接入栈
    // 如果 item 的值 <= stackB 的最小值,入栈
    if (this.countB === 0 || item <= this.min()) {
      this.stackB[this.countB++] = item;
    }
  }
  // 出栈
  pop() {
    // 先进行 stackB 的检测
    if (this.top() === this.min()) {
      // 如果 stackA 的栈顶值 === stackB 的栈顶值,stackB 出栈
      delete this.stackB[--this.countB];
    }

    // stackA 出栈
    delete this.stackA[--this.countA];
  }
  // 获取栈顶值
  top() {
    return this.stackA[this.countA - 1];
  }
  // 最小值函数
  min() {
    return this.stackB[this.countB - 1];
  }
}
class MinStack {
  constructor() {
    this.stack = [];
  }

  push(item) {
    this.stack.push(item);
  }

  pop() {
    return this.stack.pop();
  }

  top() {
    return this.stack[this.stack.length - 1];
  }

  min() {
    return Math.min.apply(null, this.stack);
  }
}
// 在存储数据的栈外,再新建一个栈,用于存储最小值
class MinStack {
  constructor() {
    // stackA 用于存储数据
    this.stackA = [];

    // stackB 用于将数据降序存储(栈顶值为最小值)
    this.stackB = [];
  }

  // 入栈
  push(item) {
    // stackA 正常入栈
    this.stackA.push(item);

    // stackB 如果没有数据 直接入栈
    // 如果 item 的值 <= stackB 的最小值,入栈
    if (this.stackB.length === 0 || item <= this.min()) {
      this.stackB.push(item);
    }
  }
  // 出栈
  pop() {
    // 先进行 stackB 的检测
    if (this.top() === this.min()) {
      // 如果 stackA 的栈顶值 === stackB 的栈顶值,stackB 出栈
      this.stackB.splice(this.stackB.length - 1, 1);
    }

    // stackA 出栈
    this.stackA.splice(this.stackA.length - 1, 1);
  }
  // 获取栈顶值
  top() {
    return this.stackA[this.stackA.length - 1];
  }
  // 最小值函数
  min() {
    return this.stackB[this.stackB.length - 1];
  }
}

739. 每日温度

通过维护单调栈 递减来计算

/**
 * @param {number[]} temperatures [73,74,75,71,69,72,76,73]
 * @return {number[]} [1,1,4,2,1,1,0,0]
 */
var dailyTemperatures = function (temperatures) {
  // 单调栈 递减
  // 默认第一个索引会入栈,for 直接从 1 开始
  const stack = [0];

  const len = temperatures.length;
  const ans = new Array(temperatures.length).fill(0);

  for (let i = 1; i < len; i++) {
    while (
      stack.length &&
      temperatures[i] > temperatures[stack[stack.length - 1]]
    ) {
      const previousIndex = stack[stack.length - 1];
      ans[previousIndex] = i - previousIndex;
      stack.pop();
    }
    stack.push(i);
  }

  return ans;
};

队列

先进先出

img

class Queue {
  constructor() {
    // 用于储存队列数据
    this.queue = [];
    this.count = 0;
  }

  // 入队方法
  enQueue(item) {
    this.queue[this.count++] = item;
  }

  // 出队方法
  deQueue() {
    if (this.isEmpty()) {
      return;
    }
    this.count--;
    return this.queue.shift();
  }

  // 空判断
  isEmpty() {
    return this.count === 0;
  }

  // size 大小 
  size() {
    return this.count;
  }

  // 获取队首元素
  top() {
    if (this.isEmpty()) {
      return;
    }
    return this.queue[0];
  }

  // 清空
  clear() {
    this.queue = [];
    this.count = 0;
  }
}
class Queue {
  constructor() {
    // 用于储存队列数据
    this.queue = {};
    this.count = 0;
    // 用于记录队首的键
    this.head = 0;
  }

  // 入队方法
  enQueue(item) {
    this.queue[this.count++] = item;
  }

  // 出队方法
  deQueue() {
    if (this.isEmpty()) {
      return;
    }

    const headData = this.queue[this.head];
    delete this.queue[this.head];

    this.head++;
    this.count--;
    return headData;
  }

  // 空判断
  isEmpty() {
    return this.count === 0;
  }

  // size 大小
  size() {
    return this.count;
  }

  // 获取队首元素
  top() {
    if (this.isEmpty()) {
      return;
    }
    return this.queue[this.head];
  }

  // 清空
  clear() {
    this.queue = {};
    this.count = 0;
    this.head = 0;
  }
}

双端队列

双端队列Deque | Kenve's Blog

img

class Deque {
  constructor() {
    this.queue = {};
    this.count = 0;
    this.head = 0;
  }

  // 队首添加
  addFront(item) {
    this.queue[--this.head] = item;
  }

  // 队尾添加
  addBack(item) {
    this.queue[this.count++] = item;
  }

  // 队首删除
  removeFront() {
    const headData = this.queue[this.head];
    delete this.queue[this.head++];
    return headData;
  }

  // 队尾删除
  removeBack() {
    const backData = this.queue[this.count - 1];
    delete this.queue[--this.count];
    // this.count - 1 与 上一步 this.count - 1 合并
    return backData;
  }

  // 获取队首值
  frontTop() {
    if (this.isEmpty()) {
      return;
    }
    return this.queue[this.head];
  }

  // 获取队尾值
  backTop() {
    if (this.isEmpty()) {
      return;
    }
    return this.queue[this.count - 1];
  }

  isEmpty() {
    return this.size() === 0;
  }

  size() {
    return this.count - this.head;
  }
}

剑指 Offer 59 - II. 队列的最大值

解题思路:

var MaxQueue = function () {
  // 存储队列数据
  this.queue = {};
  // 双端队列维护最大值(每个阶段的最大值)
  // 单调递减队列
  this.deque = {};
  // 准备队列相关的数据
  this.countQ = this.countD = this.headQ = this.headD = 0;
};

/**
 * 获取队列最大值
 * @return {number}
 */
MaxQueue.prototype.max_value = function () {
  if (this.isEmptyDeque()) {
    return -1;
  }

  // 返回 deque 队首值即可
  return this.deque[this.headD];
};

/**
 * 队尾入队
 * @param {number} value
 * @return {void}
 */
MaxQueue.prototype.push_back = function (value) {
  // 数据在 queue 入队
  this.queue[this.countQ++] = value;

  // 检测是否可以将数据添加到双端队列
  // - 队列不能为空
  // - value 大于队尾值
  while (!this.isEmptyDeque() && value > this.deque[this.countD - 1]) {
    // 删除当前队尾值
    delete this.deque[--this.countD];
  }

  // 将 value 入队
  this.deque[this.countD++] = value;
};

/**
 * 队首出队
 * @return {number}
 */
MaxQueue.prototype.pop_front = function () {
  if (this.isEmptyQueue()) {
    return -1;
  }

  // 比较 deque 与 queue 的队首值,如果相同,deque 出队,否则 deque 不操作
  if (this.queue[this.headQ] === this.deque[this.headD]) {
    delete this.deque[this.headD++];
  }

  // 给 queue 出队,并返回
  const frontData = this.queue[this.headQ];
  delete this.queue[this.headQ++];
  return frontData;
};

/**
 * 检测队列 deque 是否为空
 */
MaxQueue.prototype.isEmptyDeque = function () {
  return this.countD - this.headD === 0;
};
/**
 * 检测队列 queue 是否为空
 */
MaxQueue.prototype.isEmptyQueue = function () {
  return this.countQ - this.headQ === 0;
};

/**
 * Your MaxQueue object will be instantiated and called as such:
 * var obj = new MaxQueue()
 * var param_1 = obj.max_value()
 * obj.push_back(value)
 * var param_3 = obj.pop_front()
 */

剑指 Offer 59 - I. 滑动窗口的最大值

/**
 * @param {number[]} nums 传入的数组
 * @param {number} k 滑动窗口宽度
 * @return {number[]}
 */
var maxSlidingWindow = function (nums, k) {
  if (nums.length <= 1) {
    return nums;
  }

  const result = [];
  const deque = [];

  // 1 将窗口第一个位置的数据添加到 deque 中,保持递减
  deque.push(nums[0]);

  let i = 1;
  for (; i < k; i++) {
    // - 存在数据
    // - 在当前数据大于队尾值
    //   - 出队,再重复比较
    while (deque.length && nums[i] > deque[deque.length - 1]) {
      deque.pop();
    }
    deque.push(nums[i]);
  }

  // 将第一个位置的最大值添加到 result
  result.push(deque[0]);

  // 2 遍历后续的数据
  const len = nums.length;
  for (; i < len; i++) {
    // 同上进行比较
    while (deque.length && nums[i] > deque[deque.length - 1]) {
      deque.pop();
    }
    deque.push(nums[i]);

    // 检测当前最大值是否位于窗口外
    if (deque[0] === nums[i - k]) {
      deque.shift();
    }

    // 添加最大值到 result
    result.push(deque[0]);
  }

  return result;
};

console.log(maxSlidingWindow([1, 3, -1, -3, 5, 3, 6, 7], 3));

链表

640?wx_fmt=png&wxfrom=5&wx_lazy=1&wx_co=1

image-20220715174643065

image-20220715175110416

image-20220715183211623

image-20220715183922335

image-20220715183956174

image-20220715183904278

image-20220715184007103

class LinkedNode {
  constructor(value) {
    this.value = value;
    this.next = null;
  }
}

class LinkedList {
  constructor() {
    this.count = 0;
    this.head = null;
  }

  // 添加节点(尾)
  addAtTail(value) {
    // 创建新节点
    const node = new LinkedNode(value);
    // 检测链表是否存在数据
    if (this.count === 0) {
      this.head = node;
    } else {
      // 找到链表尾部节点,将最厚一个节点的 next 设置为 node
      let cur = this.head;
      while (cur.next) {
        cur = cur.next;
      }
      cur.next = node;
    }
    this.count++;
  }

  // 添加节点(首)
  addAtHead(value) {
    const node = new LinkedNode(value);
    if (this.count === 0) {
      this.head = node;
    } else {
      // 将 node 添加到 head 的前面
      node.next = this.head;
      this.head = node;
    }
    this.count++;
  }
  // 获取节点(根据索引)
  get(index) {
    if (this.count === 0 || index < 0 || index >= this.count) {
      return;
    }

    // 迭代链表,找到对应节点
    let current = this.head;
    for (let i = 0; i < index; i++) {
      current = current.next;
    }

    return current;
  }

  // 添加节点(根据索引)
  addAtIndex(value, index) {
    if (this.count === 0 || index >= this.count) {
      return;
    }

    // 如果 index <= 0 都添加到头部即可
    if (index <= 0) {
      return this.addAtHead(value);
    }

    // 后面为正常区间处理
    const prev = this.get(index - 1);
    const next = prev.next;

    const node = new LinkedNode(value);

    prev.next = node;
    node.next = next;

    this.count++;
  }

  // 删除(根据索引)
  removeAtIndex(index) {
    if (this.count === 0 || index < 0 || index >= this.count) {
      return;
    }

    if (index === 0) {
      this.head = this.head.next;
    } else {
      const prev = this.get(index - 1);
      prev.next = prev.next.next;
    }
    this.count--;
  }
}

const linkedList = new LinkedList();

linkedList.addAtTail("a");
linkedList.addAtTail("b");
linkedList.addAtTail("c");

linkedList.addAtHead("x");
linkedList.addAtHead("y");

linkedList.addAtIndex("z", 2);

206. 反转链表

迭代

/**
 * Definition for singly-linked list.
 * function ListNode(val, next) {
 *     this.val = (val===undefined ? 0 : val)
 *     this.next = (next===undefined ? null : next)
 * }
 */
/**
 * @param {ListNode} head
 * @return {ListNode}
 */
var reverseList = function (head) {
  // 保存 prev cur
  let prev = null;
  let cur = head;

  // 当 cur 是节点时进行迭代
  while (cur) {
    // 保存当前节点的下一个节点
    const next = cur.next;
    cur.next = prev;
    prev = cur;
    cur = next;
  }

  return prev;
};

const ans = reverseList({
  val: 1,
  next: {
    val: 2,
    next: {
      val: 3,
      next: null
    }
  }
});

console.log("ans", ans);

递归

var reverseList = function (head) {
  if (head === null || head.next === null) {
    return head;
  }

  const newHead = reverseList1(head.next);
  // 能够第一次执行到这里的节点为倒数第二个节点
  head.next.next = head;
  // head 的 next 需要在下一次递归时设置。当前设置为 null 不影响
  // - 可以让最好一次(1) 的时候设置为 null
  head.next = null;

  return newHead;
};

const ans = reverseList({
  val: 1,
  next: {
    val: 2,
    next: {
      val: 3,
      next: null
    }
  }
});

console.log("ans", ans);

面试题 02.08. 环路检测

/**
 * Definition for singly-linked list.
 * function ListNode(val) {
 *     this.val = val;
 *     this.next = null;
 * }
 */

/**
 * @param {ListNode} head
 * @return {ListNode}
 */
var detectCycle = function (head) {
  if (head === null) {
    return null;
  }

  // 声明快慢指针
  let slow = head;
  let fast = head;

  while (fast !== null) {
    // 慢指针每次移动一位
    slow = slow.next;

    // 如果不满足条件,说明 fast 为尾部节点,不存在环
    if (fast.next !== null) {
      // 快指针每次移动两位
      fast = fast.next.next;
    } else {
      return null;
    }

    // 检测是否有环
    if (fast === slow) {
      // 找到环的起点
      let ptr = head;
      while (ptr !== slow) {
        ptr = ptr.next;
        slow = slow.next;
      }

      // ptr 和 slow 的交点就是环的起始节点
      return ptr;
    }
  }

  // while 结束,说明 fast 为 null,说明链表没有环
  return null;
};

const vala = {
  val: "a",
  next: null
};
const valb = {
  val: "b",
  next: null
};
const valc = {
  val: "c",
  next: null
};

vala.next = valb;
valb.next = valc;
valc.next = valb;

console.log("detectCycle1", vala);
console.log("detectCycle", detectCycle(vala));

二叉树

144. 二叉树的前序遍历

方法一:递归

function TreeNode(val, left, right) {
  this.val = val === undefined ? 0 : val;
  this.left = left === undefined ? null : left;
  this.right = right === undefined ? null : right;
}

/**
 * Definition for a binary tree node.
 * function TreeNode(val, left, right) {
 *     this.val = (val===undefined ? 0 : val)
 *     this.left = (left===undefined ? null : left)
 *     this.right = (right===undefined ? null : right)
 * }
 */
/**
 * @param {TreeNode} root
 * @return {number[]}
 */
var preorderTraversal = function (root) {
  // 用于储存遍历的结果
  const res = [];
  // 设置函数用于进行递归遍历
  const preorder = (root) => {
    // 当前节点为空时,无需进行递归
    if (!root) {
      return;
    }

    // 记录根节点值
    res.push(root.val);
    // 前序遍历左子树
    preorder(root.left);
    // 前序遍历右子树
    preorder(root.right);
  };

  preorder(root);
  return res;
};

const A = new TreeNode("A");
const B = new TreeNode("B");
const C = new TreeNode("C");
const D = new TreeNode("D");
const E = new TreeNode("E");
const F = new TreeNode("F");

A.left = B;
A.right = C;

B.right = D;

C.left = E;
C.right = F;

console.log(preorderTraversal(A));


const one = new TreeNode(1);
const two = new TreeNode(2);
const three = new TreeNode(3);

one.right = two

two.left = three

console.log(preorderTraversal(one));

方法二:迭代

var preorderTraversal = function (root) {
  const res = [];
  const stk = [];

  while (root || stk.length) {
    while (root) {
      // 右子节点入栈
      stk.push(root.right);
      // 记录根节点
      res.push(root.val);

      // 下一步处理左子节点
      root = root.left;
    }
    // 左子树处理完毕,将 stk 出栈,处理右子树
    root = stk.pop();
  }
  return res;
};

console.log(preorderTraversal(one));
// 测试用例
[1,2,3,4,5,null,6,7,8,null,null,9]

104. 二叉树的最大深度

方法一:深度优先搜索 递归 DFS

/**
 * Definition for a binary tree node.
 * function TreeNode(val, left, right) {
 *     this.val = (val===undefined ? 0 : val)
 *     this.left = (left===undefined ? null : left)
 *     this.right = (right===undefined ? null : right)
 * }
 */
/**
 * @param {TreeNode} root
 * @return {number}
 */
var maxDepth = function (root) {
  if (!root) {
    return 0;
  }

  return Math.max(maxDepth(root.left), maxDepth(root.right)) + 1;
};

const A = new TreeNode("A");
const B = new TreeNode("B");
const C = new TreeNode("C");
const D = new TreeNode("D");
const E = new TreeNode("E");

A.left = B;
A.right = C;

C.left = D;

C.right = E;

console.log(maxDepth(A));

方法二:广度优先搜索 迭代 BFS

102. 二叉树的层序遍历

function TreeNode(val, left, right) {
  this.val = val === undefined ? 0 : val
  this.left = left === undefined ? null : left
  this.right = right === undefined ? null : right
}

const Node3 = new TreeNode('3')
const Node9 = new TreeNode('9')
const Node20 = new TreeNode('20')
const Node15 = new TreeNode('15')
const Node7 = new TreeNode('7')

Node3.left = Node9
Node3.right = Node20

Node20.left = Node15
Node20.right = Node7

/**
 * Definition for a binary tree node.
 * function TreeNode(val, left, right) {
 *     this.val = (val===undefined ? 0 : val)
 *     this.left = (left===undefined ? null : left)
 *     this.right = (right===undefined ? null : right)
 * }
 */
/**
 * @param {TreeNode} root
 * @return {number[][]}
 */
var levelOrder = function (root) {
  const ret = []
  if (!root) {
    return ret
  }

  // 存储队列数据
  const q = []
  q.push(root)

  // 遍历队列
  while (q.length !== 0) {
    const currentLevelSize = q.length
    // 针对本轮操作,创建一个新的二维数组
    ret.push([])
    for (let i = 0; i < currentLevelSize; i++) {
      // 将本次操作的结点出队
      const node = q.shift()
      ret[ret.length - 1].push(node.val)
      // 检测是否存在左右子结点,如果有入队即可
      if (node.left) {
        q.push(node.left)
      }
      if (node.right) {
        q.push(node.right)
      }
    }
  }

  return ret
}

console.log('levelOrder', levelOrder(Node3))


//  [ [ '3' ], [ '9', '20' ], [ '15', '7' ] ]

98. 验证二叉搜索树

image-20220831014409986

方法一: 递归

function TreeNode(val, left, right) {
  this.val = val === undefined ? 0 : val
  this.left = left === undefined ? null : left
  this.right = right === undefined ? null : right
}

const Node1 = new TreeNode('1')
const Node3 = new TreeNode('3')
const Node4 = new TreeNode('4')
const Node5 = new TreeNode('5')
const Node6 = new TreeNode('6')

Node5.left = Node1
Node5.right = Node4

Node4.left = Node3
Node4.right = Node6

/**
 * Definition for a binary tree node.
 * function TreeNode(val, left, right) {
 *     this.val = (val===undefined ? 0 : val)
 *     this.left = (left===undefined ? null : left)
 *     this.right = (right===undefined ? null : right)
 * }
 */

const helper = (root, lower, upper) => {
  if (root === null) {
    return true
  }
  // console.log(root.val, lower, upper)
  // 5 -Infinity Infinity
  // 1 -Infinity 5
  // 4 5 Infinity

  // 检测当前节点值是否超出边界
  if (root.val <= lower || root.val >= upper) {
    return false
  }

  // 当前节点通过检测,再检测左右子节点
  return (
    helper(root.left, lower, root.val) && helper(root.right, root.val, upper)
  )
}

/**
 * @param {TreeNode} root
 * @return {boolean}
 */
var isValidBST = function (root) {
  return helper(root, -Infinity, +Infinity)
}

console.log('isValidBST', isValidBST(Node5))

中序遍历

let isValidBST = function (root) {
  let stack = []
  let inorder = -Infinity

  while (stack.length || root !== null) {
    while (root !== null) {
      stack.push(root)
      root = root.left
    }

    root = stack.pop()

    // 如果中序遍历得到的节点值小于等于前一个 inorder,说明不是二叉搜索树
    if (root.val <= inorder) {
      return false
    }
    inorder = root.val
    root = root.right
  }
  return true
}

console.log('isValidBST', isValidBST(Node5))

94. 二叉树的中序遍历

递归

/**
 * Definition for a binary tree node.
 * function TreeNode(val, left, right) {
 *     this.val = (val===undefined ? 0 : val)
 *     this.left = (left===undefined ? null : left)
 *     this.right = (right===undefined ? null : right)
 * }
 */
/**
 * @param {TreeNode} root
 * @return {number[]}
 */
var inorderTraversal = function (root) {
  const res = []
  const inorder = (root) => {
    if (!root) {
      return
    }

    inorder(root.left)
    res.push(root.val)
    inorder(root.right)
  }

  inorder(root)

  return res
}

迭代

var inorderTraversal = function (root) {
  const res = []
  const stack = []

  while (root || stack.length) {
    while (root) {
      stack.push(root)
      root = root.left
    }

    root = stack.pop()
    res.push(root.val)
    root = root.right
  }
  return res
}

Morris 中序遍历


排序

算法学习 📒 repo

快速排序

这个方法比较简单也很好理解

方法一

let list = [6, 1, 2, 7, 9, 3, 4, 5, 10, 8];
// 自定义个数
let ageLists = []
for(let i = 0; i <=100; i++) {
    let id = Math.floor(Math.random() * 100 + 1)
    ageLists.push({
        id: id,
        age: Math.floor(Math.random() * 40 + 1),
        name: `学号${i}`,
        type: 'student'
    })
}

console.log(ageLists)

// 排数组
function quickSort(array) {
    if (array.length <= 1) {
        return array
    }

    let target = array[0]
    let left = []
    let right = []

    for (let i = 1; i < array.length; i++) {
        if (array[i] < target) {
            left.push(array[i])
        } else {
            right.push(array[i])
        }
    }

    return quickSort(left).concat([target], quickSort(right))
}

console.log(quickSort(list))

// 排对象
function quickSortObj(array, key) {
    if (array.length <= 1) {
        return array
    }

    let target = array[0]
    let left = []
    let right = []

    for (let i = 1; i < array.length; i++) {
        if (array[i][key] < target[key]) {
            left.push(array[i])
        } else {
            right.push(array[i])
        }
    }

    return quickSortObj(left, key).concat([target], quickSortObj(right, key))
}

console.time('quickSortObj')
console.log(quickSortObj(ageLists, 'id'))
console.timeEnd('quickSortObj')

方法二

// 排序数组
function quickSort(array, start, end) {
    if (end - start < 1) return

    let target = array[start]
    let l = start
    let r = end

    while (l < r) {
        while (l < r && array[r] >= target) {
            r--
        }
        array[l] = array[r]
        while (l < r && array[l] < target) {
            l++
        }
        array[r] = array[l]
    }

    array[l] = target

    quickSort22(array, start, l - 1)
    quickSort22(array, l + 1, end)
    return array
}

console.time('quickSort')
console.log(quickSort(list, 0, list.length - 1))
console.timeEnd('quickSort')

// 拍对象
function quickSort2Obj(array, start, end, key) {
    if (end - start < 1) return

    let target = array[start]
    let l = start
    let r = end

    while(l < r) {
        while(l < r && array[r][key] >= target[key]) {
            r--
        }
        array[l] = array[r]

        while(l < r && array[l][key] < target[key]) [
            l++
        ]
        array[r] = array[l]
    }

    array[l] = target

    quickSort2Obj(array, start, l - 1, key)
    quickSort2Obj(array, l + 1, end, key)

    return array
}

console.time('quickSort2Obj')
console.log(quickSort2Obj(ageLists, 0, ageLists.length - 1, 'id'))
console.timeEnd('quickSort2Obj')

这个对比方法一难点, 一下不容易理解

经过测试 少量的数据 方法二有时候比方法一要慢(10 - 100), 但是数据足够大的时候 方法二比方法一就要快很多(10000左右)

归并排序

let list = [6, 1, 2, 7, 9, 3, 4, 5, 10, 8];

function mergeSort(array) {
  if (array.length < 2) {
    return array
  }

  let mid = Math.floor(array.length / 2)
  let front = array.slice(0, mid)
  let end = array.slice(mid)

  return merge(mergeSort(front), mergeSort(end))
}

function merge(front, end) {
  let temp = []

  while (front.length && end.length) {
    if (front[0] < end[0] ){
      temp.push(front.shift())
    } else {
      temp.push(end.shift())
    }
  }

  while(front.length) {
    temp.push(front.shift())
  }
  while(end.length) {
    temp.push(end.shift())
  }
  return temp
}

console.time()
console.log(mergeSort(list))
console.timeEnd()

选择排序

let list = [6, 1, 2, 7, 9, 3, 4, 5, 10, 8];

function selectionSort(array) {
  for (let i = 0; i < array.length - 1; i++) {
    let minIndex = i
    for (let j = i + 1; j < array.length; j++) {
      if (array[j] < array[minIndex]) {
        minIndex = j
      }
    }
    [array[minIndex], array[i]] = [array[i], array[minIndex]]
  }
  return array
}

console.time()
console.log(selectionSort(list))
console.timeEnd()

插入排序

let list = [6, 1, 2, 7, 9, 3, 4, 5, 10, 8];


function insertSort(array) {
  for (let i = 1; i < array.length; i++) {
    let target = i
    for (let j = i - 1; j >= 0; j--) {
      if (array[target] < array[j]) {
        [array[target], array[j]] = [array[j], array[target]]
        target = j
      } else {
        break
      }
    }
  }
  return array
}


console.time()
console.log(insertSort(list))
console.timeEnd()

冒泡排序

let list = [6, 1, 2, 7, 9, 3, 4, 5, 10, 8];

function bubbleSort(array) {
  for (let i = 0; i < array.length; i++) {
    let complate = true
    for (let j = 0; j < array.length - 1 - i; j++) {
      console.log(1, array.length - 1 - i)
      if (array[j] > array[j + 1]) {
        [array[j], array[j + 1]] = [array[j + 1], array[j]]
        complate = false
      }
    }
    if (complate) {
      break
    }
  }
  return array
}

console.time()
console.log(bubbleSort(list))
console.timeEnd()

堆排序

let list = [6, 1, 2, 7, 9, 3, 4, 5, 10, 8];

function heapSort(array) {
  createHeap(array)
  console.log('array', array)
  // 交换第一个和最后一个元素,然后重新调整大顶堆
  for (let i = array.length - 1; i > 0; i--) {
    [array[i], array[0]] = [array[0], array[i]]
    adJust(array, 0, i)
  }
  return array
}

// 构建大顶堆,从第一个非叶子节点开始,进行下沉操作
function createHeap(array) {
  const len = array.length
  const start = parseInt(len / 2) - 1
  for (let i = start; i >= 0; i--) {
    adJust(array, i, len)
  }
}
// 将第target个元素进行下沉,孩子节点有比他大的就下沉
function adJust(array, target, len) {
  for (let i = 2 * target + 1; i < len; i= 2 * i + 1) {
    // 找到孩子节点中最大的
    if (i + 1 < len && array[i + 1] > array[i]) {
      i = i + 1
    }
    // 下沉
    if (array[i] > array[target]) {
      [array[i] ,array[target]] = [array[target], array[i]]
      target = i
    } else {
      break
    }
  }
}

console.time()
console.log(heapSort(list))
console.timeEnd()

shuffle

https://oldj.net/article/2017/01/23/shuffle-an-array-in-javascript/

https://github.com/lodash/lodash/blob/b0980a90fc83bc92e040f905ebed8196f895949c/.internal/shuffleSelf.js

https://bost.ocks.org/mike/shuffle/compare.html

-- To shuffle an array a of n elements (indices 0..n-1):
for i from n−1 downto 1 do
    j ← random integer such that 0 ≤ j ≤ i
    exchange a[j] and a[i]
let arr = [1,2,3,4,5,6,7,8,9,11]

const shuffle = (arr) => {
  let i = arr.length
  while (i) {
    let j = Math.floor(Math.random() * i--);
    [ arr[j], arr[i] ] = [ arr[i], arr[j] ]
  }
}

shuffle(arr)
console.log(arr)

// [4, 9, 1, 2, 7, 6, 5, 3, 8, 11]

Lodash

_.shuffle([1,2,3,4,5,6,7,8,9,0,10,11])

// (12) [5, 0, 3, 6, 11, 7, 8, 4, 9, 10, 1, 2]

svg stroke-dasharray、stroke-dasharray

2020-03-15 00:45:54

svg stroke-dasharray、stroke-dasharray的学习 京东零售设计服务平台在这里看到一个按钮 里面用到了这两个属性 于是找了资料学习一下

资料

SVG学习之stroke-dasharray 和 stroke-dashoffset 详解

这片文章我觉得讲得很不错 👍

<iframe height="265" style="width: 100%;" scrolling="no" title="svg stroke" src="https://codepen.io/xiaotiandada/embed/RwPMmbJ?height=265&theme-id=dark&default-tab=css,result" frameborder="no" allowtransparency="true" allowfullscreen="true"> See the Pen svg stroke by xiaotiandada (@xiaotiandada) on CodePen. </iframe>
  <svg id="line">
    <line x1="30" y1="30" x2="300" y2="30" stroke="red" stroke-width="20" stroke-dasharray="300"></line>
  </svg>

  <svg id="circle" width="200" height="200">
    <circle cx="100" cy="100" r="50" stroke="red" stroke-width="5" fill="green"></circle >
  </svg>

  <svg id="box">
    <polyline points="0,20 0,0, 100,0, 100,20" stroke="red" stroke-width="1"></polyline>
    <polyline points="0,20 0,40, 100,40, 100,0" stroke="red" stroke-width="1"></polyline>
  </svg>
    #line {
      stroke-dashoffset: 300
    }
    #line:hover {
      stroke-dashoffset: 0;
    }
    #line line {
      transition: all .3s;
    }


    #circle circle {
      transition: all .3s;
      stroke-dasharray: 314;
      stroke-dashoffset: 314;
    }


    #circle:hover circle {
      stroke-dashoffset: 0;
    }


    #box polyline {
      fill: transparent;
      stroke-dasharray: 360;
      stroke-dashoffset: 360;
      transition: all .3s;
    }
    #box:hover polyline {
      stroke-dashoffset: 0;
    }

下面是jd的按钮style

鼠标经过

我在这个cui项目里面也写了一个这个效果的小组件 具体可以自己查看 🍑

Echarts

饼图

Doughnut Chart

链接

官方给出了 demo 其实也还挺好看的,只是不适合直接放在业务里面(需要变变色,变色大小什么的)

让我们一步步改造他吧。

let json = {
  ...
   legend: {
     ...
    icon: "circle",  // legend icon形状 也可以自定义
  },
  series: [{
    name: "甜甜圈",
    type: "pie",
    radius: ["30%", "60%"], // 'radius' 扇区圆心角展现数据的百分比,半径展现数据的大小。
    center: ["50%", "50%"], // 饼图的中心(圆心)坐标,数组的第一项是横坐标,第二项是纵坐标。
    color: ["#1976D2", "#2196F3", "#03A9F4"], // 颜色
    ...
  }]
}

是不是很简单!感觉都没什么好写的 23333(继续改,后面使用上面的 json)。

仓库地址

有时候会遇到这种空心圆中间放 icon 图片的时候 于是就有下图

let json = {
  ...
    // graphic 是原生图形元素组件。可以支持的图形元素包括:
    // image, text, circle, sector, ring, polygon, polyline, rect, line, bezierCurve, arc, group,
   graphic: {
    type: "image",
    left: "center",  // 位置
    top: "center",   // 位置
    style: {
      image: "chartsGraphic.png",  // 路径
      width: 100,                  // 宽高
      height: 100
    }
  },
  ...
}

文档地址

继续复制粘贴 emmmm

如果很多个标题,设计稿放在两边! (xiaochangmian)

let json = {
  ...
  // 将legend 变成数组形式,左右各一个
    legend: [{
      x: "left",
      itemGap: 30,
      icon: "circle",
      data: []      // 里面存放名字
    },
    {
      x: "right",
      itemGap: 30,
      icon: "circle",
      data: []   // 里面存放名字
    }
  ],
  ...
}

// 我自己写了一个方法存进去,可供参考
// 传入数据和 json 配置
// 数字可以抽离出来,大家可以自行改造(或者取长度/2 需要算上单数情况)
function setChartsAreaLength(areaName, json) {
let arr1 = [],
arr2 = [];
areaName.map((item, index) => {
index < 8 ? (arr1 = [...arr1, item]) : (arr2 = [...arr2, item]);
});
json.legend[0].data = arr1;
json.legend[1].data = arr2;
}

Referer of a website

于是继续搞

这个同第一个 改改颜色就好了 然后隐藏标线和文字

let json = {
  ...
   series: [{
    data: [],
    label: {
      show: false // 是否显示标示文字
    },
    labelLine: {
      show: false // 是否显示视觉引导线
    }
  }]
  ...
};

Nested Pies

嵌套饼图

let json = {
  ...
  // 将legend 变成数组形式,左右各一个
    legend: [{
      data: ['白天', '晚上']
    },
    {
      data: ['上班', '游戏', '休息']
    }
  ],
   series: [{
      radius: [0, '36%'],    // 饼图大小  内饼图 从0-36%
      data: [{
          value: 12,
          name: '白天',
        },
        {
          value: 12,
          name: '晚上'
        }
      ]
    },
    {
      name: '分类',
      type: 'pie',
      radius: ['44%', '72%'],  // 饼图大小  内饼图 从44%-75%
      data: [{
          value: 335,
          name: '上班'
        },
        {
          value: 310,
          name: '游戏'
        }, {
          value: 300,
          name: '休息'
        }
      ]
    }
  ]
  ...
}

2018-12-24 更

嵌套饼图有时候可能文字需要在图表上面,让我们一起来改造改造

let json = {
  ...
  // 配置和上一个饼图一模一样
   series: [{
     label: {
        show: true,            // 显示折线文字(好像默认显示)
        color: '#fff',        // 文字颜色
        position: 'inside'    // 显示位置
      },
      labelLine: {
        show: false          // 内饼图文字在图上方 不需要折线
      },
    },
    {
    label: {
          show: true,       // 同上
          color: '#fff'
        },
        labelLine: {
          show: true,       // 需要折线(可自行扩展)
        },
      }
  ]
  ...
}

用nodejs快速在Matataki发文

2020-01-27 20:52:26

如何用nodejs快速在Matataki发文, 利用node爬虫来获取网页的内容然后转发到matataki上面

这里就自己的blog做一个简单的example 这是可能需要用的接口文档⬇️⬇️⬇️ (docsify真香)

开始

  1. 首先我们先初始一个项目

    mkdir matataki-post
    npm init -y
    touch index.js
  2. 理清思路

    就像怎么把大象🐘装进冰箱一样 1.... 2... 3... 首先我们需要在matataki上面注册一个账号, 我选择了邮箱 因为很简单也很方便 注册也挺快的, 然后去发布一篇文章 看看接口是如何调用的

    编辑

    发布

    分析Networ

    编辑: 我们在编辑文章的时候可以看出上传图片调用接口是 /post/uploadImage, 于是我们可以忽略其他接口调用

    发布: 发布的时候, 可以看出我们一共调用了两个核心的接口, 一个是ipfs上传, 一个是文章上传

    思路

    // 1、获取内容
    	// 1、获取html
    	// 2、解析dom获取内容
    // 2、发布文章
    	// 1、转存文章封面 因为文章的图片是外站的 我们需要转存到matataki上面才行
    	// 2、上传ipfs
    	// 3、上传文章
  3. 获取网页内容并解析dom

    因为我的blog是静态页面 所以用superagent就可以抓取到内容了, 如果是客户端渲染抓去内容可能有问题, 可以考虑用puppetter做爬虫, 然后用cheerio来解析dom 回味jq, 请求用axios因为做前端习惯了🍑

    npm i superagent cheerio axios
    const superagent = require("superagent");
    const cheerio = require("cheerio");
    const axios = require("axios");
    // ...
    // 获取内容
    const getHtml = async url => {
      try {
        // 根据url获取内容
        const res = await superagent.get(url);
        return res.text;
      } catch (err) {
        console.error(err);
        return false;
      }
    };
    
    // 拆dom 这块根据自己页面自定义
    const getDom = html => {
      if (!html) return false; // 没html返回
      const $ = cheerio.load(html);
      // 我的标题
      let title = $("#main #posts .post-header .post-title");
      // 描述
      let desc = $("#main #posts .post-body").text();
      // 内容
      let content = $("#main #posts .post-body").html();
      // 文章封面
      let cover = $("#main #posts .post-body img");
    	
      // 如果有标题
      let titleRes = title.length >= 1 ? $(title[0]).text() : "";
      // 如果有图片
      let coverRes = cover.length >= 1 ? $(cover[0]).attr("src") : "";
    	
      // 把数据返回出去
      return {
        title: titleRes,
        desc,
        content,
        cover: coverRes
      };
    };

    这块还是挺简单的233~~~

    # 然后我们可以调用方法 启动
    node index
    
    # 如果不出意外的话, 数据就能正常返回了 懒得截图了
  4. 发布文章

    首先我们需要一些平台需要的信息,

    • TOKEN, 可以去控制台的Cookies里面寻找, 找到一个keyACCESS_TOKEN 然后复制信息
    • URL 就是需要转发的文章
    • AUTHOR是你这个账号在平台的用户名
    • PLATFORM 是你这个账号的类型, 比如我是邮箱账号 我就是为 email
    const TOKEN = ""; // 身份证明
    const URL = ""; // 需要发的文章
    const AUTHOR = ""; // 用户名
    const PLATFORM = "email"; // 账号类型 邮箱账号

    然后我们需要一个config文件 我也这种做法对不对 反正能用🍑 如果你觉得直接写在index.js要方便 可以简化这步

    // config.js
    module.exports = {
      // 接口地址
      api: {
        development: "",
        production: "https://api.smartsignature.io"
      },
      // 页面地址
      webUrl: {
        development: "",
        production: "https://www.matataki.io"
      }
    }
    
    // index.js
    const config = require('./config') // config
    const mode = process.env.NODE_ENV || 'production'; // 模式
    const API = config.api[mode]; // 接口
    const webUrl = config.webUrl[mode]; // 页面地址

    增加两个命令 dev start 来区分 developmentproduction

      "scripts": {
        "test": "echo \"Error: no test specified\" && exit 1",
        "dev": "NODE_ENV=development node index",
        "start": "NODE_ENV=production node index"
      },

    把内容发布到ipfs

    const qs = require("qs");
    // ...
    
    console.log('开始获取Html...');
    let resHtml = await getHtml(URL);
    console.log('获取Dom...');
    let resDom = await getDom(resHtml);
    
    let data = {
        title: resDom.title.trim(),
        author: AUTHOR,
        desc: resDom.desc.trim(),
        content: resDom.content.trim()
      };
      data.desc = data.desc.replace(/[\r\n]/g, ""); // 去除回撤换行
      data.content = data.content.replace(/[\r\n]/g, ""); // 去除回撤换行
      let hash = await postIpfs(data);
      if (!hash) return console.log("not hash", hash);
    
    // 发布到ipfs
    const postIpfs = async ({ title, author, desc, content }) => {
      try {
        if (!TOKEN) throw new Error("没有token");
        const stringifyData = qs.stringify({
          "data[title]": title,
          "data[author]": author,
          "data[desc]": desc,
          "data[content]": content
        });
        let res = await axios({
          method: "post",
          url: `${API}/post/ipfs`,
          data: stringifyData,
          headers: { "x-access-token": TOKEN }
        });
        // console.log(res.data);
        if (res.status === 200 && res.data.code === 0) {
          return res.data.hash;
        } else return false;
      } catch (error) {
        console.log(error);
        return false;
      }
    };

    需要的 x-access-token 已经在前面定义过了, 成功请求后会返回hash地址

    然后转存图片

    下载图片这块, 按照search到的code没有修改, 使用request请求图片, 并且写入文件, 当然我也发现一个不错的第三方库, image-downloader 这个可以很轻松的下载图片

    const FormData = require('form-data');
    const fs = require('fs')
    const request = require('request')
    const path = require('path')
    // ...
    // 图片转存
    const downloadImage = async url => {
      if (!url) {
        console.log('没有url地址')
        return false
      }
      // https://github.com/Kerminate/douban-movies/blob/9119c276b2785b329f62cca684bc6d6459a7c57e/server/tasks/smms.js
    
      // 下载图片
      const downResources = (url, imgPath) => {
        return new Promise((resolve, reject) => {
          request
            .get(url)
            .pipe(fs.createWriteStream(imgPath))
            .on('finish', () => {
              resolve()
            })
        })
      }
    
      const fileName = 'photo.png'
      const imgPath = path.resolve(__dirname, './photo.jpg')
      try {
        await downResources(url, imgPath)
        // fix Callback must be a function
        const buffer = await fs.readFileSync(imgPath)
        const base64Image = Buffer.from(buffer).toString('base64')
    
        const form = new FormData()
        form.append('smfile', Buffer.from(base64Image, 'base64'), {
          filename: fileName
        })
        let headers = form.getHeaders()
        headers['x-access-token'] = TOKEN
        const res = await axios({
            method: 'POST',
            url: `${API}/post/uploadImage`,
            headers: headers,
            data: form
          })
        // console.log(res.data)
        if (res.status === 200 && res.data.code === 0) {
          return res.data.data.cover
        } else {
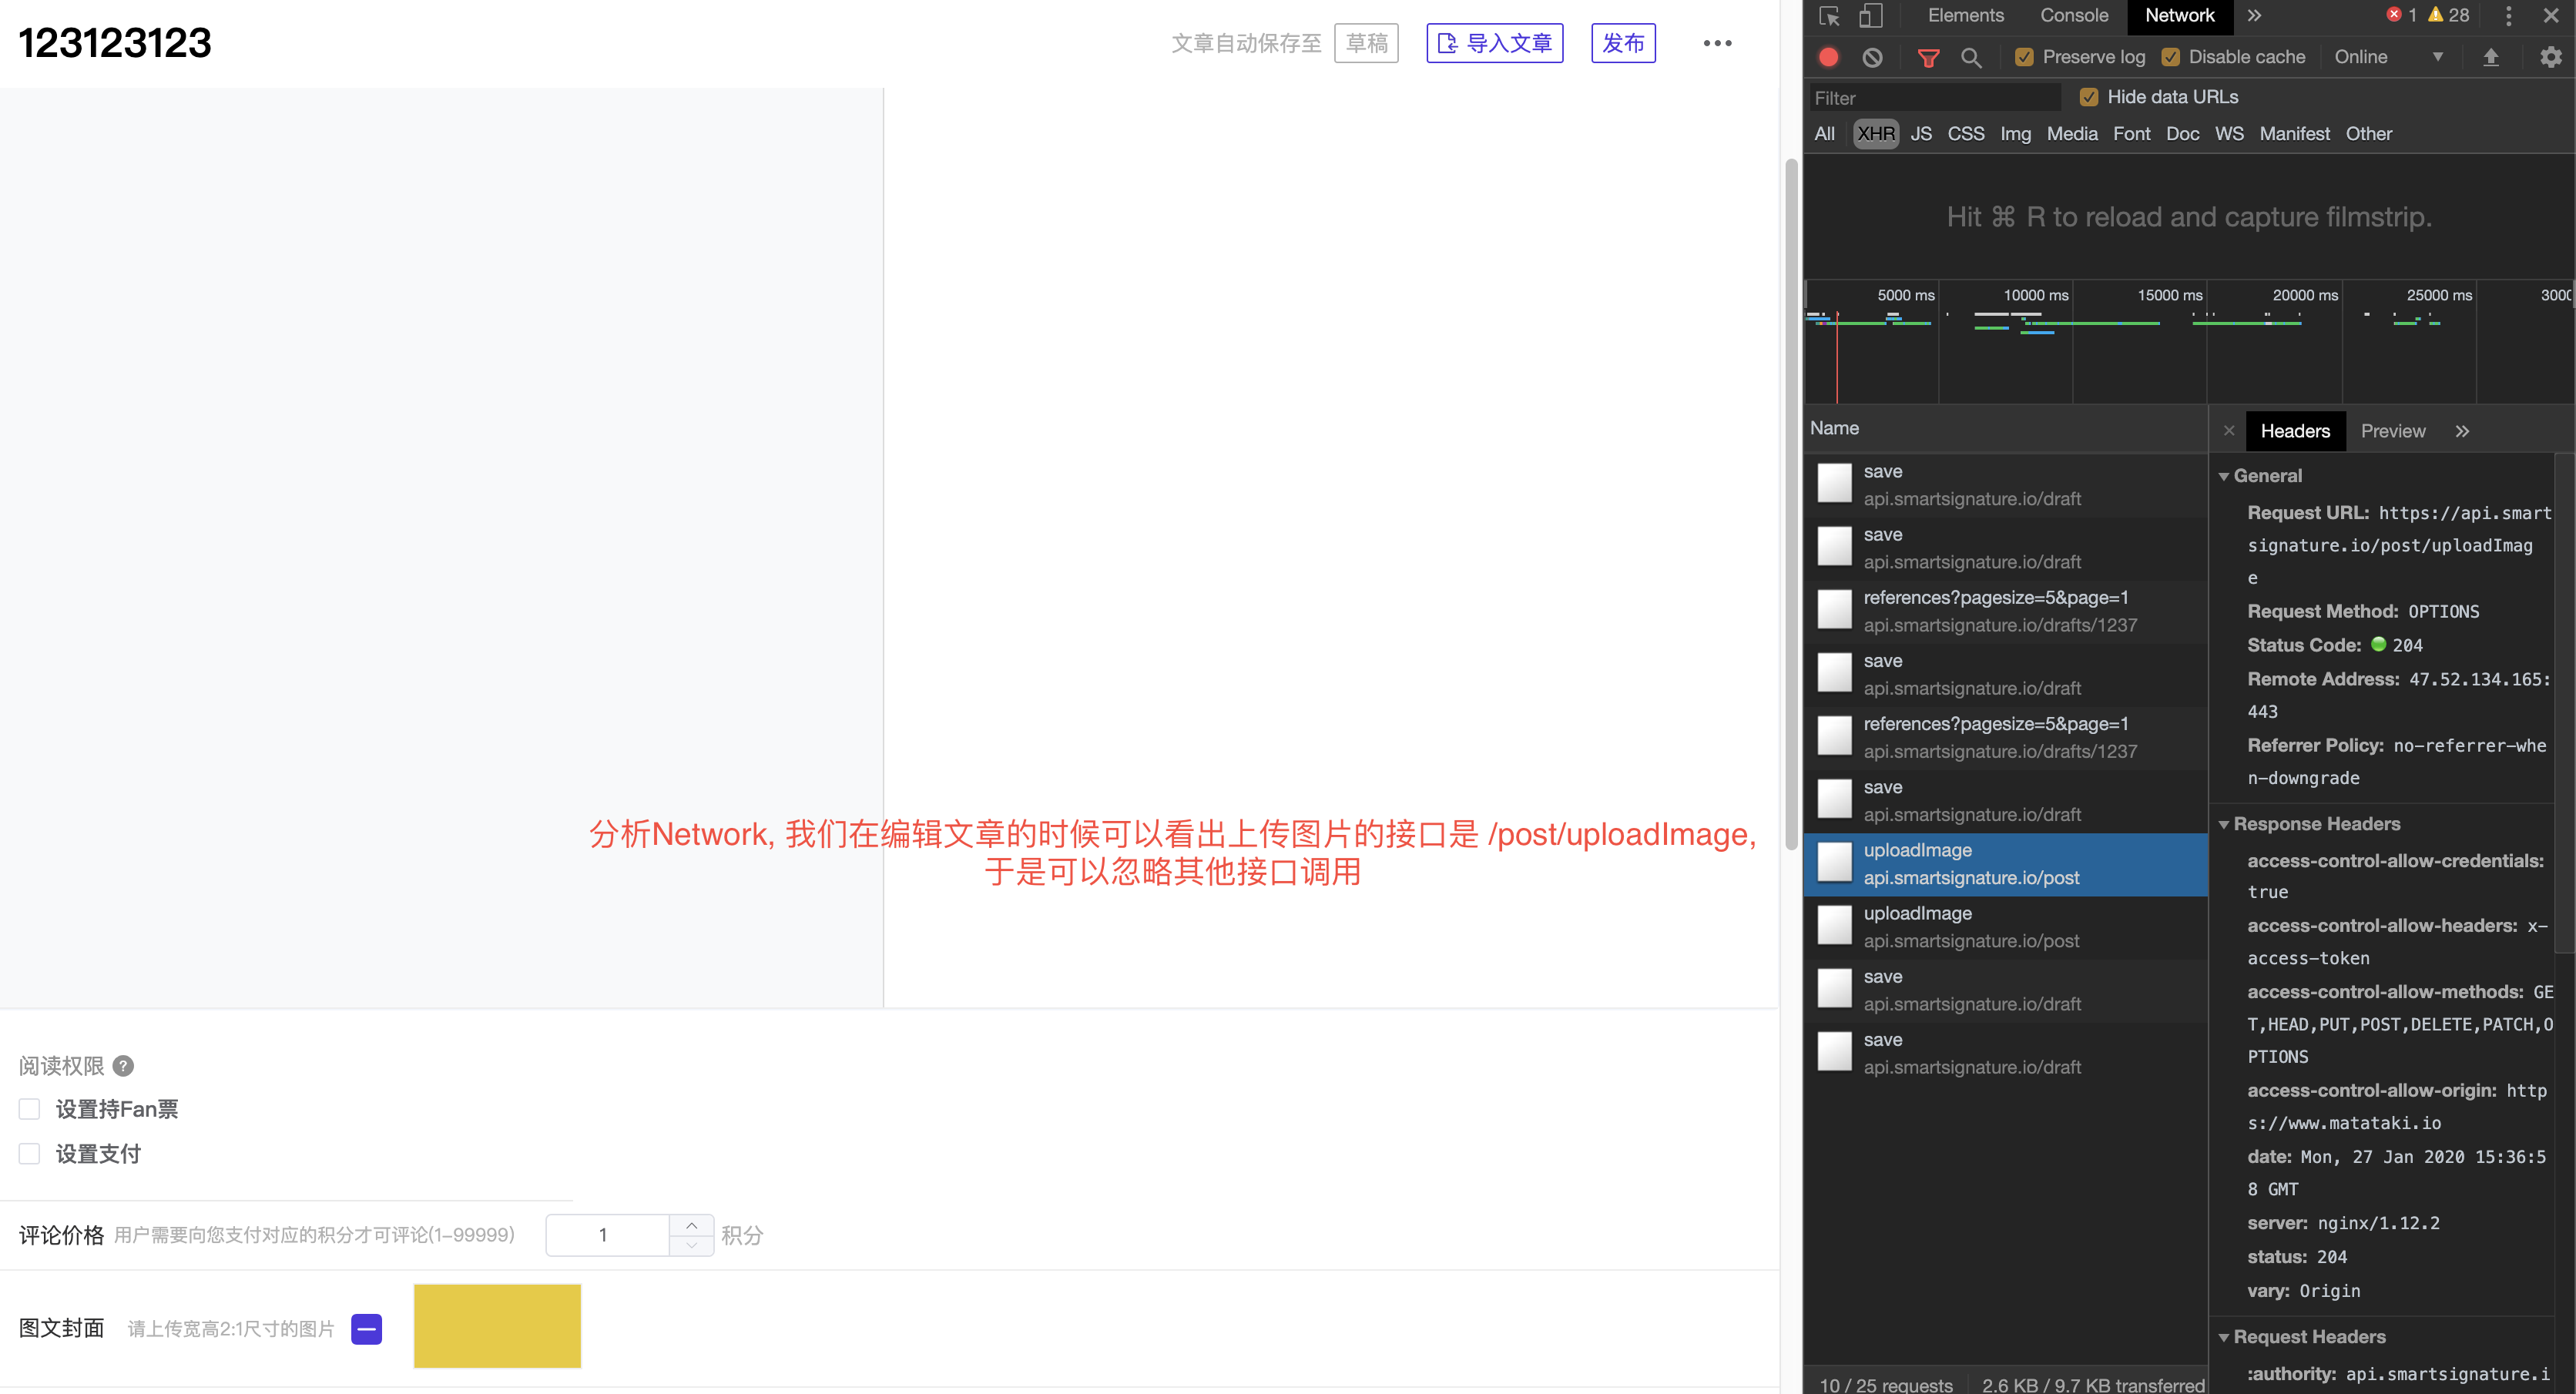
          console.log('fail, status: ', res.status)
          return false
        }
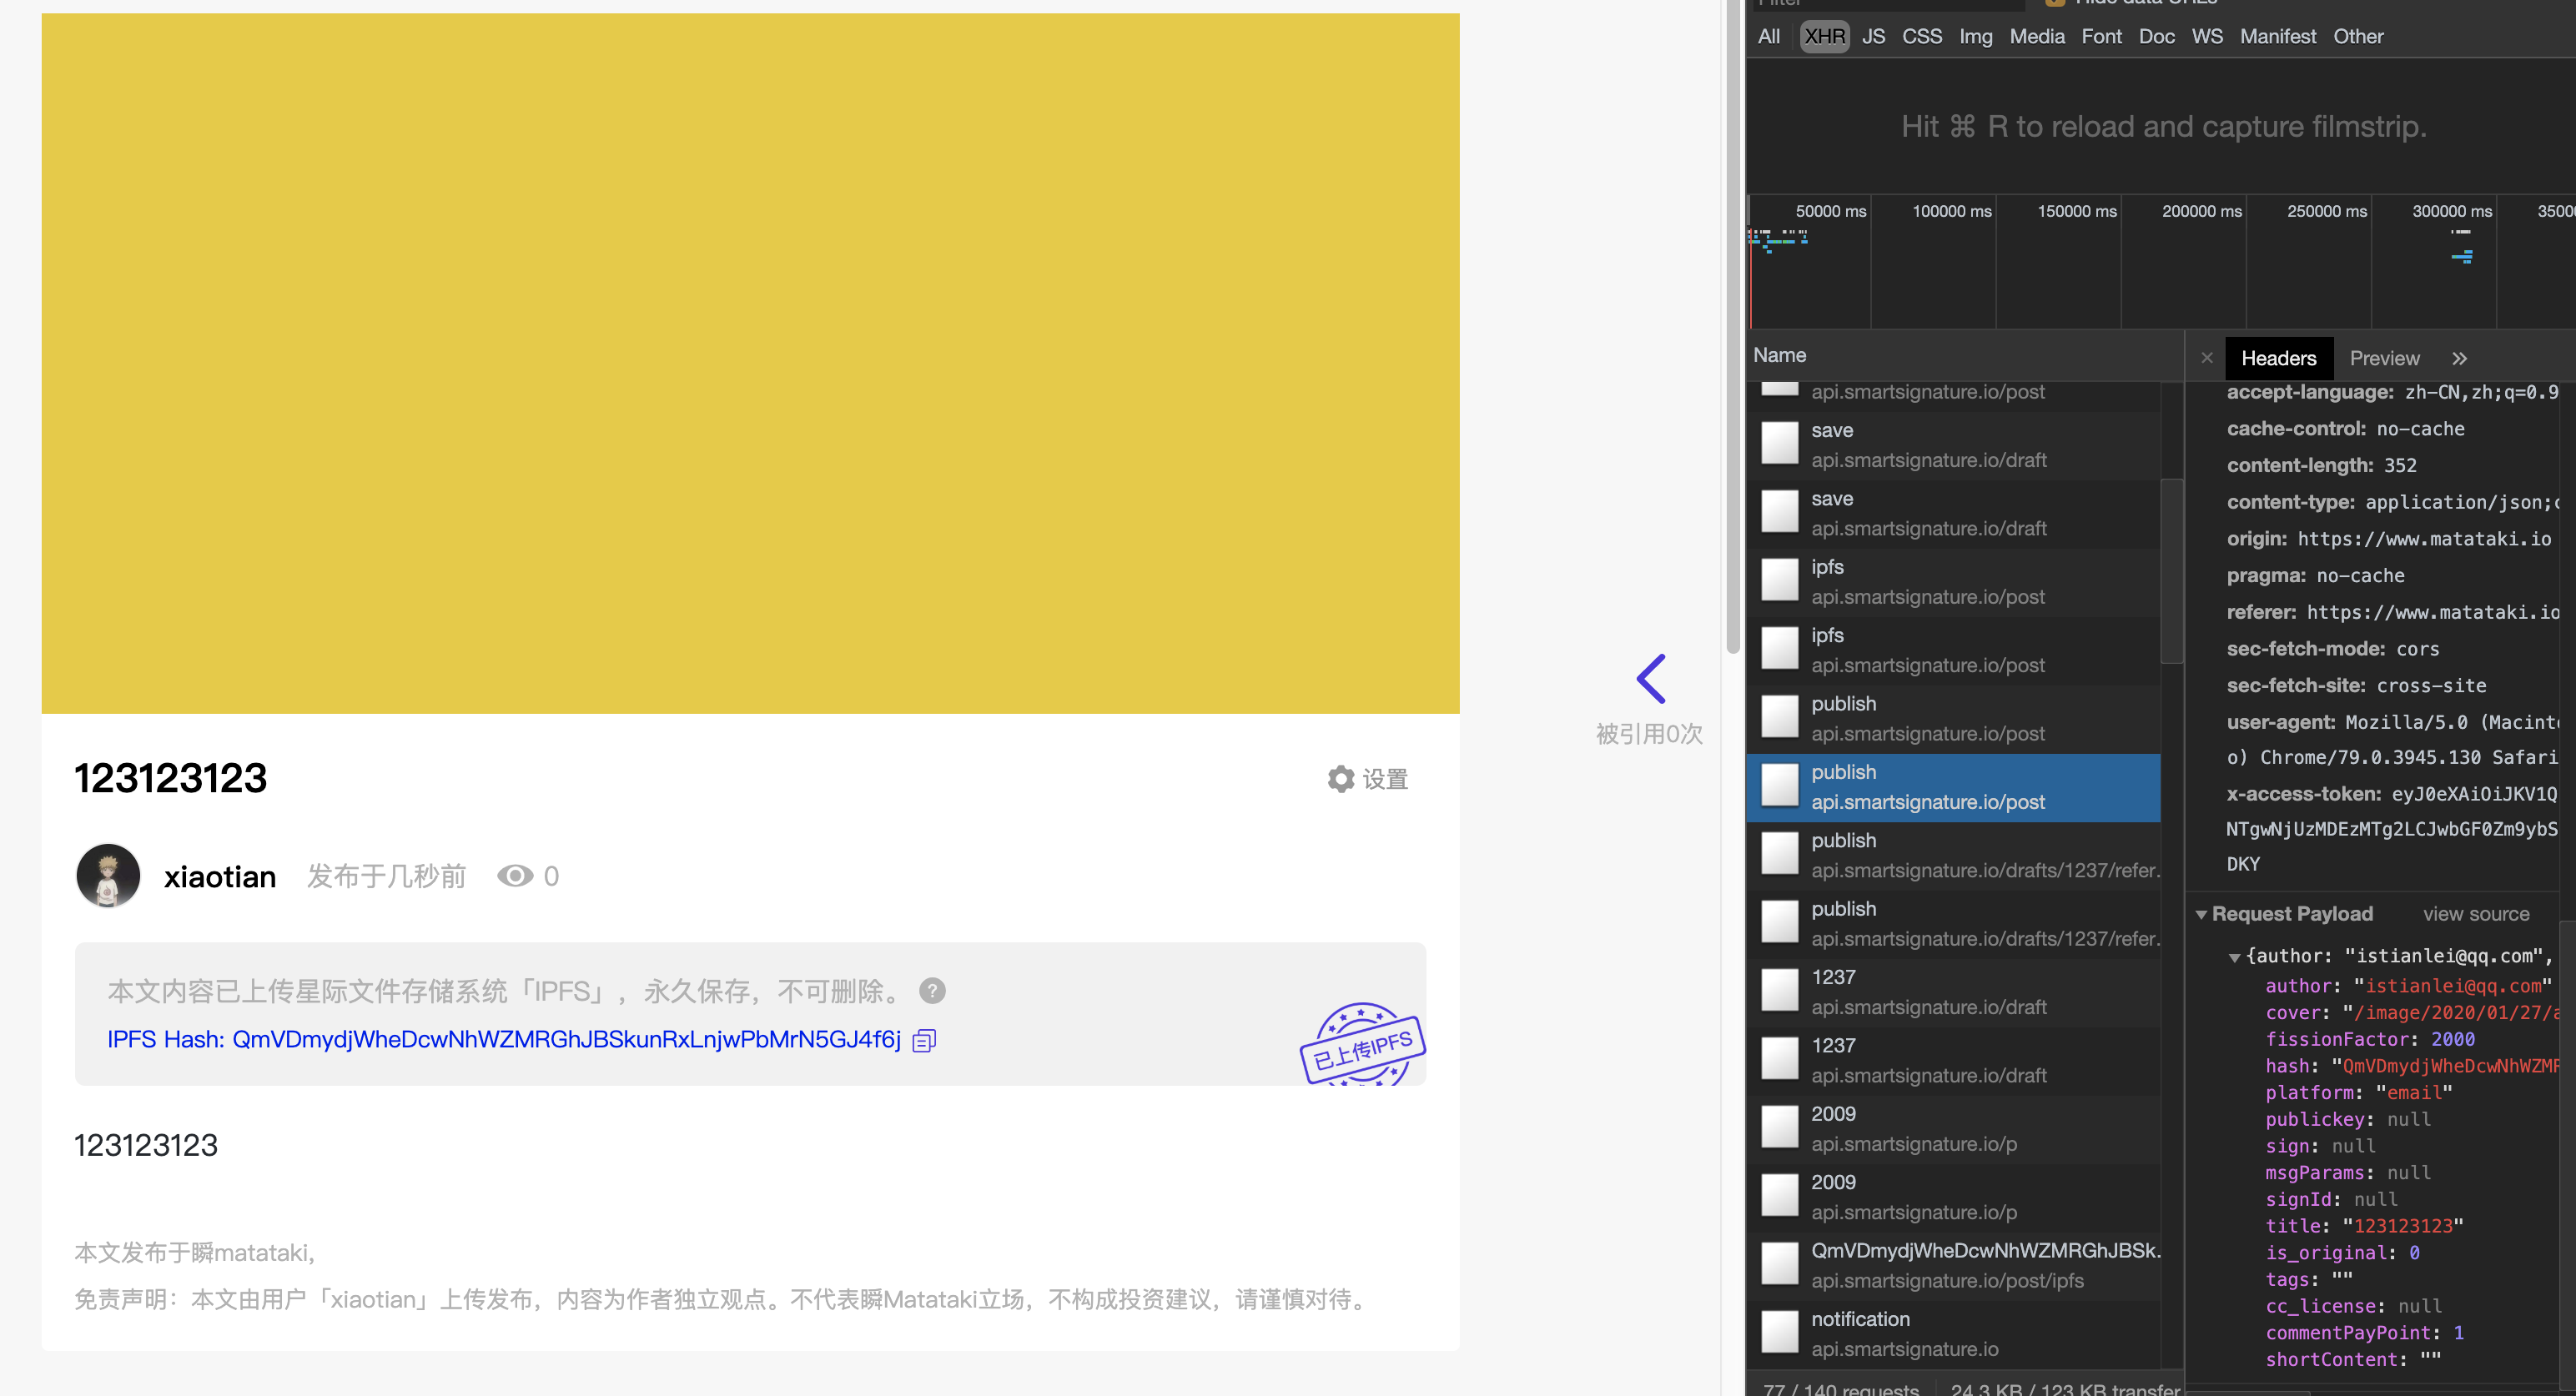
      } catch (err) {
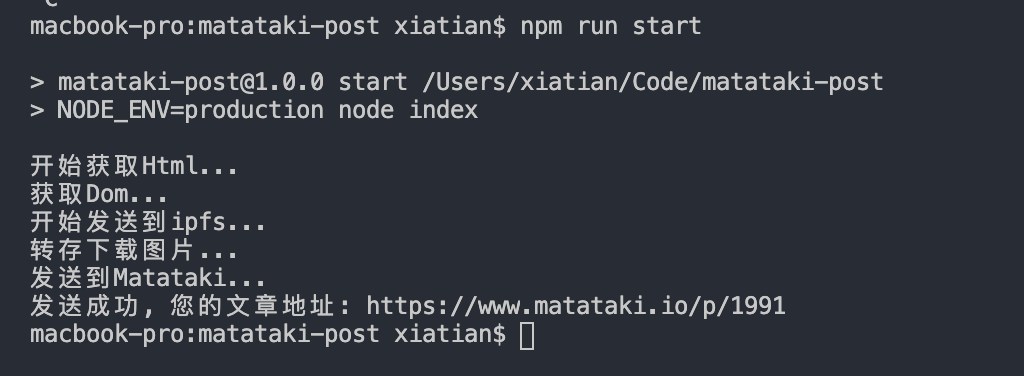
        console.log('update error', err)
        return false
      }
    };

    图片上传的核心我是从github里面search

    // ...
    // 这里的一些转换我没有弄明白, 前端一般直接一个file或者一个blob就上去了
    // 在node里面这个Buffer我还没有理解 希望大佬们看到了能教我一手👋!!!
    const base64Image = Buffer.from(buffer).toString('base64')
    const form = new FormData()
    form.append('smfile', Buffer.from(base64Image, 'base64'), {
      filename: fileName
    })
    // ...

    上传成功后会返回一个url地址, 如果是smms之类的图床上传记得多写一些判断他会判断重复的图片

    图片也有了之后就是上传文章了

    // 发布文章
    const post = async data => {
      try {
        let res = await axios({
          method: "post",
          url: `${API}/post/publish`,
          data: data,
          headers: { "x-access-token": TOKEN }
        });
        // console.log(data, res.data);
        if (res.status === 200 && res.data.code === 0) {
          return res.data;
        } else {
          console.log('fail', res.data)
          return false;
        }
      } catch (error) {
        console.log('error', error)
        return false;
      }
    };
    
      console.log('发送到Matataki...');
    	// 大部分的参数按照我这个默认就好了
      let resPost = await post({
        author: AUTHOR,
        cover,
        fissionFactor: 2000,
        hash: hash,
        platform: PLATFORM,
        publickey: null,
        sign: null,
        msgParams: null,
        signId: null,
        title: resDom.title,
        is_original: 0,
        tags: "",
        cc_license: null,
        commentPayPoint: 1,
        shortContent: ""
      });
      if (resPost) {
        console.log(`发送成功, 您的文章地址: ${webUrl}/p/${resPost.data}`)
      } else {
        console.log('发送失败!!!')
      }

    成功后会返回一个文章id然后我们去访问 console.log(`发送成功, 您的文章地址: ${webUrl}/p/${resPost.data}`)

到此流程就完全结束了!!! 归纳调用

// 开始
const init = async () => {
  console.log('开始获取Html...');
  let resHtml = await getHtml(URL);
  console.log('获取Dom...');
  let resDom = await getDom(resHtml);

  console.log('开始发送到ipfs...');
  let data = {
    title: resDom.title.trim(),
    author: AUTHOR,
    desc: resDom.desc.trim(),
    content: resDom.content.trim()
  };
  data.desc = data.desc.replace(/[\r\n]/g, ""); // 去除回撤换行
  data.content = data.content.replace(/[\r\n]/g, ""); // 去除回撤换行
  let hash = await postIpfs(data);
  if (!hash) return console.log("not hash", hash);

  console.log('转存下载图片...');
  let cover = await downloadImage(resDom.cover);
  if (!cover) return console.log('下载图片失败')
  console.log('发送到Matataki...');
  let resPost = await post({
    author: AUTHOR,
    cover,
    fissionFactor: 2000,
    hash: hash,
    platform: PLATFORM,
    publickey: null,
    sign: null,
    msgParams: null,
    signId: null,
    title: resDom.title,
    is_original: 0,
    tags: "",
    cc_license: null,
    commentPayPoint: 1,
    shortContent: ""
  });
  if (resPost) {
    console.log(`发送成功, 您的文章地址: ${webUrl}/p/${resPost.data}`)
  } else {
    console.log('发送失败!!!')
  }
};

init()

调用结果 看起来还不错🍑

预览地址 1991

仓库地址

我的Github


由于这是一个简单的example 所以不会弄得太复杂 简单的爬虫加上调用接口即可。

因为不太会node 全完自己瞎鼓捣, 如果写的不对或者不好的地方希望大佬们多多指点 指点

也欢迎加入QQ Group ID:718639024 来吐槽我🤮🤮🤮

ShuffleanArray

2019-06-13 00:06:35

Shuffle an Array (carry)
Shuffle an Array

This snippet here uses Fisher-Yates Shuffling Algorithm to shuffle a given array.

Fisher-Yates Shuffling

example

function shuffle(arr) {
    var i,
        j,
        temp;
    for (i = arr.length - 1; i > 0; i--) {
        j = Math.floor(Math.random() * (i + 1));
        temp = arr[i];
        arr[i] = arr[j];
        arr[j] = temp;
    }
    return arr;    
};

var a = [1, 2, 3, 4, 5, 6, 7, 8];
var b = shuffle(a);
console.log(b);
// [2, 7, 8, 6, 5, 3, 1, 4]

self

let arr = [1,2,3,4,5,6,7,8]
const shuffle = arr => {
  // 7 6 5 4 ... 2 1
  for(let i = arr.length - 1; i > 0; i--) {
    let temp = null
    let j = null
    // 0-7 0-6 0-5 ... ... 0-1
    j = Math.floor(Math.random() * (i + 1))
    temp = arr[j]
    arr[j] = arr[i]
    arr[i] = temp
  }
  return arr
}

console.log(shuffle(arr))

// [8, 4, 2, 3, 6, 1, 5, 7]
// [5, 4, 7, 3, 1, 6, 8, 2]
// [4, 5, 6, 8, 1, 2, 3, 7]
// [7, 5, 3, 4, 6, 8, 1, 2]
// [5, 7, 6, 3, 2, 1, 8, 4]
// [7, 6, 5, 3, 1, 8, 2, 4]
// [5, 6, 7, 8, 3, 1, 4, 2]
// [8, 3, 1, 7, 4, 5, 6, 2]
// [5, 8, 1, 4, 6, 7, 3, 2]
// [6, 5, 4, 2, 8, 3, 7, 1]

css小猫笑起来的动画

2018-06-05 13:39:54

No.3 - CSS transition 和 CSS transform 配合制作动画

仓库地址

预览地址

资料

文章地址

其实文章地址里面提供的资料已经很不错了!!!(偷懒~

效果

截图

截图

代码实现

# html
<div class="container">
  <!-- 脸 -->
  <div class="face">
    <!-- 头发 -->
    <div class="hair"></div>
    <!-- 眼睛 -->
    <div class="eye-wrap">
      <div class="eye left">
        <div class="eye-circle">
          <div class="eye-core"></div>
        </div>
        <div class="eye-bottom"></div>
        <div class="face-red"></div>
      </div>
      <div class="eye right">
        <div class="eye-circle">
          <div class="eye-core"></div>
        </div>
        <div class="eye-bottom"></div>
        <div class="face-red"></div>
      </div>
    </div>
    <!-- 鼻子 -->
    <div class="nose"></div>
    <!-- 嘴巴 -->
    <div class="mouth-wrap">
      <div class="mouth left"></div>
      <div class="mouth right"></div>
    </div>
  </div>
  <!-- 耳朵 -->
  <div class="ear-wrap">
    <div class="ear left"></div>
    <div class="ear right"></div>
  </div>
</div>
# css 动画部分样式
.face,
.hair,
.face-red,
.eye-bottom,
.ear,
.eye-core,
.mouth{
    transition: transform 1s;    
}
.face-red{
    transition: opacity 1s;
}
.mouth{
    transition: border-radius 1s;
}

.face:hover~.ear-wrap .left{
    transform-origin: 50%, 100%;
    transform: rotate(-30deg);
}
.face:hover~.ear-wrap .right{
    transform-origin: 50%, 100%;
    transform: rotate(30deg);
}
.face:hover .eye-wrap .eye-bottom{
    transform: translateY(-15px);
}

.face:hover .eye-wrap .face-red{
    opacity: 1;
}
.face:hover .eye-wrap .eye-core{
    transform: scaleX(.8);
}
.face:hover .mouth-wrap .left{
    border-radius: 0% 40% 50% 50%;
}
.face:hover .mouth-wrap .right{
    border-radius: 0% 40% 50% 50%;
}
.face:hover{
    transform: scaleX(.99);
    transform: translateY(-6px);
}
.face:hover .hair{
    transform: scaleX(.9);
}

Qq: 952822399

chrome extensions 开发中遇到的坑

2019-07-16 00:30:58

记录自己开发chrome extension中遇到的坑(🍑

开发环境

vue

使用下面资料提供的模版, 快速入坑(🍑

Dev

npm i

npm run watch:dev

会自动build, 使用dist目录即可

Build

npm run build/npm run build:dev

npm run build-zip

资料

https://developer.chrome.com/extensions

https://github.com/sxei/chrome-plugin-demo

https://github.com/Kocal/vue-web-extension (模版)

希望大家多看看文档和第二个连接的文章写的非常好(Good ❗️️️❗️❗️️)

--- 2019-7-15 ---

GraphQL

学习记录📝 Repo

资料

https://graphql.org/

https://mp.weixin.qq.com/s/bqStS2IBvBSDAiSjLdYETw

https://www.apollographql.com/docs/apollo-server/

尝鲜(初次体验)

复制文档

# ... init ...
npm install graphql
var { graphql, buildSchema } = require('graphql');

var schema = buildSchema(`
  type Query {
    hello: String
  }
`);

var root = { hello: () => 'Hello world!' };

graphql(schema, '{ hello }', root).then((response) => {
  console.log(response);
});

然后运行 node app, 基本操作了... 这个可能不太直观 ~

npm install express express-graphql graphql
var express = require('express');
var graphqlHTTP = require('express-graphql');
var { buildSchema } = require('graphql');

var schema = buildSchema(`
  type Query {
    hello: String
  }
`);

var root = { hello: () => 'Hello world!' };

var app = express();
app.use('/graphql', graphqlHTTP({
  schema: schema,
  rootValue: root,
  graphiql: true,
}));
app.listen(4000, () => console.log('Now browse to localhost:4000/graphql'));

然后运行 node app, 可以在 /graphql路由下运行他的工具页面 (懒得截图 🍑)

npm install apollo-server-express express
const express = require('express');
const { ApolloServer, gql } = require('apollo-server-express');

const typeDefs = gql`
  type Query {
    hello: String
  }
`;

const resolvers = {
  Query: {
    hello: () => 'Hello world!',
  },
};

const server = new ApolloServer({ typeDefs, resolvers });

const app = express();
server.applyMiddleware({ app });

app.listen({ port: 4000 }, () =>
  console.log('Now browse to http://localhost:4000' + server.graphqlPath)
);

重复上面的操作... 这里利用了 apollo-server

{
	hello
}

简单的查询 Query hello..... hello world 经典语录

具体的可以看文档, 没有什么营养 因为都是copy的(凑点字数).....


简单的操作

需要一个简单的 books list

  1. 查询所有books
  2. 添加 book
  3. 更新 book
  4. 删除 book

跳过依赖安装, 缺少依赖自行搞定! 没有使用数据库 本地存放一个 Varible

const express = require('express');
const { ApolloServer, gql } = require('apollo-server-express');

// 书库 没接数据库
const books = [
  {
    id: 0,
    title: 'Harry Potter and the Chamber of Secrets',
    author: 'J.K. Rowling',
  },
  {
    id: 1,
    title: 'Jurassic Park',
    author: 'Michael Crichton'
  },
];

// 定义 type
const typeDefs = gql`
  type Book {
    id: Int,
    title: String
    author: String
  }

  type Query {
    books: [Book],
  }

  type Mutation {
    createBook(title: String, author: String): Book,
    updateBook(id: Int, title: String, author: String): Book,
    deleteBook(id: Int, title: String, author: String): Book,
  }
`;
// 定义 resolvers
const resolvers = {
  Query: {
    // 查询所有书
    books: () => books,
  },
  Mutation: {
    // 创建一本书
    createBook: (_, { title, author }) => {
      let list = {
        id: books.length,
        title,
        author
      }
      books.push(list)
      return list
    },
    // 更新一本书
    updateBook: (_, { id, title, author }) => {
      let idx = books.findIndex(i => i.id === id)
      if (~idx) {
        books[idx] = {
          id: idx,
          title: title,
          author: author
        }
        return books[idx]
      } else {
        return []
      }
    },
    // 删除一本书
    deleteBook: (_, { id }) => {
      let idx = books.findIndex(i => i.id === id)
      if (~idx) {
        books.splice(idx, 1)
        return books[idx]
      } else {
        return []
      }
    }
  }
};

const server = new ApolloServer({ typeDefs, resolvers });

const app = express();
server.applyMiddleware({ app });

app.listen({ port: 4000 }, () =>
  console.log('Now browse to http://localhost:4000' + server.graphqlPath)
);
query GetBooks {
  books {
    id,
    title
    author
  }
}

mutation Create {
  createBook(title: "12312", author: "xxxxx") {title, author},
}

mutation Update {
  updateBook(id: 0, title: "123", author: "xxxxx") {id, title, author}
}

mutation Delete {
  deleteBook(id: 1) {id, title, author}
}

一些请求语句参考 愿君快速 debug

{
  "data": {
    "books": [
      {
        "id": 0,
        "title": "Harry Potter and the Chamber of Secrets",
        "author": "J.K. Rowling"
      },
      {
        "id": 1,
        "title": "Jurassic Park",
        "author": "Michael Crichton"
      }
    ]
  }
}

所有书单的返回 list

Tool

image

node-mysql爬取图片并显示

2019-11-03 23:11:39

node爬虫 简易版【站酷】

node mysql 增删改查【简易版】

结合上面的文章做了一个图片展示

node-mysql爬取图片并显示

start

启动node服务, 使用express

const express = require('express')
const app = express()
const router = require('./router')

app.use(router)
app.listen(3000, () => console.log('port in 3000'))

// router
const router = express.Router()
router.get('/', (req, res) => {
  res.send(`hello world`)
})
module.exports = router
node index.js
# 或者利用nodemon监听
nodemon index  # 写入配置文件
  "scripts": {
    "dev": "nodemon index.js"
  },
yarn dev

#or

npm run dev

在屏幕看见 hello world 就算是成功了

修改crawler.js

// 在之前下载图片逻辑后面写入插入数据库逻辑

// ...
const mysql = require('./mysql')
// ...

  // 下载图片
  const download = (item, id) => {
    try {
      let userAgent = userAgents[parseInt(Math.random() * userAgents.length)]
      // 通过 superagent 保存图片
      const req =  superagent.get(item.url)
      .set({ 'User-Agent': userAgent })
      // 增加 url title
      let url = `/image/page${id}/${item.title}.png`
      let title = item.title
      // 使用了stream(流)
      req.pipe(fs.createWriteStream(`./static/image/page${id}/${item.title}.png`))
      // 写入数据库
      mysql.sqlAdd(url, title)
      return `下载${item.title}done`
    } catch (error) {
      return console.log(`下载图片失败${item.title}`, error)
    }
  }

// mysql 文件
  // 插入数据 id自增
  sqlAdd  (url, title)  {
    let sqlAdd = 'INSERT INTO image SET ?';
    let sqlAddJson = {
      url,
      title
    }
    connection.query(sqlAdd, sqlAddJson, (err,res) => {
      if(err) return console.log('INSERT INFO ERROR:',err.message);
      console.log('INSERT INFO', res.insertId);
    });
  }

  // 没有做一些错误等预防(2333)

插入成功后, 打开数据库查一下

记得启动数据库!!!

mysql.server start

db

建表的过程就省略了...

查数据

数据有了之后, 开始查询数据

const express = require('express')
const router = express.Router()
const controller = require('./controller')
router.get('/', (req, res) => {
  res.send(`hello world 11qq`)
})

router.get('/allimg', async (req, res) => {
  // 调用controller.js
  let allImg = await controller.getAllImg()
  res.send(allImg)
})

module.exports = router

调用controller.getAllImg()并返回

const mysql = require('./mysql')

module.exports = {
  async getAllImg() {
    try {
      // 调用mysql方法
      let res = await mysql.getAllImg()
      return {
        code: 0,
        data: res,
        message: 'success'
      }
    } catch (error) {
      console.log('mysql getAllImg error', error)
      return {
        code: -1,
        data: {},
        message: 'fail'
      }
    }
  }
}

调用mysql.getAllImg()并返回

// mysql.js
// 查询所有数据并且返回
  getAllImg() {
    let sql = 'SELECT * FROM image'
    return new Promise((resolve, reject) => {
      connection.query(sql, (err, result) => {
        if (err) return reject(err)
        resolve(result)
      })
    })
  }

data

访问http://localhost:3000/allimg路由之后可能是这样

展示

数据有了之后就可以展示了

这里用了parcel打包工具

# 快速

yarn init -y

touch index.html
touch index.ts
touch index.less

yarn add --dev typescript
yarn add --dev parcel-bundler

// package.json
"scripts": {
  "start": "parcel index.html"
}

yarn start # 启动一个服务, 会有一个新页面
<!-- ... -->
  <div id="app"></div>
  <script src="./index.ts"></script>
  <!-- ... -->

内容很简单

// 使用axios
import axios from 'axios'
// 导入 less
import './index.less'
const APP_URL = 'http://127.0.0.1:3000'
const API = axios.create({
  baseURL: APP_URL,
  timeout: 1000
});

API.get('/allimg')
  .then( (res) => {
    console.log(res)
    if (res.status === 200 && res.data.code === 0)
    setList(res.data.data)
  })
  .catch( (error) => {
    console.log(error);
  })


// 写入html结构
const setList = (arr: object[]) => {
  let app = document.querySelector('#app')
  let ulDom = document.createElement('ul')
  ulDom.classList.add('list')
  ulDom.setAttribute('role', 'list')
  let dom: string = ``

  interface Img {
    url: string,
    title: string
  }

  arr.map((i: Img) => {
    dom += `<li>
      <img src="${APP_URL}${i.url}">
      <div>
      <span>url: ${i.url}</span>
      <span>title: ${i.title}</span>
      </div>
    </li>`
  })

  ulDom.innerHTML = dom
  app.append(ulDom)
}

然后查看, 发现有问题,接口请求 Network Error (这里是跨域问题)

我们使用cors来解决

// yarn add cors
const express = require('express')
const router = express.Router()
const cors = require('cors') // 导入
const controller = require('./controller')

router.use(cors()) // 全局允许 如果需要单独配置, 看官方文档
router.get('/', (req, res) => {
  res.send(`hello world 11qq`)
})

router.get('/allimg', async (req, res) => {
  let allImg = await controller.getAllImg()
  res.send(allImg)
})

module.exports = router

解决跨域之后就出现数据了, 然后把样式美化一下, 到这里上面的图片还没有加上!!!

.list {
  li {
    display: flex;
    align-items: center;
    margin: 6px 0;
    &:hover {
      background-color: #eee;
      img {
        width: 300px;
      }
    }
    & > span {
      font-size: 14px;
      color: #333;
      list-style: 1.5;
    }
    & > div {
      display: flex;
      flex-direction: column;
      justify-content: center;
      margin-left: 20px;
    }
  }
  img {
    width: 100px;
    transition: width .3s;
  }
}

为了假如图片, 我设置了node静态资源(也不知道做法对不对 反正是跑起来了)

在 Express 中提供静态文件

const express = require('express')
const app = express()
// 设置static
app.use(express.static('static'));
const mysql = require('./mysql')
mysql.init()

const router = require('./router')
app.use(router)
// 这里是爬虫的方法
// const crawler = require('./crawler')
// crawler.init()


app.listen(3000, () => console.log('port in 3000'))

然后访问接口数据的路径加上http://localhost:3000/就可以了

效果展示

node-mysql爬取图片并显示

还有很多优化点可以做, 分页什么什么吧啦吧啦, 代码优化 错误处理 emmmmm

本地调试微信SDK

2019-10-23 13:05:50

这里使用vue(其他道理应该也是一样的), 因为微信的sdk只能在他的域名下才能正常使用, 我们又不能去服务端开发然后build, 所有在本地调试微信sdk就很有必要了,(微信分享在另一篇会写)

首选假设你有一个备案并且在微信设置好了域名(自己配置, 或者有一个好的同事👍)

假如你的域名是www.wx.com

工具

Nginx

iHost(mac一个修改host的软件)

调试器 微信开发工具(Google搜索 官网下载)

微信SDk文档

go

首先需要了解一下什么是host, 然后我们要做的就是修改本地host文件, 访问 www.wx.com 的时候访问我们自定义的ip地址

127.0.0.1	www.wx.com

save之后 我们访问 www.wx.com 会访问本地的 127.0.0.1 (懒得截图)

启动一个vue demo(省略N字)

vue create *

# ...

yarn serve #这里会跑一个http服务, 端口可能是8080也可能是任意其他

然后再回到访问www.wx.com页面(还是无法正常访问本地的vue demo项目), 原因是默认的端口是80, 而我们的服务是8080, 这时候我们需要吧80端口代理到8080(使用nginx)

# N种安装方法之一

brew install nginx

安装完成之后

nginx

发现会有一个默认的Nginx页面(这里就说明你安装成功了👍) (懒得截图)

nginx -s stop # 我们停掉它

然后找到config文件, nginx的配置文件叫 nginx.conf, 我本地的路径为 /usr/local/etc/nginx (其他平台Google搜索, 查看配置文件在哪儿)

server {
	listen 80;
	server_name sstest.frontenduse.top;

  location / {
    proxy_pass http://localhost:8080;
  }
}

可以又多个 server

通过 proxy_pass 代理80端口到8080端口(如果默认的80端口暂用, 可以改为别的比如8081 随意)

nginx # 此时访问localhost, 会进入之前启动的vue demo页面

然后去vue demo里面引入微信的sdk 出现如下类似的图就算正常了

具体怎么引入看官方文档(下篇文章会写)

script 或者 import, 然后按照微信的文章配置就好了微信SDk文档

网图

网图

vue优化记录

2019-11-21 12:48:47

1.看别人怎么优化的
2.看chrome提示怎么优化

const ImageminPlugin = require('imagemin-webpack-plugin').default
const imageminMozjpeg = require('imagemin-mozjpeg')

// 图片优化
new ImageminPlugin({
  test: /\.(jpe?g|png|gif)$/i,
  plugins: [
    imageminMozjpeg({
      disable: process.env.NODE_ENV !== 'production',
      quality: '65-80',
      progressive: true
    })
  ]
})

提取 CSS 到单个文件-简单的方法

首页

performance 30
Accessibility 78
BestPractices 79
SEO 100

performance

performance 30!

Serve images in next-gen formats

Image formats like JPEG 2000, JPEG XR, and WebP often provide better compression than PNG or JPEG, which means faster downloads and less data consumption. Learn more.

修改了png, 使用webp 利用photoshop插件保存图片

performance 35!

Serve images in next-gen formats(不提示)

但是由于兼容问题, 这里炸了 哈哈哈哈哈哈哈哈😂

... 等待后续

正则匹配两个字符串之间的内容

2019-10-12 00:32:54

在线工具

匹配A字符与B字符之间的字符(包含AB)

A.*?B

匹配A字符与B字符之间的字符(包含A不包含B)

A.*?(?=B)

匹配A字符与B字符之间的字符(不包含AB)

(?<=A).*?(?=B)


资料

### 正则中的 ?= 、?<= 、?!、 ?<!=

以前看正则的时候遇到?= 、?<=,在网上搜索出来名字有称之为正向预查、负向预查的,有称之为前瞻、后顾的,看用法的话大概知道是怎么回事,但就是记不住啊,对于我来说,这名称太抽象(鬼扯)了。

今天看书看到作者讲到正则,感觉自己又有所领悟,翻出来重新理解了一下。

如今我的理解是这样的,我将<记为方向,包含这个箭头说明是放在目标内容左边的:

1. ```?=``` : 询问后面跟着的东西是否等于这个    /b(?=a)/.test('bab')

2. ```?<=``` : 询问是否以这个东西开头  /(?<=a)b/.test('ab')

3. ```?!``` : 询问后面跟着的东西是否不是这个  /b(?!a)/.test('bb')

4. ```?<!=``` :询问是否不是以这个东西开头  /(?<!=a)b/.test('bb')

其实按照我这样理解的话,```?!``` 后面要是加上```=```就更加符合我的心理预期了,最后还有一点,匹配得到的结果并不包含 ?=、?<=、?!和?<!=里面的内容

### 顺便记录一下

javascript的replace方法的第二个参数,如果是传入的字符串的话,有几个特殊的东西。

1. ```$&`` : 表示匹配到的结果。'javascript'.replace(/script/, '$&$&') ->  ‘javascriptscript’

2. ```$\```` : 表示匹配到的结果的左边或者说前面的那一堆字符串。 'javascript'.replace(/script/, '$& 不是 $`')  ->  "javascript 不是 java"

3. ```$'``` : 表示匹配到的结果的右边或者说后面的那一堆字符串。 '我是猪'.replace(/我是/, "$&$'")  ->   "我是猪猪"

4. ```$$``` : 表示$字符。

作者:不过从心而已
链接:https://www.jianshu.com/p/661af704198c
来源:简书
著作权归作者所有。商业转载请联系作者获得授权,非商业转载请注明出处。

掘金头像旋转动画

2018-06-04 00:19:54

掘金头像旋转动画


参考文章或者地址

文章

掘金头像地址

模仿地址

代码实现

# 结构
<div class="avatar"></div>
# 样式
.avatar {
  width: 100px;
  height: 100px;
  border-radius: 50%;
  overflow: hidden;
  margin: 0 auto;
  background-image: url(https://avatars2.githubusercontent.com/u/24250627?s=460&v=4);
  background-size: cover;
}

.avatar:hover {
  -webkit-transform: rotate(666turn);
  transform: rotate(666turn);
  transition-delay: 1s;
  transition-property: all;
  transition-duration: 59s;
  transition-timing-function: cubic-bezier(.34, 0, .84, 1)
}

资料参考

turn

转、圈(Turns)。一个圆共1圈

90deg = 100grad = 0.25turn ≈ 1.570796326794897rad

资料有兼容说明

vue微信分享

2019-11-02 00:30:30

上文 配置环境

这篇主要是分享vue做微信分享

假设本地的开发环境已经准备好了!!! 👍 并且你有一个好的同事为你写好了接口😊

npm的地址

sdk
axios

npm install weixin-js-sdk #微信官方js-sdk

npm install axios #基于Promise的HTTP客户端,用于浏览器和node.js

新建一个js文件(假如他叫wechat_share.js)

import wx from 'weixin-js-sdk'
import axios from 'axios'

export default ({ title, desc, link, imgUrl }) => {
  let defaultTitle = '默认标题'
  let defaultDesc = '默认描述'
  let defaultLink = window.location.href
  let defaultimgUrl ='默认图片'
  // 通过接口获取签名信息, 传递url过去, url 需要 encodeURIComponent
  axios
    .get(`/xxx/sign?url=${encodeURIComponent(defaultLink)}`)
    .then(res => {
      if (res.status === 200 && '其他判断') {
        let { hash, timestamp, nonce } = res.data.data
        wx.config({
          debug: false, // 开启调试模式,调用的所有api的返回值会在客户端alert出来,若要查看传入的参数,可以在pc端打开,参数信息会通过log打出,仅在pc端时才会打印。
          appId: 'xxxxxx', // 必填,公众号的唯一标识
          timestamp, // 必填,生成签名的时间戳
          nonceStr: nonce, // 必填,生成签名的随机串
          signature: hash, // 必填,签名
          jsApiList: [
            'updateAppMessageShareData',
            'updateTimelineShareData',
            'onMenuShareAppMessage'
          ]
        })
        wx.error(function(res) {
          console.log('wechat error', res)
        })
        wx.ready(function() {
          wx.updateAppMessageShareData({
            title: title || defaultTitle,
            desc: desc || defaultDesc,
            link: link || defaultLink,
            imgUrl: imgUrl || defaultimgUrl,
            success: function() {
              console.log('wechat share success updateAppMessageShareData')
            }
          })
          wx.updateTimelineShareData({
            title: title || desc || defaultTitle,
            link: link || defaultLink,
            imgUrl: imgUrl || defaultimgUrl,
            success: function() {
              console.log('wechat share success updateTimelineShareData')
            }
          })
          // 即将废弃,适配电脑版微信,参考:https://mp.weixin.qq.com/wiki?action=doc&id=mp1421141115#10
          wx.onMenuShareAppMessage({
            title: title || defaultTitle,
            desc: desc || defaultDesc,
            link: link || defaultLink,
            imgUrl: imgUrl || defaultimgUrl,
            success: function() {
              console.log('wechat share success onMenuShareAppMessage')
            }
          })
        })
      }
    })
}

封装了一个简单的方法, 用户做微信分享 我们只需要调用方法, 并且传递信息即可, 里面的标题信息可以根据自己的实际情况修改!!!

接下来只需要在使用的地方调用即可(我在全局写了一个)

// main.js
import wechatShare from 'wechat_share'
Vue.prototype.$wechatShare = wechatShare

// other.vue xxx used

this.$wechatShare({})

如果每个页面都调用一次那就太麻烦了, 利用router的钩子函数, 然后把方法放入router.js 里面, 使用 router.afterEach 方法(全局后置钩子)

// router.js
import wechatShare from 'wechat_share'

router.afterEach((to, from) => {
  wechatShare({})
})

然后每个页面都会拥有分享功能(😄😄😄😄)


但是这里有一个问题�⚠️️️️️�⚠️️️️️�⚠️️️️️, 切换页面 然后去签名的时候, 微信报错说是无效签名!!!!

原因是因为传递的localhost.href与当前页面不符合!!!

因为router.afterEach是异步的(别人这样说的)然后需要通过this.$nextTick来解决(用setTimeout也可以 但是不太好 你懂的233)

// router.js
import wechatShare from 'wechat_share'
import Vue from 'vue'

router.afterEach((to, from) => {
  Vue.nextTick(() => {
    wechatShare({})
  })
})

在router里面使用讲this.$nextTick修改为Vue.nextTick(这样就可以解决, router.afterEach获取的localhost.href与当前页面不符合的问题

然后就是一个个别页面, 需要定制化内容分享, 调用方法即可

// 异步
async xx() {
  await xx().then(() => {
      this.$wechatShare({
        title,
        desc,
        imgUrl
      })
  })
}

// 同步
this.$wechatShare({
  title,
  desc,
  imgUrl
})

如果是异步的只需要在调用完方法之后, 调用写入内容即可(🚀🚀🚀)


如果每个页面都想设置怎么办???

解决方案 在router的meta里面配置一些简单的信息即可

...
router: [
     {
      path: '/',
      name: 'index',
      component: () => import(/* webpackChunkName: "index" */ 'index.vue'),
      meta: {
        title: 'xxxxxxxxxx'
        ....
      }
    },
]
...

router.afterEach((to, from) => {
  Vue.nextTick(() => {
    wechatShare({
      title: to.meta.title
    })
  })
})

在钩子函数afterEach里面设置默认的title: to.meta.title 👍 🚀 🔥

效果图

体验地址 微信打开会自动跳转的

https://matataki.io/

效果图

网易云APP启动界面【模仿】

2019-07-04 22:24:23

第一次还原这样的效果吧(我真菜😢😢😢!!!), 完成度70-80%(叹气😕)

项目地址

预览

素材

工具

  • 工具

    • AE
    • PS
    • PxCook
  • Code

还原过程

简单的适配

let htmlWidth = document.documentElement.clientWidth || document.body.clientWidth
let htmlDom = document.querySelector('html')
htmlDom.style.fontSize = htmlWidth / 10 + 'px'

其实适配的方法有很多种,个人比较懒就简单的搜哈先 下面给大家贴出了一些文章

手淘的方案也非常好,挺好用的 https://github.com/amfe/lib-flexible

Vant的方案

// Rem 适配
// Vant 中的样式默认使用px作为单位,如果需要使用rem单位,推荐使用以下两个工具

// postcss-pxtorem 是一款 postcss 插件,用于将单位转化为 rem
// lib-flexible 用于设置 rem 基准值
// 下面提供了一份基本的 postcss 配置,可以在此配置的基础上根据项目需求进行修改

module.exports = {
  plugins: {
    'autoprefixer': {
      browsers: ['Android >= 4.0', 'iOS >= 7']
    },
    'postcss-pxtorem': {
      rootValue: 37.5,
      propList: ['*']
    }
  }
}

https://youzan.github.io/vant/#/zh-CN/quickstart

素材导出

bodymovin

  • 使用Ae的插件bodymovin导出Json文件, 我们装上之后把一些用不到的元素按钮隐藏先. 教程靠大家自己Google

  • 然后需要psd的可以在AE中导出(方法一样Google 233😏😏😏)

  • icon可以在PSD导出, 然后尺寸什么的在PxCook Ps了吗标注,量尺寸什么的,甚至在在线的标注工具标记(方法很多🤨🤨🤨)

使用Lottie

npm install lottie-web

lottie.loadAnimation({
  container: element, // the dom element that will contain the animation
  renderer: 'svg',
  loop: true,
  autoplay: true,
  path: 'data.json' // the path to the animation json
});

基本的使用还是很简单的👨🏻‍💻

我们可以看见下面有时间轴, 可以看到动画时长什么的,然后我根据这个还原出来的效果不尽人意,(自己太菜 慢慢学习怎么还原这样的稿吧🙁🙁🙁)

查看动画时间

  animation: logo-button-bottom 1.5s;
  animation-fill-mode: forwards;

查看效果执行

@keyframes logo-button-bottom {
  0% {
    transform: translate(-50%, 80/75rem);
    opacity: 0;
  }
  20% {
    opacity: 1;
  }
  100% {
    opacity: 1;
    transform: translate(-50%, 0);
  }
}

查看效果的动画曲线

animation: logo-button-bottom 1.5s ease-out;

大概就是这么多了吧... ... 看了看 垃圾文章无疑了 2333

开了个Qq群,大家也可以进来互相交流~ iD 718639024

vue个人小项目总结

2018-06-22 13:14:50

简介

自己写了一个vue小项目总结总结(为了节省篇幅和大家阅读的时间直接进入正题 认真脸!)


项目详情可以查看的我Github仓库地址

项目预览地址

  • 用户登录帐号密码都是11
  • 后台管理登录也是11
  • (其实还有别的帐号密码,如果您有心情可以查看api自己用Postman注册,用户注册自己可以直接在页面上注册)

github描述文档写了使用了写技术栈 和 界面截图

功能总结

前端api调用

# api
import axios from 'axios'
import store from '@/store/store'

export default () => {
  return axios.create({
    baseURL: `http://123.207.60.132:8081/`,
    headers: {
      Authorization: `Bearer ${store.state.token}`
    }
  })
}

import Api from '@/services/Api'

export default {
  userLogin(credentials) {
    return Api().post('/userLogin', credentials)
  }
}

# music api

import axios from 'axios'
export default () => {
  return axios.create({
    baseURL: `http://123.207.60.132:3000/`
  })
}

import Api from '@/services/musicApi'

export default {
  getTopList() {
    return Api().get('/top/list?idx=3')
  }
}

前端vuex状态管理

import Vue from 'vue'
import Vuex from 'vuex'
import createPersistedState from 'vuex-persistedstate'

Vue.use(Vuex)

export default new Vuex.Store({
  strict: true,
  plugins: [createPersistedState()],
  state: {
    token: null,
    user: null,
    isUserLoggedIn: false
  },

  mutations: {
    setToken(state, token) {
      state.token = token
      state.isUserLoggedIn = !!(token)
    },
    setUser(state, user) {
      state.user = user
    }
  },

  actions: {
    setToken({ commit }, token) {
      commit('setToken', token)
    },
    setUser({ commit }, user) {
      commit('setUser', user)
    }
  }
})

前端界面

# 组件使用
<v-slider :sliderImg="sliderImg"></v-slider>

# 组件引入
 import VSlider from './Slider/Index'

export default {
    # 声明组件
    components: {
        VSlider
    },
    data() {
        return {
            sliderImg: [
                {
                src: 'item1'
                },
                {
                src: 'item2'
                },
                {
                src: 'item3'
                },
                {
                src: 'item4'
                }
            ]
        }
    }
}
  • 前端页面基本都是按照这样的方式写的 更多内容地址

后台界面

  • 后台界面除了按照前端页面写的以外还用了vue-element-admin后台界面的写法

  • 其中侧边栏是根据 router.js 配置的路由并且根据权限动态生成的,这样就省去了写一遍路由还要手动再写一次侧边栏这种麻烦事,但也遇到了一个问题,路由可能会有多层嵌套,很多人反馈自己的侧边栏会有三级,甚至还有五级的。所以重构了一下侧边栏,使用了递归组件,这样不管你多少级,都能愉快的显示了。文章地址 复制的hhhh

  • 页面还用了icon文章地址

  • 主页显示用了v-charts图表组件 这个基本的使用挺简单的看看文档就ok了 不用另外写文章了

  • 更多内容地址

前端router

import Vue from 'vue'
import Router from 'vue-router'
Vue.use(Router)

export const constantRouterMap = [
  { path: '*', redirect: '/404', hidden: true }
]

export default new Router({
  mode: 'history', // require service support
  scrollBehavior: () => ({ y: 0 }),
  routes: constantRouterMap
})

后端基本服务

const express = require('express')
const app = express()
const config = require('./config/config')

const fs = require('fs')
const path = require('path')
require('./router/index.js')(app)
app.use(express.static(path.resolve(__dirname, './dist')))

app.get('*', function(req, res) {
    const html = fs.readFileSync(path.resolve(__dirname, './dist/index.html'), 'utf-8')
    res.send(html)
})

app.listen(config.port, function () {
  console.log(`server run ${config.port} port`)
})
  • 后台主要使用nodejs express mongodb提供服务

  • 功能 用户登录注册

  • 功能 管理员登录注册

  • 用户的密码加密

  • 更多内容地址

后端model

const mongoose = require('mongoose')
const Schema = mongoose.Schema
const bcrypt =require('bcryptjs')  // 密码加密
let SALT_WORK_FACTOR = 10
const config = require('../config/config')
mongoose.connect(config.database)


var UserSchema = new Schema({
  userName: {
    type: String,
    unique: true,  // 不重复
    require: true  // 不为空
  }
})

// 在保存密码之前用bcrypt加密保证密码只有用户知道
UserSchema.pre('save', function (next){
  // 保存this指向
  let _this = this
  // 判断是否为最新
  if(!_this.isModified('password')){
      return next()
  }
  // 加密EMMM 产生一个salt
  bcrypt.genSalt(SALT_WORK_FACTOR, function (err, salt){
    if(err){
      return next(err)
    }

    // 结合salt 生成 hash
    bcrypt.hash(_this.password, salt, function (err, hash) {
      if(err){
        return next(err)
      }

      // 用hash覆盖明文密码
      _this.password = hash
      next()
    })
  })
})

// 通过bcrypt的compare方法,对再次传入的密码和数据库中保存的加密后的密码进行比较,如果匹配,则登录成功 isMatch 为布尔值
// mongoose 模型扩展 在 methods 对象上扩展
UserSchema.methods.comparePassword = function (candidatePassword, cb) {
  bcrypt.compare(candidatePassword, this.password, function (err, isMatch) {
    if (err) {
      return cb(err);
    }

    cb(null, isMatch);
  });
};
module.exports = mongoose.model('User', UserSchema)
  • 使用mongoose Schema定义数据模型

  • 通过bcrypt密码加密

  • 扩展方法 对密码加密

  • 更多内容地址

后端controllers

const User = require('../model/User')
const AdminUser = require('../model/AdminUser')
const jwt = require('jsonwebtoken')
const config = require('../config/config')


// token
function jwtSignUser(user) {
  const ONE_WEEK = 60 * 60 * 24 * 7
  return jwt.sign(user, config.authentication.jwtSecret, {
    expiresIn: ONE_WEEK
  })
}

module.exports = {
  async userLogin(req, res) {
    try {
      await User.findOne({
        userName: req.body.userName
      }, function (err, user) {
        .........
      })
    }
  }
}
  • 登录成功返回
success: true,
message: '登录成功',
token: 'token值'
  • 登录成功返回
success: false,
message: '登录失败', (或其他信息详情看文件)
token: ''
  • 对用户的密码判断
 user.comparePassword(req.body.pass, (err, isMatch) => {
     ...
 }

总结

  • 通过上面的练习学习了更多新知识

  • 更加理解前后端的交互

  • 加强了技术掌握程度

  • 还有很多不符合现在开发的规范

  • 代码不够精简干练

  • 基础知识掌握不牢固

  • 设计审美水平需要提升

  • ......

大概就是这么多吧, 项目还有很多部规范的地方以后会慢慢改正, 虽然是个人里练习的项目, 自己还是话了很多时间和心血

最后 最后 最后 说一个厚脸皮的话 小哥哥小姐姐如果觉得不错的话可以给小生点一个 Star 嘛 谢谢哇QAQ~~

自己马上就要实习了 有大佬看上带走的吗!QAQ

less循环

2019-08-16 11:55:30

使用递归调用来循环

less 编译前

.loop(@n) when (@n > 0) {
  div:nth-of-type(@{n}){
    width: (@n*10px);
    height: 40px;
    background: red;
    margin: 10px;
    font-size: 12px;
  }
  .loop(@n - 1);
}

.loop(5);

css 编译后

div:nth-of-type(5) {
  width: 50px;
  height: 40px;
  background: red;
  margin: 10px;
  font-size: 12px;
}
div:nth-of-type(4) {
  width: 40px;
  height: 40px;
  background: red;
  margin: 10px;
  font-size: 12px;
}
div:nth-of-type(3) {
  width: 30px;
  height: 40px;
  background: red;
  margin: 10px;
  font-size: 12px;
}
div:nth-of-type(2) {
  width: 20px;
  height: 40px;
  background: red;
  margin: 10px;
  font-size: 12px;
}
div:nth-of-type(1) {
  width: 10px;
  height: 40px;
  background: red;
  margin: 10px;
  font-size: 12px;
}

lolSix周年活动页面

前言

2018-03-19 12:27:36

在掘金看到了一个大佬发的 LOL六周年里的按钮动画 的文章, 觉得很有意思

于是进 lolSix周年活动页面 看看效果 只剩下哇塞!哇塞!哇塞!

于是自己决定试试,参考首页写一部分效果

ps: demo demo仓库

两个动画都是通过改变class来完成的效果

(function () {
    // 定义所需要的变量
    let navBtns = $('#nav-ul i')
    let navBtnli = $('#nav-ul li')
    let navhs = $('#nav li')
    let navhem = $('#nav em')
    // 两个改变class的计数变量
    let numLi = {
        numi: 1,
        numh: 1
    }
    // 清楚定时器的变量
    let time = null

    // 鼠标经过和移除 触发run方法
    navBtnli.on('mouseover', function () {
        let navI = $(this).children('i')
        run(navI, 'ans2_btn', numLi.numi)
    })
    navBtnli.on('mouseout', function () {
        let target = $(this).children('i')
        stop(target)
    })

    navhs.on('mouseover', function () {
        $(this).removeClass('ligb')
        let navh = $(this).children('em')
        run(navh, 'ans_btn', numLi.numh)
    })

    navhs.on('mouseout', function () {
        let target = $(this).children('em')
        stop(target)
        $(this).addClass('ligb')
    })

    // 接受三个参数, 需要改变的对象, 需要改变的名字, 需要改变的数
    function run(obj, name, num) {
        // js定时器setTimeout 无法调用局部变量的解决办法
        function runs() {
            if (num > 25) {
                num = 1
            }
            obj.css('display', 'block')
            obj.removeClass()
            obj.addClass(nameNav + num)
            num++
            time = setTimeout(function () {
                clearTimeout(time)
                runs()
            }, 30)
        }
        runs()
    }
    // 停止动画
    function stop(target) {
        clearTimeout(time)
        target.css('display', 'none')
    }

})()

html结构请参考 官方页面或者我的仓库里面的html文件

然后就是中间的 flash 动画,使用了html object标签,

但是我在Ubuntu上面chrome测试的时候正常没有问题,(自己在Ubuntu开虚拟机上win测试,IE11,360有效果,chrome,firefox就没有了,懵逼 希望有大佬可以跟我提点一二)

但是在Firefox测试的时候不会显示,

于是用了兼容的处理方法,先贴一个通用的处理方法(自己也研究了一会儿,第一次接触2333~~),

    // 这是活动页面的解决办法
    // 大家也可以看看这个文档 https://github.com/swfobject/swfobject 
    // An open source Javascript framework for detecting the Adobe Flash Player plugin and embedding Flash (swf) files.
    // 自己英文比较垃圾 chrome 翻译过来就是
    // 用于检测Adobe Flash Player插件并嵌入Flash(swf)文件的开源Javascript框架。

    // 这个文件可以引用腾讯的,也可以下载,也可以新建文件复制粘贴
    <script src="./public/js/swfobject.js"></script>
    <script src="index.swf"></script>
    <script>
        var params = {
            scale: "noscale",
            wmode: "transparent",
            align: "middle",
            allowFullscreen: "true",
            allowScriptAccess: "always",
            FlashVars: "timer=1480586966506&endtimer=1481094000000"
        }
        swfobject.embedSWF("index.swf", "mymovie", "100%", "670", "8.0.0","expressInstall.swf", null, params);
    </script>

虽然解决了引入swf动画的兼容问题,但是在firefox上面根本不显示啊 23333~~~

大佬的解决办法非常简单 请继续细心观看文章!

// 提前在html结构上面写一个静态的替代图片,然后隐藏
<div class="logob">英雄联盟6周年盛典</div>

// 这里是swf文件的位置
<div id="mymovie" class="mymovie"></div>

// 通过判断 来显示静态图片(虽然没有了swf动画,但是总不不显示比较好 赞 学习了~!)
 setTimeout(function () {
    if ($(".mymovie").length > 0) {
        $(".logob").css({
            "display": "block"
        });
    }
}, 1000)

Ethereum contract

Ethereum

Ethereum study notes

学习资料

cryptozombies 这个教程写的挺好的!!!

简易的拍卖 rinkeby 测试网

总结(一)

配置本地的开发环境以及遇到的坑

首先看看这里 https://ethereum.org/

然后开发可以参照这篇文章进行学习和实战 https://www.qikegu.com/docs/4733

truffle init的时候遇到一个connect x.x.x.x:443的错误

官方给出来的答复是 GFW It's all GFW's fault, when i crossed GFW, everything work. issues/2995

我目前的解决方案是直接clone repo然后一些基本的目录都有了,然后在继续参考教程跑流程

总结(二)

本地部署多个项目的合约无法成功

本地执行 truffle compile 显示是成功的

执行 truffle migrate 显示是最新的

但是实际在 truffle console || truffle test 里面调用时错误的

解决方案是 truffle migrate --reset 增加 --reset !!!

看到一篇文章有写到这个问题 https://www.jianshu.com/p/42479ede6730

这个命令会执行所有migrations目录下的js文件。如果之前执行过truffle migrate命令,再次执行,只会部署新的js文件,如果没有新的js文件,不会起任何作用。如果使用--reset参数,则会重新的执行所有脚本的部署。truffle migrate --reset。

总结(二)

简单的计数器合约

初始化项目

因为本地truffle init有问题, 所以我这里采取clone的方式init, 具体步骤参考上文

git clone xxxxxx

然后替换名字

mv xxx counter

然后喜欢性的npm

npm init

新建计数器合约

contracts目录新建

touch Counter.sol
pragma solidity >=0.4.21 <0.7.0;

// 声明
contract Counter {
  // 声明计数器变量
  uint256 counter;

  // 部署时调用 初始化
  constructor() public {
    counter = 0;
  }

  // 增加方法
  function increase() public {
    counter += 1;
  }

  // 返回counter uint256是类型
  function get() public view returns(uint256) {
    return counter;
  }

}

编译、部署、测试合约

部署的时候需要在migrations目录新建2_deploy_contracts.js前面需要加上序号

执行需要 具体文档有写 https://www.qikegu.com/docs/4798

truffle compile

truffle migrate

truffle test

部署过程基本都大同小异(略过 不重复写了), 可以参考上文的资料进行部署


⬆️   已落后


使用 (Hardhat)(https://hardhat.org/guides/create-task.html)

利用animation制作slider

2018-06-25 19:02:53

利用css animation制作slider

文章地址

预览地址

<div class="container">
    <div class="img">
        <img src="./img/1.jpg" alt="">
    </div>
    <div class="img">
        <img src="./img/2.jpg" alt="">
    </div>
    <div class="img">
        <img src="./img/3.png" alt="">
    </div>
    <div class="img">
        <img src="./img/4.jpg" alt="">
    </div>
    <div class="img">
        <img src="./img/5.jpg" alt="">
    </div>

    <div class="bottom">
        <div class="img-bottom">
            <img src="./img/1.jpg" alt="">
        </div>
        <div class="img-bottom">
            <img src="./img/2.jpg" alt="">
        </div>
        <div class="img-bottom">
            <img src="./img/3.png" alt="">
        </div>
        <div class="img-bottom">
            <img src="./img/4.jpg" alt="">
        </div>
        <div class="img-bottom">
            <img src="./img/5.jpg" alt="">
        </div>
    </div>
</div>
*,
*::after,
*::before {
    box-sizing: border-box;
}
html,
body {
    height: 100%;
}
body {
    padding: 0;
    margin: 0;
}
.container {
    width: 100%;
    height: 100%;
    position: relative;
    overflow: hidden;
}
div.img {
    position: absolute;
    width: 100%;
    height: 100%;
    overflow: hidden;
}
div.img img {
    width: 100%;
    height: 100%;
}
div.img:nth-child(1) {
    left: -100%;
    -webkit-transition: .5s;
    -moz-transition: .5s;
    -ms-transition: .5s;
    -o-transition: .5s;
    transition: .5s;
    -webkit-transition-timing-function: ease-out;
    -moz-transition-timing-function: ease-out;
    -ms-transition-timing-function: ease-out;
    -o-transition-timing-function: ease-out;
    transition-timing-function: ease-out;
}
div.img:nth-child(2) {
    top: 100%;
    -webkit-transition: .5s;
    -moz-transition: .5s;
    -ms-transition: .5s;
    -o-transition: .5s;
    transition: .5s;
    -webkit-transition-timing-function: ease-out;
    -moz-transition-timing-function: ease-out;
    -ms-transition-timing-function: ease-out;
    -o-transition-timing-function: ease-out;
    transition-timing-function: ease-out;
}
div.img:nth-child(3) {
    transform: scale(0.1);
    -webkit-transition: 1s;
    -moz-transition: 1s;
    -ms-transition: 1s;
    -o-transition: 1s;
    transition: 1s;
    -webkit-transition-timing-function: ease-in;
    -moz-transition-timing-function: ease-in;
    -ms-transition-timing-function: ease-in;
    -o-transition-timing-function: ease-in;
    transition-timing-function: ease-in;
}
div.img:nth-child(4) {
    transform: scale(2.0);
    -webkit-transition: 1s;
    -moz-transition: 1s;
    -ms-transition: 1s;
    -o-transition: 1s;
    transition: 1s;
    -webkit-transition-timing-function: ease-out;
    -moz-transition-timing-function: ease-out;
    -ms-transition-timing-function: ease-out;
    -o-transition-timing-function: ease-out;
    transition-timing-function: ease-out;
    z-index: 1;
}
div.img:nth-child(5) {
    transform: rotate(-360deg) scale(0.1);
    -webkit-transition: .7s;
    -moz-transition: .7s;
    -ms-transition: .7s;
    -o-transition: .7s;
    transition: .7s;
    -webkit-transition-timing-function: ease-in-out;
    -moz-transition-timing-function: ease-in-out;
    -ms-transition-timing-function: ease-in-out;
    -o-transition-timing-function: ease-in-out;
    transition-timing-function: ease-in-out;
}
div.bottom {
    position: absolute;
    bottom: 0;
    left: 50%;
    transform: translateX(-50%);
    width: 850px;
    z-index: 10;
}
div.bottom div.img-bottom {
    float: left;
    margin: 0 10px;
}
div.bottom div.img-bottom img {
    width: 150px;
    height: 100px;
}
div.active {
    left: 0 !important;
}
div.active {
    top: 0 !important;
}
div.active {
    transform: scale(1.0) !important;
}
div.active {
    transform: scale(1.0) !important;
}
div.active {
    transform: rotate(0deg) scale(1.0) !important;
}
window.onload = function () {
    var imgBottom = document.getElementsByClassName('img-bottom')
    var imgToggle = document.getElementsByClassName('img')

    var attrArr = [
        'leftImg', 'topImg', 'scaleImg', 'scaleImgs', 'scaleRotateImg'
    ]

    var getCls = function (element) {
        return element.getAttribute('class')
    }
    var setCls = function (element, cls) {
        return element.setAttribute('class', cls)
    }
    var addCls = function (element, cls) {
        var baseCls = getCls(element)
        if (baseCls.indexOf(cls) == -1) {
            setCls(element, baseCls + ' ' + cls)
        }
    }

    var delCls = function(element, cls) {
        var baseCls = getCls(element)
        if(baseCls.indexOf(cls) != -1){
            setCls(element, baseCls.split(cls).join(' ').replace(/\s+/g, ' '))
        }
    }

    var toggleImg = function (i) {
        return function () {
            ImgAddIndex(i)
        }
    }
    for (var i = 0; i < imgBottom.length; i++) {
        imgBottom[i].onclick = toggleImg(i)
    }

    function ImgAddIndex (i) {
        for(var j = 0;j<imgToggle.length;j++) {
            imgToggle[j].style.zIndex = 0
            delCls(imgToggle[j], 'active')
        }

        addCls(imgToggle[i], 'active')
        imgToggle[i].style.zIndex = 9;
    }
}

Recommend Projects

  • React photo React

    A declarative, efficient, and flexible JavaScript library for building user interfaces.

  • Vue.js photo Vue.js

    🖖 Vue.js is a progressive, incrementally-adoptable JavaScript framework for building UI on the web.

  • Typescript photo Typescript

    TypeScript is a superset of JavaScript that compiles to clean JavaScript output.

  • TensorFlow photo TensorFlow

    An Open Source Machine Learning Framework for Everyone

  • Django photo Django

    The Web framework for perfectionists with deadlines.

  • D3 photo D3

    Bring data to life with SVG, Canvas and HTML. 📊📈🎉

Recommend Topics

  • javascript

    JavaScript (JS) is a lightweight interpreted programming language with first-class functions.

  • web

    Some thing interesting about web. New door for the world.

  • server

    A server is a program made to process requests and deliver data to clients.

  • Machine learning

    Machine learning is a way of modeling and interpreting data that allows a piece of software to respond intelligently.

  • Game

    Some thing interesting about game, make everyone happy.

Recommend Org

  • Facebook photo Facebook

    We are working to build community through open source technology. NB: members must have two-factor auth.

  • Microsoft photo Microsoft

    Open source projects and samples from Microsoft.

  • Google photo Google

    Google ❤️ Open Source for everyone.

  • D3 photo D3

    Data-Driven Documents codes.