Datadog Real User Monitoring (RUM) enables you to visualize and analyze the real-time performance and user journeys of your application’s individual users.
To install with NPM, run:
npm install @datadog/mobile-react-nativeTo install with Yarn, run:
yarn add @datadog/mobile-react-nativeMinimum React Native version: SDK supports React Native version 0.63.4 or higher. Compatibility with older versions is not guaranteed out of the box.
- In the Datadog app, select UX Monitoring > RUM Applications > New Application.
- Choose
react-nativeas your Application Type. - Provide a new application name to generate a unique Datadog application ID and client token.
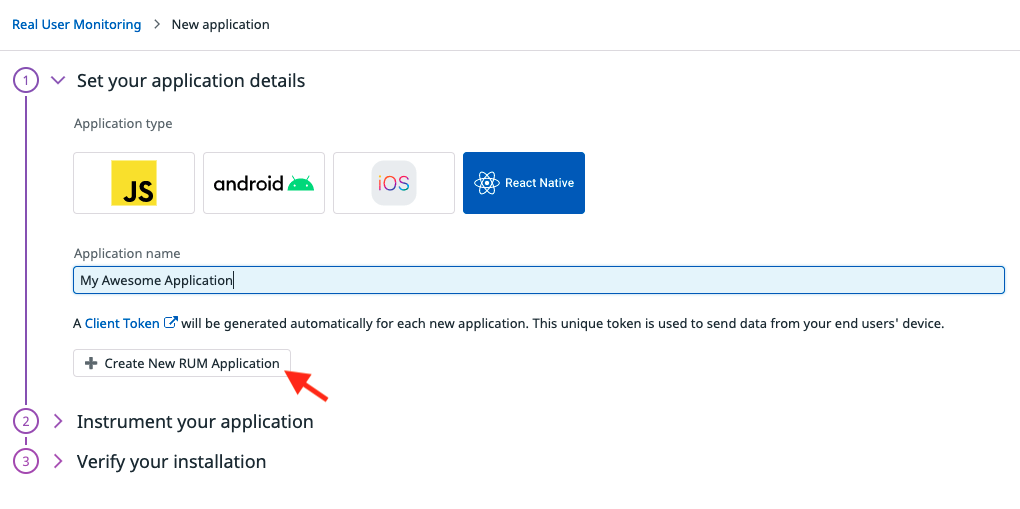
To ensure the safety of your data, you must use a client token. You cannot use only Datadog API keys to configure the @datadog/mobile-react-native library, because they would be exposed client-side. For more information about setting up a client token, see the Client Token documentation.
import { DdSdkReactNative, DdSdkReactNativeConfiguration } from '@datadog/mobile-react-native';


const config = new DdSdkReactNativeConfiguration(
    "<CLIENT_TOKEN>",
    "<ENVIRONMENT_NAME>",
    "<RUM_APPLICATION_ID>",
    true, // track User interactions (e.g.: Tap on buttons).
    true, // track XHR Resources
    true // track Errors
)
// Optional: Select your Datadog website (one of "US", "EU" or "GOV")
config.site = "US"
// Optional: enable or disable native crash reports
config.nativeCrashReportEnabled = true
// Optional: sample RUM sessions (here, 80% of session will be sent to Datadog. Default = 100%)
config.sampleRate = 80

await DdSdkReactNative.initialize(config)

// Once SDK is initialized you need to setup view tracking to be able to see data in the RUM Dashboard.If user interactions tracking is enabled as in the code example above, the SDK traverses up the hierarchy of components starting from the component that received a tap, looking for dd-action-name property. Once found, it is used as a name for the action reported.
Alternatively, you can use the accessibilityLabel element property to give the tap action a name; otherwise, the element type is reported. You can check the sample app for usage examples.
Because React Native offers a wide range of libraries to create screen navigation, by default only manual view tracking is supported. You can manually start and stop a view using the following startView() and stopView methods.
import { DdSdkReactNative, DdSdkReactNativeConfiguration, DdLogs, DdRum } from '@datadog/mobile-react-native';


// Start a view with a unique view identifier, a custom view url, and an object to attach additional attributes to the view
DdRum.startView('<view-key>', '/view/url', Date.now(), { 'custom.foo': "something" });
// Stops a previously started view with the same unique view identifier, and an object to attach additional attributes to the view
DdRum.stopView('<view-key>', Date.now(), { 'custom.bar': 42 });
Use one of Datadog's integrations to automatically track views if you're using the following libraries:
- If you use the
react-native-navigationlibrary, then add the@datadog/mobile-react-native-navigationpackage and follow the setup instructions. - If you use the
react-navigationlibrary, then add the@datadog/mobile-react-navigationpackage and follow the setup instructions.
You can attach user information to all RUM events to get more detailed information from your RUM sessions.
For user-specific information, use the following code wherever you want in your app (after the SDK has been initialized). The id, name, and email attributes are built into Datadog, and you can add other attributes that makes sense for your app.
DdSdkReactNative.setUser({
    id: "1337",
    name: "John Smith",
    email: "[email protected]",
    type: "premium"
})You can also keep global attributes to track information about a specific session, such as A/B testing configuration, ad campaign origin, or cart status.
DdSdkReactNative.setAttributes({
    profile_mode: "wall",
    chat_enabled: true,
    campaign_origin: "example_ad_network"
})If automatic instrumentation doesn't suit your needs, you can manually create RUM Events and Logs:
import { DdSdkReactNative, DdSdkReactNativeConfiguration, DdLogs, DdRum } from '@datadog/mobile-react-native';

// Initialize the SDK
const config = new DdSdkReactNativeConfiguration(
    "<CLIENT_TOKEN>",
    "<ENVIRONMENT_NAME>",
    "<RUM_APPLICATION_ID>",
    true, // track User interactions (e.g.: Tap on buttons)
    true, // track XHR Resources
    true // track Errors
)
DdSdkReactNative.initialize(config);

// Send logs (use the debug, info, warn or error methods)
DdLogs.debug("Lorem ipsum dolor sit amet…", {});
DdLogs.info("Lorem ipsum dolor sit amet…", {});
DdLogs.warn("Lorem ipsum dolor sit amet…", {});
DdLogs.error("Lorem ipsum dolor sit amet…", {});

// Track RUM Views manually
DdRum.startView('<view-key>', 'View Url', {}, Date.now());
//…
DdRum.stopView('<view-key>', { 'custom': 42 }, Date.now());

// Track RUM Actions manually
DdRum.addAction('TAP', 'button name', {}, Date.now());
// or in case of continuous action
DdRum.startAction('TAP', 'button name', {}, Date.now());
// to stop action above
DdRum.stopAction({}, Date.now());

// Add custom timings
DdRum.addTiming('<timing-name>');

// Track RUM Errors manually
DdRum.addError('<message>', 'source', '<stacktrace>', {}, Date.now());

// Track RUM Resource manually
DdRum.startResource('<res-key>', 'GET', 'http://www.example.com/api/v1/test', {}, Date.now());
//…
DdRum.stopResource('<res-key>', 200, 'xhr', {}, Date.now());

// Send spans manually
const spanId = await DdTrace.startSpan("foo", { 'custom': 42 }, Date.now());
//...
DdTrace.finishSpan(spanId, { 'custom': 21 }, Date.now());
Resource tracking is able to provide the following timings:
First Byte- The time between the scheduled request and the first byte of the response. This includes time for the request preparation on the native level, network latency, and the time it took the server to prepare the response.Download- The time it took to receive a response.
{{< partial name="whats-next/whats-next.html" >}}