This document explains the steps necessary for installing ROS Indigo on the Raspberry PI and takes it a step farther to give an introduction of how to incorporate some of the Raspberry Pi's hardware capabilities so that they can be utilized as part of a ROS package. This documentation is by no means a fully complete resource of all of the Raspberry Pi's capabilities. However, the hope is that it can provide a good introduction and starting point so that the time spent in the small details can be minimized as much as possible.
The code associated with this document is intended as a launch point and a means of demonstrating how to work with the GPIO on the Raspberry Pi. It is by no means meant to be a complete solution, nor is it guaranteed to be bug free. Rather it is intended to demonstrate concepts so that it can be expanded to other specific applications. Each of the code files is written in Python.
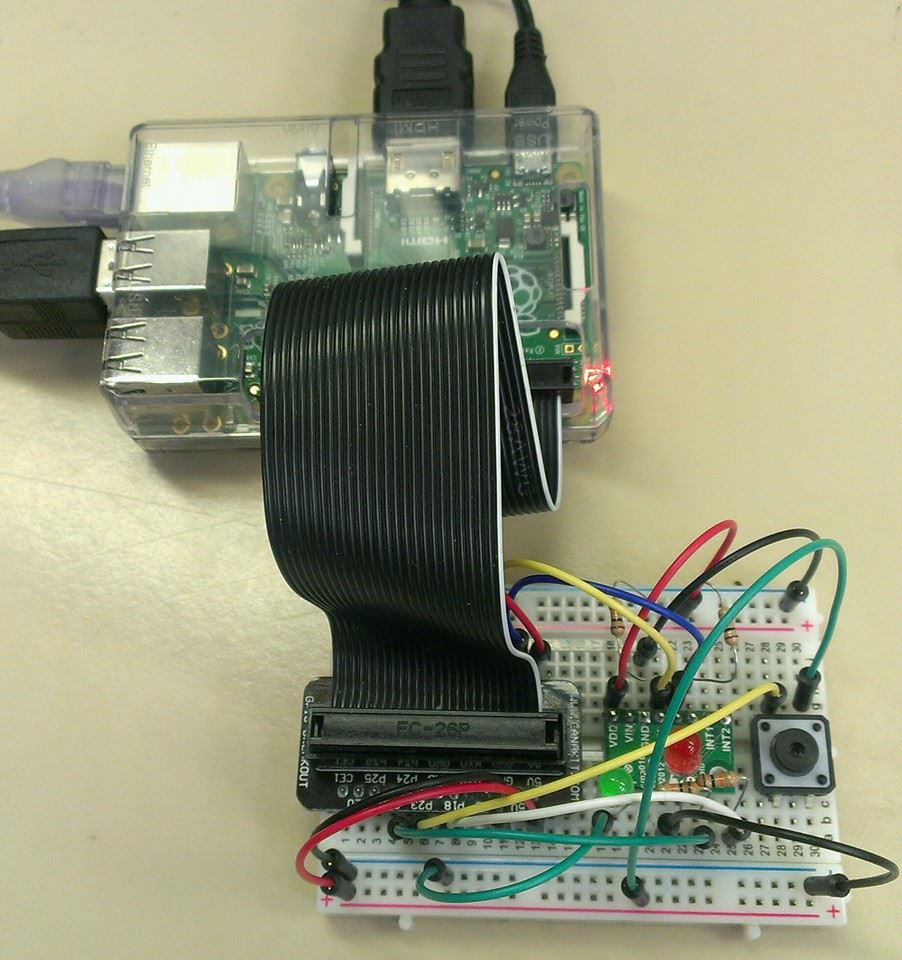
The setup used for generating this documentation included a Raspberry Pi B+ board, a keyboard, a mouse, a HDMI monitor, a LSM303DLHC Ultra-compact high-performance eCompass module: 3D accelerometer and 3D magnetometer (datasheet here), a Raspberry Pi B+ GPIO Breakout Board for easy use with a breadboard, some LEDs, pushbuttons, resistors, and wire.
The Raspberry Pi B+ board has a mini-SD card slot which holds the SD card that contains the operating system and all files. The Raspbian OS is recommended to be installed. The Raspberry Pi has an HDMI port and can be connected to an HDMI monitor to create a small micro-computer. It also has 4 USB ports for using periphal devices like keyboard, USB key, mouse, web camera, and so forth. All the devices listed above requires no drivers; they will automatically work when plugged in. The Raspberry will start as soon as the power is plugged in.
Things to note:
- When using the terminal in Raspbian OS, some command line commands are different from Ubuntu 14.04. Some of the same aliases are not available out of the box, and there are many tools that are not installed by default.
- The Raspberry Pi is not a very powerful system. Everything takes longer than on a regular x86 processor, so be prepared to exercise patience.
To install ROS Indigo, visit this link. It will guide the installation process step by step.
There are a few items of note regarding these instructions. First of all, beware that the installation process will take 8 or more hours to complete. The installation process will involve compiling many libraries and packages from source, which takes a long time on the Raspberry Pi's hardware. Secondly, during the installation process you will likely encounter errors as you go. Ignore these errors and press on. When you are finished with all of the steps you will be able to run roscore and other applications.
When the ROS Indigo installation has completed, create a new workspace following the instructions on the Create a ROS Workspace page. Then use the turtlesim node to test whether ROS was installed successfully or not. Follow the turtlesim link to run the node.
Here you might encounter some error like "turtlesim_node could not be found". First of all, you should check your ROS environment variables. Run the command
$ env | grep ROS
and look for the environment variables ROS_ROOT and ROS_PACKAGE_PATH. They should have the following values
ROS_ROOT=/opt/ros/indigo/share/ros
ROS_PACKAGE_PATH=/opt/ros/indigo/share:/opt/ros/indigo/stacks
If the environment variables are set up appropriately, that means your turtlesim package is not installed appropriately. You should try to clone the package ros_tutorials to your workspace and attempt to run it from there.
Once the turtlesim is running on the Raspberry Pi test the network connection by using turtle_teleop_key to control the motion of the turtle. First of all, establish a local network using a router and connect the Raspberry Pi and your computer with it. In order to resolve the name of the Raspberry Pi and the remote computer, install avahi-daemon on Raspberry Pi:
$ sudo apt-get install avahi-daemon
On the remote machine set the following environment variables
$ export ROS_HOSTNAME=remotecomputer.local
$ export ROS_MASTER_URI=http://raspberrypi.local:11311
where remotecomputer.local is the name of the remote computer and raspberrypi.local is the name of the Raspberry Pi. On the Raspberry Pi set the ROS_HOSTNAME variable as follows
$ export ROS_HOSTNAME=raspberrypi.local
This should be run on each terminal that is running roscore or using rosrun or roslaunch. For more information about ROS networking see the ROS Network Setup page.
Once the networking has been setup, try to control the turtle via the keyboard on your machine (use turtle_teleop_key). You could get the turtle running like following:

Now that ROS Indigo has been installed on the Raspberry Pi, it is time to start making use of its features. The following pages demonstrate how to utilize its hardware in the ROS environment.
- The GPIO page demonstrates how to program the GPIO pins by controlling an LED and reading a pushbutton.
- The I2C page demonstrates how to read and write over I2C by interfacing with an accelerometer. It also demonstrates how to display the Raspberry Pi in rviz as it uses the acceleration data to show its position.
Our circuit picture (don't worry, the pages contain schematics):
###Taking the Raspberry Pi Farther
The capabilities of the Raspberry Pi go further still than what is outlined in this document. The following pages provide some information on looking into the possibilities:


