Example React Native app that implements a browser extension. This example was created with React Native version 0.48.1. The instructions may require updating for later versions. This project builds on the great instructions published by PromptWorks at https://www.promptworks.com/blog/building-ios-app-extensions-with-react-native , which did a bit less than we're aiming for here, and were for an earlier version of React Native so could be a bit out of date.
- Create a React Native app, e.g.
react-native init MyReactNativeExampleBrowserExtensionThis should create a folder called MyReactNativeExampleBrowserExtension. - Open the iOS app in XCode, using the file
MyReactNativeExampleBrowserExtension/ios/MyReactNativeExampleBrowserExtension.xcodeproj
- Select your project in the left bar, click the
Generaltab, and click the plus icon to add a new Target
- Choose
Action Extensionto create the extension Make sure to choose Objective-C as the language, and leave the default selection
for
Make sure to choose Objective-C as the language, and leave the default selection
for Action Typeto bePresents User Interface. For this example we will be showing a UI built with React Native when the extension is activated. If you see a prompt to
 Activate "My Example Extension" scheme, click theActivatebutton.
- At this point you have an Action Extension in your app. Note that a new folder named after the name of the extension you chose, in this example
My Example Extension, has been created in theiosfolder, and contains three files,ActionViewController.h,ActionViewController.mandInfo.plist. We'll be rewriting the code inActionViewController.mpretty soon.


The goal of this section is to configure the Action Extension you've just created to be the same as the main application. This example was created with React Native version 0.48.1, so if you're using a later version and your config is different, use the config in your app instead.
- In XCode, click your project name in the left bar. You may see a vertical list appear saying
ProjectsandTargets, but if now, click the icon circled in the screenshot below to expand that UI control. Click the first target, in this exampleReactNativeExampleBrowserExtensionand expand theLink Binary With Librariessection. Note all the libraries in there, perhaps take a screenshot to avoid jumping back and forth. You'll need to replicate them elsewhere.
- In the
Targetslist, select your extension, in this exampleMy Example Extension. Click the+icon in theLink Binary With Librariessection and add all of the libraries you saw in the main app config. It should look like this when done

- In order for the project to compile properly (compilation, remember that headache from the 90's? Yeah, well welcome back to it :-( ), we'll add some "linker flags". Select your extension's target in the project settings again, in this case
My Example Extension. Click theBuild Settingstab, and make sure to click theAllbutton just below the tabs, otherwise XCode will helpfully hide the property you need to set.
Scroll down to find theOther Linker Flagsproperty, and double click on the row (do not expand it). This pops up a dialog, where you should click the+icon. Add
Add -ObjCand-lc++to this dialog.
- To enable the app to load JavaScript we need to add an exception to the
App Transport Security Settingsto allow local files to be loaded. The easiest way to do this is to copy the required text from the main app. To do so, expand the main project section in the left bar, in this exampleReactNativeExampleBrowserExtension, and choose theInfo.plistfile. Right click on theApp Transport Security Settingsproperty and copy it. Now expand the Extension section in the left bar, in this example
 My Example Extensionand select theInfo.plistfile. Right click and paste. you should see the setting forApp Transport Security Settingsbe replicated.
- Now let's test out the app and make sure everything is working! In your terminal, make sure that you are in the root folder of your React Native app, in this example a folder called
ReactNativeExampleBrowserExtension, and not in theiossubfolder. Run the commandreact-native run-ios, which should successfully build and run your app in the simulator. - Once your app is visible, close it using the Home button (Cmd-Shift-H), and open Safari. Tap the share button on the bottom, and an action sheet should appear. Your shiny new extension is not visible here yet, so we have to activate it. (Sadly, end users will need to do the same when they install from the App Store. Talk to your nearest Apple executive when you run into them hanging around cafes in Cupertino about this...) Scroll the bottom row of icons all the way to the right and tap the
Moreicon. This should pop up a list containing the name of your extension, in this exampleMy Example Extension. Tap the toggle control to enable it and hitDone. You should now see the empty icon for your extension in the action sheet. Tap it, and you'll see the empty UI pop up with aDonebutton on the top. Congrats, your app works!


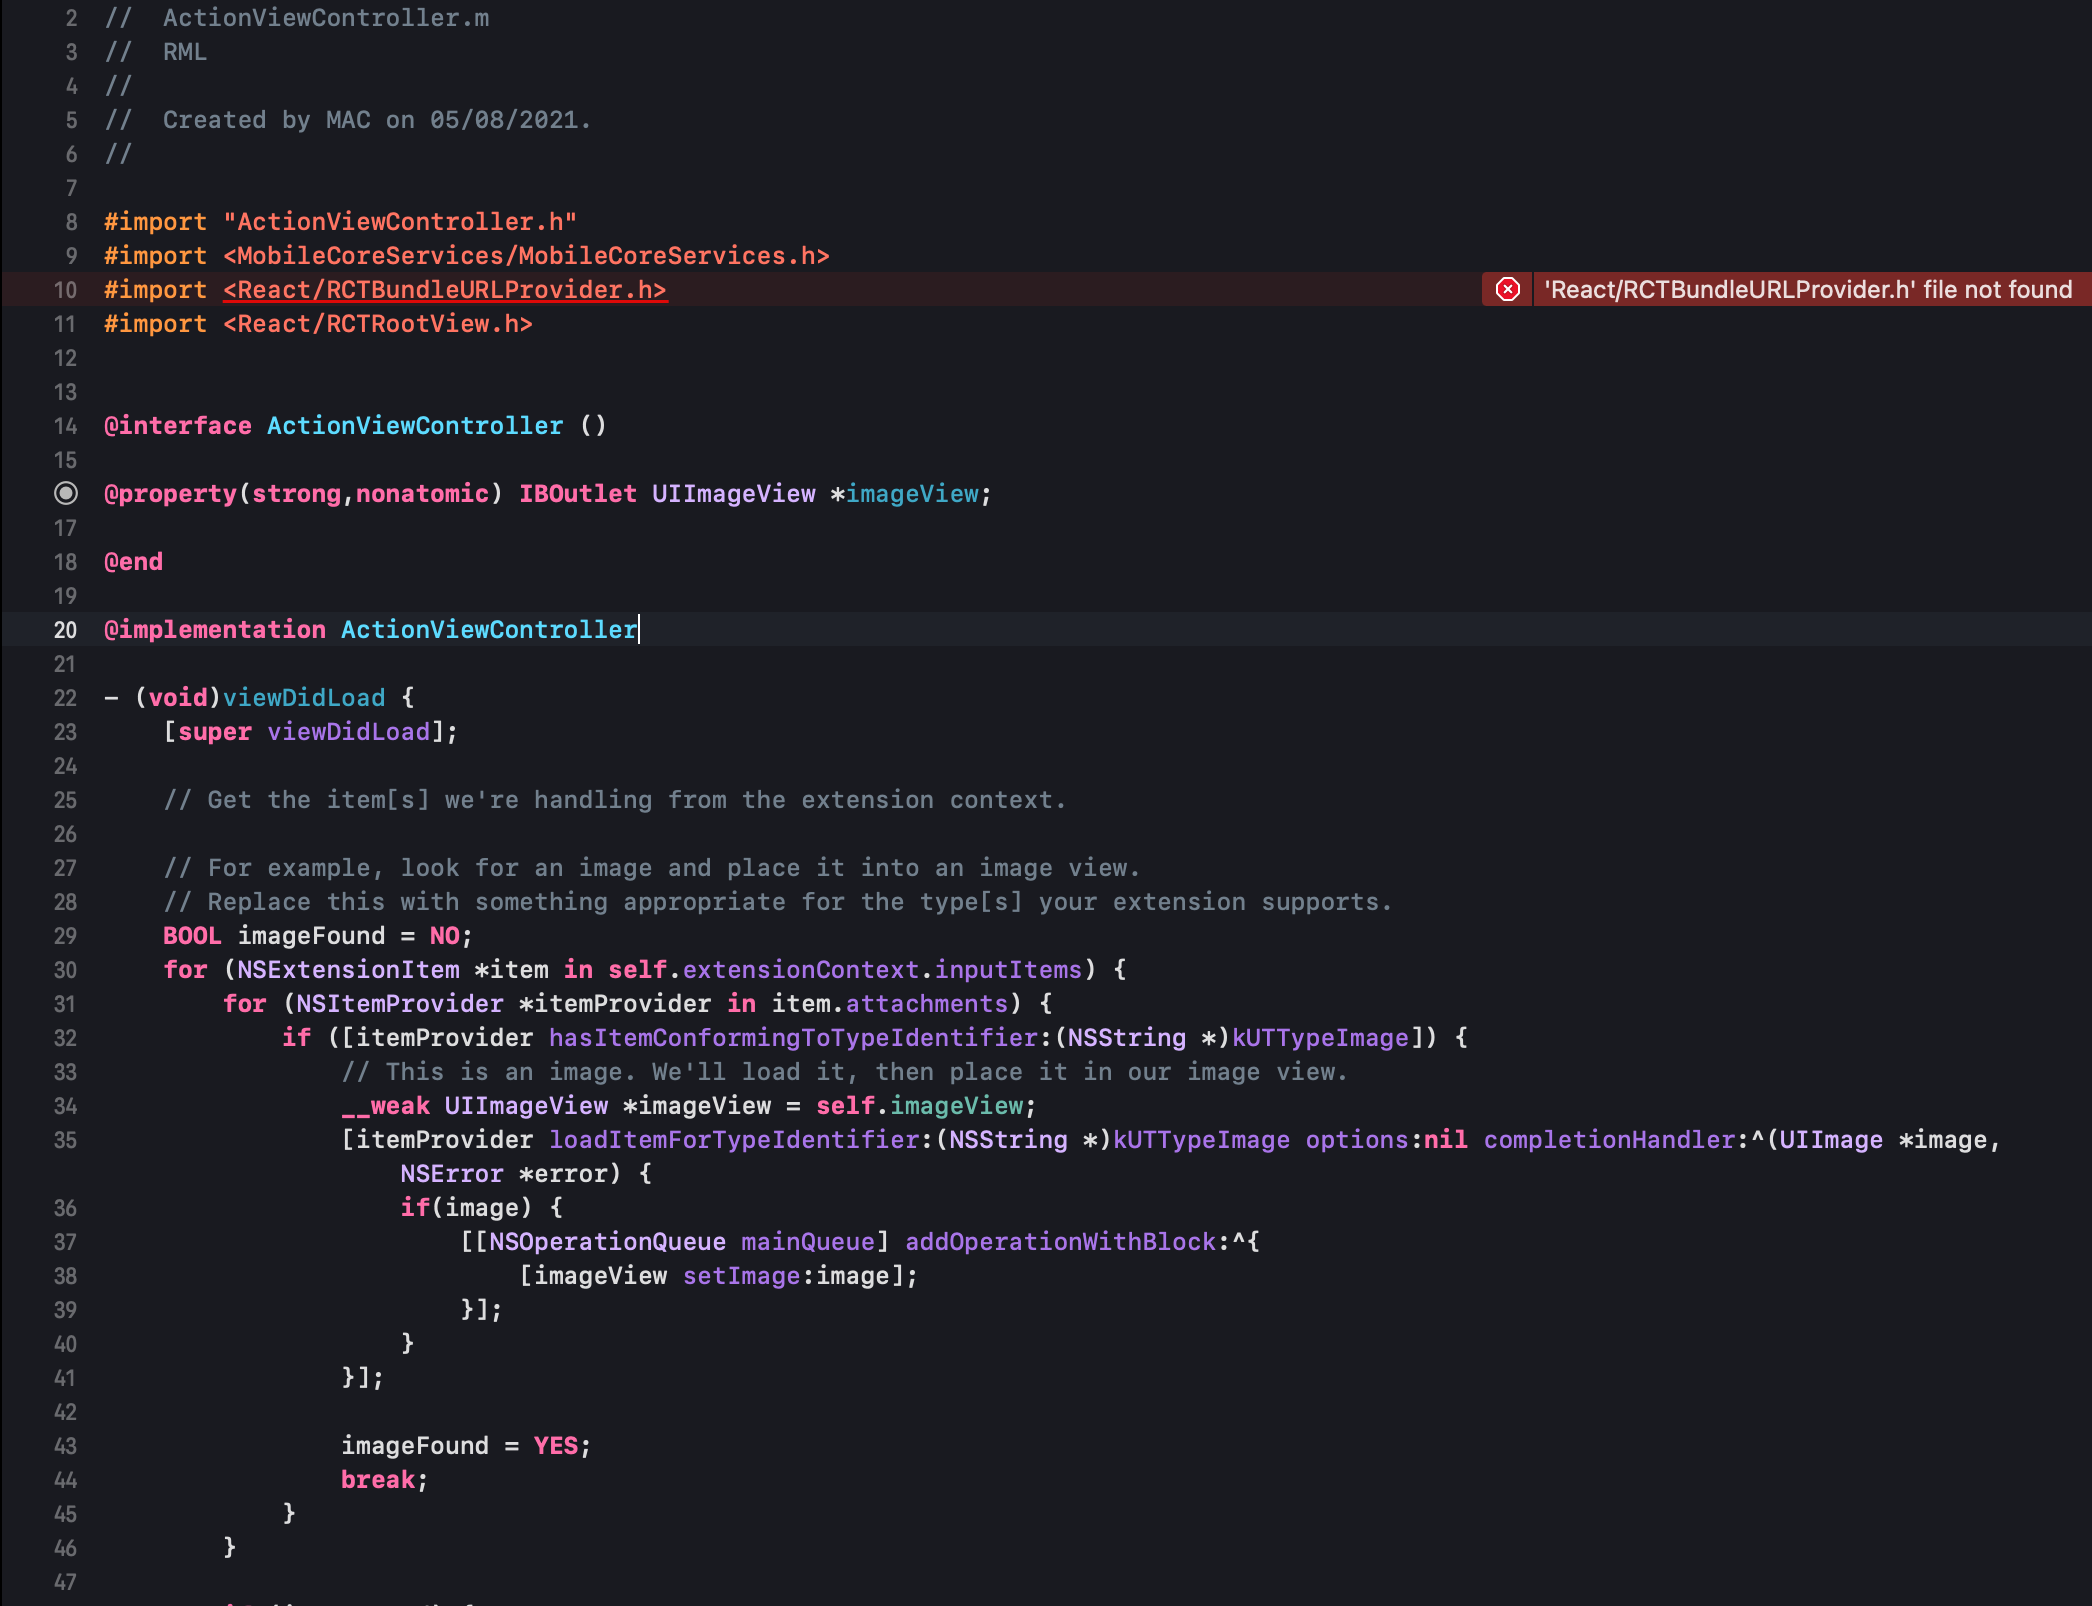
The previous steps created the file ActionViewController.m, which defines what happens when the UI needs to load. Take a look at it's contents, you will see the viewDidLoad
function containing the default code generated by XCode to render the UI. We will replace this with a loadView function that creates a RCTRootView with the JavaScript code.
- Add the following code to the top of
ActionViewController.m#import <React/RCTBundleURLProvider.h> #import <React/RCTRootView.h> - Add the following code below the line
@implementation ActionViewControllerinActionViewController.m
- (void)loadView {
    NSURL *jsCodeLocation;

    jsCodeLocation = [[RCTBundleURLProvider sharedSettings] jsBundleURLForBundleRoot:@"index.ios" fallbackResource:nil];

    RCTRootView *rootView = [[RCTRootView alloc] initWithBundleURL:jsCodeLocation
                                                        moduleName:@"ReactNativeExampleBrowserExtension"
                                                 initialProperties:nil
                                                     launchOptions:nil];
    rootView.backgroundColor = [[UIColor alloc] initWithRed:1.0f green:1.0f blue:1.0f alpha:1];
    self.view = rootView;
}
Note that this code was mostly copied directly from AppDelegate.m, with nil replacing launchOptions
since there are no launch options.
- Comment out the entire
viewDidLoadfunction.
The previous code showed the same UI in your action extension as appears in the main app. This is unlikely to be what you want to have happen, so let's send a property to React Native to tell it to render a different UI.
- Update the
loadViewmethod inActionViewController.mto pass in a dictionary with a property calledisActionExtensionset totrue. We pass this to theinitialPropertiesvalue.
NSDictionary *initialProps =
  [NSDictionary dictionaryWithObject:[NSNumber numberWithBool: TRUE] forKey:@"isActionExtension"];

RCTRootView *rootView =
  [[RCTRootView alloc] initWithBundleURL:jsCodeLocation
      moduleName:@"ReactNativeExampleBrowserExtension"
      initialProperties:initialProps
launchOptions:nil];- Create a new React component called 'ActionExtensionScreen' in the file 'app/ActionExtensionScreen.js'
(create the
appfolder). Put the following code in there.
// @flow

import React from 'react';
import { Text, View } from 'react-native';

export default class ActionExtensionScreen extends React.Component {
  render() {
    return (
      <View style={{ paddingTop: 100 }}>
        <Text style={{ fontSize: 30, textAlign: 'center' }}>Hello from our Action Extension!</Text>
      </View>
    );
  }
}- Update the root component of the app, in the file
index.ios.js, to add the prop check for isActionExtension.
import ActionExtensionScreen from './app/ActionExtensionScreen';

export default class ReactNativeExampleBrowserExtension extends Component {
  static propTypes = {
    isActionExtension: PropTypes.bool
  };

  static defaultProps = {
    isActionExtension: false
  };

  render() {
    if (this.props.isActionExtension) {
      return <ActionExtensionScreen />;
    } else {
      return (
        <View style={styles.container}>
          <Text style={styles.welcome}>Welcome to ReactNativeExampleBrowserExtension!</Text>
          <Text style={styles.instructions}>
            This app shows how to create a browser extension using React Native
          </Text>
          <Text style={styles.instructions}>
            You can mostly ignore this main app code, all the fun is in the extension and the
            README, which contains the instructions you should follow
          </Text>
        </View>
      );
    }
  }
}
Now when you open the action extension, you'll see the ActionExtensionScreen component rendered.

To close the extension, the done method on ActionViewController must be called. Unfortunately
this is in Objective-C, so we can't call it directly from JavaScript. To enable this we
will create a Native Module.
This gets a bit hacky due to the fact that Action Extensions do not have access to the application context so we need to keep track of the ActionViewController ourselves.
- Update the
ActionViewController.hfile to expose a pointer to the view controller, and set that pointer when the view is loaded. The new code looks like:
#import <UIKit/UIKit.h>

@interface ActionViewController : UIViewController

- (void) done;

extern ActionViewController * actionViewController;

@end- Update
ActionViewContoller.mto also include a pointer toactionViewController, and set the value of the pointer at the end of theloadViewfunction.
@interface ActionViewController ()

@property(strong,nonatomic) IBOutlet UIImageView *imageView;

@end

ActionViewController * actionViewController = nil;

@implementation ActionViewController

- (void)loadView {
  // All other existing code here....

  // New code
  actionViewController = self;
}- Time to create the NativeModule! Create a new file called
ActionExtension.hin the same folder asAppDelegate.m.
#import <React/RCTBridgeModule.h>

@interface ActionExtension : NSObject <RCTBridgeModule>
@end
Create a file called ActionExtension.m in the same folder. You will be prompted to choose
the targets that the file should be compiled for. Make sure to select both the default one,
My Example Extension and the main target, which should be the first in the list.
#import "ActionExtension.h"
#import "ActionViewController.h"

@implementation ActionExtension

RCT_EXPORT_MODULE();

RCT_EXPORT_METHOD(done) {
  [actionViewController done];
}

@end
To avoid compilation/linker issues, add ActionViewController.m to the Compile Sources list of the
main project's Build Phases tab.

- Update the
ActionExtensionScreen.jsfile to contain aDonecomponent, which when pressed activates the newly exposeddone()function on the native module.
// @flow

import React from 'react';
import { NativeModules, TouchableOpacity, Text, View } from 'react-native';

export default class ActionExtensionScreen extends React.Component {
  render() {
    return (
      <View style={{ paddingTop: 100 }}>
        <Text style={{ fontSize: 30, textAlign: 'center' }}>Hello from our Action Extension!</Text>
        <View style={{ paddingTop: 100 }}>
          <TouchableOpacity onPress={this._handleDone}>
            <Text style={{ fontSize: 30, textAlign: 'center' }}>Done</Text>
          </TouchableOpacity>
        </View>
      </View>
    );
  }

  _handleDone = () => {
    // Call the function that has been exposed on the native module to close the screen.
    NativeModules.ActionExtension.done();
  };
}
Now run your app again with react-native run-ios and try opening the extension from a browser.
Clicking the Done component should close the extension, taking you back to the browser!
Running in Release mode, rather than the Dev mode that we've been using up until now, does not work
out of the box when using an Action Extension. This is because, to run in Release mode,
React Native bundles up all the required JavaScript code and creates a file called main.jsbundle,
and adds that file to the build folder of your application. Of course, the App Extension is
a separate application, so it doesn't have access to this file. The result is that when you try to
open the app extension from the browser, nothing happens.
There is likely a way to enable cross-application bundle access (a bundle is what Apple calls the set of assets in your app), and I tried out a few that didn't work, but the approach I found to work was to write a script that runs after React Native finishes building and copies the file into the extension app.
- Create a folder in the root of the project called
scripts. In that folder, create a text file calledcopyJsBundle.sh. In that file, add the following:
cp "$CONFIGURATION_BUILD_DIR/$UNLOCALIZED_RESOURCES_FOLDER_PATH/main.jsbundle" "$CONFIGURATION_BUILD_DIR/<YOUR_APP_EXTENSION_NAME>.appex"
cp "$CONFIGURATION_BUILD_DIR/$UNLOCALIZED_RESOURCES_FOLDER_PATH/main.jsbundle.meta" "$CONFIGURATION_BUILD_DIR/<YOUR_APP_EXTENSION_NAME>.appex"
In this, replace <YOUR_APP_EXTENSION_NAME> with the name of your app extension, in this example
it is My Example Extension.
The other parameters are passed in by React Native, which I discovered looking at the build file
for iOS in node_modules/react-native/scripts/react-native-xcode.sh.
You need to make this file executable, so in a terminal, from the root of your project, type
chmod +x scripts/copyJsBundle.sh
- Now you have to tell XCode to run this script after the main build has completed. This is done
by editing the file
ios/<YOUR_PROJECT>.xcodeproj/project.pbxproj, so in this caseios/ReactNativeExampleBrowserExtension/project.pbxproj. In this file, search for any instances ofreact-native-xcode.sh, then edit that line to add&& ../scripts/copyJsBundle.sh, so the line should look like
shellScript = "export NODE_BINARY=node\n../node_modules/react-native/scripts/react-native-xcode.sh && ../scripts/copyJsBundle.sh";
-
Switch both the main project's scheme and the extension project's scheme to Release mode by going to the menu
Product/Scheme/Edit Scheme, clicking onRunin the left side of the dialog that pops up, and choosingReleasefrom the dropdown. You can toggle between different project schemes in the top left of the dialog to modify both in one go. -
Run the app on the simulator, open the browser, go to some website, open the Share dialog and tap your extension's icon. It should open up correctly and render the React Native UI! This also means it should be possible to actually package up your app and send it to Apple for entry in the app store.
You'll notice that when you open your extension in the Simulator, you do not see logs show up in the XCode console. This is because XCode automatically attaches its debug session to the main app. The way to fix this is to attach the debug session to the app from which you'll open your extension, in this example it's Safari.
-
Open the Scheme for your extension. Click the menu
Product/Scheme/Edit Schemeand choose your extension's project in the top left of the dialog that pops up. ChooseRunon the left side of the dialog. Change theExecutabledropdown toAsk on Launch. Click theClosebutton. -
At the top of XCode, just to the right of the Stop button, choose your extension project to be run. It was probably on your main app all along. Click the
Playbutton to run it and you should be prompted for the app to run it in the context of. Choose Safari. Now you should see all your logs in the Console! If you do not see the Console at all, you can show it by going to the menuView/Debug Area/Activate Console