This python package (availabe on PyPI at https://pypi.org/project/numpngw/)
defines the function write_png that writes a numpy array to a PNG file,
and the function write_apng that writes a sequence of arrays to an
animated PNG (APNG) file. Also included is the class AnimatedPNGWriter
that can be used to save a Matplotlib animation as an animated PNG file;
see Example 8 for an example.
Capabilities of write_png include:
- creation of 8-bit and 16-bit RGB files;
- creation of 1-bit, 2-bit, 4-bit, 8-bit and 16-bit grayscale files;
- creation of RGB and grayscale images with an alpha channel;
- setting a transparent color;
- automatic creation of a palette for an indexed PNG file;
- inclusion of
tEXt,tIME,bKGD,pHYs,gAMA,cHRMandiCCPchunks.
The package is written in pure python. The only external dependencies are numpy and setuptools.
The package has a suite of unit tests, but it should still be considered prototype-quality software. There may be backwards-incompatible API changes between releases.
This software is released under the BSD 2-clause license.
For packages with more features (including functions for reading PNG files), take a look at:
- pypng (https://pypi.python.org/pypi/pypng) or
- imageio (https://pypi.python.org/pypi/imageio).
The following examples show some PNG and animated PNG files created with numpy and numpngw. To see the animations in Examples 5 - 8, you must view this file with a browser that supports animated PNG files. Most web browsers support animated PNG; see https://caniuse.com/apng for support status.
The following script creates this PNG file, an 8-bit RGB image.
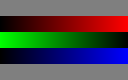
The script:
import numpy as np
from numpngw import write_png


# Example 1
#
# Create an 8-bit RGB image.

img = np.zeros((80, 128, 3), dtype=np.uint8)

grad = np.linspace(0, 255, img.shape[1])

img[:16, :, :] = 127
img[16:32, :, 0] = grad
img[32:48, :, 1] = grad[::-1]
img[48:64, :, 2] = grad
img[64:, :, :] = 127

write_png('example1.png', img)
The following script creates this PNG file, a 1-bit grayscale image.

The script:
import numpy as np
from numpngw import write_png

# Example 2
#
# Create a 1-bit grayscale image.

mask = np.zeros((48, 48), dtype=np.uint8)
mask[:2, :] = 1
mask[:, -2:] = 1
mask[4:6, :-4] = 1
mask[4:, -6:-4] = 1
mask[-16:, :16] = 1
mask[-32:-16, 16:32] = 1

write_png('example2.png', mask, bitdepth=1)
The following script creates this PNG file, a 16-bit RGB file in which the value (0, 0, 0) is transparent. It might not be obvious, but the two squares are transparent.
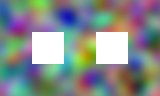
The script:
import numpy as np
from numpngw import write_png

# Example 3
#
# Create a 16-bit RGB image, with (0, 0, 0) indicating a transparent pixel.

# Create some interesting data.
w = 32
nrows = 3*w
ncols = 5*w
kernel = np.exp(-np.linspace(-2, 2, 35)**2)
kernel = kernel/kernel.sum()
rng = np.random.default_rng(seed=121263137472525314065)
x = rng.standard_normal((nrows, ncols, 3))
x = np.apply_along_axis(lambda z: np.convolve(z, kernel, mode='same'), 0, x)
x = np.apply_along_axis(lambda z: np.convolve(z, kernel, mode='same'), 1, x)

# Convert to 16 bit unsigned integers.
z = (65535*((x - x.min())/x.ptp())).astype(np.uint16)

# Create two squares containing (0, 0, 0).
z[w:2*w, w:2*w] = 0
z[w:2*w, -2*w:-w] = 0

# Write the PNG file, and indicate that (0, 0, 0) should be transparent.
write_png('example3.png', z, transparent=(0, 0, 0))
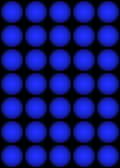
The following script uses the option use_palette=True to create this 8-bit
indexed RGB file.

The script:
import numpy as np
from numpngw import write_png


# Example 4
#
# Create an 8-bit indexed RGB image that uses a palette.

img_width = 300
img_height = 200
img = np.zeros((img_height, img_width, 3), dtype=np.uint8)

rng = np.random.default_rng(seed=121263137472525314065)
for _ in range(40):
    width = rng.integers(5, img_width // 5)
    height = rng.integers(5, img_height // 5)
    row = rng.integers(5, img_height - height - 5)
    col = rng.integers(5, img_width - width - 5)
    color = rng.integers(80, 256, size=2)
    img[row:row+height, col:col+width, 1:] = color

write_png('example4.png', img, use_palette=True)
This animated PNG

is created by the following script. As in the other examples, most of the script is code that generates the data to be saved. The line that creates the PNG file is simply:
write_apng("example5.png", seq, delay=50, use_palette=True)
The script:
import numpy as np
from numpngw import write_apng

# Example 5
#
# Create an 8-bit RGB animated PNG file.

height = 20
width = 200
t = np.linspace(0, 10*np.pi, width)
seq = []
for phase in np.linspace(0, 2*np.pi, 25, endpoint=False):
    y = 150*0.5*(1 + np.sin(t - phase))
    a = np.zeros((height, width, 3), dtype=np.uint8)
    a[:, :, 0] = y
    a[:, :, 2] = y
    seq.append(a)

write_apng("example5.png", seq, delay=50, use_palette=True)
Another animated RGB PNG. In this example, the argument seq
that is passed to write_apng is a numpy array with shape
(num_frames, height, width, 3).

The script:
import numpy as np
from numpngw import write_apng

# Example 6
#
# Create an 8-bit RGB animated PNG file.

def smoother(w):
    # Return the periodic convolution of w with a 3-d Gaussian kernel.
    r = np.linspace(-3, 3, 21)
    X, Y, Z = np.meshgrid(r, r, r)
    kernel = np.exp(-0.25*(X*X + Y*Y + Z*Z)**2)
    fw = np.fft.fftn(w)
    fkernel = np.fft.fftn(kernel, w.shape)
    v = np.fft.ifftn(fw*fkernel).real
    return v

height = 40
width = 250
num_frames = 30
rng = np.random.default_rng(seed=121263137472525314065)
w = rng.standard_normal((num_frames, height, width, 3))
for k in range(3):
    w[..., k] = smoother(w[..., k])

seq = (255*(w - w.min())/w.ptp()).astype(np.uint8)

write_apng("example6.png", seq, delay=40)
Create an animated PNG with different display times for each frame.
The script:
import numpy as np
from numpngw import write_apng

# Example 7
#
# Create an animated PNG file with nonuniform display times
# of the frames.

bits1 = np.array([
    [0,0,1,0,0],
    [0,1,1,0,0],
    [0,0,1,0,0],
    [0,0,1,0,0],
    [0,0,1,0,0],
    [0,0,1,0,0],
    [0,1,1,1,0],
    ])

bits2 = np.array([
    [0,1,1,1,0],
    [1,0,0,0,1],
    [0,0,0,0,1],
    [0,1,1,1,0],
    [1,0,0,0,0],
    [1,0,0,0,0],
    [1,1,1,1,1],
    ])

bits3 = np.array([
    [0,1,1,1,0],
    [1,0,0,0,1],
    [0,0,0,0,1],
    [0,0,1,1,0],
    [0,0,0,0,1],
    [1,0,0,0,1],
    [0,1,1,1,0],
    ])

bits_box1 = np.array([
    [0,0,0,0,0],
    [1,1,1,1,1],
    [1,0,0,0,1],
    [1,0,0,0,1],
    [1,0,0,0,1],
    [1,1,1,1,1],
    [0,0,0,0,0],
    ])

bits_box2 = np.array([
    [0,0,0,0,0],
    [0,0,0,0,0],
    [0,1,1,1,0],
    [0,1,0,1,0],
    [0,1,1,1,0],
    [0,0,0,0,0],
    [0,0,0,0,0],
    ])

bits_dot = np.array([
    [0,0,0,0,0],
    [0,0,0,0,0],
    [0,0,0,0,0],
    [0,0,1,0,0],
    [0,0,0,0,0],
    [0,0,0,0,0],
    [0,0,0,0,0],
    ])

bits_zeros = np.zeros((7, 5), dtype=bool)
bits_ones = np.ones((7, 5), dtype=bool)


def bits_to_image(bits, blocksize=32, color=None):
    bits = np.asarray(bits, dtype=bool)
    if color is None:
        color = np.array([255, 0, 0], dtype=np.uint8)
    else:
        color = np.asarray(color, dtype=np.uint8)

    x = np.linspace(-1, 1, blocksize)
    X, Y = np.meshgrid(x, x)
    Z = np.sqrt(np.maximum(1 - (X**2 + Y**2), 0))
    # The "on" image:
    img1 = (Z.reshape(blocksize, blocksize, 1)*color)
    # The "off" image:
    img0 = 0.2*img1

    data = np.where(bits[:, None, :, None, None],
                    img1[:, None, :], img0[:, None, :])
    img = data.reshape(bits.shape[0]*blocksize, bits.shape[1]*blocksize, 3)
    return img.astype(np.uint8)

# Create `seq` and `delay`, the sequence of images and the
# corresponding display times.

color = np.array([32, 48, 255])
blocksize = 24
# Images...
im3 = bits_to_image(bits3, blocksize=blocksize, color=color)
im2 = bits_to_image(bits2, blocksize=blocksize, color=color)
im1 = bits_to_image(bits1, blocksize=blocksize, color=color)
im_all = bits_to_image(bits_ones, blocksize=blocksize, color=color)
im_none = bits_to_image(bits_zeros, blocksize=blocksize, color=color)
im_box1 = bits_to_image(bits_box1, blocksize=blocksize, color=color)
im_box2 = bits_to_image(bits_box2, blocksize=blocksize, color=color)
im_dot = bits_to_image(bits_dot, blocksize=blocksize, color=color)

# The sequence of images:
seq = [im3, im2, im1, im_all, im_none, im_all, im_none, im_all, im_none,
       im_box1, im_box2, im_dot, im_none]
# The time duration to display each image, in milliseconds:
delay = [1000, 1000, 1000, 333, 250, 333, 250, 333, 500,
         167, 167, 167, 1000]

# Create the animated PNG file.
write_apng("example7.png", seq, delay=delay, default_image=im_all,
           use_palette=True)
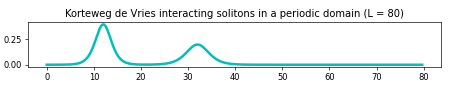
This example shows how a Matplotlib animation can be saved as an animated PNG file with numpngw.AnimatedPNGWriter. (Be careful with this class--it can easily create very large PNG files.)
The script:
import numpy as np
from scipy.integrate import odeint
from scipy.fftpack import diff as psdiff

import matplotlib.pyplot as plt
from matplotlib import animation
from numpngw import AnimatedPNGWriter


def kdv_exact(x, c):
    """
    Profile of the exact solution to the KdV for a single soliton
    on the real line.
    """
    u = 0.5*c*np.cosh(0.5*np.sqrt(c)*x)**(-2)
    return u


def kdv(u, t, L):
    """
    Differential equations for the KdV equation, discretized in x.
    """
    # Compute the x derivatives using the pseudo-spectral method.
    ux = psdiff(u, period=L)
    uxxx = psdiff(u, period=L, order=3)

    # Compute du/dt.
    dudt = -6*u*ux - uxxx

    return dudt


def kdv_solution(u0, t, L):
    """
    Use odeint to solve the KdV equation on a periodic domain.

    `u0` is initial condition, `t` is the array of time values at which
    the solution is to be computed, and `L` is the length of the periodic
    domain.
    """
    sol = odeint(kdv, u0, t, args=(L,), mxstep=5000)
    return sol


def update_line(num, x, data, line):
    """
    Animation "call back" function for each frame.
    """
    line.set_data(x, data[num, :])
    return line,


# Set the size of the domain, and create the discretized grid.
L = 80.0
N = 256
dx = L / (N - 1.0)
x = np.linspace(0, (1-1.0/N)*L, N)

# Set the initial conditions.
# Not exact for two solitons on a periodic domain, but close enough...
u0 = kdv_exact(x-0.15*L, 0.8) + kdv_exact(x-0.4*L, 0.4)

# Set the time sample grid.
T = 260
t = np.linspace(0, T, 225)

print("Computing the solution.")
sol = kdv_solution(u0, t, L)

print("Generating the animated PNG file.")

fig = plt.figure(figsize=(7.5, 1.5))
ax = fig.gca()
ax.set_title("Korteweg de Vries interacting solitons in a periodic domain "
            "(L = 80)")

# Plot the initial condition. lineplot is reused in the animation.
lineplot, = ax.plot(x, u0, 'c-', linewidth=3)
plt.tight_layout()

ani = animation.FuncAnimation(fig, update_line, frames=len(t),
                              init_func=lambda : None,
                              fargs=(x, sol, lineplot))
writer = AnimatedPNGWriter(fps=12)
ani.save('kdv.png', dpi=60, writer=writer)

plt.close(fig)