![]()
![]()
This is a framework for running common deep learning models for point cloud analysis tasks against classic benchmark. It heavily relies on Pytorch Geometric and Facebook Hydra.
The framework allows lean and yet complex model to be built with minimum effort and great reproducibility. It also provide a high level API to democratize deep learning on pointclouds. See our paper at 3DV for an overview of the framework capacities and benchmarks of state-of-the-art networks.
- CUDA 10 or higher (if you want GPU version)
- Python 3.7 or higher + headers (python-dev)
- PyTorch 1.8.1 or higher (PyTorch >= 1.9 is recommended)
- A Sparse convolution backend (optional) see here for installation instructions
Install with
pip install torch
pip install torch-points3d├─ benchmark # Output from various benchmark runs
├─ conf # All configurations for training nad evaluation leave there
├─ notebooks # A collection of notebooks that allow result exploration and network debugging
├─ docker # Docker image that can be used for inference or training
├─ docs # All the doc
├─ eval.py # Eval script
├─ find_neighbour_dist.py # Script to find optimal #neighbours within neighbour search operations
├─ forward_scripts # Script that runs a forward pass on possibly non annotated data
├─ outputs # All outputs from your runs sorted by date
├─ scripts # Some scripts to help manage the project
├─ torch_points3d
├─ core # Core components
├─ datasets # All code related to datasets
├─ metrics # All metrics and trackers
├─ models # All models
├─ modules # Basic modules that can be used in a modular way
├─ utils # Various utils
└─ visualization # Visualization
├─ test
└─ train.py # Main script to launch a trainingAs a general philosophy we have split datasets and models by task. For example, datasets has five subfolders:
- segmentation
- classification
- registration
- object_detection
- panoptic
where each folder contains the dataset related to each task.
- PointNet from Charles R. Qi et al.: PointNet: Deep Learning on Point Sets for 3D Classification and Segmentation (CVPR 2017)
- PointNet++ from Charles from Charles R. Qi et al.: PointNet++: Deep Hierarchical Feature Learning on Point Sets in a Metric Space
- RSConv from Yongcheng Liu et al.: Relation-Shape Convolutional Neural Network for Point Cloud Analysis (CVPR 2019)
- RandLA-Net from Qingyong Hu et al.: RandLA-Net: Efficient Semantic Segmentation of Large-Scale Point Clouds
- PointCNN from Yangyan Li et al.: PointCNN: Convolution On X-Transformed Points (NIPS 2018)
- KPConv from Hugues Thomas et al.: KPConv: Flexible and Deformable Convolution for Point Clouds (ICCV 2019)
- MinkowskiEngine from Christopher Choy et al.: 4D Spatio-Temporal ConvNets: Minkowski Convolutional Neural Networks (CVPR19)
- VoteNet from Charles R. Qi et al.: Deep Hough Voting for 3D Object Detection in Point Clouds (ICCV 19)
- FCGF from Christopher Choy et al.: Fully Convolutional Geometric Features (ICCV'19)
- PointGroup from Li Jiang et al.: PointGroup: Dual-Set Point Grouping for 3D Instance Segmentation
- PPNet (PosPool) from Ze Liu et al.: A Closer Look at Local Aggregation Operators in Point Cloud Analysis (ECCV 2020)
- TorchSparse from Haotian Tang et al: Searching Efficient 3D Architectures with Sparse Point-Voxel Convolution
- PVCNN model for semantic segmentation from Zhijian Liu et al:Point-Voxel CNN for Efficient 3D Deep Learning
- MS-SVConv from Sofiane Horache et al: 3D Point Cloud Registration with Multi-Scale Architecture and Self-supervised Fine-tuning
Please refer to our documentation for accessing some of those models directly from the API and see our example notebooks for KPconv and RSConv for more details.
 |
|
 |
|
 |
|
 |
|
 |
-
Scannet from Angela Dai et al.: ScanNet: Richly-annotated 3D Reconstructions of Indoor Scenes
-
S3DIS from Iro Armeni et al.: Joint 2D-3D-Semantic Data for Indoor Scene Understanding
* S3DIS 1x1
* S3DIS Room
* S3DIS Fused - Sphere | Cylinder
- Shapenet from Angel X. Chang et al.: ShapeNet: An Information-Rich 3D Model Repository
- Scannet from Angela Dai et al.: ScanNet: Richly-annotated 3D Reconstructions of Indoor Scenes
- S3DIS from Iro Armeni et al.: Joint 2D-3D-Semantic Data for Indoor Scene Understanding
* S3DIS Fused - Sphere | Cylinder
- SemanticKitti from J. Behley et al: SemanticKITTI: A Dataset for Semantic Scene Understanding of LiDAR Sequences
-
3DMatch from Andy Zeng et al.: 3DMatch: Learning Local Geometric Descriptors from RGB-D Reconstructions
-
The IRALab Benchmark from Simone Fontana et al.:A Benchmark for Point Clouds Registration Algorithms, which is composed of data from:
-
Kitti odometry with corrected poses (thanks to @humanpose1) from A. Geiger et al: Are we ready for Autonomous Driving? The KITTI Vision Benchmark Suite
- ModelNet from Zhirong Wu et al.: 3D ShapeNets: A Deep Representation for Volumetric Shapes
We currently support Minkowski Engine > v0.5 and torchsparse >= v1.4.0 as backends for sparse convolutions. Those packages need to be installed independently from Torch Points3d, please follow installation instructions and troubleshooting notes on the respective repositories. At the moment MinkowskiEngine see here (thank you Chris Choy) demonstrates faster training. Please be aware that torchsparse is still in beta and does not support CPU only training.
Once you have setup one of those two sparse convolution framework you can start using are high level to define a unet backbone or simply an encoder:
from torch_points3d.applications.sparseconv3d import SparseConv3d

model = SparseConv3d("unet", input_nc=3, output_nc=5, num_layers=4, backend="torchsparse") # minkowski by default
You can also assemble your own networks by using the modules provided in torch_points3d/modules/SparseConv3d/nn. For example if you wish to use torchsparse backend you can do the following:
import torch_points3d.modules.SparseConv3d as sp3d

sp3d.nn.set_backend("torchsparse")
conv = sp3d.nn.Conv3d(10, 10)
bn = sp3d.nn.BatchNorm(10)
Mixed precision allows for lower memory on the GPU and slightly faster training times by performing the sparse convolution, pooling, and gradient ops in float16. Mixed precision training is currently supported for CUDA training on SparseConv3d networks with the torchsparse backend. To enable mixed precision, ensure you have the latest version of torchsparse with pip install --upgrade git+https://github.com/mit-han-lab/torchsparse.git. Then, set training.enable_mixed=True in your training configuration files. If all the conditions are met, when you start training you will see a log entry stating:
[torch_points3d.models.base_model][INFO] - Model will use mixed precision
If, however, you try to use mixed precision training with an unsupported backend, you will see:
[torch_points3d.models.base_model][WARNING] - Mixed precision is not supported on this model, using default precision...
The PretrainedRegistry enables anyone to add their own pre-trained models and re-create them with only 2 lines of code for finetunning or production purposes.
[You]Launch your model training with Wandb activated (wandb.log=True)[TorchPoints3d]Once the training finished,TorchPoints3dwill upload your trained model within our custom checkpoint to your wandb.[You]WithinPretainedRegistryclass, add akey-value pairwithin its attributeMODELS. Thekeyshould be describe your model, dataset and training hyper-parameters (possibly the best model), thevalueshould be theurlreferencing the.ptfile on your wandb.
Example: Key: pointnet2_largemsg-s3dis-1 and URL value: https://api.wandb.ai/files/loicland/benchmark-torch-points-3d-s3dis/1e1p0csk/pointnet2_largemsg.pt for the pointnet2_largemsg.pt file.
The key desribes a pointnet2 largemsg trained on s3dis fold 1.
[Anyone]By using thePretainedRegistryclass and by providing thekey, the associated model weights will bedownloadedand the pre-trained model will beready to usewith its transforms.
[In]:
from torch_points3d.applications.pretrained_api import PretainedRegistry

model = PretainedRegistry.from_pretrained("pointnet2_largemsg-s3dis-1")

print(model.wandb)
print(model.print_transforms())

[Out]:
=================================================== WANDB URLS ======================================================
WEIGHT_URL: https://api.wandb.ai/files/loicland/benchmark-torch-points-3d-s3dis/1e1p0csk/pointnet2_largemsg.pt
LOG_URL: https://app.wandb.ai/loicland/benchmark-torch-points-3d-s3dis/runs/1e1p0csk/logs
CHART_URL: https://app.wandb.ai/loicland/benchmark-torch-points-3d-s3dis/runs/1e1p0csk
OVERVIEW_URL: https://app.wandb.ai/loicland/benchmark-torch-points-3d-s3dis/runs/1e1p0csk/overview
HYDRA_CONFIG_URL: https://app.wandb.ai/loicland/benchmark-torch-points-3d-s3dis/runs/1e1p0csk/files/hydra-config.yaml
OVERRIDES_URL: https://app.wandb.ai/loicland/benchmark-torch-points-3d-s3dis/runs/1e1p0csk/files/overrides.yaml
======================================================================================================================

pre_transform = None
test_transform = Compose([
    FixedPoints(20000, replace=True),
    XYZFeature(axis=['z']),
    AddFeatsByKeys(rgb=True, pos_z=True),
    Center(),
    ScalePos(scale=0.5),
])
train_transform = Compose([
    FixedPoints(20000, replace=True),
    RandomNoise(sigma=0.001, clip=0.05),
    RandomRotate((-180, 180), axis=2),
    RandomScaleAnisotropic([0.8, 1.2]),
    RandomAxesSymmetry(x=True, y=False, z=False),
    DropFeature(proba=0.2, feature='rgb'),
    XYZFeature(axis=['z']),
    AddFeatsByKeys(rgb=True, pos_z=True),
    Center(),
    ScalePos(scale=0.5),
])
val_transform = Compose([
    FixedPoints(20000, replace=True),
    XYZFeature(axis=['z']),
    AddFeatsByKeys(rgb=True, pos_z=True),
    Center(),
    ScalePos(scale=0.5),
])
inference_transform = Compose([
    FixedPoints(20000, replace=True),
    XYZFeature(axis=['z']),
    AddFeatsByKeys(rgb=True, pos_z=True),
    Center(),
    ScalePos(scale=0.5),
])
pre_collate_transform = Compose([
    PointCloudFusion(),
    SaveOriginalPosId,
    GridSampling3D(grid_size=0.04, quantize_coords=False, mode=mean),
])We use Poetry for managing our packages. In order to get started, clone this repositories and run the following command from the root of the repo
poetry install --no-root
This will install all required dependencies in a new virtual environment.
Activate the environment
poetry shellYou can check that the install has been successful by running
python -m unittest -vFor pycuda support (only needed for the registration tasks):
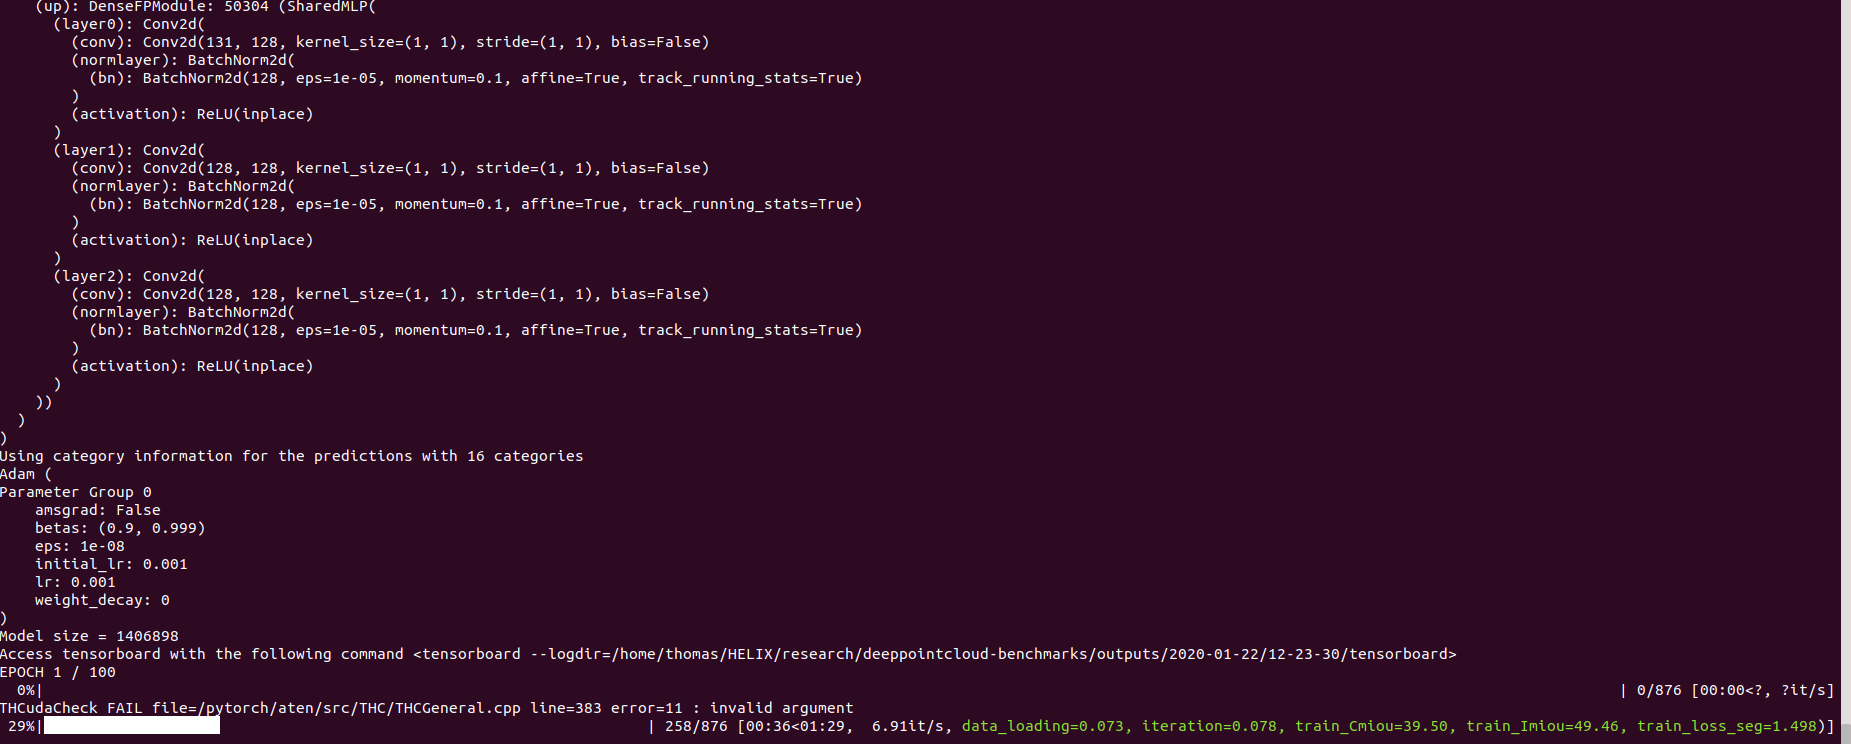
pip install pycudapoetry run python train.py task=segmentation models=segmentation/pointnet2 model_name=pointnet2_charlesssg data=segmentation/shapenet-fixedAnd you should see something like that
The config for pointnet++ is a good example of how to define a model and is as follow:
# PointNet++: Deep Hierarchical Feature Learning on Point Sets in a Metric Space (https://arxiv.org/abs/1706.02413)
# Credit Charles R. Qi: https://github.com/charlesq34/pointnet2/blob/master/models/pointnet2_part_seg_msg_one_hot.py

pointnet2_onehot:
  architecture: pointnet2.PointNet2_D
  conv_type: "DENSE"
  use_category: True
  down_conv:
    module_name: PointNetMSGDown
    npoint: [1024, 256, 64, 16]
    radii: [[0.05, 0.1], [0.1, 0.2], [0.2, 0.4], [0.4, 0.8]]
    nsamples: [[16, 32], [16, 32], [16, 32], [16, 32]]
    down_conv_nn:
      [
        [[FEAT, 16, 16, 32], [FEAT, 32, 32, 64]],
        [[32 + 64, 64, 64, 128], [32 + 64, 64, 96, 128]],
        [[128 + 128, 128, 196, 256], [128 + 128, 128, 196, 256]],
        [[256 + 256, 256, 256, 512], [256 + 256, 256, 384, 512]],
      ]
  up_conv:
    module_name: DenseFPModule
    up_conv_nn:
      [
        [512 + 512 + 256 + 256, 512, 512],
        [512 + 128 + 128, 512, 512],
        [512 + 64 + 32, 256, 256],
        [256 + FEAT, 128, 128],
      ]
    skip: True
  mlp_cls:
    nn: [128, 128]
dropout: 0.5We provide a script for running a given pre trained model on custom data that may not be annotated. You will find an example of this for the part segmentation task on Shapenet. Just like for the rest of the codebase most of the customization happens through config files and the provided example can be extended to other datasets. You can also easily create your own from there. Going back to the part segmentation task, say you have a folder full of point clouds that you know are Airplanes, and you have the checkpoint of a model trained on Airplanes and potentially other classes, simply edit the config.yaml and shapenet.yaml and run the following command:
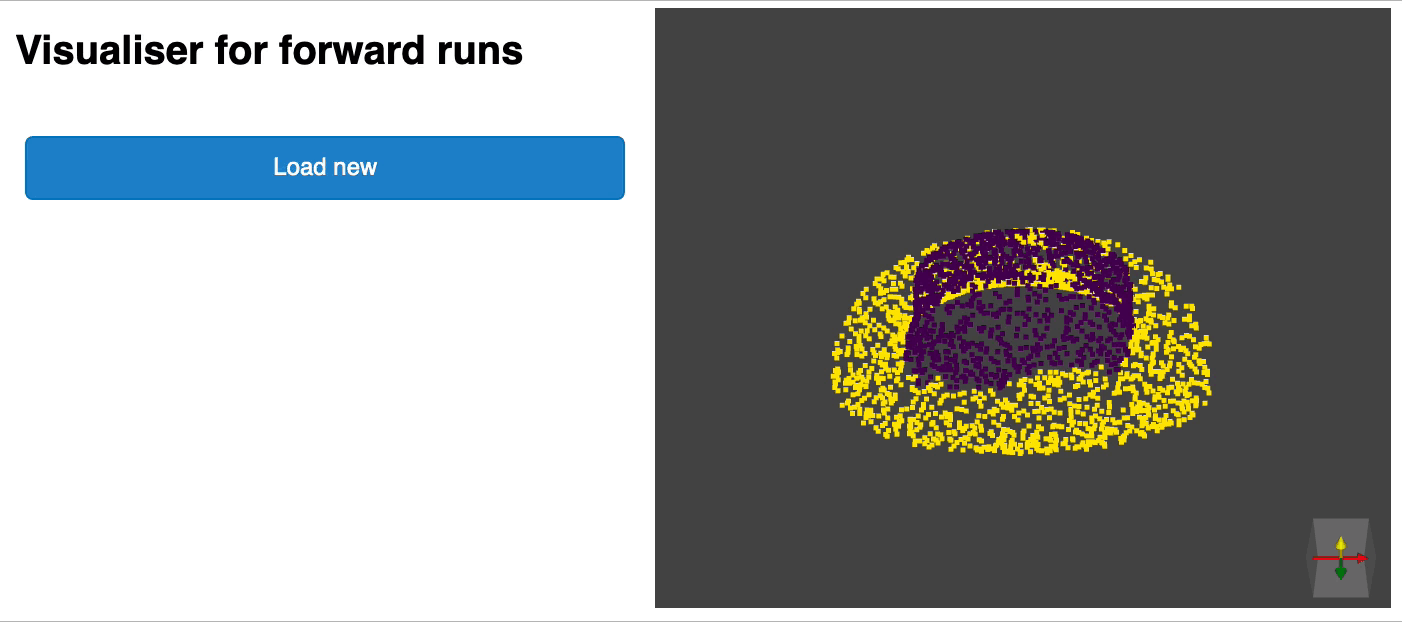
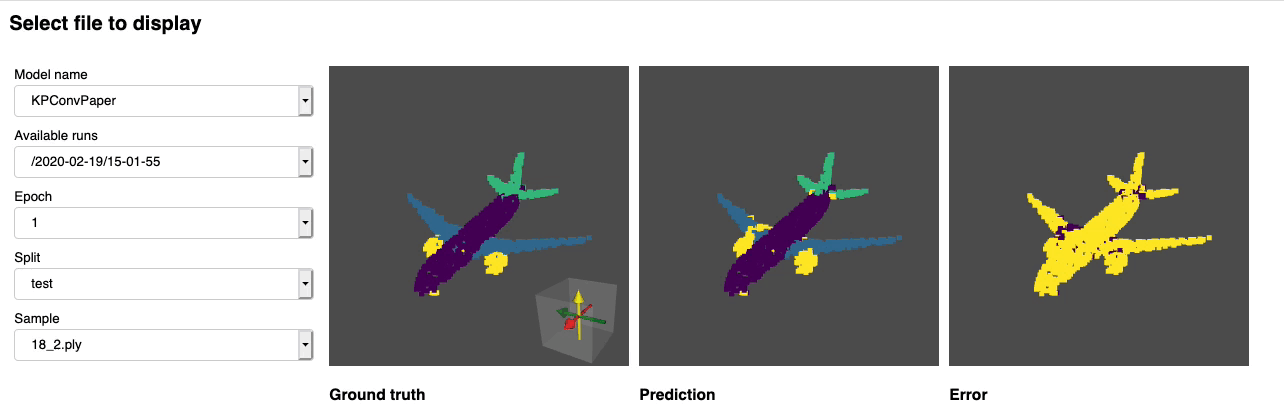
python forward_scripts/forward.pyThe result of the forward run will be placed in the specified output_folder and you can use the notebook provided to explore the results. Below is an example of the outcome of using a model trained on caps only to find the parts of airplanes and caps.
Finally, for people interested in deploying their models to production environments, we provide a Dockerfile as well as a build script. Say you have trained a network for semantic segmentation that gave the weight <outputfolder/weights.pt>, the following command will build a docker image for you:
cd docker
./build.sh outputfolder/weights.pt
You can then use it to run a forward pass on a all the point clouds in input_path and generate the results in output_path
docker run -v /test_data:/in -v /test_data/out:/out pointnet2_charlesssg:latest python3 forward_scripts/forward.py dataset=shapenet data.forward_category=Cap input_path="/in" output_path="/out"The -v option mounts a local directory to the container's file system. For example in the command line above, /test_data/out will be mounted at the location /out. As a consequence, all files written in /out will be available in the folder /test_data/out on your machine.
We advice to use snakeviz and cProfile
Use cProfile to profile your code
poetry run python -m cProfile -o {your_name}.prof train.py ... debugging.profiling=True
And visualize results using snakeviz.
snakeviz {your_name}.prof
It is also possible to use torch.utils.bottleneck
python -m torch.utils.bottleneck /path/to/source/script.py [args]
Ensure that at least PyTorch 1.8.0 is installed and verify that cuda/bin and cuda/include are in your $PATH and $CPATH respectively, e.g.:
$ python -c "import torch; print(torch.__version__)"
>>> 1.8.0

$ echo $PATH
>>> /usr/local/cuda/bin:...

$ echo $CPATH
>>> /usr/local/cuda/include:...
When we update the version of Pytorch that is used, the compiled packages need to be reinstalled, otherwise you will run into an error that looks like this:
... scatter_cpu.cpython-36m-x86_64-linux-gnu.so: undefined symbol: _ZN3c1012CUDATensorIdEv
This can happen for the following libraries:
- torch-points-kernels
- torch-scatter
- torch-cluster
- torch-sparse
An easy way to fix this is to run the following command with the virtual env activated:
pip uninstall torch-scatter torch-sparse torch-cluster torch-points-kernels -y
rm -rf ~/.cache/pip
poetry install
This can happen when trying to run the code on a different GPU than the one used to compile the torch-points-kernels library. Uninstall torch-points-kernels, clear cache, and reinstall after setting the TORCH_CUDA_ARCH_LIST environment variable. For example, for compiling with a Tesla T4 (Turing 7.5) and running the code on a Tesla V100 (Volta 7.0) use:
export TORCH_CUDA_ARCH_LIST="7.0;7.5"
See this useful chart for more architecture compatibility.
Raises OSError: [WinError 6] The handle is invalid / wandb: ERROR W&B process failed to launch
Wandb is currently broken on Windows (see this issue), a workaround is to use the command line argument wandb.log=false
We provide a notebook based pyvista and panel that allows you to explore your past experiments visually. When using jupyter lab you will have to install an extension:
jupyter labextension install @pyviz/jupyterlab_pyviz
Run through the notebook and you should see a dashboard starting that looks like the following:
Contributions are welcome! The only asks are that you stick to the styling and that you add tests as you add more features!
For styling you can use pre-commit hooks to help you:
pre-commit install
A sequence of checks will be run for you and you may have to add the fixed files again to the stashed files.
When it comes to docstrings we use numpy style docstrings, for those who use Visual Studio Code, there is a great extension that can help with that. Install it and set the format to numpy and you should be good to go!
Finaly, if you want to have a direct chat with us feel free to join our slack, just shoot us an email and we'll add you.
If you find our work useful, do not hesitate to cite it:
@inproceedings{
  tp3d,
  title={Torch-Points3D: A Modular Multi-Task Frameworkfor Reproducible Deep Learning on 3D Point Clouds},
  author={Chaton, Thomas and Chaulet Nicolas and Horache, Sofiane and Landrieu, Loic},
  booktitle={2020 International Conference on 3D Vision (3DV)},
  year={2020},
  organization={IEEE},
  url = {\url{https://github.com/nicolas-chaulet/torch-points3d}}
}
and please also include a citation to the models or the datasets you have used in your experiments!


![dependabot[bot] avatar](https://avatars.githubusercontent.com/in/29110?v=4 "dependabot[bot]")


![pre-commit-ci[bot] avatar](https://avatars.githubusercontent.com/in/68672?v=4 "pre-commit-ci[bot]")


